[Angular] Day25. Reactive forms (一)
上一篇中介绍完 Template-driven forms 後,接着再介绍 Angular 的另一种 form,那就是 Reactive forms,它提供了一种 model-driven 的方法来处理随时间变化的表单输入,本章中会介绍如何创建本章中会介绍如何创建和更新基本的表单控制元件、如何在 component 中使用多个控制元件、验证表单的值以及创建动态表单,随着需求新增换删除控制元件。

Overview of reactive forms
reactive forms 使用显示且不可变的方法来管理表单在某个时间点的状态,表单状态在每次更新都会返回一个新的状态,从而保持模型在每次更改间都保持完整,reactive forms 是围绕着 observable 构建的,所以可以进行同步的访问。
reactive forms 还提供了简易的测试路径,因为可以确保数据在请求时是一致且可预测的,数据流中的任何操作者都可以安全的操作数据,与 template-driven forms 不同的点在於他提供对数据模型的同步访问、不变的 observable operator 以及可观察数据流变化的跟踪。
Adding a basic form control
要使用 reactive forms 的表单控制元件分为三个步骤:
- 在 app.module.ts 中引入
ReactiveFormsModule - 在 component 中创建一个
FormControl实例 - 在 template 中注册
FormControl
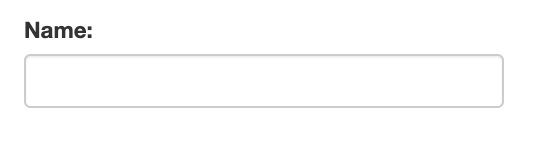
一样举个例子,将建立一个使用者将他们姓名填入画面中的输入框,透过 FormControl 捕获到输入的值并将它显示出来。
-
从
@angular/form中引入ReactiveFormsModule并将它添加到 ngModule 的 imports 中import { ReactiveFormsModule } from '@angular/forms'; @NgModule({ imports: [ // other imports ... ReactiveFormsModule ], }) export class AppModule { } -
使用 Angular CLI 建立一个 component
ng generate component NameEditor -
在 name-editer.component.ts 中新增 FormControl
import { Component, OnInit } from '@angular/core'; import { FormControl } from '@angular/forms'; // (1) @Component({ selector: 'app-name-editor', templateUrl: './name-editor.component.html', styleUrls: ['./name-editor.component.css'] }) export class NameEditorComponent implements OnInit { name = new FormControl(''); // (2) constructor() { } ngOnInit(): void { } }- (1): 从
@angular/forms中引入FormControl - (2): 给予
FormControl一个参数(空字串)做为预设值并将它实例化
- (1): 从
-
在 name-editer.component.html 中绑定 FormControl
<div class="formGroup">
    <label for="name">Name: </label>
    <input id="name" type="text" class="form-control" [formControl]="name">
</div>
Displaying a form control value
要显示使用者输入的值可以透过以下的方式:
- 通过
valueChanges observable可以在使用 AsyncPipe 的 template 或使用subscribe()method 在 component 中监听表单中值的变化 - 使用
valueproperty 他可以提供当前值的快照
先介绍如何使用 value 取得当前值的快照
<div class="formGroup">
    <label for="name">Name: </label>
    <input id="name" type="text" class="form-control" [formControl]="name">

    <p>Value: {{ name.value }}</p>
</div>
使用 property binding 将 FormControl 的实例绑定在 template 中
再来介绍可以在 component 中使用 subscribe() 监听表单中值的变化
import { Component, OnInit } from '@angular/core';
import { FormControl } from '@angular/forms';

@Component({
  selector: 'app-name-editor',
  templateUrl: './name-editor.component.html',
  styleUrls: ['./name-editor.component.css']
})
export class NameEditorComponent implements OnInit {
  name = new FormControl('');
  constructor() { }

  ngOnInit(): void {
    this.name.valueChanges.subscribe(v => console.log(v));
  }
}
Replacing a form control value
reactive forms 可以以编成的方式更改控制元件的内容,可以让你更灵活的更新值而无需与使用者交互,FormControl 实例提供了一个 setValue() method,可以更新表单控制元件的值并根据控制元件的结构验证所提供值的结构,简单来说如果你要更改的值的结构与控制元件的结构不相符的话会出错,这个方法可以用在比如点击编辑一个产品,透过 API 获得当前产品的信息并将这些信息显示在画面中的每一个输入元素上,下面举一个简单的例子:
-
在 name-editor.component.ts 中新增一个 method 当使用者点击画面按钮时触发
import { Component, OnInit } from '@angular/core'; import { FormControl } from '@angular/forms'; @Component({ selector: 'app-name-editor', templateUrl: './name-editor.component.html', styleUrls: ['./name-editor.component.css'] }) export class NameEditorComponent implements OnInit { name = new FormControl(''); constructor() { } ngOnInit(): void {} updateName() { this.name.setValue('Nancy'); } } -
在 name-editor.component.html 中新增一个
<button>并绑定刚刚写的 method<div class="formGroup"> <label for="name">Name: </label> <input id="name" type="text" class="form-control" [formControl]="name"> <button (click)="updateName()" class="btn btn-success">Update Name</button> </div>
当点击画面中的按钮後,会利用 FormControl 实例提供的 serValue() method 将控制元件的值更新。
Grouping form controls
一个表单通常会包含几个相关的控制元件,reactive forms 提供了两种将多个相关控制元件分组到单个输入表单的方法:
- form group 定义了一个带有一组固定控制元件的表单,可以一起管理这些控制元件,也可进行嵌套以创建更复杂的表单
- form array 定义了一个
动态的表单,可以在其中添加或删除运行时的控制元件,也可以嵌套已进行更复杂的表单
就像 FormControl 可以让你控制单个输入一样,FormGroup 可以让你跟踪一组表单控制元件的表单状态,在创建表单时 group 中的每一个控制元件都按名称进行跟踪,举个例子
-
使用 Angular CLI 建立一个新的 Component
ng generate component ProfileEditor -
在 profile-editor.component.ts 中创建 FormGroup 实例
import { Component, OnInit } from '@angular/core'; import { FormControl, FormGroup } from '@angular/forms'; // (1) @Component({ selector: 'app-profile-editor', templateUrl: './profile-editor.component.html', styleUrls: ['./profile-editor.component.css'] }) export class ProfileEditorComponent implements OnInit { profileForm = new FormGroup({ // (2) firstName: new FormControl(''), lastName: new FormControl(''), }); ngOnInit(): void { } }- (1): 从 '@angular/forms' 中引入
FormControl与FormGroup - (2): 创建
FormGroup的实例,一样使用new关键字,将带有 FormControl 的 object 传入做为参数(初始值)
- (1): 从 '@angular/forms' 中引入
-
在 profile-editor.component.html 中绑定 FormGroup 和 FormControl
<form [formGroup]="profileForm" class="form-group">
  <div class="form-control">
    <label for="first-name">First Name: </label>
    <input id="first-name" type="text" formControlName="firstName" />
  </div>
  <div class="form-control">
    <label for="last-name">Last Name: </label>
    <input id="last-name" type="text" formControlName="lastName" />
  </div>
</form>
使用
[formGroup]directive 绑定 component 中的 FormGroup 实例,这样会在 model 和表单输入框之间建立一个通信层,FormControlName directive 提供的formControlName将每个单独的输入绑定到 FormGroup 中定义的 FormControl,FormControl 与各自绑定的输入元素进行通信,他们之间的通信与单独使用一个 FormControl 一样。
Save form data
reactive forms 和 tempate-driven forms 一样可以使用 ngSubmit 提交整个表单,举个例子
-
在 profile-editor.component.ts 中添加一个 method 当使用者点击 submit 後触发
import { Component, OnInit } from '@angular/core'; import { FormControl, FormGroup } from '@angular/forms'; @Component({ selector: 'app-profile-editor', templateUrl: './profile-editor.component.html', styleUrls: ['./profile-editor.component.css'] }) export class ProfileEditorComponent implements OnInit { formValue: any; // (1) profileForm = new FormGroup({ firstName: new FormControl(''), lastName: new FormControl(''), }); ngOnInit(): void { } onSubmit() { // (2) this.formValue = this.profileForm.value; } }- (1): 新增一个 property 用於储存 form 的资料与显示在画面中
- (2): 将 formGroup 的数据赋予 formValue
-
在 profile-editor.component.html 中新增一个
<button>并在<form>上绑定一个 event<form [formGroup]="profileForm" class="form-group" (ngSubmit)="onSubmit()"> <div class="form-control"> <label for="first-name">First Name: </label> <input id="first-name" type="text" formControlName="firstName" /> </div> <div class="form-control"> <label for="last-name">Last Name: </label> <input id="last-name" type="text" formControlName="lastName" /> </div> <button type="submit" class="btn btn-success">Submit</button> </form> <h3>Form Value: {{ formValue | json }}</h3>

Creating nested form groups
FormGroup 除了可以接收含有 FormControl 的 object 之外,还可以接收 object 里面包涵另一个 FormGroup 的嵌套结构,这样可以将复杂的表单组合成同一个 FormGroup 更利於维护,将大型的表单分解为几个更小且更易於管理的 group 最後再合并再一起,举个例子吧
-
在 profile-editor.component.ts 中将原本的 FormGroup 中多添加一组 FormGroup
import { Component, OnInit } from '@angular/core'; import { FormControl, FormGroup } from '@angular/forms'; @Component({ selector: 'app-profile-editor', templateUrl: './profile-editor.component.html', styleUrls: ['./profile-editor.component.css'] }) export class ProfileEditorComponent implements OnInit { formValue: any; profileForm = new FormGroup({ firstName: new FormControl(''), lastName: new FormControl(''), address: new FormGroup({ street: new FormControl(''), city: new FormControl(''), state: new FormControl(''), zip: new FormControl('') }) }); ngOnInit(): void { } onSubmit() { this.formValue = this.profileForm.value; } } -
在 profile-editor.component.html 中添加输入元素并将它绑定下一层的 FormGroup 和 FormControl
<form [formGroup]="profileForm" class="form-group" (ngSubmit)="onSubmit()">
  <div class="form-control">
    <label for="first-name">First Name: </label>
    <input id="first-name" type="text" formControlName="firstName" />
  </div>
  <div class="form-control">
    <label for="last-name">Last Name: </label>
    <input id="last-name" type="text" formControlName="lastName" />
  </div>

  <div formGroupName="address">
    <h2>Address</h2>

    <div class="form-control">
      <label for="street">Street: </label>
      <input id="street" type="text" formControlName="street" />
    </div>
    <div class="form-control">
      <label for="city">City: </label>
      <input id="city" type="text" formControlName="city" />
    </div>
    <div class="form-control">
      <label for="state">State: </label>
      <input id="state" type="text" formControlName="state" />
    </div>
    <div class="form-control">
      <label for="zip">Zip Code: </label>
      <input id="zip" type="text" formControlName="zip" />
    </div>
  </div>

  <button type="submit" class="btn btn-success">Submit</button>
</form>

<h3>Form Value: {{ formValue | json }}</h3>
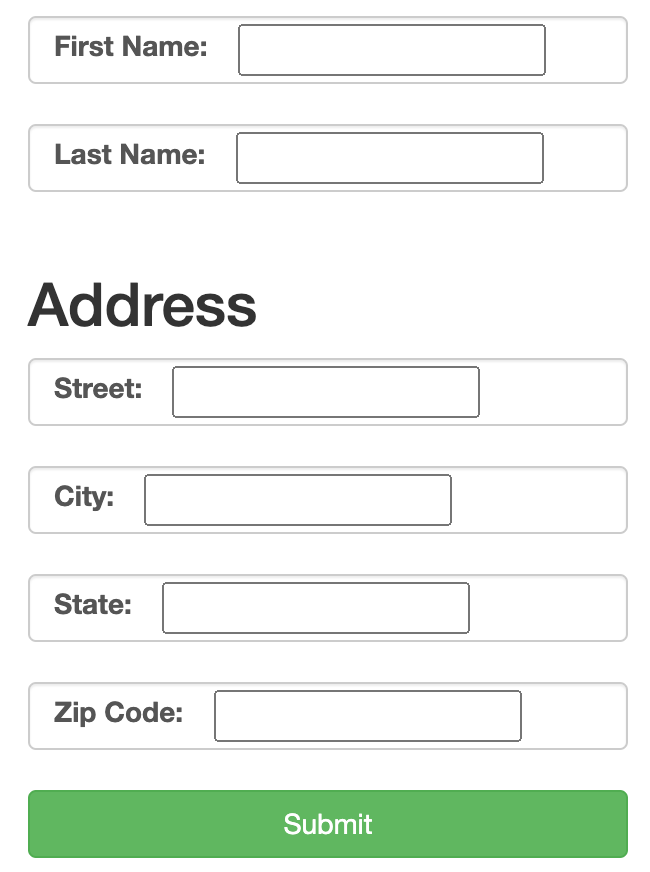
可以测试一下当把每一个输入框都输入数据後点击 submit 看看输出的结果会是如何。
Updating parts of the data model
在介绍 FormControl 的 setValue() 时有提到当要设定的数据模型如果跟 FormGroup 的格式不同的话则会发生错误,这边要来仔细讲解一下,对於更新 FormGroup 中 FormControl 的值有三种方式:
- 使用
setValue()method 为单个 FormControl 设置新的值,但是如果使用 setValue() 的话必须严格遵守 FormGorup 的结构一次替换就要换掉整组,但是面对复杂的嵌套表单而言严格的检查可以避免错误。 - 使用
patchValue()method 替换掉表单中的任何 FormControl 的内容,使用这个方法就可以不用遵守 FormGroup 的格式,可以做到只更新某一个部分的值,但是在面对复杂的表单时,就算发生错误时不会提醒只会默默地失败。 - 使用 FormGroup 的 property
get,用於获得 FormGroup 中单个 FormControl 的实例,在对这个实力使用setValue()就可以只更改单一个 FormControl 的值
先在 profile-editor.component.html 中新增一个 <button> 并绑掉更新数据个 event
<button (click)="onUpdate()" class="btn btn-success">Update</button>
接着来介绍如何使用三种方式更新画面中输入框的内容
-
使用 setValue() 更改数据
onUpdate() {
    this.profileForm.setValue({
      firstName: 'Fandix',
      lastName: 'Huang',
      address: {
        street: 'Queen',
        city: 'New York',
        state: 'New York',
        zip: '123'
      }
    })
  }
-
使用 patchValue() 更改部分 FormControl 的内容
onUpdate() {
    this.profileForm.patchValue({
      firstName: 'Fandix',
      lastName: 'Huang',
      address: {
        street: 'Queen',
        zip: '123'
      }
    })
  }
-
使用
get获得单一 FomControl 并使用 setValue() 更新内容onUpdate() { this.profileForm.get('firstName')?.setValue('Fandix'); this.profileForm.get('address')?.get('city')?.setValue('New York'); }使用
get获得address的实例时,要记得获得的还是FormGroup,所以要获得city的实例需要在调用一次get才能获得下一层
结论
本章中介绍了如何使用 FormControl 建立单一个表单控制元件,可以使用 FormControl 实例提供的 property value 获得使用者输入的数据,也可以使用 subscribe() 获得表单的快照,而 reactive forms 的另一个特色就是可以利用编成的方式更改表单的内容,所以可以使用 setValue() 做到这个功能。
也介绍了如何使用 FormGroup 将多个相关控制元件分组到单个输入表单中,获得表单数据的方法也是使用 FormGroup 实例提供的 value property,也可以使用 subscribe() 获得表单的快照,至於设定表单内容的话可以使用 setValue()、patchValue() 两种方式设定,但要注意的是使用 setValue() 需要注意填入的格式需要与 FormGroup 的格式相同不然会出错,这对於复杂的嵌套表单而言可以起到很好的检查作用,而使用 patchValue() 虽然不用满足 FormGroup 的格式,的是在面对复杂的表单时,就算出错他也不会提醒而会默默的设定失败,所以要特别注意,最後可以使用 FormGroup 实例提供的 get property 可以获得单独的 FormControl 实例。
由於 reactive forms 的篇章比较长,所以一样分成两篇讲解,下一篇将会介绍如何使用 FormBuilder 利用比较简单的方式建立 FormGroup 和 FormControl,也会介绍如何使用 FormArray 建立动态的表单,详细的内容就明天再介绍吧,那麽明天见吧。
Reference
Day19 Elastic APM (三)
我们已经把Elastic APM可前的需要都部署好了,接下来为了使用APM,对官方提供的APM Ag...
Day 23: Behavioral patterns - Memento
目的 当系统需要提供「复原功能」、「取消复原功能」、「回复到上一个步骤」等需要将这些资料暂时存放在记...
[PoEAA] Domain Logic Pattern - Service Layer
本篇同步发布於个人Blog: [PoEAA] Domain Logic Pattern - Serv...
【Day 23】React 关於 Hook(3)
关於 Hook 的方法与实作 useContext useContext 可以使元件跨越层级直接传递...
基於 SAML 的联合身份管理 (FIM) 以支持单点登录 (SSO)
来源:安全断言标记语言 (SAML) V2.0 技术概述 如上图所示: .一个用户可以在每个域中拥...