新新新手阅读 Angular 文件 - Component - ngOnDestroy(1) - Day25
本文内容
本文内容为阅读有关 Angular 的元件的 lifecycle hook - ngOnDestroy 的笔记内容。
ngOnDestroy
呼叫时机: 当 Angular 要消灭某个 Component 或者 Directive 之前,会呼叫 ngOnDestroy 这个 lifecycle hook。
在官方文件中,有建议我们在 ngOnDestroy 这个 lifecycle hook 做以下这些事情,以防止 memory leak
- 将 observable 的订阅全部都解订阅。
- 将绑定的监听事件都解绑。
- 停止计时器的计时功能。
memory leak?
什麽是 memory leak,根据维基百科的解释
In computer science, a memory leak is a type of resource leak that occurs when a computer program incorrectly manages memory allocations in a way that memory which is no longer needed is not released.
以上的内容简单来说,就是错误的管理记忆体的配置,某些不再被用到的记忆体,却没有被正确地释放,这种状况就会造成 memory leak。
UnSubscribe Observable
这边就来说明如果没有解订阅 Observable 的话,会怎麽造成记忆体泄漏地状况。
在许多产品上,时常会有当点击某个按钮,就去远端 server 取得资料,并绑资料呈现在画面上的操作。
以下来写个简单的范例
[子元件 - TypeScript]
import { Component, VERSION } from '@angular/core';
import { AuthService } from '@app/auth.service.ts'
@Component({
  selector: 'child',
})
export class AppComponent  {
  constructor(private authService:AuthService){}

  getUserName() {
    this.authService
      .getUserName()
      .subscribe(user => window.alert(`Hello!! ${user.name}`))
  }
}
[子元件 - View]
<button type="button" (click)="getUserName">fetch UserData</button>
[父元件 - View]
<child></child>
上面的范例可以看到,当我们点击子元件的按钮,他会去远端取得使用者的资料,并订阅回传的 Observable ,并将里面的使用者姓名呈现在 alert 对话框里面。
这一切看起来都很合理对吧!! 阿不就你点一次按钮,就跳一个提示对话框,然後,里面呈现从远端取回来的使用者姓名吗?!
没错喔,但是,其实,在每一次完成子元件的 getUserName 函式的内容,我们都会隐性的产出一个 subscription,
哪泥?! 在哪? subscription 就是下图程序码会产生出来的东西
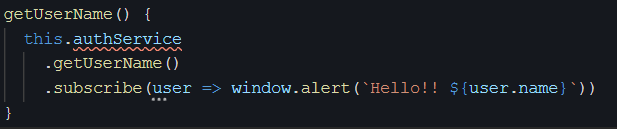
所以,每当我们按下一次按钮就会执行一次 getUserName 内容,接着,产生出一份 subscription ,按下第二次,就产生出第二个 subscription,按越多次,就产生越多 subscription。
等到,这个 child 要被消灭的时候,这些产生出来的 subscription 没有被退订阅,就变成了在记忆体宇宙中的太空垃圾,进而造成上面所说的 memory leak 罗~
加入 ngOnDestroy 来解订阅
所以,上面的范例,我们就必须加入 ngOnDestroy 来解决这个问题罗。
改写的内容如下
[子元件 - TypeScript]
import { Component, OnDestroy} from '@angular/core';
import { AuthService } from '@app/auth.service.ts'
import { Subscription } from 'rxjs';

export class AppComponent implements OnDestroy  {
  userSub:Subscription
  constructor(private authService:AuthService){}

  getUserName() {
    this.userSub = this.authService
      .getUserName()
      .subscribe(user => window.alert(`Hello!! ${user.name}`))
  }

  ngOnDestroy() {
    if(this.userSub){
      this.userSub.unsubscribe()
    }
  }
}
ok~~ 是不是蛮轻松的呢,要加的内容也不是很多,就是要引入 ngOnDestroy 这个 lifecycle hook 到子元件里面。
另外,还要引入 RxJs 的 Subscription 来存取我们每一次在 getUserName 函式中攒生出来的 subscription,最後,在 ngOnDestroy 里面,判断如果 this.userSub 确实有存取到内容,就将它解订阅。
如此,就可以防止隐性产生 Subscription 而造成的 memory leak 罗。
解订阅优化写法
上面的范例中的写法是传统的写法。但是它有一个很麻烦的点,当我们有很多 subscription 的话,就得要每一个 subscription 都手动为它加上解订阅的内容,这样的话,有一百个 subscription 不就要写一百次吗?! 没错。
所以,我们会引入 takeUntil 这个 rxjs 的 operator 来优化以上的写法。
先讲一下 takeUntil 的功能,当 takeUntil 里面的内容接收到值时,就会终止数据流。
让我们来改写以下,上面的范例
[子元件 - TypeScript ]
import { Component, OnDestroy} from '@angular/core';
import { AuthService } from '@app/auth.service.ts'
import { Subject } from 'rxjs';
import { takeUntil } from 'rxjs/operators';

export class AppComponent implements OnDestroy  {
  destroy$ = new Subject<boolean>()

  constructor(private authService:AuthService){}

  getUserName() {
    this.authService
      .getUserName()
      .pipe(
        takeUntil(this.destroy$) // 要写在 pipe 的最後面
      )
      .subscribe(user => window.alert(`Hello!! ${user.name}`))
  }

  ngOnDestroy() {
    this.destroy$.next(true)
    this.destroy$.unsubscribe()
  }
}
以上的范例,改写的内容,我们不再使用 Subscription 取而代之的是使用 Subject。
step 1.
那我们定义了一个 destroy$ 的 Subject 物件,它要传入布林值。
step 2.
接着,我们利用 pipe 接在 getUserName 回传的 Observable 後面。
它的功能就是,当 takeUntil 的 destroy$ 接收到值的时候,就会终止它的数据流。
step3.
ngOnDestroy 的 lifecycle hook 就是我们要启动 destroy$ 的时机,所以,有看到我们呼叫了它的 next 并传送了一个 true,此时,每个 subscription 有加上 takeUntil(this.destroy$) 的,都会终止它们的数据流。
最後,我们再解定阅 destroy$ 本身。
经过以上的优化,我们就不用一个一个 subscription 写它们各自的解订阅内容了。
再次优化解订阅的写法
在这篇文章中,有提供一个更简洁的解订阅写法。
大意就是,把 destroy$ 和 在 ngOnDestroy 启动 destroy$ 的内容写在父元件里面。子元件的话,就将父元件的内容继承进来,如此,子元件也能调用属於父元件的 destroy$,最後,就在那些需要解订阅的 subscription 加入 takeUntil(destroy$) 的内容。
Refernce
Day13 继续用 TailwindCSS 切版部落格文章内页样式
Day13!上一篇我们用 TailwindCSS 切版出了还不错看的部落格首页,显示文章列表。今天让...
Wentz的风险模型
Wentz的风险模型 (Wentz’s Risk Model)结合了孔雀模型(Peacock Mo...
[Day 11] 资料产品生命周期管理-原始资料
不同类型的资料产品在其各自专案周期有需要注意的地方,以下我们将说明在处理原始资料时,各阶段应该做的事...
[Day-1] 记录C++开发环境安装过程
今天我选择了"Dev-C++" 来当我学习C++的入门开发环境! 会想下载Dev...
Day 4:透过 npm、Hexo 指令在本机端安装你的 Hexo 部落格
当前置必要安装工具用好後,就可以在本机搭建 Hexo 部落格啦!安装过程会使用到指令,所以我们要打开...