[NestJS 带你飞!] DAY31 - 实战演练 (下)
角色授权设计
前面有提到这次要设计的系统共有三种角色,并且会使用 Casbin 来做授权机制。
提醒:Authorization 的技巧可以参考 DAY25 - Authorization & RBAC。
模型与政策
Casbin 的授权机制由存取控制模型与政策模型所组成,我们先将存取控制模型进行定义,在 rbac 资料夹下新增 model.conf,并将请求、政策、角色定义、效果与验证器设置好:
[request_definition]
r = sub, obj, act

[policy_definition]
p = sub, obj, act

[role_definition]
g = _, _

[policy_effect]
e = some(where (p.eft == allow))

[matchers]
m = g(r.sub, p.sub) && keyMatch2(r.obj, p.obj) && (r.act == p.act || p.act == '*')
接着,在 rbac 资料夹下建立 policy.csv,将下方的存取条件进行配置:
-
admin:/users、/todos的所有资源皆可以操作。 -
member:可对/todos与/users的资源做read并且对/todos/:id进行update的操作。 -
manager:继承member的存取权,并可对/todos进行create操作、/todos/:id进行delete操作。
p, role:admin, /api/users, *
p, role:admin, /api/users/:id, *
p, role:admin, /api/todos, *
p, role:admin, /api/todos/:id, *
p, role:manager, /api/todos, create
p, role:manager, /api/todos/:id, delete
p, role:member, /api/todos, read
p, role:member, /api/todos/:id, update
p, role:member, /api/users, read

g, role:manager, role:member
模组包装
我们在 Authorization 那篇有实作把 Casbin 包装成模组,这里我们同样需要实作一遍,在 src/core/modules 资料夹下透过 CLI 产生 AuthorizationModule 与 AuthorizationService:
$ nest generate module core/modules/authorization
$ nest generate service core/modules/authorization
Casbin 需要使用 enforcer 来 套用 model.conf 与 policy.csv,这种第三方物件可以透过自订 Provider 的方式进行处理,在 src/core/modules/authorization/constants 资料夹下新增 token.const.ts,设计一个注入 enforcer 用的 token:
export const AUTHORIZATION_ENFORCER = 'authorization_enforcer';
我希望 model.conf 与 policy.csv 是可以透过外部提供的,故我们需要运用 DynamicModule 的设计方法来处理,输入值的介面也需要进行制定,在 src/core/modules/authorization/interfaces 资料夹下新增 option.interface.ts:
export interface RegisterOptions {
  modelPath: string;
  policyAdapter: any;
  global?: boolean;
}
调整 AuthorizationModule 的内容,将其修改成 DynamicModule,并将 AuthorizationService 与 enforcer 汇出:
import { DynamicModule, Module } from '@nestjs/common';

import { newEnforcer } from 'casbin';

import { AUTHORIZATION_ENFORCER } from './constants/token.const';
import { RegisterOptions } from './interfaces/option.interface';

import { AuthorizationService } from './authorization.service';

@Module({})
export class AuthorizationModule {
  static register(options: RegisterOptions): DynamicModule {
    const { modelPath, policyAdapter, global = false } = options;
    const providers = [
      {
        provide: AUTHORIZATION_ENFORCER,
        useFactory: async () => {
          const enforcer = await newEnforcer(modelPath, policyAdapter);
          return enforcer;
        },
      },
      AuthorizationService,
    ];

    return {
      global,
      providers,
      module: AuthorizationModule,
      exports: [...providers],
    };
  }
}
设计一个 enum 来与我们角色的资源操作做配对,在 src/core/modules/authorization 下新增一个 enums 资料夹并建立 action.enum.ts:
export enum AuthorizationAction {
  CREATE = 'create',
  READ = 'read',
  UPDATE = 'update',
  DELETE = 'delete',
  NONE = 'none',
}
AuthorizationService 负责做权限检查以及把 HttpMethod 转换成 AuthorizationAction:
import { Inject, Injectable } from '@nestjs/common';

import { Enforcer } from 'casbin';

import { AUTHORIZATION_ENFORCER } from './constants/token.const';
import { AuthorizationAction } from './enums/action.enum';

@Injectable()
export class AuthorizationService {
  constructor(
    @Inject(AUTHORIZATION_ENFORCER) private readonly enforcer: Enforcer,
  ) {}

  public checkPermission(subject: string, object: string, action: string) {
    return this.enforcer.enforce(subject, object, action);
  }

  public mappingAction(method: string): AuthorizationAction {
    switch (method.toUpperCase()) {
      case 'GET':
        return AuthorizationAction.READ;
      case 'POST':
        return AuthorizationAction.CREATE;
      case 'PATCH':
      case 'PUT':
        return AuthorizationAction.UPDATE;
      case 'DELETE':
        return AuthorizationAction.DELETE;
      default:
        return AuthorizationAction.NONE;
    }
  }
}
建立 index.ts 做汇出管理:
export { AuthorizationModule } from './authorization.module';
export { AuthorizationService } from './authorization.service';
export { AUTHORIZATION_ENFORCER } from './constants/token.const';
Guard
接下来我们需要实作一个 RoleGuard 来针对角色的存取权做验证,透过 CLI 在 src/core/guards 资料夹下建立 RoleGuard:
$ nest generate guard core/guards/role
RoleGuard 会透过 AuthorizationService 对角色进行审查,并将结果回传:
import {
  CanActivate,
  ExecutionContext,
  Injectable,
  UnauthorizedException,
} from '@nestjs/common';

import { Request } from 'express';
import { Observable } from 'rxjs';

import { AuthorizationService } from '../modules/authorization';

@Injectable()
export class RoleGuard implements CanActivate {
  constructor(private readonly authorizationService: AuthorizationService) {}

  canActivate(
    context: ExecutionContext,
  ): boolean | Promise<boolean> | Observable<boolean> {
    const request: Request = context.switchToHttp().getRequest();
    const { user, path, method } = request;
    const action = this.authorizationService.mappingAction(method);

    if (!user) {
      throw new UnauthorizedException();
    }

    return this.authorizationService.checkPermission(
      `role:${(user as any).role}`,
      path,
      action,
    );
  }
}
调整 index.ts,将 RoleGuard 进行汇出:
export { JwtAuthGuard } from './jwt-auth.guard';
export { LocalAuthGuard } from './local-auth.guard';
export { RoleGuard } from './role.guard';
系统整合
完成角色授权验证功能後,就要将 RoleGuard 套用至 UserController 与 TodoController 上,下方为 UserController 调整後的内容,主要就是多了 RoleGuard:
import {
  Body,
  ConflictException,
  Controller,
  Delete,
  ForbiddenException,
  Get,
  Param,
  Patch,
  Post,
  Query,
  UseGuards,
} from '@nestjs/common';

import { SearchPipe } from '../../core/pipes';
import { JwtAuthGuard, RoleGuard } from '../../core/guards';
import { SearchDto } from '../../core/bases/dto';

import { CreateUserDto } from './dto/create-user.dto';
import { UpdateUserDto } from './dto/update-user.dto';

import { UserService } from './user.service';

@UseGuards(JwtAuthGuard, RoleGuard)
@Controller('users')
export class UserController {
  constructor(private readonly userService: UserService) {}

  @Get()
  async getUsers(@Query(SearchPipe) query: SearchDto) {
    return this.userService.findUsers(query, '-password');
  }

  @Post()
  async createUser(@Body() dto: CreateUserDto) {
    const { username, email } = dto;
    const exist = await this.userService.existUser({
      $or: [{ username }, { email }],
    });

    if (exist) {
      throw new ConflictException('username or email is already exist.');
    }

    const user = await this.userService.createUser(dto);
    const { password, ...result } = user;
    return result;
  }

  @Delete(':id')
  async deleteUser(@Param('id') id: string) {
    const response = await this.userService.deleteUser(id);
    if (!response) {
      throw new ForbiddenException();
    }
    return response;
  }

  @Patch(':id')
  async updateUser(@Param('id') id: string, @Body() dto: UpdateUserDto) {
    const user = await this.userService.updateUser(id, dto, '-password');
    if (!user) {
      throw new ForbiddenException();
    }
    return user;
  }
}
在 TodoController 套用 RoleGuard:
import {
  Body,
  Controller,
  Delete,
  ForbiddenException,
  Get,
  Param,
  Patch,
  Post,
  Query,
  UseGuards,
} from '@nestjs/common';

import { JwtAuthGuard, RoleGuard } from '../../core/guards';
import { SearchPipe } from '../../core/pipes';
import { SearchDto } from '../../core/bases/dto';

import { CreateTodoDto } from './dto/create-todo.dto';
import { UpdateTodoDto } from './dto/update-todo.dto';

import { TodoService } from './todo.service';

@UseGuards(JwtAuthGuard, RoleGuard)
@Controller('todos')
export class TodoController {
  constructor(private readonly todoService: TodoService) {}

  @Get()
  async getTodos(@Query(SearchPipe) query: SearchDto) {
    return this.todoService.findTodos(query);
  }

  @Post()
  async createTodo(@Body() dto: CreateTodoDto) {
    return this.todoService.createTodo(dto);
  }

  @Delete(':id')
  async deleteTodo(@Param('id') id: string) {
    const response = await this.todoService.deleteTodo(id);
    if (!response) {
      throw new ForbiddenException();
    }
    return response;
  }

  @Patch(':id')
  async updateTodo(@Param('id') id: string, @Body() dto: UpdateTodoDto) {
    const todo = await this.todoService.updateTodo(id, dto);
    if (!todo) {
      throw new ForbiddenException();
    }
    return todo;
  }
}
系统使用情境
完成这套系统之後,我们要来模拟使用情境,进而展示这套系统的成果,首先,我们透过指令将 Nest App 启动:
$ npm run start:dev
注册与登入
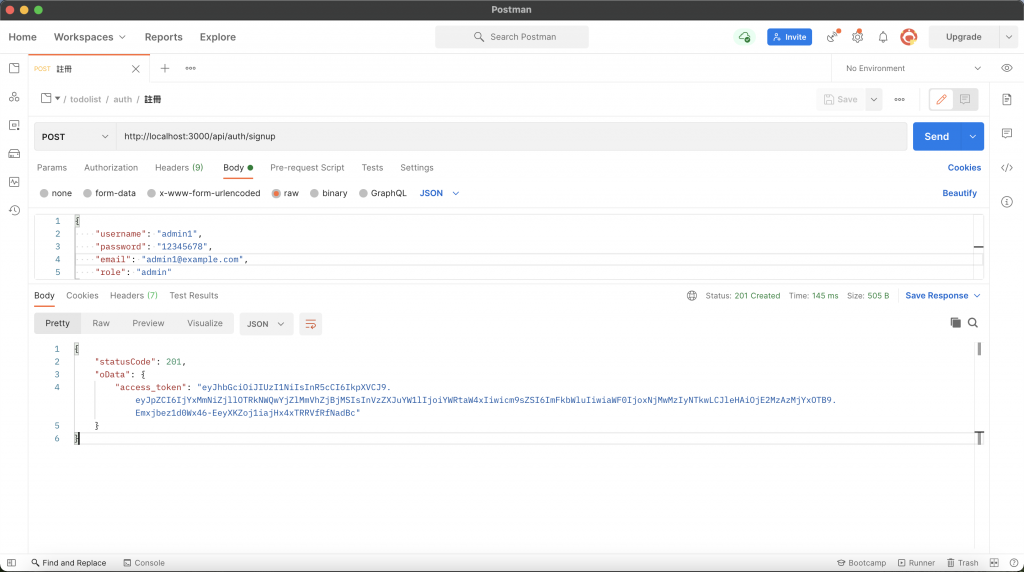
启动後,透过 [POST] /api/auth/signup 进行预设使用者注册:
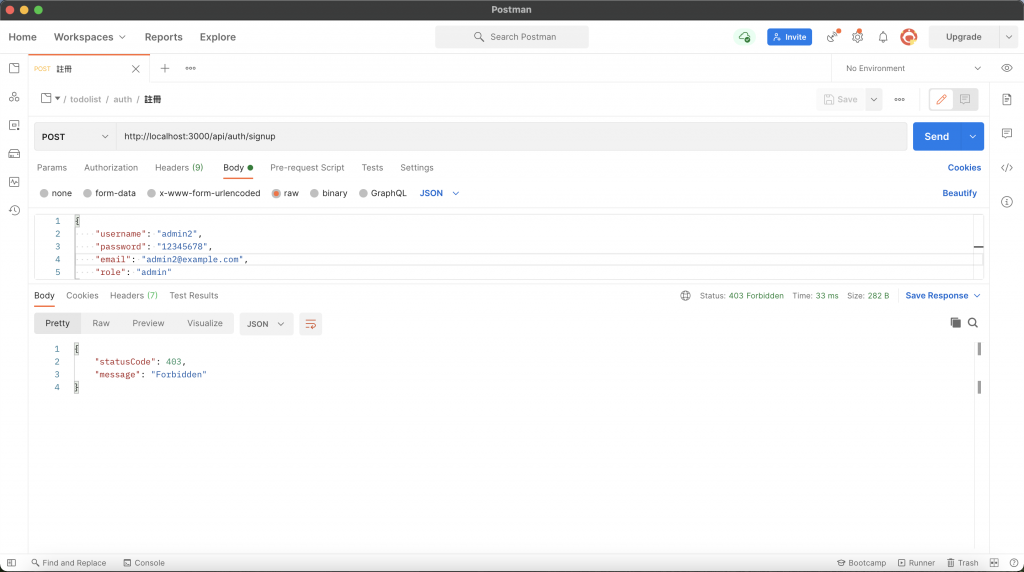
检测一下是否有成功挡下第二次注册,有正确挡下的话会收到 403 的错误:
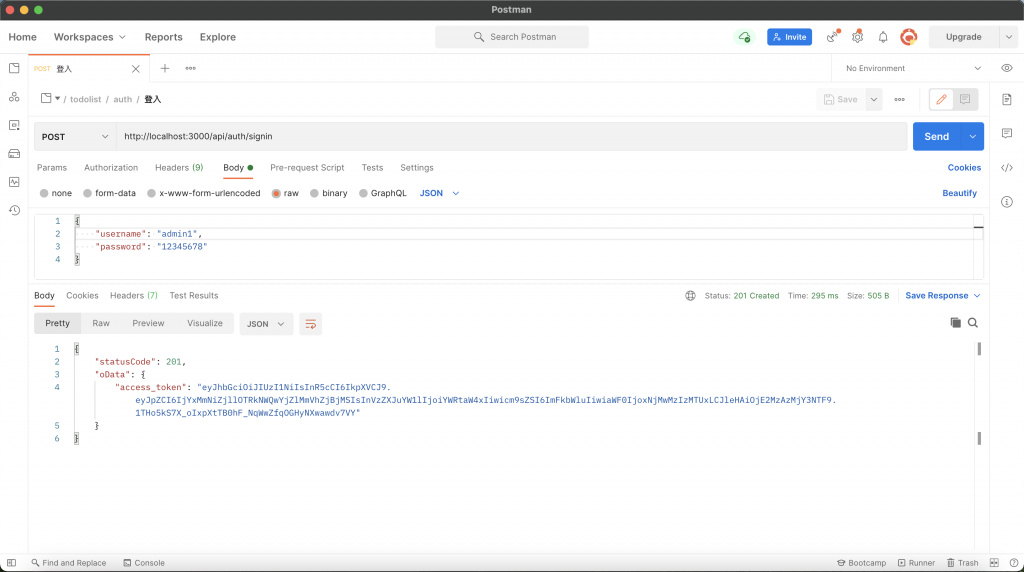
透过 [POST] /api/auth/signin 进行登入:
使用者
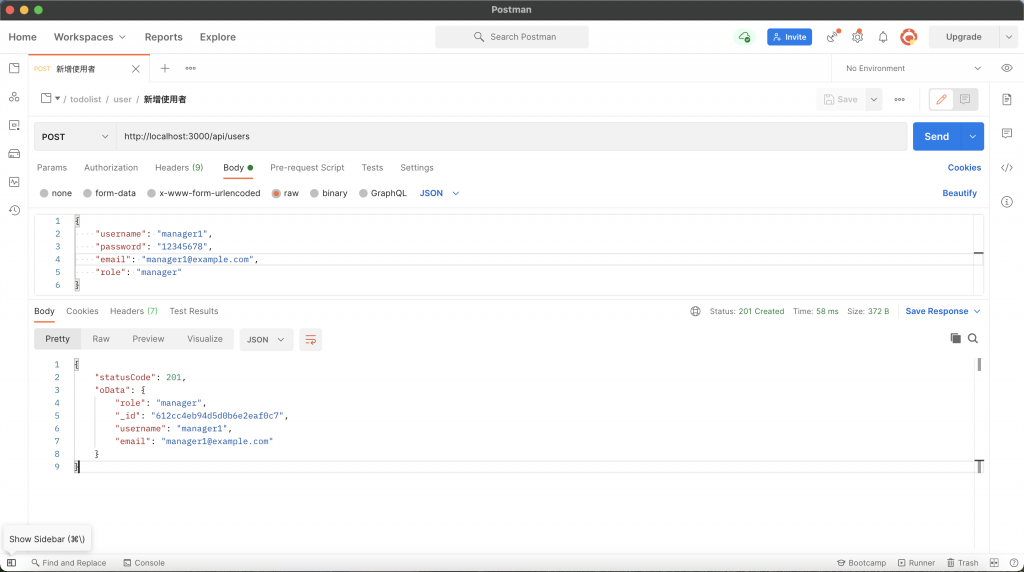
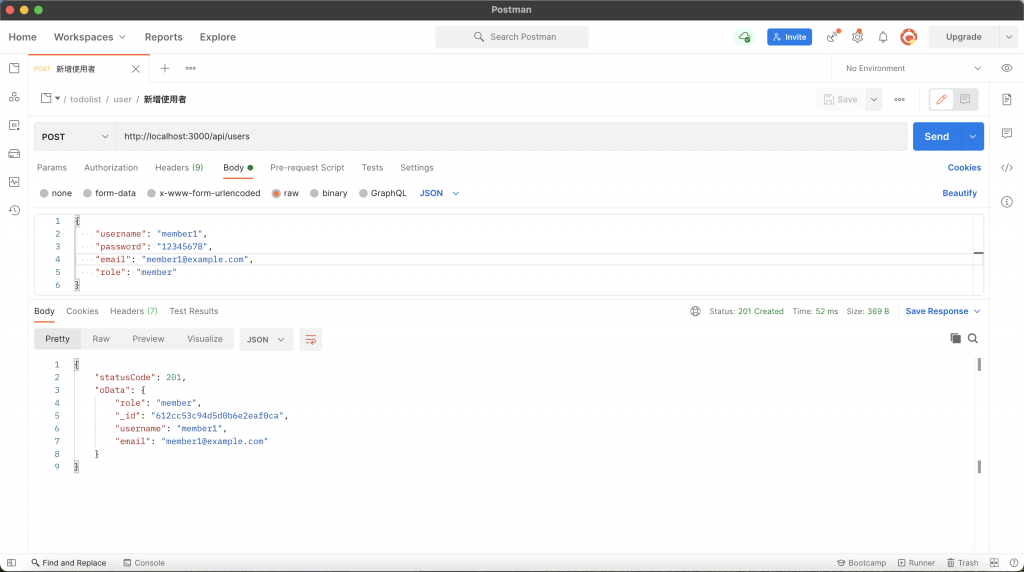
透过登入的 API 取得 token 後,就可以将它带入 Header 中进行其他 API 操作,我们先使用角色为 admin 的帐号来建立三个使用者,他们的角色分别为:manager、member 与 member,使用 [POST] /api/users 来建立:
-
username为manager1的manager:
-
username为member1的member:
-
username为member2的member:

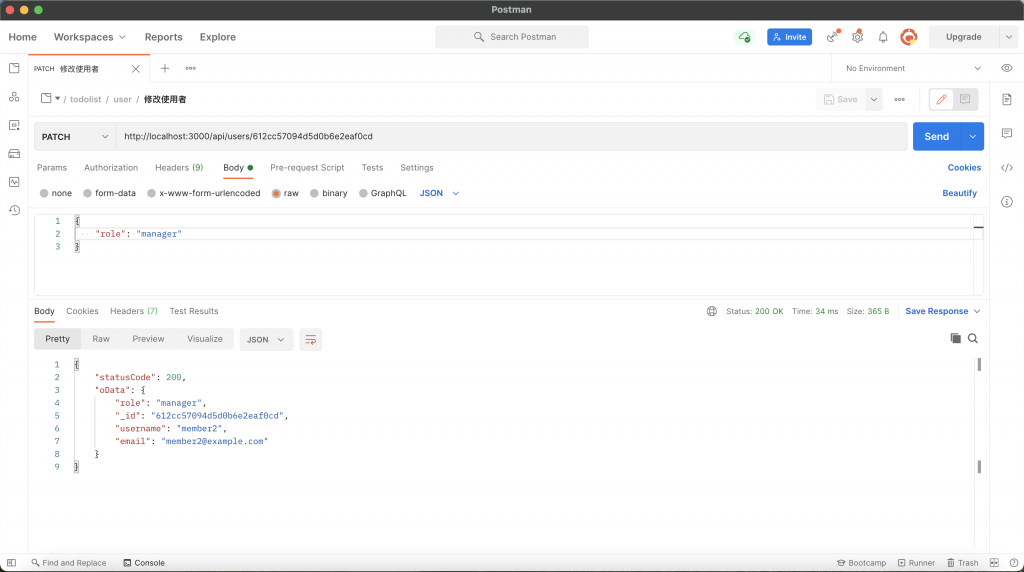
使用 [PATCH] /api/users/:id 来修改 member2 的角色,将他角色变更为 manager:
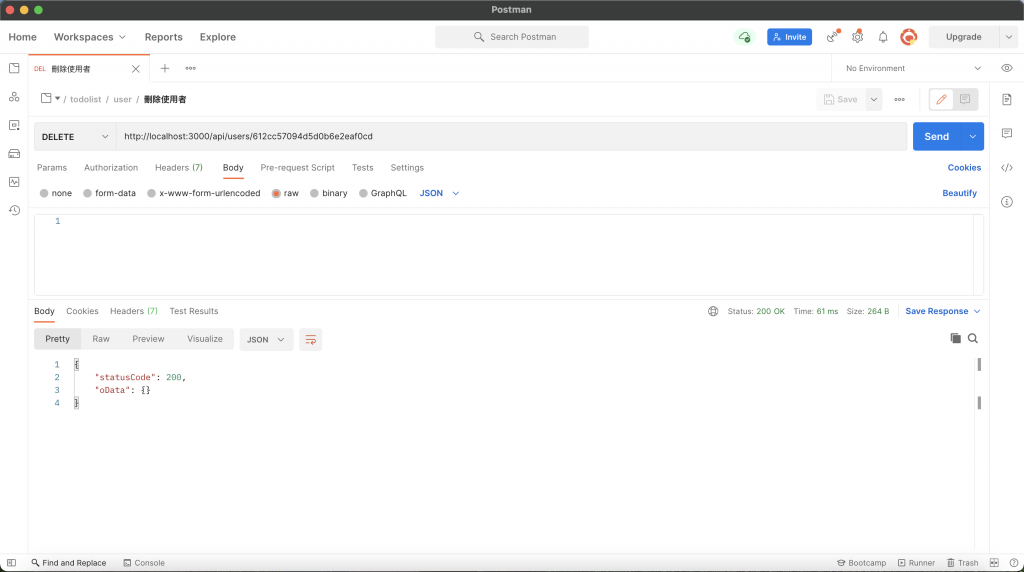
透过 [DELETE] /api/users/:id 将 member2 移除:
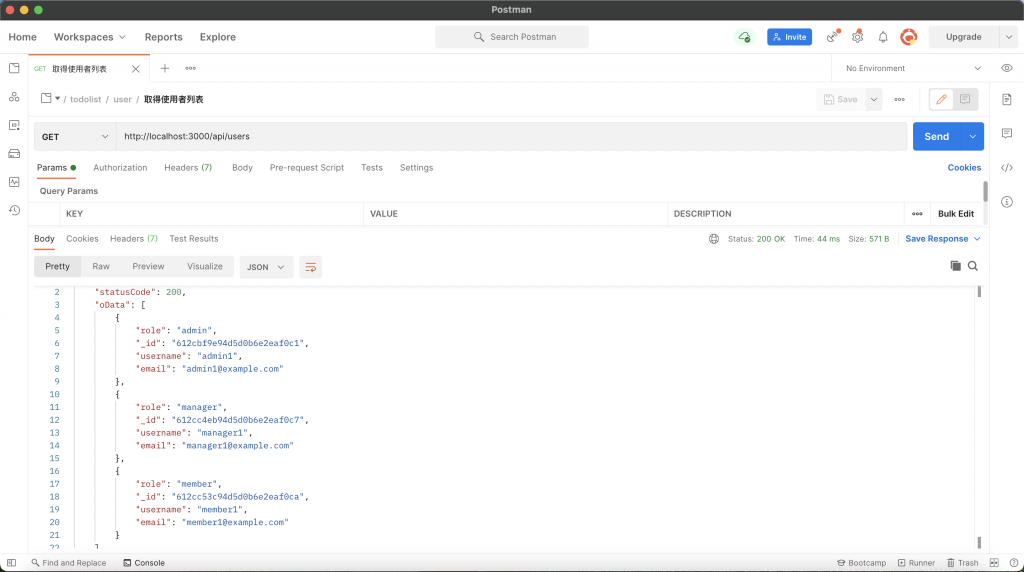
使用 [GET] /api/users 确认 member2 是否已经从使用者中删除:
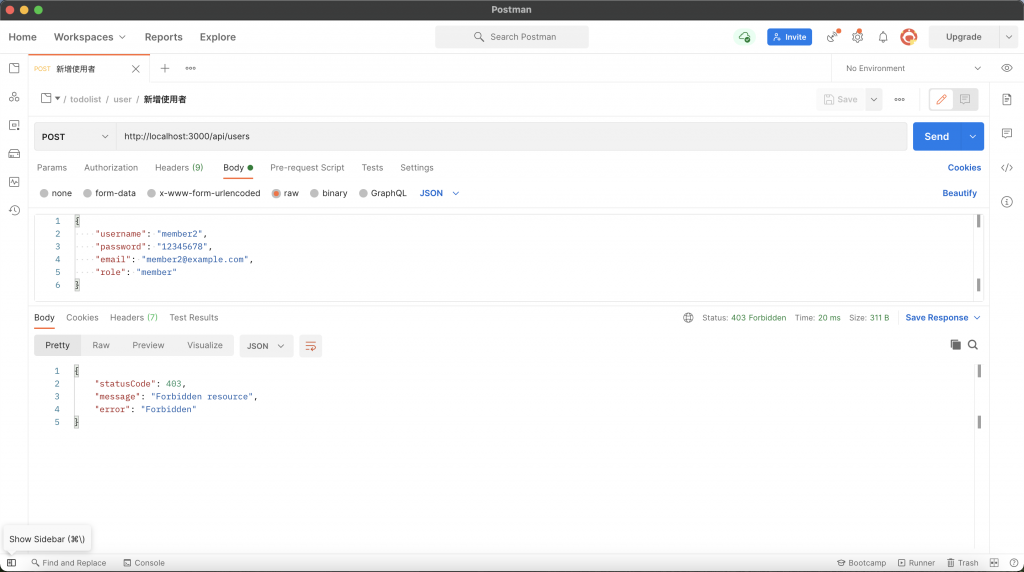
最後,使用 manager1 来建立使用者,会收到 403 的错误,因为只有 admin 可以进行新增、删除、修改使用者的操作:
待办事项
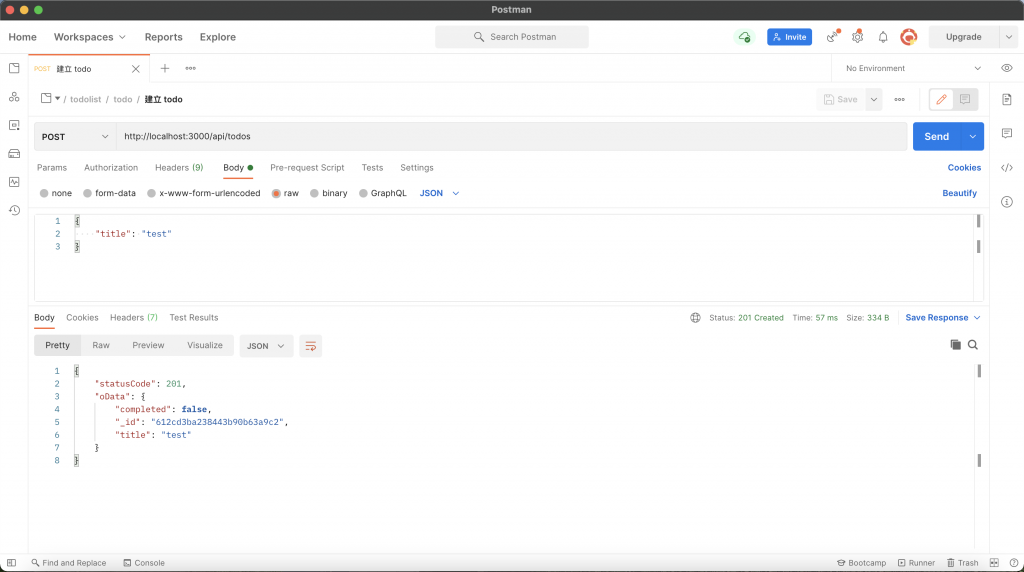
我们使用 manager1 透过 [POST] /api/todos 来新增待办事项:
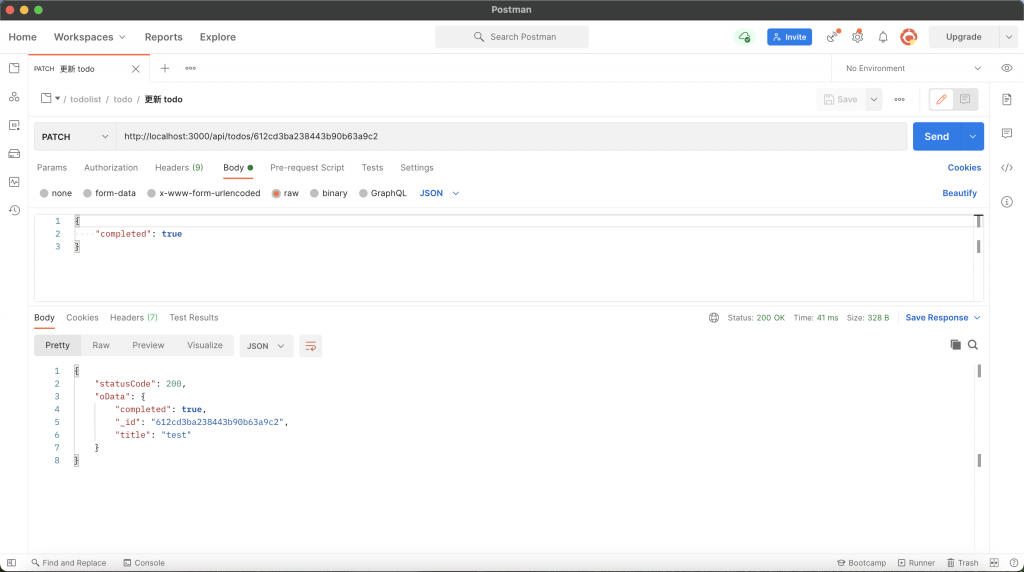
使用 [PATCH] /api/todos/:id 将该笔待办事项的 completed 改为 true:
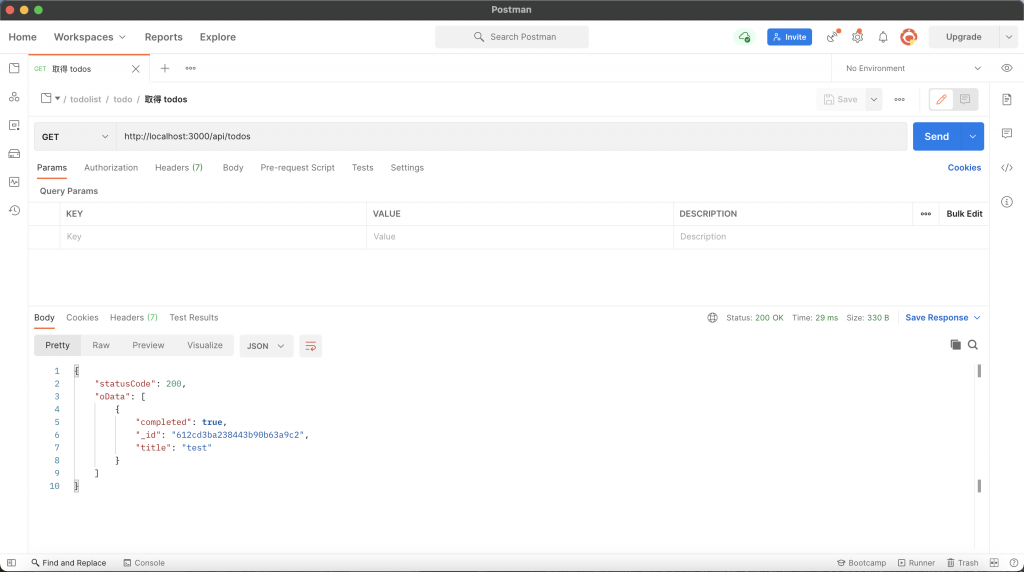
使用 [GET] /api/todos 来取得待办事项列表:
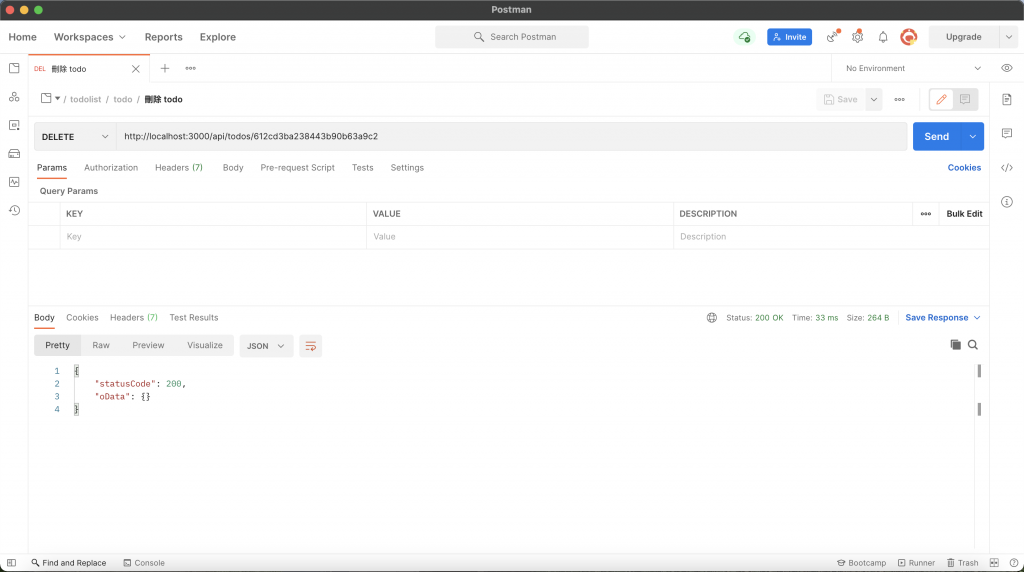
透过 [DELETE] /api/todos/:id 将该笔待办事项删除:
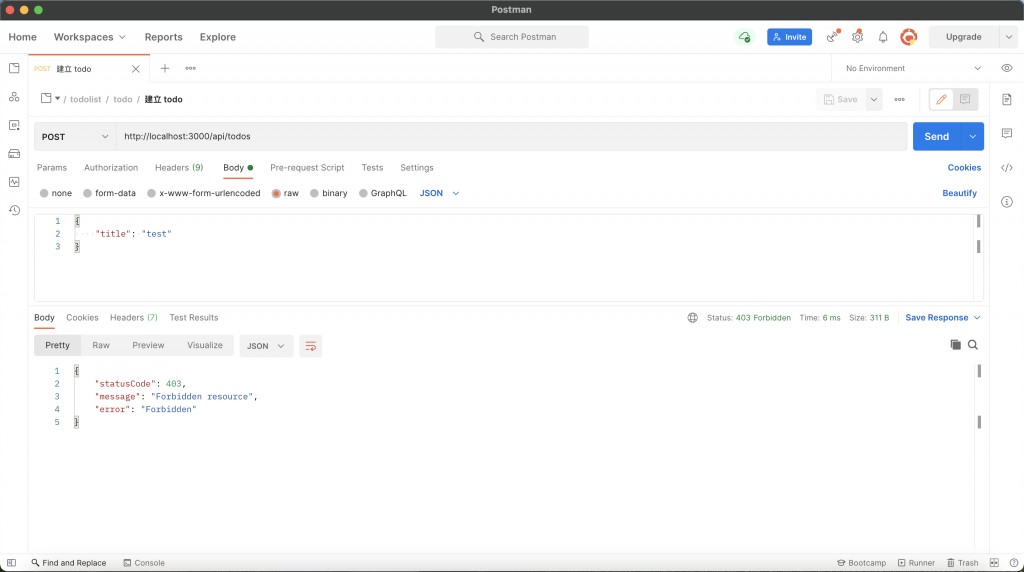
使用 member1 新增待办事项,会收到 403 的错误,因为 member 不能对待办事项进行新增与删除的操作:
小结
终於完成了这套系统了,这也表示这个系列文将划下句点,相信各位在经历这 31 天的奋斗以後,对 Nest 有更进一步的认识。明天会再发一篇文章来做个总结,谢谢大家这一路以来的支持!
<<: Day29 - 【概念篇】用Keycloak学习JWT权杖格式 - JWT权杖格式介绍(1)
Day04 - Gem-activerecord-import 批次建立介绍与应用
前言 当需要大量建立资料时,可以选择逐笔建立,但会有 N+1 insert problem 透过 a...
[面试]准备好要询问公司的问题,面试就是资讯战!
打着「吃亏就是占便宜」的口号,许多人别说去争取不属於自己的东西,连属於自己的东西都没有开口的勇气。...
Day28 - Linux 编译 POC/exploit
复习:渗透测试的目的 在合法委托下,确认目标网站或系统有可利用的漏洞,若确认有目标在取得授权下,提升...
【在厨房想30天的演算法】Day 16 演算法 : 排序 sort III 希尔、摇晃、基数
Aloha!又是我少女人妻 Uerica ~ 我每天看到时间快接近午夜 12 点,都能感受到灰姑娘的...
Day 15 Compose LazyRow
今年的疫情蛮严重的,希望大家都过得安好,希望疫情快点过去,能回到一些线下技术聚会的时光~ 今天目标:...