Day30 Gin with Drone
Ngrox
前置作业,因为我们是在local进行开发,但由於drone的设定上需要一个对外的https接口,
因此我们透过Ngrox将我们的https:localhost:8081向外暴露,指令如下
$ ngrok http 8081
ngrok by @inconshreveable                                                                                                                                                                       (Ctrl+C to quit)

Session Status                online
Session Expires               1 hour, 55 minutes
Version                       2.3.40
Region                        United States (us)
Web Interface                 http://127.0.0.1:4040
Forwarding                    http://6eb3-115-165-224-61.ngrok.io -> http://localhost:8081
Forwarding                    https://6eb3-115-165-224-61.ngrok.io -> http://localhost:8081

Connections                   ttl     opn     rt1     rt5     p50     p90
                              0       0       0.00    0.00    0.00    0.00
另外,ngrox的操作与申请步骤可以参考下方连结
https://medium.com/life-after-hello-world/5分钟完成-ngrok-设定-mac-6cedab20bc21
Github OAuth Settings
请至Github页面然後选择右上方Settings → Developer settings → OAuth Apps
之後New OAuth App,注册一个新的OAuth application
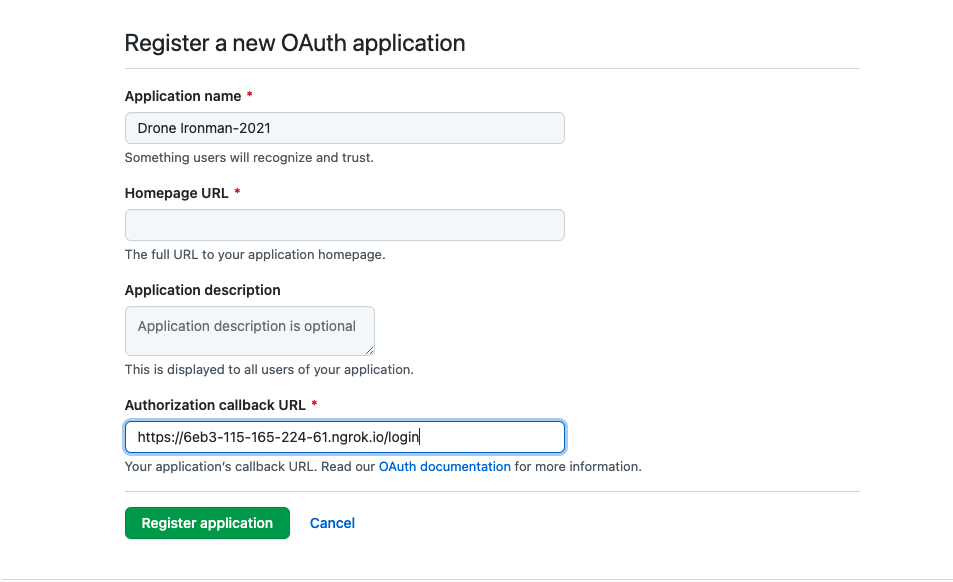
- Authorization callback URL: 请填写刚刚ngrox所创建的URL并加上
/login
Drone Settings
docker-compose.yaml
version: '2'

services:
  drone-server:
    image: drone/drone:1
    ports:
      - 8081:80
    volumes:
      - ./:/data
    restart: always
    environment:
      - DRONE_SERVER_HOST=${DRONE_SERVER_HOST}
      - DRONE_SERVER_PROTO=${DRONE_SERVER_PROTO}
      - DRONE_RPC_SECRET=${DRONE_RPC_SECRET}

      # GitHub Config
      - DRONE_GITHUB_SERVER=https://github.com
      - DRONE_GITHUB_CLIENT_ID=${DRONE_GITHUB_CLIENT_ID}
      - DRONE_GITHUB_CLIENT_SECRET=${DRONE_GITHUB_CLIENT_SECRET}

      - DRONE_LOGS_PRETTY=true
      - DRONE_LOGS_COLOR=true

  # runner for docker version
  drone-runner:
    image: drone/drone-runner-docker:1
    restart: always
    depends_on:
      - drone-server
    volumes:
      - /var/run/docker.sock:/var/run/docker.sock
    environment:
      - DRONE_RPC_HOST=${DRONE_RPC_HOST}
      - DRONE_RPC_PROTO=${DRONE_RPC_PROTO}
      - DRONE_RPC_SECRET=${DRONE_RPC_SECRET}
      - DRONE_RUNNER_CAPACITY=3
这边要注意一下,在根目录的位置记得要创建一个.env的档案并将上头的environment变数写入其中!
.env
DRONE_SERVER_HOST=6eb3-115-165-224-61.ngrok.io
DRONE_SERVER_PROTO=https
DRONE_RPC_HOST=drone-server
DRONE_RPC_PROTO=http
DRONE_RPC_SECRET=da39a3ee5e6b4b0d3255bfef95601890afd80709
DRONE_GITHUB_CLIENT_ID=fe42a44452ec710267b6
DRONE_GITHUB_CLIENT_SECRET=eb585deb6dbe76b4a2fc98427a6a205fb2240204
- DRONE_SERVER_HOST: localhost所ngrox出去的URL
- DRONE_SERVER_PROTO: 我们走https protocol
- DRONE_RPC_HOST: 由於是用compose,且在同一台机器,故透过container name在同个docker network即可以互通
- DRONE_RPC_PROTO: http protocol
- DRONE_RPC_SECRET: 自定义的一串String,建议用随机杂凑产生器产生
- DRONE_GITHUB_CLIENT_ID: Github OAuth Application的Client Id
- DRONE_GITHUB_CLIENT_SECRET: Github OAuth Application的Secret Key
Start with drone
docker-compose up
drone-runner_1  | time="2021-10-15T00:51:46Z" level=info msg="starting the server" addr=":3000"
drone-runner_1  | time="2021-10-15T00:51:46Z" level=error msg="cannot ping the remote server" error="Post http://drone-server/rpc/v2/ping: dial tcp 172.18.0.2:80: connect: connection refused"
drone-server_1  | {
drone-server_1  |   "level": "info",
drone-server_1  |   "msg": "main: internal scheduler enabled",
drone-server_1  |   "time": "2021-10-15T00:51:47Z"
drone-server_1  | }
drone-server_1  | {
drone-server_1  |   "acme": false,
drone-server_1  |   "host": "6eb3-115-165-224-61.ngrok.io",
drone-server_1  |   "level": "info",
drone-server_1  |   "msg": "starting the http server",
drone-server_1  |   "port": ":80",
drone-server_1  |   "proto": "https",
drone-server_1  |   "time": "2021-10-15T00:51:47Z",
drone-server_1  |   "url": "https://6eb3-115-165-224-61.ngrok.io"
drone-server_1  | }
drone-server_1  | {
drone-server_1  |   "interval": "30m0s",
drone-server_1  |   "level": "info",
drone-server_1  |   "msg": "starting the cron scheduler",
drone-server_1  |   "time": "2021-10-15T00:51:47Z"
drone-server_1  | }
drone-server_1  | {
drone-server_1  |   "interval": "24h0m0s",
drone-server_1  |   "level": "info",
drone-server_1  |   "msg": "starting the zombie build reaper",
drone-server_1  |   "time": "2021-10-15T00:51:47Z"
drone-server_1  | }
drone-runner_1  | time="2021-10-15T00:51:47Z" level=info msg="successfully pinged the remote server"
drone-runner_1  | time="2021-10-15T00:51:47Z" level=info msg="polling the remote server" arch=amd64 capacity=3 endpoint="http://drone-server" kind=pipeline os=linux type=docker
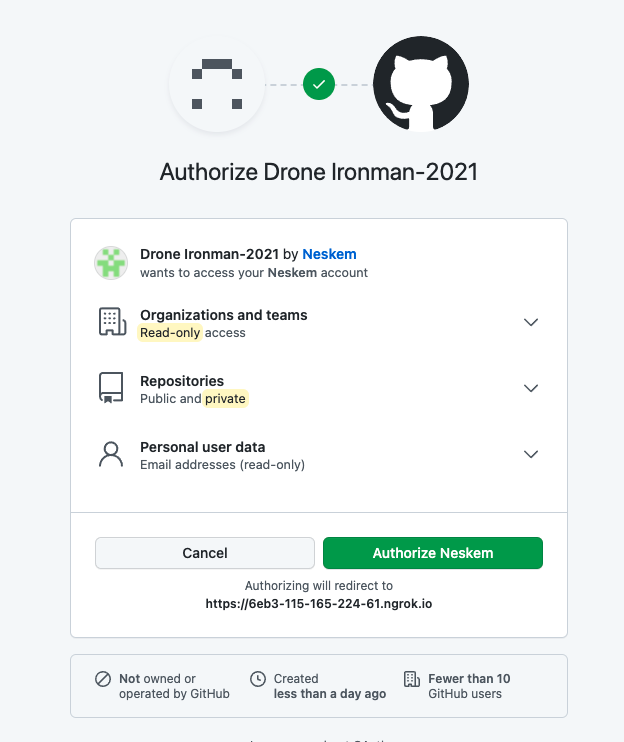
第一次进到Drone Server URL时,会需要进行一个与Github的认证
认证後就能看到你在Github所有的Repositories
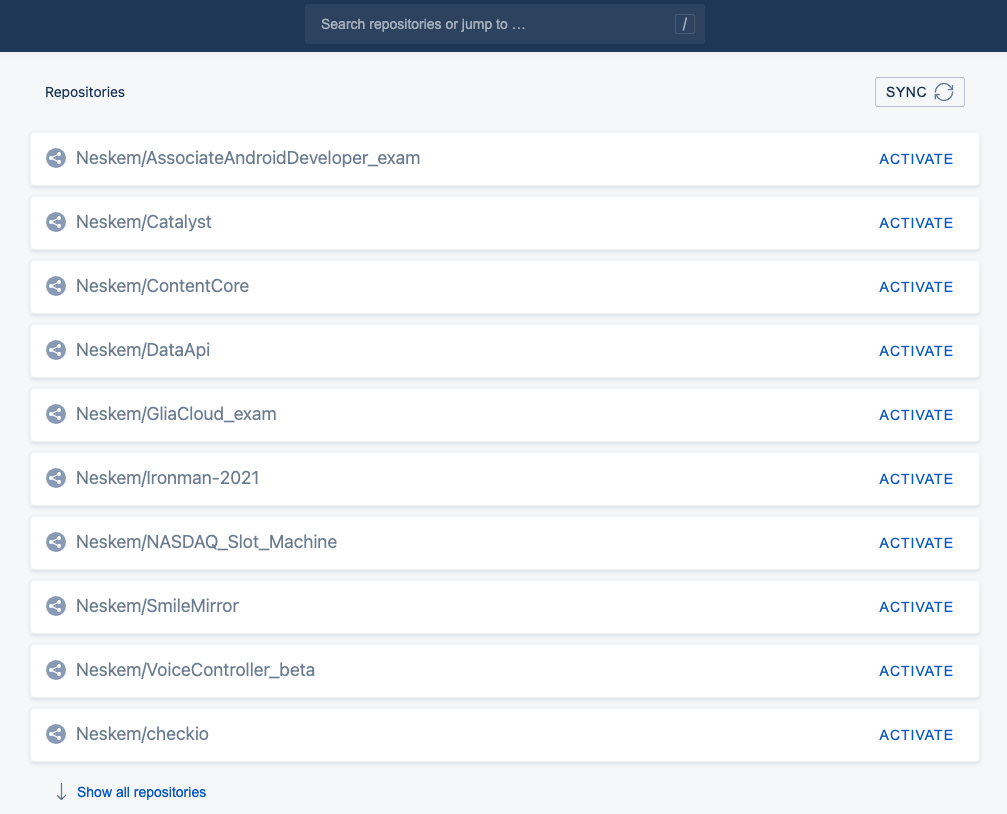
到这边我们drone server的设定就已经完成,接下来则要回到Gin Project来新增.drone.yml来撰写CD启动时的pipeline
Create Docker Registry
这边我是选用dockerhub的免费registry
docker-compose.yaml
ironman-2021:
    container_name: ironman-2021
    image: ghjjhg567/ironman2021
这边记得要补上对应到的docker image repository
Gin With Drone
Step1
.drone.yaml
kind: pipeline
type: docker
name: clone

steps:
  - name: docker
    image: plugins/docker
    settings:
      registry: ghjjhg567/ironman2021:latest
      repo: hub.docker.com/repository/docker/ghjjhg567/ironman2021
      auto_tag: true
      auto_tag_suffix: linux-amd64
      username: ghjjhg567
      password:
        from_secret: docker_password
这边就参照官方的写法,每当drone CI被trigger时会去参照跟目录的Dockerfile并将其build起来push到指定repo。
Step2
之後请到drone server URL,并设定Repository的SETTINGS
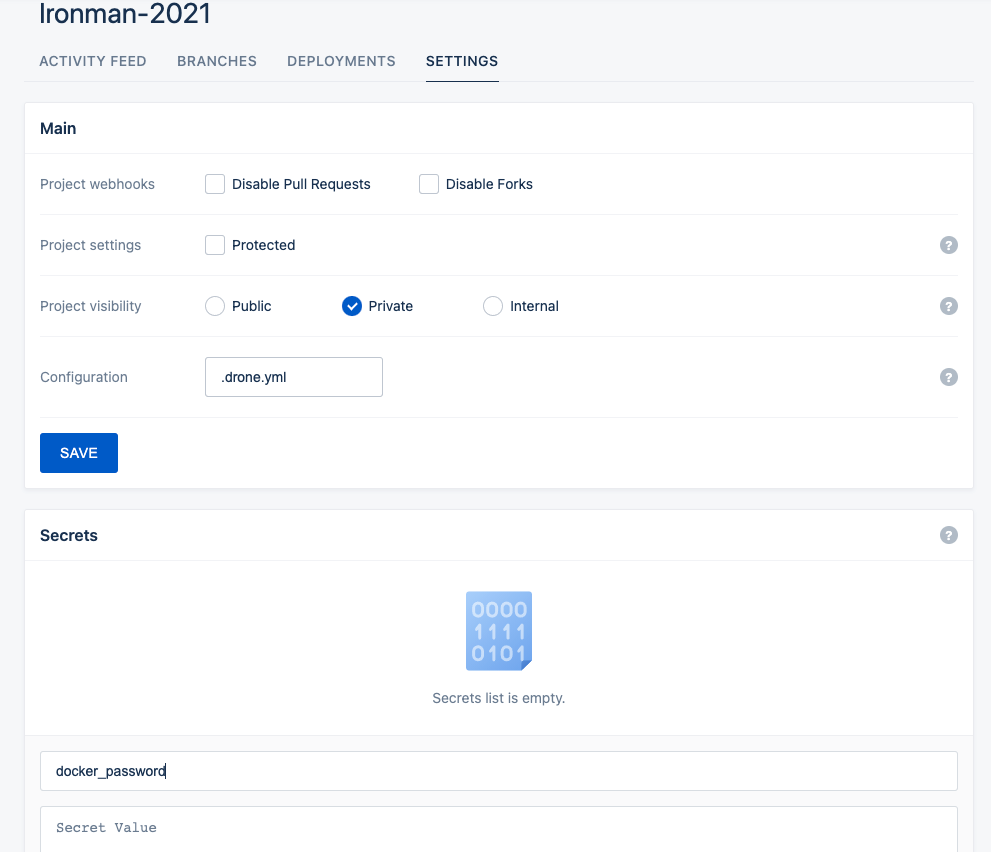
请记得在Secrets加上变数docker_password,并在value填上自己的dockerhub密码
Step3
Push Code to Github
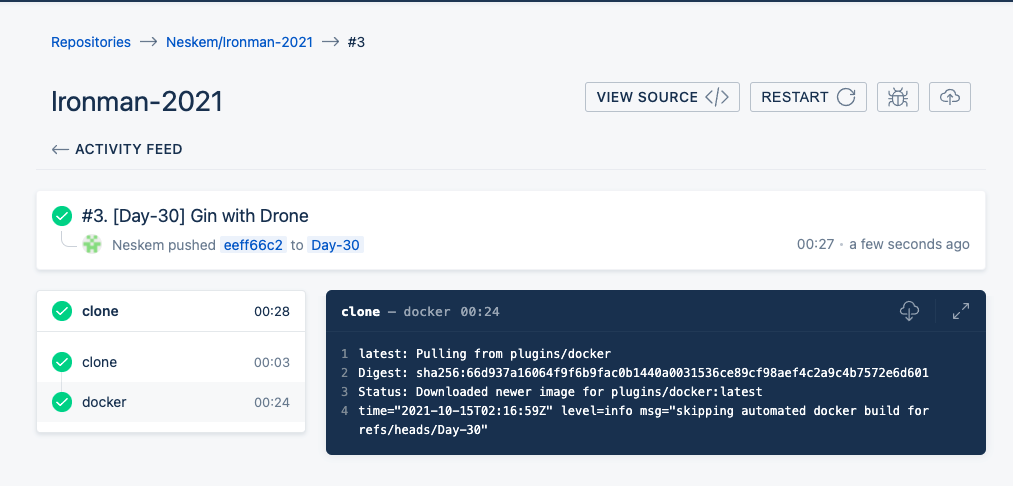
此时就会自动Trigger Drone CI,并执行Drone Pipeline的动作。
Summary
https://github.com/Neskem/Ironman-2021/tree/Day-30
这趟旅程说长不长说短不短,我们从一开始的介绍golang语法,到Gin的介绍,再到Gin的常见第三方套件使用与实作,最後再到利用Drone来进行CI,这也算走完了一整个开发周期!
那最後也感谢同事们的邀约与参赛,让我能够重拾当初写Code的热情来学习新技术,咱们就明年再见吧(应该吧)
Reference
https://medium.com/life-after-hello-world/5分钟完成-ngrok-设定-mac-6cedab20bc21
[从0到1] C#小乳牛 练成基础程序逻辑 Day 30 - 刷题日常 九大练功房 剑指Leetcode
九大刷题场所 | C#练功房 | 提升kyu段位 ...
那些被忽略但很好用的 Web API / SessionStorage
狡兔有三窟,储存用户端的资料当然也要有三个。 相信大家应该都有遇过需要将资料储存在用户端的需求,像...
.NET Core第6天_如何将asp.net core应用部属到IIS_透过visual studio
部属.net core程序到IIS上 这里用local IIS测试 预先需要先安装 .NET Cor...
Day 11 利用 docker 安装 nginx 并配置 https
现今的浏览器如 Firefox, Google Chrome 多以将仅 http 的网站和连结标注为...
Day 02: JavaScript 与 物件导向程序设计
物件导向程序设计是什麽? 英文原文:Object-oriented programming,简称 O...