新新新手阅读 Angular 文件 - Day07
学习目标
本文章将会是阅读官方文件Add navigation with routing 内容所做的笔记。
接续 Day06 的内容。
新增导转路由连结按钮 - routerLink
在昨天的内容中,我们是透过修改网页的路由路径来切换网页的内容。
但是,我们不可能让使用者需要藉由这样的操作,才能看到他想要看到的内容阿。
所以,Angular 提供了 navigation link 类似连结按钮的功能,让使用者点击该连结按钮之後,网页就可以被导转到的他们想要看到的网页罗。
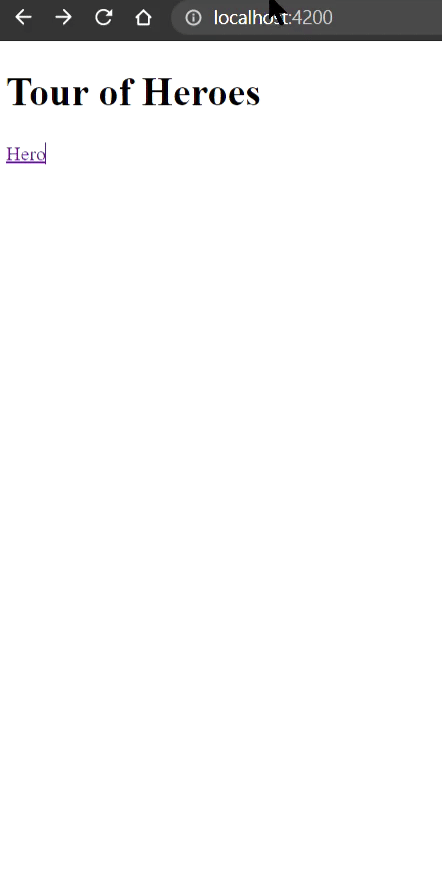
那我们就在 app.component.html 加入这个导转的连结按钮。
<div>
  <h1>
    {{ title }}
  </h1>
  <nav>
    <a routerLink="/heroes">Hero</a>
  </nav>
  <router-outlet></router-outlet>
</div>
可以看到 Angular 的导转连结按钮是直接用 a 连结做成的,不像 Vue 是特别自制了一个 router-link 的连结按钮。
在这个 a 连结要附上 routerLink 这个 directive 并将我们在 routing 档案中设定的 HeroesComponent 的路由路径 /heroes 设给它,设定完成後,你就可以在画面中看到出现了一个 Hero 的连结按钮。
按下去之後,可以看到网页的 url 被加入了 hero之外 ,画面中也出现 HeroesComponent 元件的内容罗。
新增 dashboard 元件
接下来我们要新增 dashboard 的元件,
所以,先输入指令 ng g c dashboard ,成功创完之後,Angular CLI 会自动帮我们将这个新增的元件引入专案中。
接着,我们要为这个元件设定专属它的路由
--- app-routing.module.ts ---
import { DashboardComponent } from './dashboard/dashboard.component';
const routes: Routes = [
  { path: 'heroes', component: HeroesComponent },
  { path: 'dashboard', component: DashboardComponent }
];

@NgModule({
  imports: [RouterModule.forRoot(routes)],
  exports: [RouterModule]
})
export class AppRoutingModule { }
新增预设路由
dashboard 这个元件的内容,是这个专案的首页,所以,当使用者一进入我们的网页的时候,第一个画面会先看到首页的内容,这个效果就需要设定预设路由来达到罗~
--- app-routing.module.ts ---
import { DashboardComponent } from './dashboard/dashboard.component';
const routes: Routes = [
  { path: 'heroes', component: HeroesComponent },
  { path: 'dashboard', component: DashboardComponent },
  { path: '', redirectTo: '/dashboard', pathMatch: 'full'}
];

@NgModule({
  imports: [RouterModule.forRoot(routes)],
  exports: [RouterModule]
})
export class AppRoutingModule { }
加入的程序码内容的功能为当当下 url 为空白时,网页路由会被导转到 /dashboard,并且路径的内容要完全符合空白(pathMatch: 'full'),才会执行这个导转的功能,而当使用者一进入到网页的时候,通常 url 会是空白的,所以,会直接被导转到 dashboard 页面罗。
新增导转到 dashboard 的导转连结按钮
接着,在 app.component.html 档案中加入可以将当前页面导转到 dashboard 页面的连结按钮。
--- app.component.html ---
<div>
  <h1>
    {{ title }}
  </h1>
  <nav>
    <a routerLink="/heroes">Hero</a>
    <a routerLink="/dashboard">DashBoard</a>
  </nav>
  <router-outlet></router-outlet>
</div>
页面导转到呈现指定英雄资料的页面
接下来,我们要透过改变路由,进入到指定路由,进而让画面呈现指定英雄的详细资料。
所以,接下来我们就要来设定路由了
首先,我们先将 HeroesComponent 元件里面的 app-hero-detail 标签拿掉,免得会重复出现英雄详细内容。
第二,到 routing 设定的档案中,加入以下设定
--- app.routing.module.ts ---
const routes: Routes = [
  // ..
  { path: 'detail/:id', component: HeroDetailComponent }, // 呈现详细资料的路由设定
];

@NgModule({
  imports: [RouterModule.forRoot(routes)],
  exports: [RouterModule]
})
export class AppRoutingModule { }
可以看到路由中有一个 :id 可以用来动态设定路由,当我们点击不一样的英雄会传入不一样的 id 并获取相对应的资料。
接下来,我们要分别在 dashboard 页面和 HeroesComponent 页面中英雄按钮的 routerLink 路由设定对应路由
--- dashboard.component.html ---
<div class="heroes-menu">
  <a *ngFor="let hero of heroes" routerLink="/detail/{{ hero.id }}">
    {{ hero.name }}
  </a>
</div>
--- heroes.component.html ---
<h2>My Heroes</h2>
<ul class="heroes">
  <li *ngFor="let hero of heroes" (click)="onSelect(hero)" [class.selected]="hero === selectedHero">
    <a routerLink="/detail/{{hero.id}}">
      <span class="badge">{{hero.id}}</span> {{hero.name}}
    </a>
  </li>
</ul>
可被导转到的 HeroDetailComponent
因为,现在英雄的详细资料呈现的功能全权交给 hero-detail 元件来呈现,所以,我们必须为 hero-detail 元件做一个能够接受传入的英雄 id 是多少并透过这个 id 来跟资料库要对应的英雄资料,最後,再将获取到的资料渲染到画面中。
首先,我们要引入以下三个模组到 hero-detail 元件中
--- hero-detail.component.ts ---
import { ActivatedRoute } from '@angular/router';
import { Location } from '@angular/common';
import { HeroService } from '../hero.service';

@Component({
  // ...
})
export class HeroDetailComponent implements OnInit {
  constructor(
    private route: ActivatedRoute,
    private heroService: HeroService,
    private location: Location
  ) { }
}
ActivatedRoute 模组,元件可以透过这个模组来获取当下的路由资讯,所以,我们可以藉由它来取出在 url 中,该英雄的 id
HeroService 模组,模仿远端资料库,我们会将从 url 中取出来的 id 丢到这个模组中,接着,这个模组就会回传相对的英雄资讯给我们。
location 模组: 用来操作浏览器的模组,像是前一页、後一页...等等,之类的功能。
从路由路径中解析出传入的英雄 ID
接下来,我们要从 route 中取出 id 资讯。
--- hero-detail.component.ts ---
@Component({
  // ...
})
export class HeroDetailComponent implements OnInit {
	ngOnInit(): void {
    this.getHero();
  }

  getHero(): void {
    const id = Number(this.route.snapshot.paramMap.get('id'));
    this.heroService.getHero(id)
      .subscribe(hero => this.hero = hero);
  }
}
在 ngOnInit 加入 getHero 的内容,可以在当 hero-detail 元件在创建的时候,就执行取得 url 的 id 资讯。
route.snapshot: 会在元件被创建的时候,纪录该元件当下的 route 资讯
paramMap: 会去纪录的 route 中取得我们在後面指定的参数内容,像这边我们就指定要取得 id 参数的内容
最後,取到 id 的资讯之後,就把它丢到 getHero 函式中去得到相对应的英雄资讯,并将其设给 hero-detail 元件的 hero 成员。
设计回到上一页的功能
设计一个回到上一页的按钮在 hero-detail 元件中。
--- hero-detail.component.html ---
<button (click)="goBack">go back</button>

--- hero-detail.component.ts---
goBack(): void {
  this.location.back();
}
这边的内容就可以看到我们透过引入的 location 模组来达到类似像 JS 的 go.back() 让浏览器回上一页的功能。
Summary
这边做个总结
- 我们可以设计像是 detail/:id 这种路由路径,来动态切换不同的 id 对应到不同的页面内容。
- 如何设定预设的首页内容,我们可以透过 redirectTo 来达到。
- 如何透过
this.route.snapshot得到当下元件的路由资讯,再透过paramMap.get('id')来取得路由资讯中指定的 id 参数的内容,最後,再将 id 丢到指定函式中,去资料库取得相对应的内容,再将该内容渲染到页面上。 - 利用 location 模组来达到回到上一页的功能。
<<: (Day7) 隐含转型 - 偷偷转换的 Strings 与 Numbers 类型
>>: Day07:资料结构 - 杂凑表(Hash Table)
Day10 Overlapping Example
昨天已经看过我们在实务上可能会遇到的需求,利用多个可能重复范围的配对池,当作匹配搜寻条件,今天让我们...
30天轻松学会unity自制游戏-捡道具
目前的炸弹可以连发,来制作炸弹道具数量,让炸弹有限,直接在Player程序加装炸弹数,开启Playe...
Progressive Web App Checklist: 优化检核清单项目说明 (7)
Starts fast, stays fast Web App 的效能会直接影响使用者体验,也会影响...
第一章 之三
先前大致上看了这三个网域供应商都有各自的云端主机空间平台提供,接下来就针对空间与功能做个评比分享给大...
NIST SDLC和RMF
安全控制是风险处理的一部分,风险评估之後进行。安全控制的范围是根据风险评估的结果确定的。根据NIST...