使用WSL2在Windows下快速打造Linux开发环境(含Docker)
对於习惯使用windows在开发大部分工作的开发者来说,如果想要同时开发适合在Linux-based运行的程序来说, 像是(後台服务, 各式的脚本程序, Linux 命令列工具, 爬虫, Docker, cluster...)等的话, 可以用诸如(VMWare或是VirtualBox安装Linux, 用另外一台单机, 开一个VPS)等的方式来完成.
但如果想要快速测试, 这些难免都要多了一些步骤. 还好Microsoft越来越佛心了, 发布的WSL2(Windows Subsystem for Linux), 这是一个Linux核心的虚拟层, 可以几乎拥有Linux核心跟所有指令, 完整的system call支援. 目前的版本WSL2比起前一版, 这版直接对linux system call做了虚拟优化, 效能比前一代使用转译的方法效能更高.
*关於 Windows WSL2可以到下面网址看尾软的介绍
https://docs.microsoft.com/zh-tw/windows/wsl/about*
系统要求
建议先升级windows10到20H1/20H2 or higher, 预设就会是WSL2的版本
启用安装WSL必要元件
-
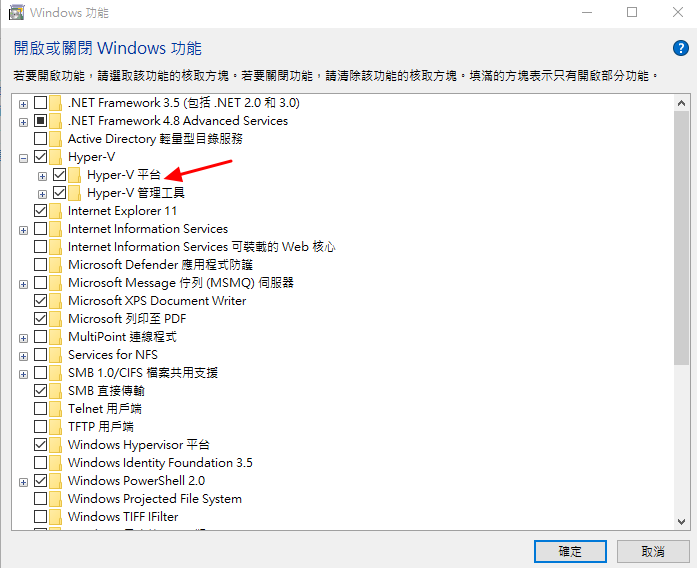
因为最新的WSL2使用Hyper-V, 所以确认已经打开Hyper-V的功能
去控制台 — ->程序和功能 — ->开启或关Windows功能 →勾选Hyper-V平台
-
以系统管理员身执行以下 PowerShell 指令:
dism.exe /online /enable-feature /featurename:Microsoft-Windows-Subsystem-Linux /all /norestart
dism.exe /online /enable-feature /featurename:VirtualMachinePlatform /all /norestart
然後重开机...
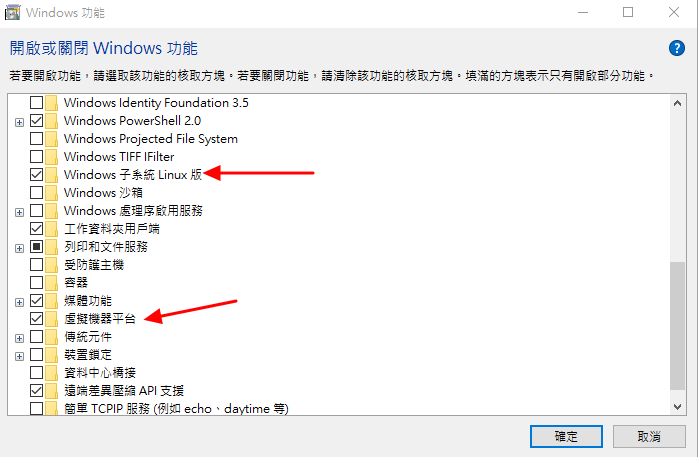
开完机後可以到控制台 — ->程序和功能 — ->开启或关Windows功能确认是否已经开启
-
将WSL预设版本调成WSL2
执行下列命令把WSL改成使用WSL2, 如果已经是WSL2就不需要罗!
wsl --set-default-version 2 -
安装 Linux 发行版本
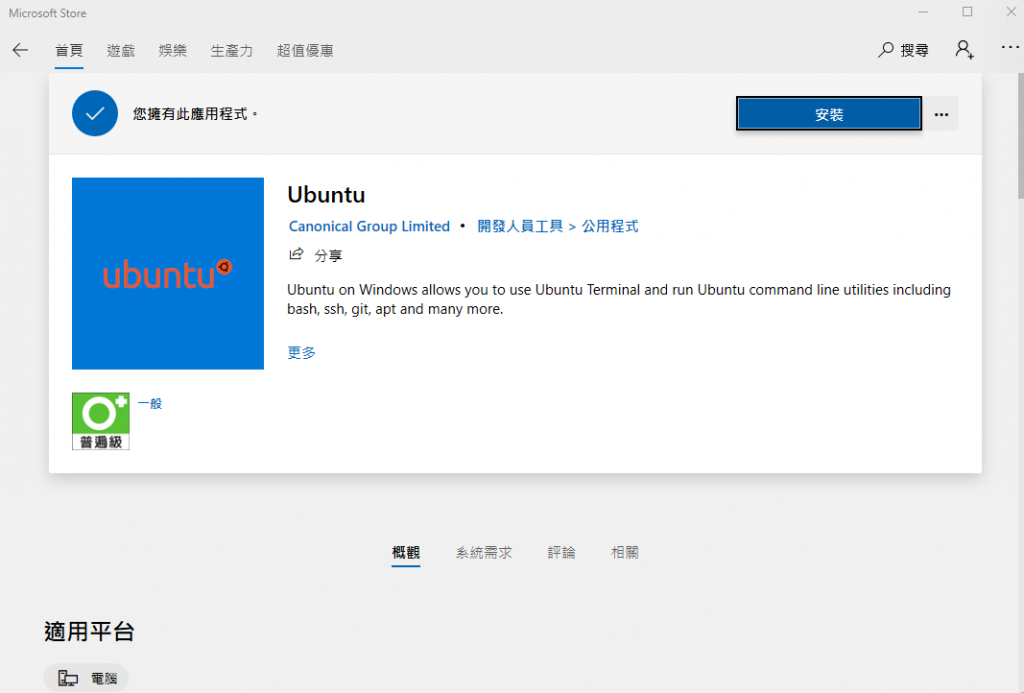
在 Windows 10 中开启 Microsoft Store,然後在商店中搜寻你要的Linux发行版本,这边安装的是Ubuntu, 所以搜寻关键字 Ubuntu, 找到你要的发行版後安装
安装後点选启动
设置好帐号密码
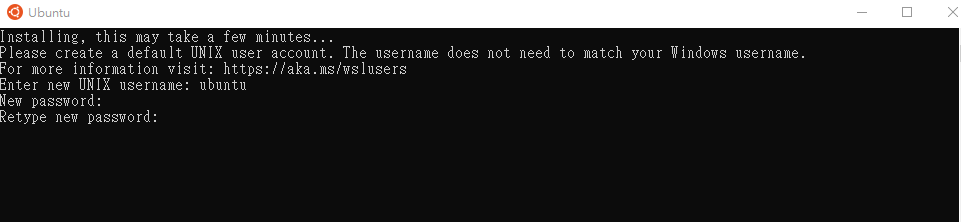
就可以进入Ubuntu的Shell介面
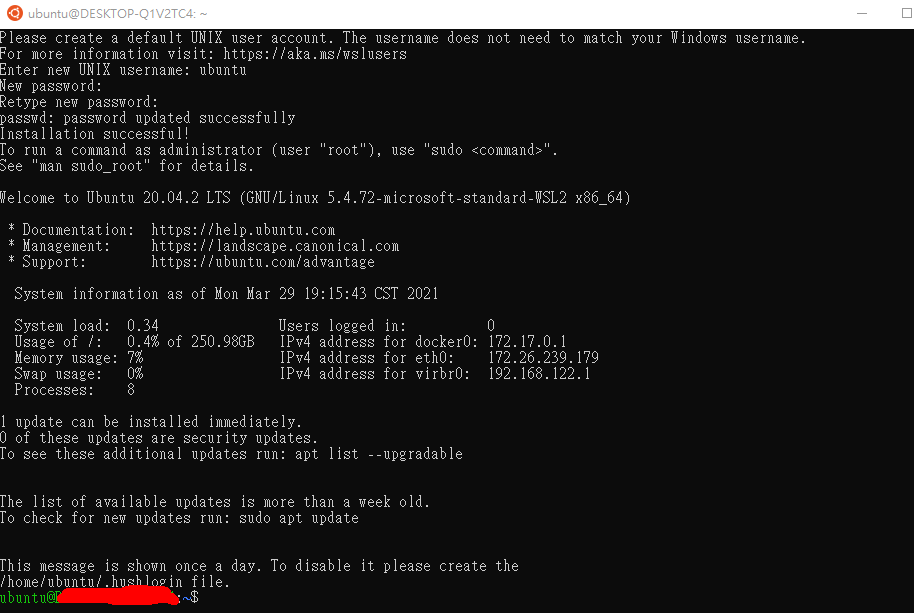
然後关掉视窗, 就可以使用WSL2来操作Ubuntu
使用WSL2
- 列出WSL指令
wsl -h
-
列出所有已经安装的Linux发行版
wsl -l
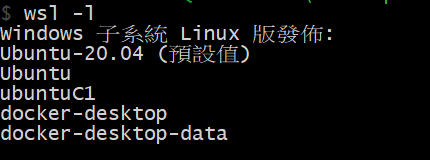
基本上可以安装多个Linux发行版, 同时也可以执行多各Linux, 这样就可以打造出多重linux的环境. -
Ubuntu起手式
执行Linux 发行版并进入Shell, wsl -d "Linux发行版的名称"
这里使用
wsl -d Ubuntu
基本上档案系统, 网路等资源是跟Windows共用的, 这也是最棒的一点, 提供档案拷贝的便利性, 网路也自动设定好, 直接配置一个IP可以直接连网.
要注意一点是档案系统是共用的, 可能不小心就砍掉不该砍的档案X(.
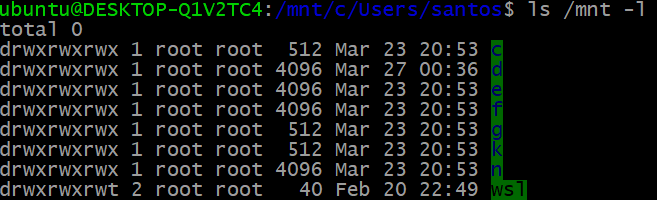
所有的Windows磁碟都被mount在/mnt下面可以直接存取(但要小心操作...)
更换Systemd
现在很多Linux套件都需要systemd来管理跟启动服务. 由於WSL2是Windows下的一个VM, 所以微软实作了一个init (PID 1) 来做到快速啓动WSL VM以及作为与windows 沟通的桥梁. 可以执行systemctl确认是否有systemd
ubuntu@DESKTOP:/mnt/$ systemctl
System has not been booted with systemd as init system (PID 1). Can't operate.
Failed to connect to bus: Host is down
所幸, GitHub 上已经有几个专案可以直接拿来建构有systemd(PID 1)环境, 这里我们使用
DamionGans/ubuntu-wsl2-systemd-script, 只要按照说明操作就可以了
ubuntu@CM-PC-02057:~$ git clone https://github.com/DamionGans/ubuntu-wsl2-systemd-script.git
Cloning into 'ubuntu-wsl2-systemd-script'...
remote: Enumerating objects: 3, done.
remote: Counting objects: 100% (3/3), done.
remote: Compressing objects: 100% (3/3), done.
remote: Total 118 (delta 0), reused 2 (delta 0), pack-reused 115
Receiving objects: 100% (118/118), 34.22 KiB | 455.00 KiB/s, done.
Resolving deltas: 100% (57/57), done.
ubuntu@CM-PC-02057:~/ubuntu-wsl2-systemd-script$ bash ubuntu-wsl2-systemd-script.sh
[sudo] password for ubuntu:
Get:1 http://security.ubuntu.com/ubuntu focal-security InRelease [109 kB]
Hit:2 http://archive.ubuntu.com/ubuntu focal InRelease
Get:3 http://archive.ubuntu.com/ubuntu focal-updates InRelease [114 kB]
Get:4 http://security.ubuntu.com/ubuntu focal-security/main amd64 Packages [574 kB]
Get:5 http://archive.ubuntu.com/ubuntu focal-backports InRelease [101 kB]
Get:6 http://security.ubuntu.com/ubuntu focal-security/main Translation-en [120 kB]
Get:7 http://security.ubuntu.com/ubuntu focal-security/main amd64 c-n-f Metadata [7380 B]
Get:8 http://security.ubuntu.com/ubuntu focal-security/restricted amd64 Packages [148 kB]
Get:9 http://security.ubuntu.com/ubuntu focal-security/restricted Translation-en [21.6 kB]
Get:10 http://security.ubuntu.com/ubuntu focal-security/restricted amd64 c-n-f Metadata [392 B]
Get:11 http://security.ubuntu.com/ubuntu focal-security/universe amd64 Packages [550 kB]
Get:12 http://archive.ubuntu.com/ubuntu focal/universe amd64 Packages [8628 kB]
Get:13 http://security.ubuntu.com/ubuntu focal-security/universe Translation-en [81.2 kB]
Get:14 http://security.ubuntu.com/ubuntu focal-security/universe amd64 c-n-f Metadata [10.7 kB]
Get:15 http://security.ubuntu.com/ubuntu focal-security/multiverse amd64 Packages [14.8 kB]
Get:16 http://security.ubuntu.com/ubuntu focal-security/multiverse Translation-en [3160 B]
Get:17 http://security.ubuntu.com/ubuntu focal-security/multiverse amd64 c-n-f Metadata [340 B]
Get:18 http://archive.ubuntu.com/ubuntu focal/universe Translation-en [5124 kB]
Get:19 http://archive.ubuntu.com/ubuntu focal/universe amd64 c-n-f Metadata [265 kB]
Get:20 http://archive.ubuntu.com/ubuntu focal/multiverse amd64 Packages [144 kB]
Get:21 http://archive.ubuntu.com/ubuntu focal/multiverse Translation-en [104 kB]
Get:22 http://archive.ubuntu.com/ubuntu focal/multiverse amd64 c-n-f Metadata [9136 B]
Get:23 http://archive.ubuntu.com/ubuntu focal-updates/main amd64 Packages [894 kB]
Get:24 http://archive.ubuntu.com/ubuntu focal-updates/main Translation-en [208 kB]
Get:25 http://archive.ubuntu.com/ubuntu focal-updates/main amd64 c-n-f Metadata [12.9 kB]
Get:26 http://archive.ubuntu.com/ubuntu focal-updates/restricted amd64 Packages [171 kB]
Get:27 http://archive.ubuntu.com/ubuntu focal-updates/restricted Translation-en [25.3 kB]
Get:28 http://archive.ubuntu.com/ubuntu focal-updates/restricted amd64 c-n-f Metadata [436 B]
Get:29 http://archive.ubuntu.com/ubuntu focal-updates/universe amd64 Packages [758 kB]
Get:30 http://archive.ubuntu.com/ubuntu focal-updates/universe Translation-en [160 kB]
Get:31 http://archive.ubuntu.com/ubuntu focal-updates/universe amd64 c-n-f Metadata [16.5 kB]
Get:32 http://archive.ubuntu.com/ubuntu focal-updates/multiverse amd64 Packages [21.6 kB]
Get:33 http://archive.ubuntu.com/ubuntu focal-updates/multiverse Translation-en [5508 B]
Get:34 http://archive.ubuntu.com/ubuntu focal-updates/multiverse amd64 c-n-f Metadata [596 B]
Get:35 http://archive.ubuntu.com/ubuntu focal-backports/main amd64 c-n-f Metadata [112 B]
Get:36 http://archive.ubuntu.com/ubuntu focal-backports/restricted amd64 c-n-f Metadata [116 B]
Get:37 http://archive.ubuntu.com/ubuntu focal-backports/universe amd64 Packages [4032 B]
Get:38 http://archive.ubuntu.com/ubuntu focal-backports/universe Translation-en [1448 B]
Get:39 http://archive.ubuntu.com/ubuntu focal-backports/universe amd64 c-n-f Metadata [224 B]
Get:40 http://archive.ubuntu.com/ubuntu focal-backports/multiverse amd64 c-n-f Metadata [116 B]
Fetched 18.4 MB in 5s (3487 kB/s)
Reading package lists... Done
Selecting previously unselected package daemonize.
(Reading database ... 32157 files and directories currently installed.)
Preparing to unpack .../daemonize_1.7.8-1_amd64.deb ...
Unpacking daemonize (1.7.8-1) ...
Selecting previously unselected package fontconfig.
Preparing to unpack .../fontconfig_2.13.1-2ubuntu3_amd64.deb ...
Unpacking fontconfig (2.13.1-2ubuntu3) ...
Setting up fontconfig (2.13.1-2ubuntu3) ...
Regenerating fonts cache... done.
Setting up daemonize (1.7.8-1) ...
Processing triggers for man-db (2.9.1-1) ...
'\\wsl$\Ubuntu\home\ubuntu\ubuntu-wsl2-systemd-script'
是目前用来启动 CMD.EXE 的目录路径。不支援 UNC 路径。
预设目录是 Windows 目录。

成功: 已经储存指定的值。
'\\wsl$\Ubuntu\home\ubuntu\ubuntu-wsl2-systemd-script'
是目前用来启动 CMD.EXE 的目录路径。不支援 UNC 路径。
预设目录是 Windows 目录。

成功: 已经储存指定的值。
安装成功後需要登出, 重啓Linux发布版本, 使用 wsl -t Ubuntu
ubuntu@CM-PC-02057:~/ubuntu-wsl2-systemd-script$ exit
logout

$ wsl -t Ubuntu
$ wsl -d Ubuntu
Sleeping for 1 second to let systemd settle
Welcome to Ubuntu 20.04.2 LTS (GNU/Linux 5.4.72-microsoft-standard-WSL2 x86_64)

 * Documentation:  https://help.ubuntu.com
 * Management:     https://landscape.canonical.com
 * Support:        https://ubuntu.com/advantage

  System information as of Thu Apr  1 10:09:24 CST 2021

  System load:  0.06               Processes:             50
  Usage of /:   0.5% of 250.98GB   Users logged in:       0
  Memory usage: 1%                 IPv4 address for eth0: 172.18.19.105
  Swap usage:   0%

36 updates can be installed immediately.
22 of these updates are security updates.
To see these additional updates run: apt list --upgradable


The programs included with the Ubuntu system are free software;
the exact distribution terms for each program are described in the
individual files in /usr/share/doc/*/copyright.

Ubuntu comes with ABSOLUTELY NO WARRANTY, to the extent permitted by
applicable law.
检查有没有成功启动systemd
ubuntu@CM-PC-02057:~$ ps aux
USER         PID %CPU %MEM    VSZ   RSS TTY      STAT START   TIME COMMAND
root           1  0.0  0.0  26912 11224 ?        Ss   10:09   0:00 /lib/systemd/systemd --unit=basic.target
root          43  0.0  0.0  45288 15332 ?        S<s  10:09   0:00 /lib/systemd/systemd-journald
root          62  0.0  0.0  21608  5000 ?        Ss   10:09   0:00 /lib/systemd/systemd-udevd
systemd+      67  0.0  0.0  18596  7936 ?        Ss   10:09   0:00 /lib/systemd/systemd-networkd
message+     229  0.0  0.0   7372  4520 ?        Ss   10:09   0:00 /usr/bin/dbus-daemon --system --address=systemd: --nofork --nopidfile --systemd-activation --syslog-only
root         230  0.0  0.0  10452  4712 pts/0    S    10:09   0:00 /bin/login -p -f        'HOSTTYPE=x86_64' 'PWD=/mnt/c/Users/ubuntu' 'TERM=xterm-256color' 'WSLENV=BASH_ENV/u' 'WSL_DISTRO_NAME=Ubuntu' 'WSL_INTEROP=/run/WSL/10_interop'
root         300  0.0  0.0  16984  7900 ?        Ss   10:09   0:00 /lib/systemd/systemd-logind
ubuntu       303  0.0  0.0  18488  9604 ?        Ss   10:09   0:00 /lib/systemd/systemd --user
ubuntu       304  0.0  0.0  28272  3068 ?        S    10:09   0:00 (sd-pam)
ubuntu       310  0.1  0.0  10108  5096 pts/0    S    10:09   0:00 -bash
ubuntu       330  0.0  0.0  11164  4140 pts/0    T    10:09   0:00 systemctl
ubuntu       331  0.0  0.0   7592  2564 pts/0    T    10:09   0:00 pager
恭喜!!接近完整的Linux更近一步罗
安装Docker
有了systemd 你就可以安装docker engine了, 照着官方的步骤做就可以了
完成後来个Docker Hello World吧!!
ubuntu@Ubuntu:~/$ docker run hello-world

Hello from Docker!
This message shows that your installation appears to be working correctly.

To generate this message, Docker took the following steps:
 1. The Docker client contacted the Docker daemon.
 2. The Docker daemon pulled the "hello-world" image from the Docker Hub.
    (amd64)
 3. The Docker daemon created a new container from that image which runs the
    executable that produces the output you are currently reading.
 4. The Docker daemon streamed that output to the Docker client, which sent it
    to your terminal.

To try something more ambitious, you can run an Ubuntu container with:
 $ docker run -it ubuntu bash

Share images, automate workflows, and more with a free Docker ID:
 https://hub.docker.com/

For more examples and ideas, visit:
 https://docs.docker.com/get-started/
可能会遇到的问题
- WSL 2 需要更新其核心元件
Download the Linux kernel update package: https://wslstorestorage.blob.core.windows.net/wslblob/wsl_update_x64.msi - WSL网路玩烂了
可以先shutdown wsl试看看: wsl --shutdown
不行的话, 就重开电脑吧 - WslRegisterDistribution failed with error: 0xc03a001a
出现这个错误, 是说这个发行版的安装目录是被设定成压缩的, 需要去这个安装目录下把压缩disable
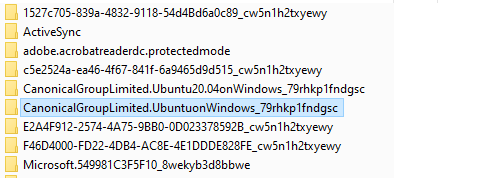
解决方法是前往以下路径
C:\Users\your user name\AppData\Local\Packages
your user name请换成你的本机使用者名称
如果安装的是Ubuntu,所以请找到 “CanonicalGroupLimited.Ubuntu” 并点选右键 -> 内容
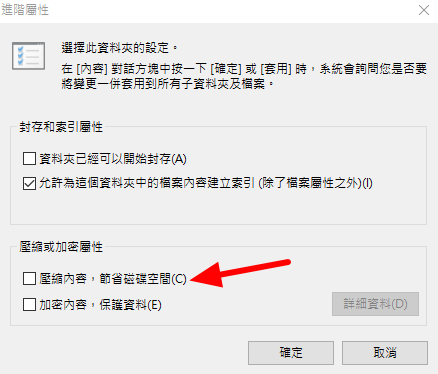
点选「进阶」
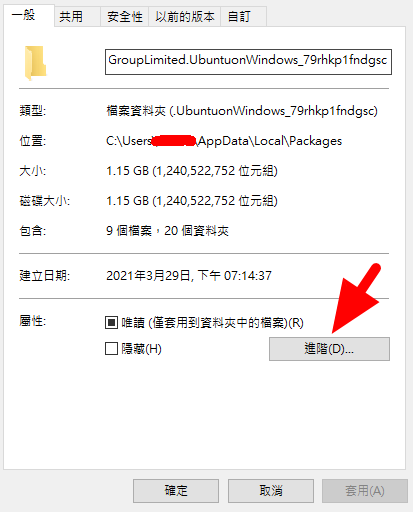
将"压缩内容,节省磁碟空间"取消勾选,并按确定
结语
因为想要在Windows中使用Linux docker的关系, 无意间发现的WSL2这摸好用的系统, 推荐大家需要快速试验linux上面的程序或套件时可以安装使用
>>: 【左京淳的JAVA WEB学习笔记】第十二章 用户管理
react 大冒险-setTimeout setInterval in react -day 24
今天来说明如何在 react 内执行 setTimeout 跟 setInterval 复习概念,在...
30天程序语言研究
今天是30天程序语言研究的第二十五天,由於最近写unix语言的东西用到很多,所以做了很多笔记,就想说...
Day 3 ( 入门 ) 吃水果
吃水果 教学原文参考:吃水果 这篇文章会介绍,如何在 Scratch 3 里使用换造型、点击角色、音...
Vue.js 从零开始:Vue CLI / Gihub Pages
本篇为Vue CLI最後一篇,专案已经建立好,环境也有概略的说明,接下来当然是上传到Gihub Pa...
【Day 03】- 打针!打针!从 R0 注入的那件事!
Agenda 资安宣言 测试环境与工具 学习目标 技术原理与程序码 References 下期预告 ...