Day 19 : Linux - 如何用virtualBox安装Linux的VM虚拟机?
如标题,这篇想教大家如何用virtualBox安装Linux的VM虚拟机
这里我们用的Linux发行版是Ubuntu 20.04.03
首先,先开启virtualBox,并按「新增」
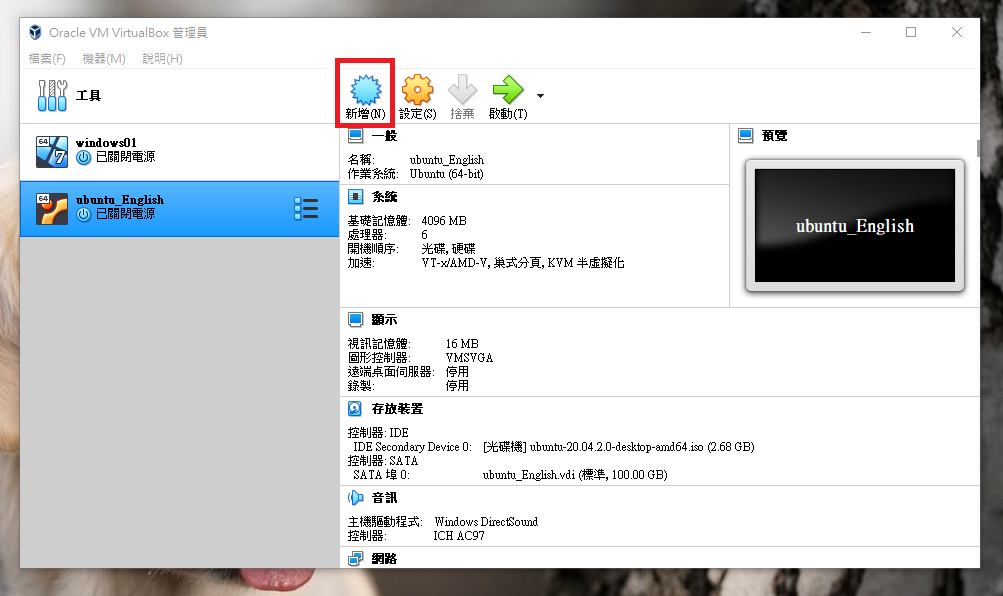
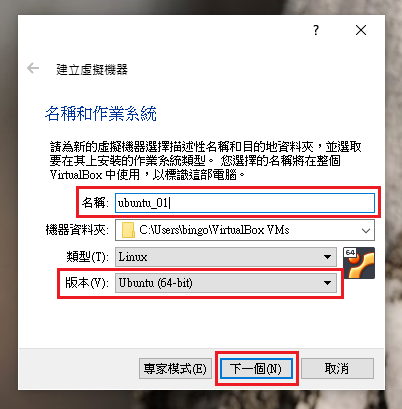
只要名称内含有ubuntu这个词汇,它版本就会自动跳成Ubuntu (64-bit)
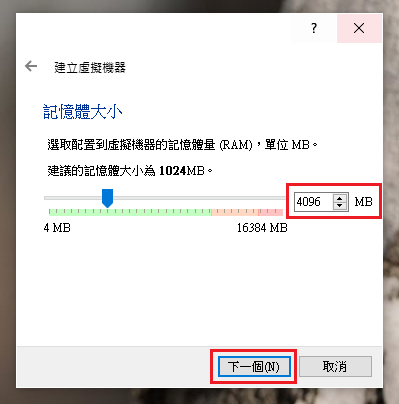
这里记忆体给它4096MB
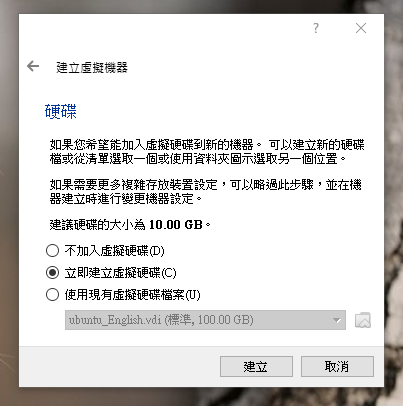
选立即建立虚拟硬碟
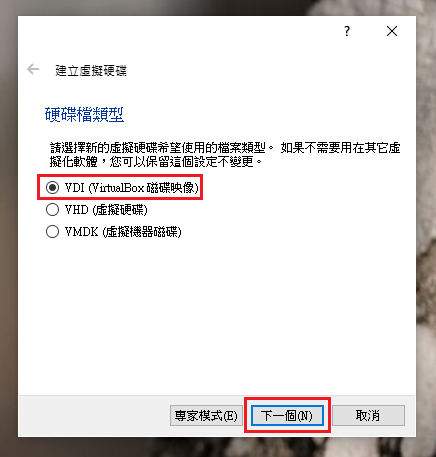
选VDI (virtualBox磁碟映像)
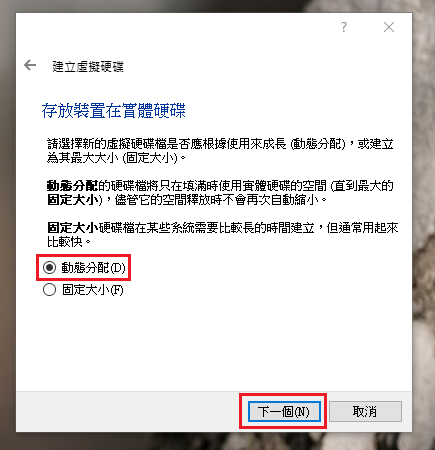
这里我们使用动态分配,因为会比较省硬碟空间
那「动态分配」和「固态分配」的差异是什麽呢?假设我们现在给它50GB的空间,但目前只使用20GB,选「动态分配」的话它只会占实体硬碟20GB;但如果选「固态分配」,不管你有没有使用到50GB的空间,它都会占实体硬碟50GB
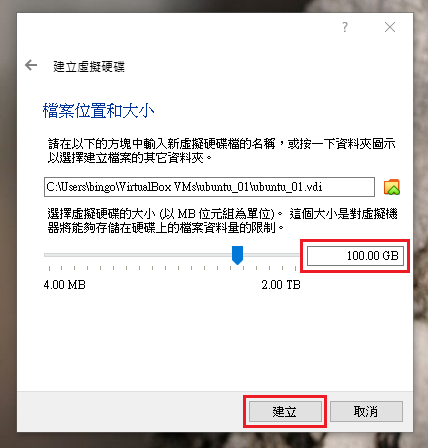
虚拟硬碟我们给它100GB
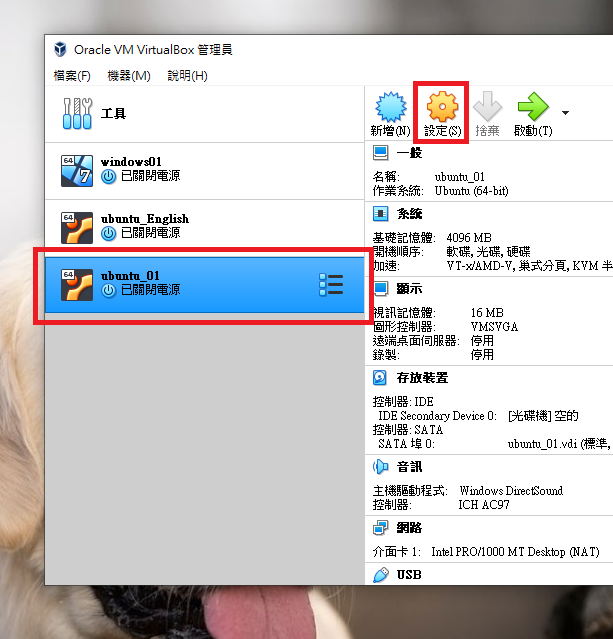
建好後点选它,并按「设定」
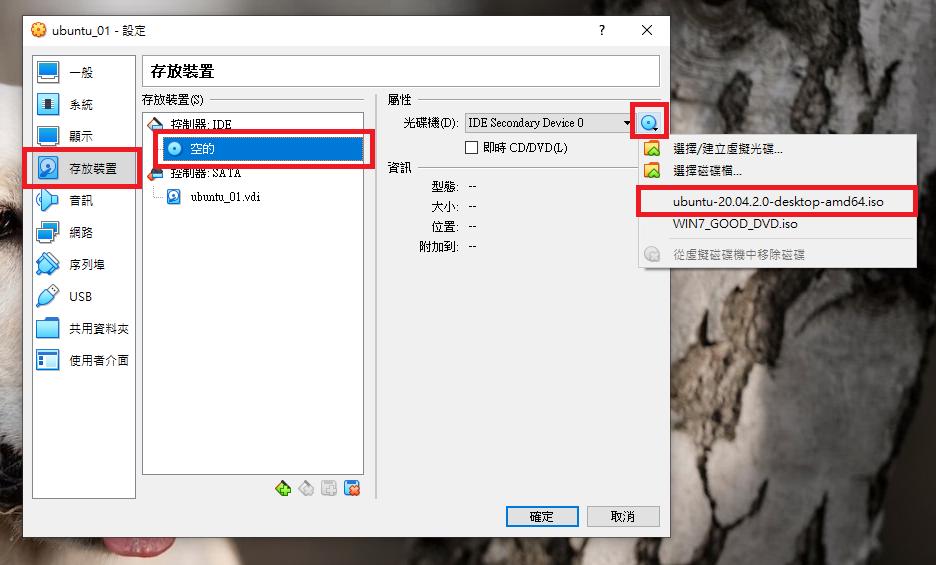
到存放装置,点「控制器: IDE的光碟机」增加我们事先下载好的ubuntu-20.04的ISO档 (如果还没下载可以去看Day 1)
如果它没显示在框框里,可以点「选择磁碟档」去找它
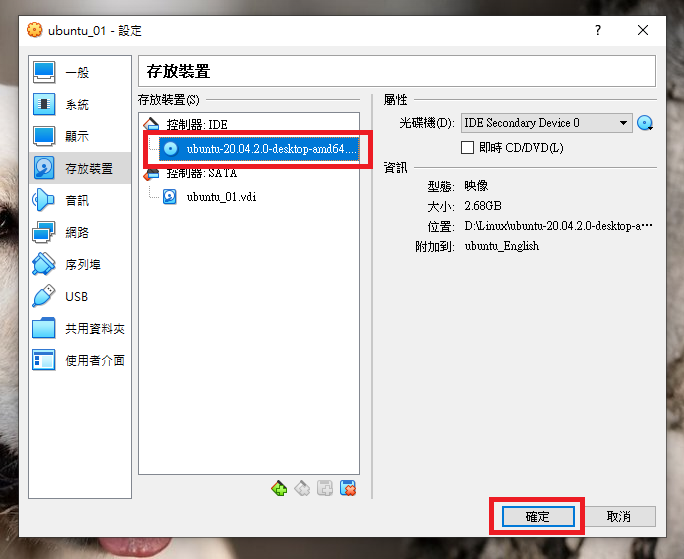
确认它有无存放成功,有就会在「控制器: IDE」显示,确认後按「确定」
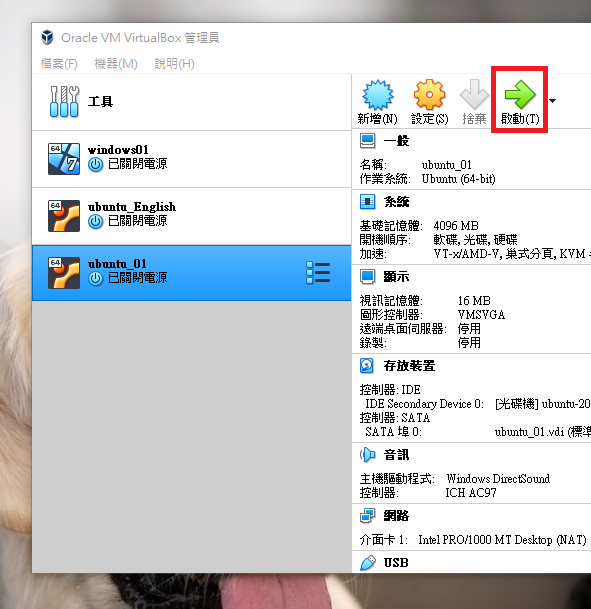
再按「启动」
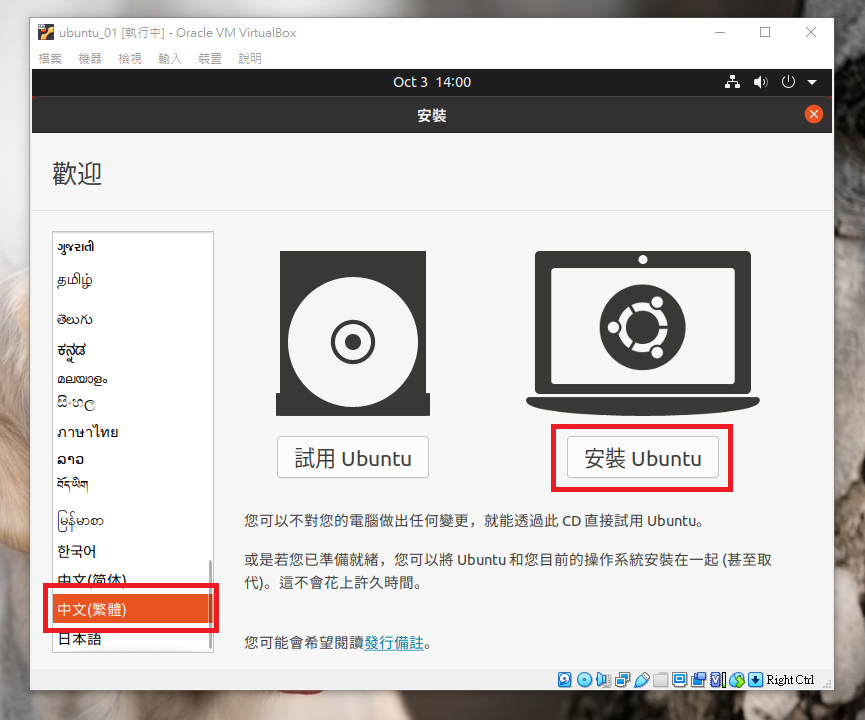
语言选择「中文(繁体)」,再按「安装ubuntu」
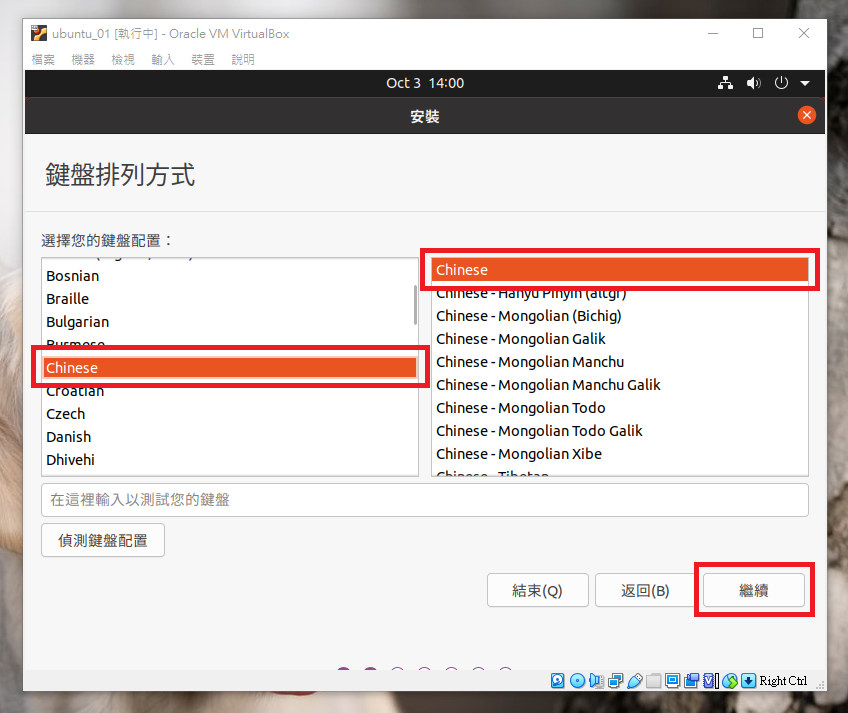
这里它会帮你选好,两者皆为chinese
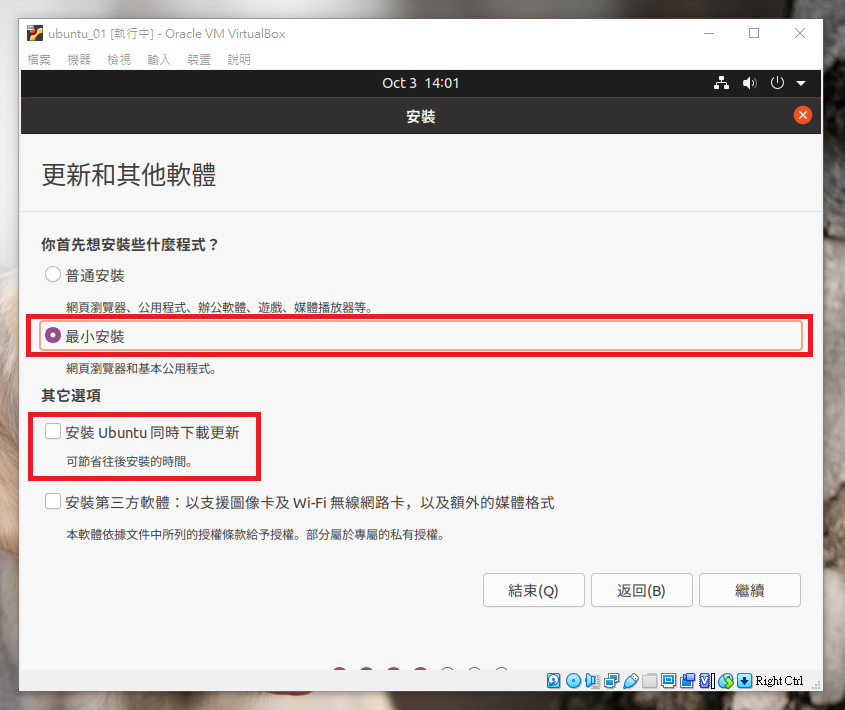
为了省时间,我们把「安装ubuntu同时下载更新」取消勾选
按「最小安装」或「普通安装」都可以,如果你会听音乐、玩游戏……等,再选「普通安装」,没有的话选「最小安装」即可
点选「清除磁碟并安装ubuntu」
请注意: 这里的清除磁碟是清除这个VM虚拟机上的「虚拟磁碟」,并不是清除「实体硬碟」的,请各位放心点选
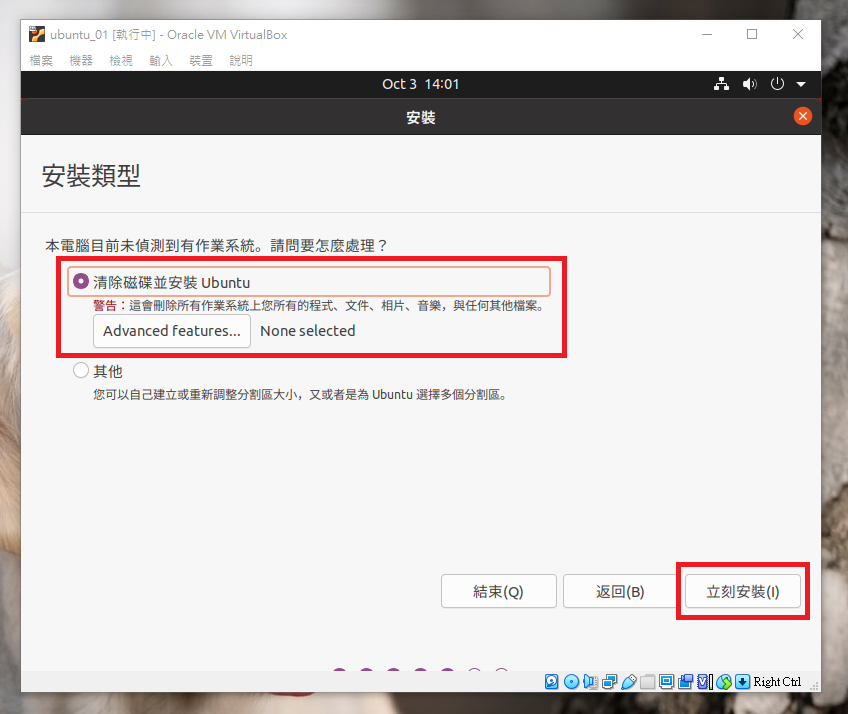
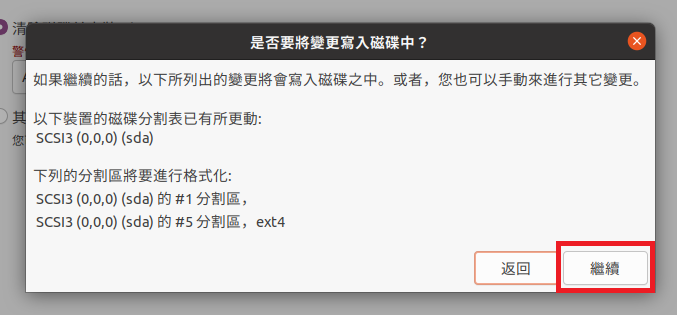
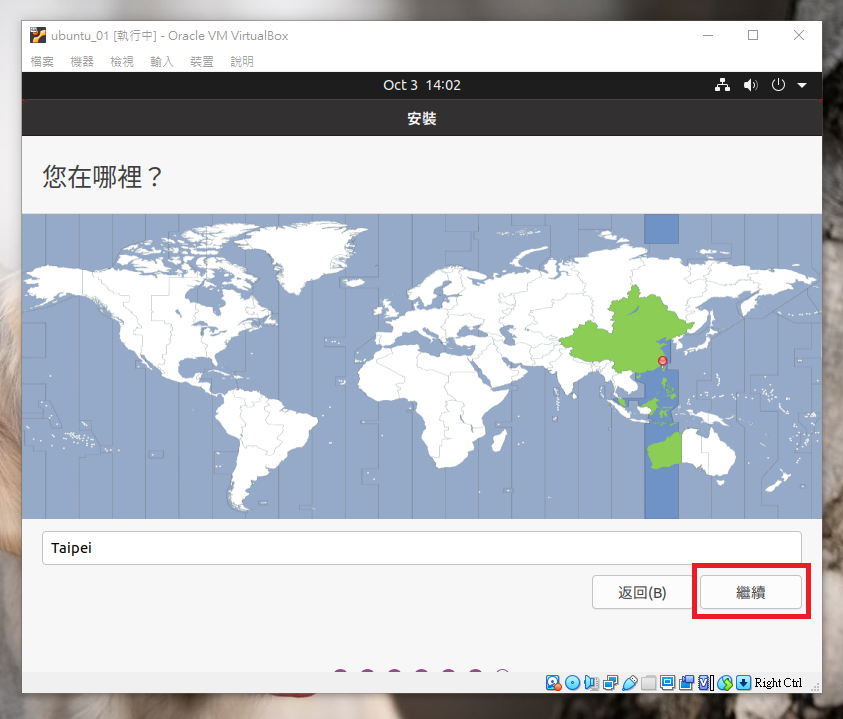
点击「继续」
时区我们选taipei,如果你想看它显示国外时间,也可以自行挑选想要的时区
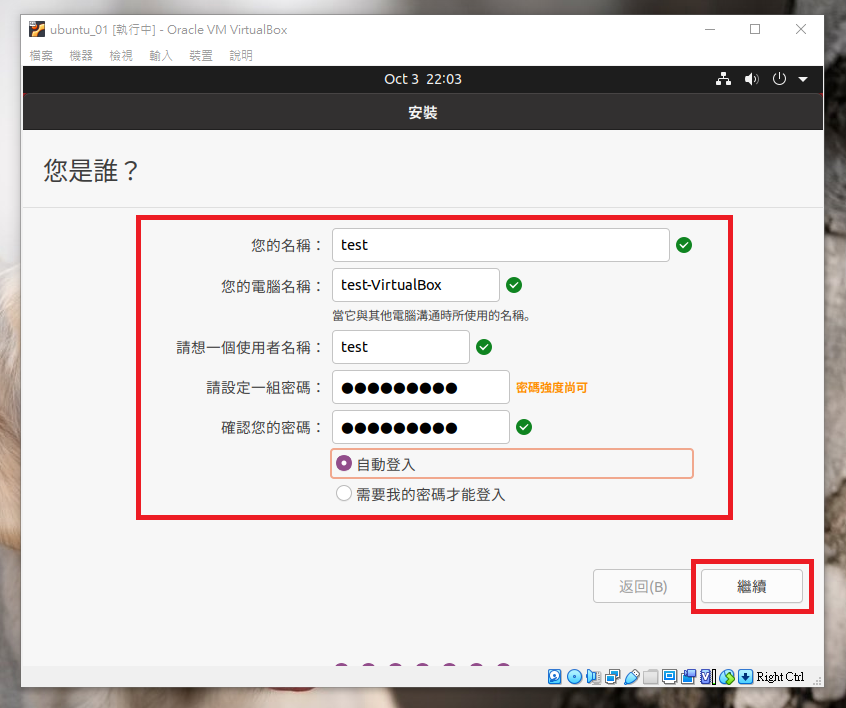
输入你的「名称」、「密码」
如果你希望启动这台VM虚拟机时不需输入密码,就可以直接进到桌面,那就点选「自动登入」
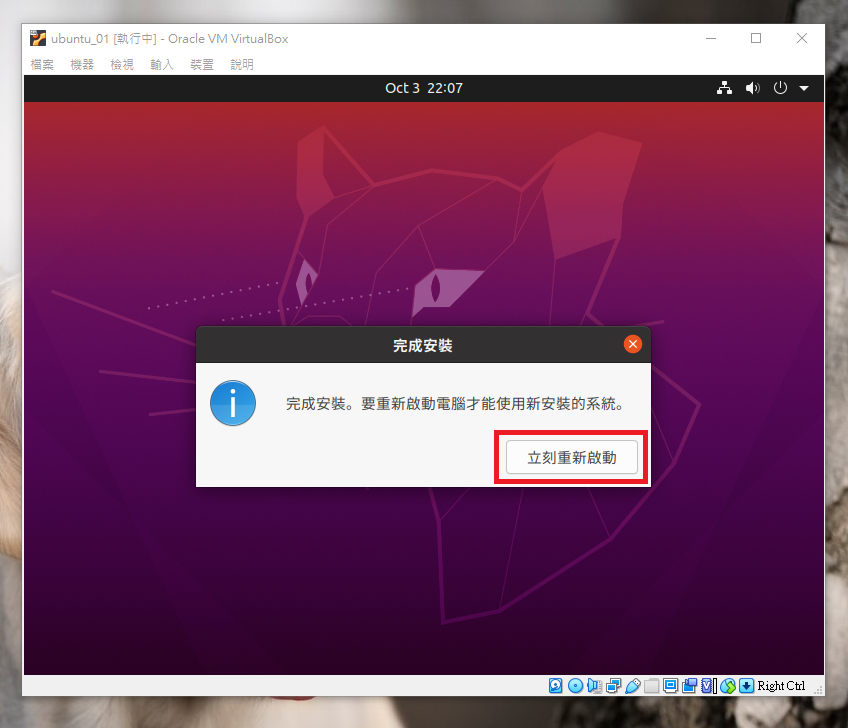
等它跑一下,跑完看到这个画面,点击「立即重新启动」,看到黑频後按enter
如果它一直卡在黑频,你可以直接按叉叉,选「关闭电脑电源」
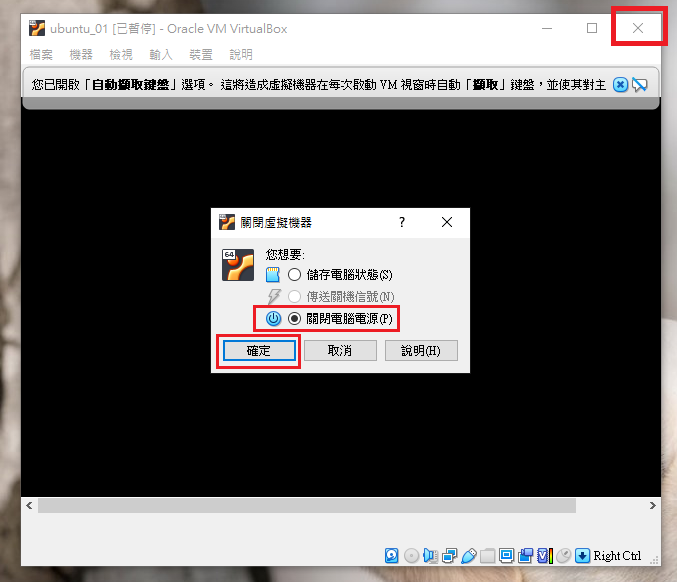
就可以成功进到这台VM虚拟机罗!
以上就是今天的介绍
如果想在windows或mac的系统上同时运作linux,照着以上步骤一步一步做就可以实现罗!
还有,如果想自己分割硬碟区,也可以看看Day 20喔!
<<: Day 18. 阿咧?我记得我安装过XCode? Can't find Xcode install for Metal compiler | Unreal Engine
>>: Day 18 — To Do List (5) 新增 To Do Event
从 JavaScript 角度学 Python(2) - 历史
前言 每个程序语言都有属於它独一无二的诞生故事,毕竟以 JavaScript 的历史背景来讲是还满有...
[Day07] Service 与 Dependency Injection (依赖注入)
什麽是依赖注入 在说明什麽是 Dependency Injection(DI, 依赖注入)前,要先来...
Day30 ATT&CK for ICS - Inhibit Response Function(2)
T0804 Block Reporting Message 攻击者尝试阻止回报封包,这些封包内容可能...
Day5:深入认识 Coroutine
这几天我们把 Coroutine 神秘的面纱好像掀开了一点,知道他是用来解决非同步程序的问题,也我们...
Flutter体验 Day 1-前言
前言 Flutter入门 Flutter 是 Goole 推出的开源 UI 工具包,通过 Dart ...