【第十八天 - Flutter Cloud Messaging(下)】
前言
今日的程序码 => GITHUB
路由器教学 => 【第三天 - Flutter Route 规划分享】
server send message => 教学文章
接续前一篇文章 => 【第十七天 - Flutter Cloud Messaging(上)】
Flutter Code
RemoteMessage
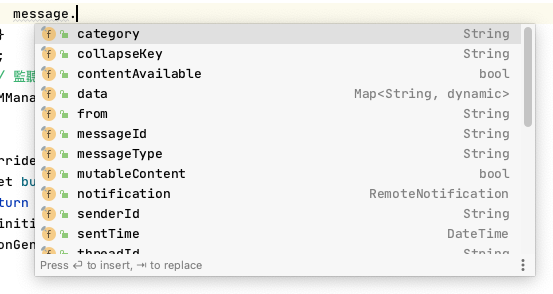
这个物件,我自己最常用的就是 notification 和 data 了。还记得 【第十七天 - Flutter Cloud Messaging(上)】,在 Cloud Message 有要你们传一个 route 和 secondPage 吗?
这种客制化的资料就会传到 RemoteMessage.data 里面。

Main
- 启用
FCM的背景处理、初始化 - 设定
flutterLocalNotificationsPlugin初始化 - 监听
terminal点击推播事件 - 监听
foreground前景推播事件
/// 背景 Handler for FCM
Future<void> _firebaseMessagingBackgroundHandler(RemoteMessage message) async {
  // 确保初执行前有初始化
  await Firebase.initializeApp();
  print('Handling a background message ${message.messageId}');
}
/// flutterLocalNotificationsPlugin 初始设定
const AndroidNotificationChannel channel = AndroidNotificationChannel(
  'high_importance_channel', // id
  'High Importance Notifications', // title
  'This channel is used for important notifications.', // description
  importance: Importance.max,
);
/// flutterLocalNotificationsPlugin 初始宣告
final FlutterLocalNotificationsPlugin flutterLocalNotificationsPlugin =
    FlutterLocalNotificationsPlugin();

void main() async {
  WidgetsFlutterBinding.ensureInitialized();
  await Firebase.initializeApp();

  /// 背景处理
  FirebaseMessaging.onBackgroundMessage(_firebaseMessagingBackgroundHandler);

  /// 创建一个 Android 通知通道。
  /// 我们在`AndroidManifest.xml`文件中使用这个通道来覆盖
  /// 默认 FCM 通道启用抬头通知。
  /// https://github.com/FirebaseExtended/flutterfire/blob/master/packages/firebase_messaging/firebase_messaging/example/lib/main.dart
  await flutterLocalNotificationsPlugin
      .resolvePlatformSpecificImplementation<
          AndroidFlutterLocalNotificationsPlugin>()
      ?.createNotificationChannel(channel);

  runApp(MyApp());
}

class MyApp extends StatefulWidget {
  const MyApp({Key? key}) : super(key: key);

  @override
  _MyAppState createState() => _MyAppState();
}

class _MyAppState extends State<MyApp> {
  @override
  void initState() {
    super.initState();
    /// 初始化 LocalNotification 设定
    LocalNotificationService.initialize(context);
    ///gives you the message on which user taps
    ///and it opened the app from terminated state
    /// App 被完全关掉後,时点选通知开启App(Terminated)
    FirebaseMessaging.instance.getInitialMessage().then((message) {
      if (message != null) {
        print('从 App 被完全关闭状态打开:' + message.data["route"]);
        final routeFromMessage = message.data["route"];
        Navigator.pushNamed(context, routeFromMessage);
      }
    });
    /// 监听 terminal 推播事件。
    FCMManager.foregroundMessage();
  }

  @override
  Widget build(BuildContext context) {
    return MaterialApp(
      initialRoute: RouteName.homePage,
      onGenerateRoute: MyRouter.generateRoute,
    );
  }
}
LocalNotificationService、FCMManager
LocalNotificationService
- 完成 android 的初始值
- 详细官方文件
FCMManager
- 背景点击推播事件
- 前景点击推播事件
class LocalNotificationService {
  static void initialize(BuildContext context) {
    /// 初始化 LocalNotification 的动作。
    /// iOS 这边还需要加上其他设定。
    final InitializationSettings initializationSettings =
        InitializationSettings(
            android: AndroidInitializationSettings("@mipmap/ic_launcher"));
    flutterLocalNotificationsPlugin.initialize(
      initializationSettings,
    );
  }
}

class FCMManager {
  static void onMessageOpenedApp(BuildContext context) {
    ///When the app is in background but opened and user taps
    ///on the notification
    /// 从背景处中点击推播当 App 缩小状态时,开启应用程序时,该流会发送 RemoteMessage。背景处理。
    FirebaseMessaging.onMessageOpenedApp.listen((message) {
      print('从背景中打开' + message.toString());
      final routeFromMessage = message.data["route"];
      if(routeFromMessage!=Null && routeFromMessage==RouteName.secondPage) {
        Navigator.of(context).pushNamed(routeFromMessage);
      }
    });
  }

  static void foregroundMessage() {
    /// foreground work
    /// 前景处理
    FirebaseMessaging.onMessage.listen((RemoteMessage message) {
      print('前景处理 FcM 触发' + message.toString());
      RemoteNotification? notification = message.notification;
      AndroidNotification? android = message.notification?.android;

      // If `onMessage` is triggered with a notification, construct our own
      // local notification to show to users using the created channel.
      if (notification != null && android != null && !kIsWeb) {
        flutterLocalNotificationsPlugin.show(
            notification.hashCode,
            notification.title,
            notification.body,
            NotificationDetails(
              android: AndroidNotificationDetails(
                channel.id,
                channel.name,
                channel.description,
                icon: android.smallIcon,
              ),
            ));
      }
    });
  }
}
HomePage
- 监听背景推播
- 先去取得当下 device_token
- 向 FireStore 取得和当下
device_token一样的订阅主题资料 - 点击 subscribe => 订阅
channel1频道。 - 订阅 channel1 频道到
FireStore - 点击
unsubscribe取消订阅。 - 更新
FireStore。
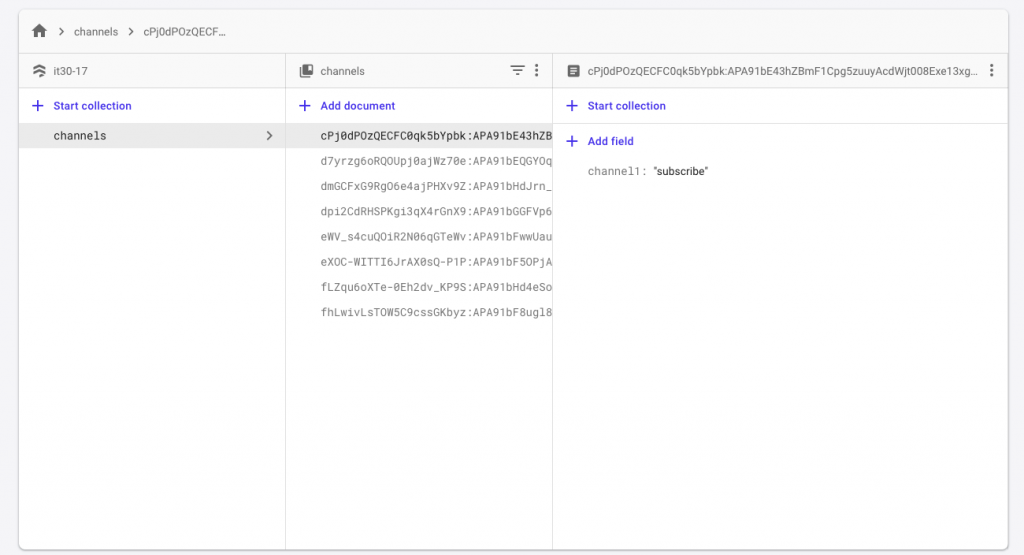
可以看到有订阅 channel1 的,就会记录在 collection == channels,document 会等於自己的 device token

class HomePage extends StatefulWidget {
  @override
  _HomePageState createState() => _HomePageState();
}

class _HomePageState extends State<HomePage> {
  /// 要取得 device token,好让 JS 档案和 FCM TEST MESSAGE 可以传送指定 token
  late String deviceToken;

  /// 订阅的 Topic
  List subscribed = [];

  /// 有哪些频道可供 topic 订阅。
  List channels = [
    'channel1',
    'channel2',
    'channel3',
    'channel4',
    'channel5',
    'channel6',
    'channel7'
  ];

  @override
  void initState() {
    super.initState();

    /// 监听背景推播
    FCMManager.onMessageOpenedApp(context);
    getToken();
    getTopics();
  }

  @override
  Widget build(BuildContext context) {
    return Scaffold(
      appBar: AppBar(
        title: Text('FCM DEMO'),
        centerTitle: true,
      ),
      body: ListView.builder(
        itemCount: channels.length,
        itemBuilder: (context, index) => ListTile(
          title: Text(channels[index]),
          trailing: subscribed.contains(channels[index])
              ? ElevatedButton(
                  onPressed: () async => cancelSubscribed(index),
                  child: Text('unsubscribe'),
                )
              : ElevatedButton(
                  onPressed: () async => startSubscribed(index),
                  child: Text('subscribe')),
        ),
      ),
    );
  }

  /// 向 FCM 请求 device_token
  void getToken() async {
    var token = (await FirebaseMessaging.instance.getToken())!;
    setState(() {
      deviceToken = token;
    });
    print('device token:' + deviceToken);
  }

  /// 向 firebase 取得 collection == channels 并去找到 documnet == token 的那笔资料里面的所有 key 值
  void getTopics() async {
    await FirebaseFirestore.instance
        .collection('channels')
        .get()
        .then((value) => value.docs.forEach((element) {
              if (deviceToken == element.id) {
                subscribed = element.data().keys.toList();
              }
            }));

    setState(() {
      subscribed = subscribed;
    });
  }

  /// 开始订阅 topic 到 fireStore
  void startSubscribed(int index) async {
    await FirebaseMessaging.instance.subscribeToTopic(channels[index]);

    await FirebaseFirestore.instance
        .collection('channels')
        .doc(deviceToken)
        .set({channels[index]: 'subscribe'}, SetOptions(merge: true));
    setState(() {
      subscribed.add(channels[index]);
    });
  }

  /// 取消订阅 topic from fireStore
  void cancelSubscribed(int index) async {
    await FirebaseMessaging.instance.unsubscribeFromTopic(channels[index]);
    await FirebaseFirestore.instance
        .collection('channels')
        .doc(deviceToken)
        .update({channels[index]: FieldValue.delete()});
    setState(() {
      subscribed.remove(channels[index]);
    });
  }
}
JS Code
官方文件,这里大多数是参考官网文件。里面有很详细的解说和程序码。
会分成两种
- broadcast 的推播
- topic 的推播(有订阅才会收到)
执行前
- 记得要将 【第十七天 - Flutter Cloud Messaging(上)】 的 serviceAccountKey.json 放到目录里
- 建立一个
function的 folder - 建立两个档案
sendbroad.js、sendnotif.js。 - 到 ternimal 下这个指令
cd function
npm install firebase-admin --save
node sendbroad.js
node sendnotif.js
sendbroad.js
要记得改掉 serviceAccount 里面的路径。
// 初始化 token
var admin = require("firebase-admin");

var serviceAccount = require("serviceAccountKey.json 的路径");

admin.initializeApp({
    credential: admin.credential.cert(serviceAccount)
});

var db = admin.firestore();

async function start() {
    var topics = [];
    const col = await db.collection('channels').get();
    col.forEach((doc) => {
        topics.push(doc.id);
    })

    console.log('topics:',topics)
    var message = {
        notification: {
            title: 'FCM DEMO',
            body: 'BroadCast ^_^'
        },
        // token: registrationToken
    };

    admin.messaging().sendToDevice(topics, message)
        .then((response) => {
            // Response is a message ID string.
            console.log('Successfully sent message:', response);
        })
        .catch((error) => {
            console.log('Error sending message:', error);
        });
}

start()


// Send a message to the device corresponding to the provided
// registration token.
sendnotif.js
这边可以改 message 里面的资料
admin.messaging().sendToTopic('channel1',message),这行里面的 channel1 可以改成其他的 topic 比方说 channel2、channel3 等等...
//初始化 firebase admin 设定
var admin = require("firebase-admin");

var serviceAccount = require("/Users/wayne/AndroidStudioProjects/IT30/day_17/serviceAccountKey.json");

admin.initializeApp({
  credential: admin.credential.cert(serviceAccount)
});
// This registration device token comes from the client FCM SDKs.
var registrationToken = 'eXOC-WITTI6JrAX0sQ-P1P:APA91bF5OPjAi9t3JoVHYeYyVLvg06kRY_Qr2cM4aln3c6ejQtIofkDhNL75KhkwmnzKVAlRByOqEZa-9CjRbLwdGZQ4t4K1UPL_wnW_Y8hG9ltCum3VlLhm7_ncX9OTsuiUiQSdyxAz';
// 要传的推播讯息。
var message = {
//  data:{
//     route:'secondPage'
//  },
  notification: {
    title: 'FCM DEMO',
    body: 'Only subscribers receive it~~'
  },
};

// Send a message to the device corresponding to the provided
// registration token.
// 开始发送推播资讯给 device token == registrationToken 的人,且那位使用者需要有订阅 Topic == channel1。
admin.messaging().sendToTopic('channel1',message)
  .then((response) => {
    // Response is a message ID string.
    console.log('Successfully sent message:', response);
  })
  .catch((error) => {
    console.log('Error sending message:', error);
  });
<<: [Day - 17 ] - Spring 导入选择器原理与开发
>>: {DAY 20} Pandas 学习笔记part.6
30天学会 Python-Day20: 作用域
变数作用域 某变数的作用域代表某变数能够被使用的地方 以 Python 来说就是同个函式内,变数被建...
[CSS] Flex/Grid Layout Modules, part 2
本篇会有不少冷门范例。 其实我觉得很奇妙,就是我老是踩到一些超冷门连 Google 都找不太到的雷...
【Day19】电子商务与行销篇-营销活动
#odoo #开源系统 #数位赋能 #E化自主 企业之广告行销手法,除了透过email、UTMs、问...
里氏替换原则 Liskov Substitution Principle
今天来谈谈 SOLID 当中的里氏替换原则,同样的先来看一下例子。 延续先前的例子,公司持续拓展,满...
Day7-在认识 useMemo 前,先认识 React.memo
今天介绍的是避免重新渲染的 HOC(Higher Order Component) React.me...