[NestJS 带你飞!] DAY10 - Pipe (下)
前一篇有提到如果遇到物件格式的资料要如何做验证这个问题,事实上这个解法只需要使用 DTO、ValidationPipe、class-validator 以及 class-transformer ,这里先完成简单的前置作业,透过 npm 安装 class-validator 与 class-transformer:
$ npm install --save class-validator class-transformer
DTO 格式验证
为了模拟验证机制,这里先产生一个 TodoModule 与 TodoController:
$ nest generate module features/todo
$ nest generate controller features/todo
接着,在 features/todo 下新增 dto 资料夹,并建立 create-todo.dto.ts:
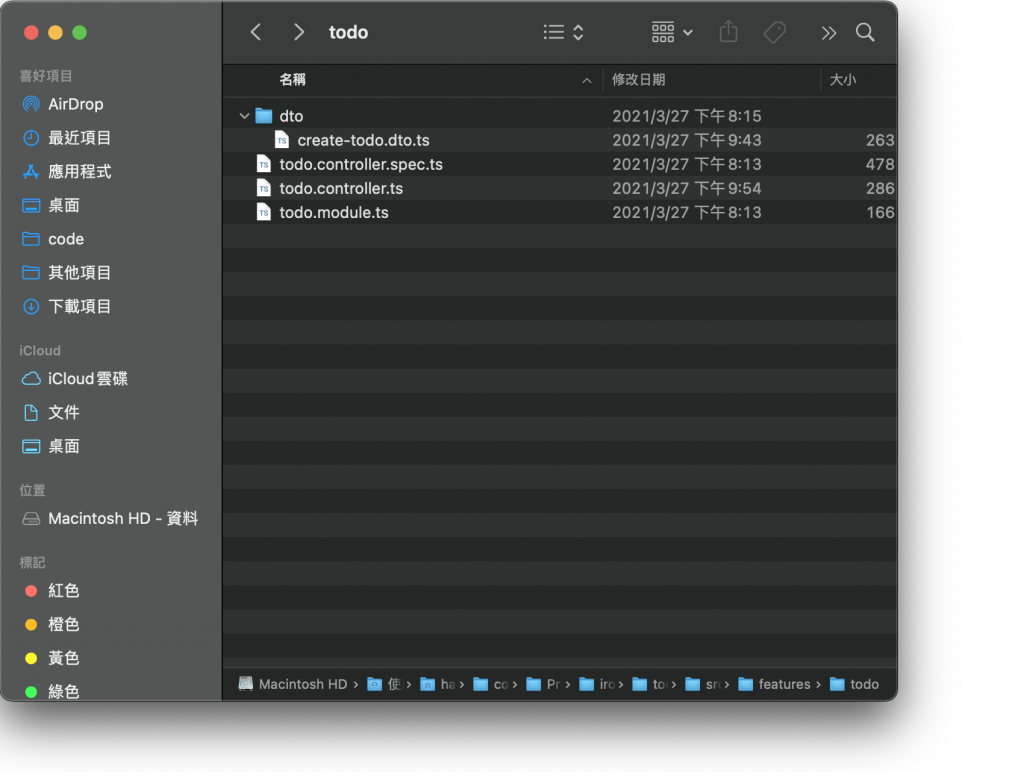
在验证格式机制上,必须要采用 class 的形式建立 DTO,原因在Controller(下)这篇有提过,如果采用 interface 的方式在编译成 JavaScript 时会被删除,如此一来,Nest 便无法得知 DTO 的格式为何。这里我们先简单定义一下 create-todo.dto.ts 的内容:
export class CreateTodoDto {
  public readonly title: string;
  public readonly description?: string;
}
我希望 title 的规则如下:
- 为必填
- 必须是
String - 最大长度为 20
description 的规则如下:
- 为选填
- 必须是
String
那要如何套用这些规则呢?非常简单,透过 class-validator 就能办到,主要是替这些属性添加特定的装饰器:
import { IsNotEmpty, IsOptional, IsString, MaxLength } from 'class-validator';


export class CreateTodoDto {

  @MaxLength(20)
  @IsString()
  @IsNotEmpty()
  public readonly title: string;

  @IsString()
  @IsOptional()
  public readonly description?: string;
}
提醒:详细的装饰器内容可以参考 class-validator。
如此一来便完成了规则的定义,实在是太好用啦!接下来只需要在资源上透过 @UsePipes装饰器套用 ValidationPipe 即可:
import { Body, Controller, Post, UsePipes, ValidationPipe } from '@nestjs/common';
import { CreateTodoDto } from './dto/create-todo.dto';

@Controller('todos')
export class TodoController {

  @Post()
  @UsePipes(ValidationPipe)
  create(@Body() dto: CreateTodoDto) {
    return {
      id: 1,
      ...dto
    };
  }

}
在 Controller 层级套用也可以,就会变成该 Controller 下的所有资源都支援验证:
import { Body, Controller, Post, UsePipes, ValidationPipe } from '@nestjs/common';
import { CreateTodoDto } from './dto/create-todo.dto';

@Controller('todos')
@UsePipes(ValidationPipe)
export class TodoController {

  @Post()
  create(@Body() dto: CreateTodoDto) {
    return {
      id: 1,
      ...dto
    };
  }

}
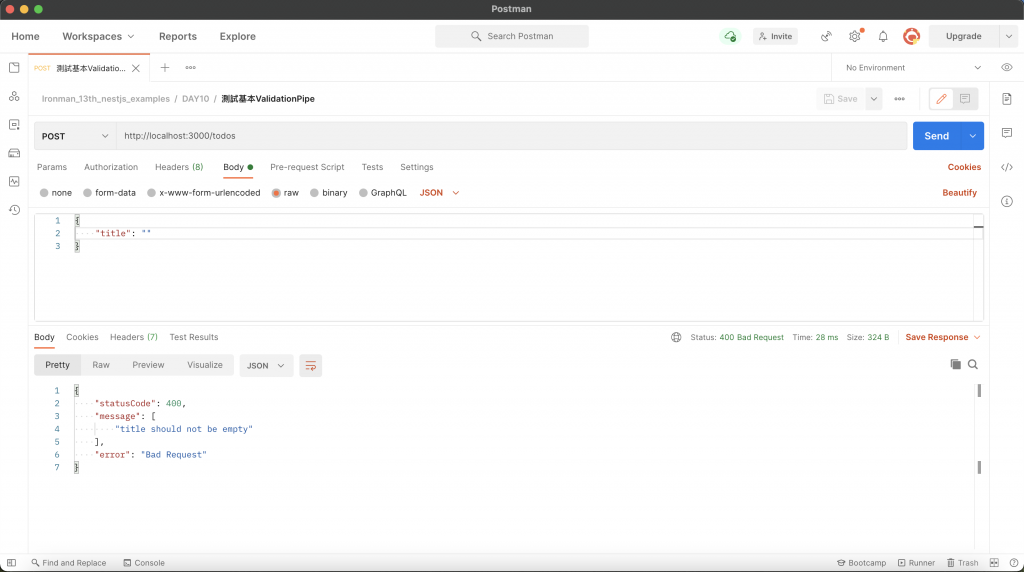
透过 Postman 来测试,会发现顺利报错:
关闭错误细项
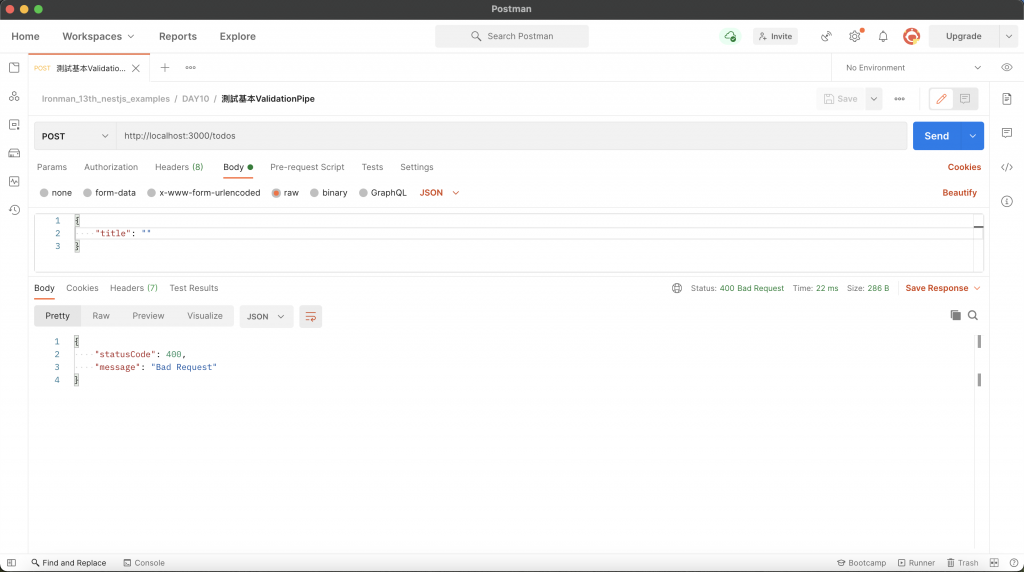
如果不想要回传错误的项目,可以透过 ValidationPipe 的 disableErrorMessages 来关闭:
import { Body, Controller, Post, UsePipes, ValidationPipe } from '@nestjs/common';
import { CreateTodoDto } from './dto/create-todo.dto';

@Controller('todos')
export class TodoController {

  @Post()
  @UsePipes(new ValidationPipe({ disableErrorMessages: true }))
  create(@Body() dto: CreateTodoDto) {
    return {
      id: 1,
      ...dto
    };
  }

}
透过 Postman 进行测试:
自订 Exception
与其他 Pipe 一样可以透过 exceptionFactory 自订 Exception:
import { Body, Controller, HttpStatus, NotAcceptableException, Post, UsePipes, ValidationPipe } from '@nestjs/common';
import { ValidationError } from 'class-validator';
import { CreateTodoDto } from './dto/create-todo.dto';

@Controller('todos')
export class TodoController {

  @Post()
  @UsePipes(
    new ValidationPipe({
      exceptionFactory: (errors: ValidationError[]) => {
        return new NotAcceptableException({
          code: HttpStatus.NOT_ACCEPTABLE,
          message: '格式错误',
          errors
        });
      }
    })
  )
  create(@Body() dto: CreateTodoDto) {
    return {
      id: 1,
      ...dto
    };
  }

}
透过 Postman 进行测试:

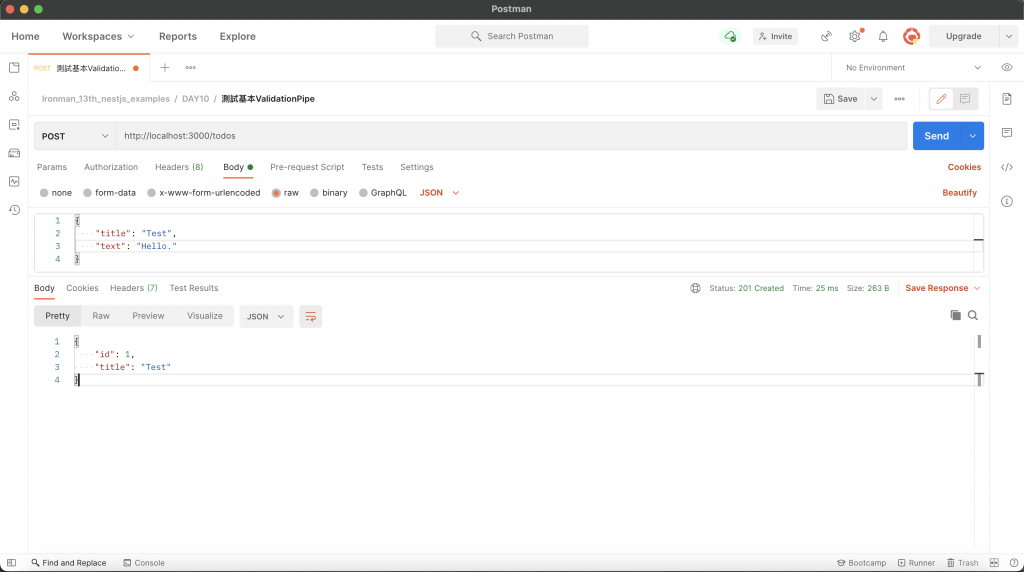
自动过滤属性
以前面新增 Todo 的例子来说,可接受的参数为 title 与 description,假设今天客户端传送下方资讯:
{
  "title": "Test",
  "text": "Hello."
}
可以发现传了一个毫无关联的 text,这时候想要快速过滤掉这种无效参数该怎麽做呢?透过 ValidationPipe 设置 whitelist 即可,当 whitelist 为 true 时,会 自动过滤掉於 DTO 没有任何装饰器的属性,也就是说,就算有该属性但没有添加 class-validator 的装饰器也会被视为无效属性。这里我们简单实验一下 whitelist:
import { Body, Controller, Post, UsePipes, ValidationPipe } from '@nestjs/common';
import { CreateTodoDto } from './dto/create-todo.dto';

@Controller('todos')
export class TodoController {

  @Post()
  @UsePipes(new ValidationPipe({ whitelist: true }))
  create(@Body() dto: CreateTodoDto) {
    return {
      id: 1,
      ...dto
    };
  }

}
透过 Postman 进行测试:
如果想要传送无效参数时直接报错的话,则是同时使用 whitelist 与 forbidNonWhitelisted:
import { Body, Controller, Post, UsePipes, ValidationPipe } from '@nestjs/common';
import { CreateTodoDto } from './dto/create-todo.dto';

@Controller('todos')
export class TodoController {

  @Post()
  @UsePipes(new ValidationPipe({ whitelist: true, forbidNonWhitelisted: true }))
  create(@Body() dto: CreateTodoDto) {
    return {
      id: 1,
      ...dto
    };
  }

}
透过 Postman 进行测试:

自动转换
ValidationPipe 还提供 transform 参数来转换传入的物件,将其实例化为对应的 DTO:
import { Body, Controller, Post, UsePipes, ValidationPipe } from '@nestjs/common';
import { CreateTodoDto } from './dto/create-todo.dto';

@Controller('todos')
export class TodoController {

  @Post()
  @UsePipes(new ValidationPipe({ transform: true }))
  create(@Body() dto: CreateTodoDto) {
    console.log(dto);
    return dto;
  }

}
透过 Postman 进行测试,会在终端机看到下方结果,会发现 dto 为 CreateTodoDto 实例:
CreateTodoDto { title: 'Test' }
transform 还有一个很厉害的功能,还记得如何取得路由参数吗?假设路由参数要取得 id,这个 id 型别是 number,但正常来说路由参数收到的时候都会是 string,透过 transform Nest 会尝试去转换成我们指定的型别:
import { Controller, Get, Param, UsePipes, ValidationPipe } from '@nestjs/common';

@Controller('todos')
export class TodoController {

  @Get(':id')
  @UsePipes(new ValidationPipe({ transform: true }))
  get(@Param('id')id : number) {
    console.log(typeof id);
    return '';
  }

}
透过浏览器存取 http://localhost:3000/1,会在终端机看到型别确实转换成 number 了:
number
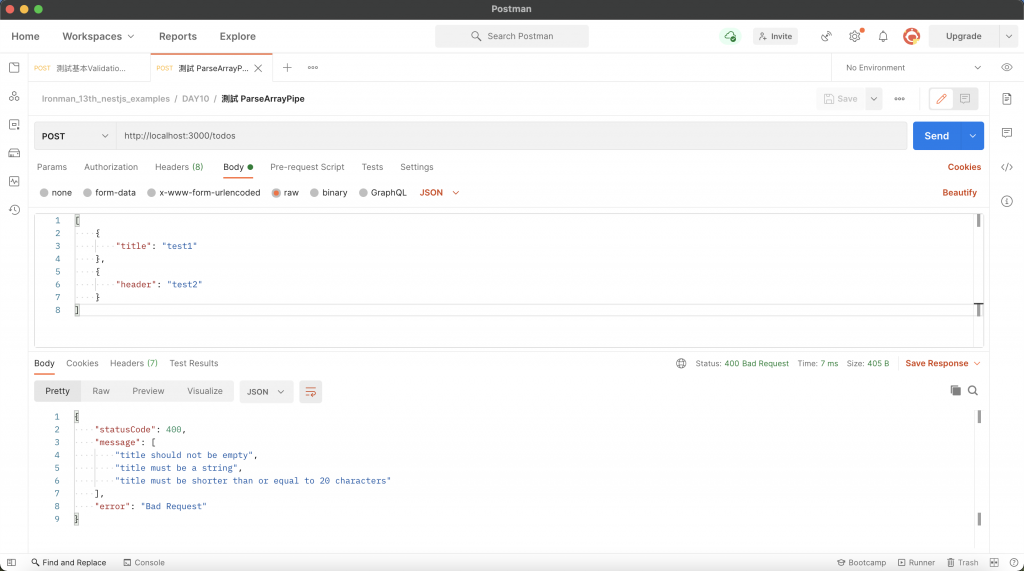
检测阵列 DTO
如果传入的物件为阵列格式,不能使用 ValidationPipe,要使用 ParseArrayPipe,并在 items 带入其 DTO:
import { Body, Controller, ParseArrayPipe, Post } from '@nestjs/common';
import { CreateTodoDto } from './dto/create-todo.dto';

@Controller('todos')
export class TodoController {

  @Post()
  create(
    @Body(new ParseArrayPipe({ items: CreateTodoDto }))
    dtos: CreateTodoDto[]
  ) {
    return dtos;
  }

}
透过 Postman 进行测试:
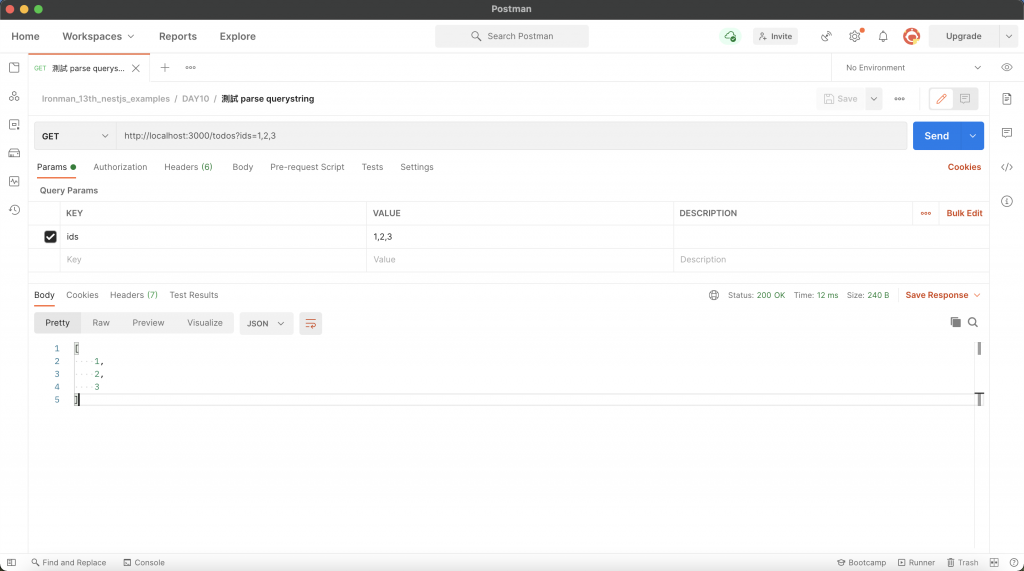
解析查询参数
ParseArrayPipe 还可以用来解析查询参数,假设查询参数为 ?ids=1,2,3,此时就可以善用此方法来解析出各个 id,只需要添加 separator 去判断以什麽作为分界点:
import { Controller, Get, ParseArrayPipe, Query } from '@nestjs/common';

@Controller('todos')
export class TodoController {
  @Get()
  get(
    @Query('ids', new ParseArrayPipe({ items: Number, separator: ',' }))
    ids: number[]
  ) {
    return ids;
  }
}
透过 Postman 进行测试:
DTO 技巧
当系统越来越庞大的时候,DTO 的数量也会随之增加,有许多的 DTO 会有重复的属性,例如:相同资源下的 CRUD DTO,这时候就会变得较难维护,还好 Nest 有提供良好的解决方案,运用特殊的继承方式来处理:
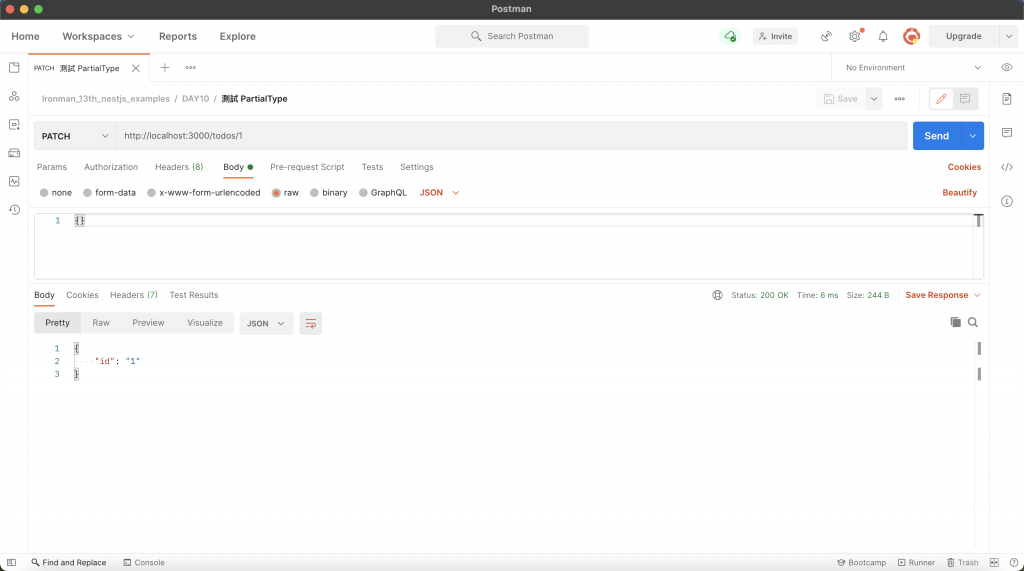
局部性套用 (Partial)
局部性套用的意思是将既有的 DTO 所有栏位都取用,只是全部转换为非必要属性,需要使用到 PartialType 这个函式来把要取用的 DTO 带进去,并给新的 DTO 继承。这边我们先建立一个 update-todo.dto.ts 在 dto 资料夹中,并让它继承 CreateTodoDto 的栏位:
import { PartialType } from '@nestjs/mapped-types';
import { CreateTodoDto } from './create-todo.dto';

export class UpdateTodoDto extends PartialType(CreateTodoDto) {
}
其效果相当於:
import { IsNotEmpty, IsOptional, IsString, MaxLength } from 'class-validator';

export class UpdateTodoDto {
  @MaxLength(20)
  @IsString()
  @IsNotEmpty()
  @IsOptional()
  public readonly title?: string;

  @IsString()
  @IsOptional()
  public readonly description?: string;
}
接着来修改 todo.controller.ts:
import { Body, Controller, Param, Patch, UsePipes, ValidationPipe } from '@nestjs/common';
import { UpdateTodoDto } from './dto/update-todo.dto';

@Controller('todos')
export class TodoController {
    @Patch(':id')
    @UsePipes(ValidationPipe)
    update(
        @Param('id') id: number,
        @Body() dto: UpdateTodoDto
    ) {
        return {
            id,
            ...dto
        };
    }
}
透过 Postman 进行测试,这边我不带任何值去存取 PATCH /todos/:id,会发现可以通过验证:
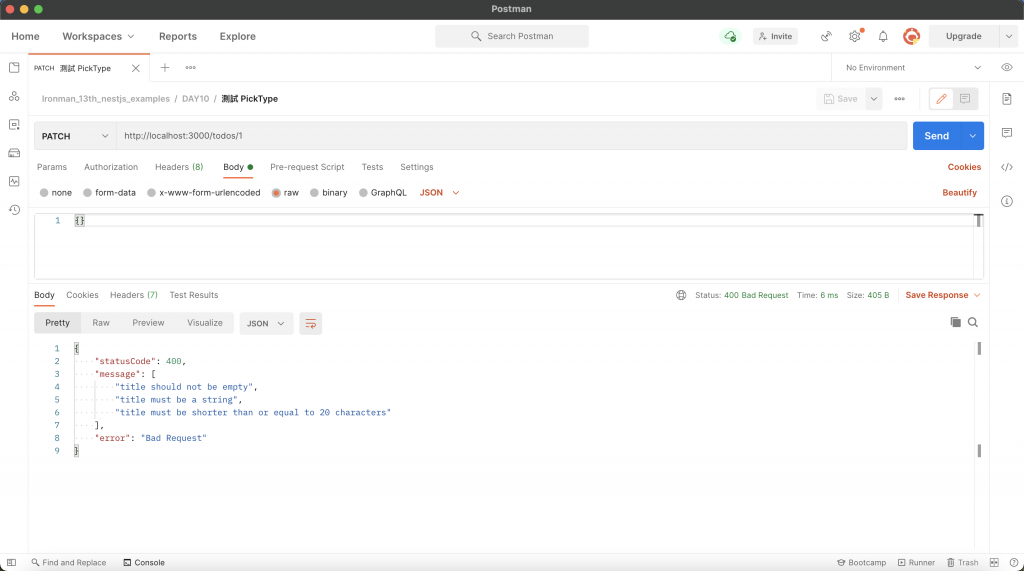
选择性套用 (Pick)
选择性套用的意思是用既有的 DTO 去选择哪些是会用到的属性,需要使用到 PickType 这个函式来把要取用的 DTO 带进去以及指定要用的属性名称,并给新的 DTO 继承。这边我们沿用 UpdateTodoDto 并让它继承 CreateTodoDto 的 title 栏位:
import { PickType } from '@nestjs/mapped-types';
import { CreateTodoDto } from './create-todo.dto';

export class UpdateTodoDto extends PickType(CreateTodoDto,  ['title']) {
}
其效果等同於:
import { IsNotEmpty, IsString, MaxLength } from 'class-validator';

export class UpdateTodoDto {
  @MaxLength(20)
  @IsString()
  @IsNotEmpty()
  public readonly title: string;
}
todo.controller.ts 沿用前面的范例:
import { Body, Controller, Param, Patch, UsePipes, ValidationPipe } from '@nestjs/common';
import { UpdateTodoDto } from './dto/update-todo.dto';

@Controller('todos')
export class TodoController {
    @Patch(':id')
    @UsePipes(ValidationPipe)
    update(
        @Param('id') id: number,
        @Body() dto: UpdateTodoDto
    ) {
        return {
            id,
            ...dto
        };
    }
}
透过 Postman 进行测试,这边我不带任何值去存取 PATCH /todos/:id,会发现无法通过验证:
忽略套用 (Omit)
忽略套用的意思是用既有的 DTO 但忽略不会用到的属性,需要使用到 OmitType 这个函式来把要取用的 DTO 带进去以及指定要忽略的属性名称,并给新的 DTO 继承。这边我们沿用 UpdateTodoDto 并让它继承 CreateTodoDto 的栏位,但忽略 title 属性:
import { OmitType } from '@nestjs/mapped-types';
import { CreateTodoDto } from './create-todo.dto';

export class UpdateTodoDto extends OmitType(CreateTodoDto,  ['title']) {
}
其效果等同於:
import { IsOptional, IsString } from 'class-validator';

export class UpdateTodoDto {
  @IsString()
  @IsOptional()
  public readonly description?: string;
}
这里稍微调整一下 todo.controller.ts,将 whitelist 与 forbidNonWhitelisted 设为 true:
import { Body, Controller, Param, Patch, UsePipes, ValidationPipe } from '@nestjs/common';
import { UpdateTodoDto } from './dto/update-todo.dto';

@Controller('todos')
export class TodoController {
    @Patch(':id')
    @UsePipes(new ValidationPipe({ whitelist: true, forbidNonWhitelisted: true }))
    update(
        @Param('id') id: number,
        @Body() dto: UpdateTodoDto
    ) {
        return {
            id,
            ...dto
        };
    }
}
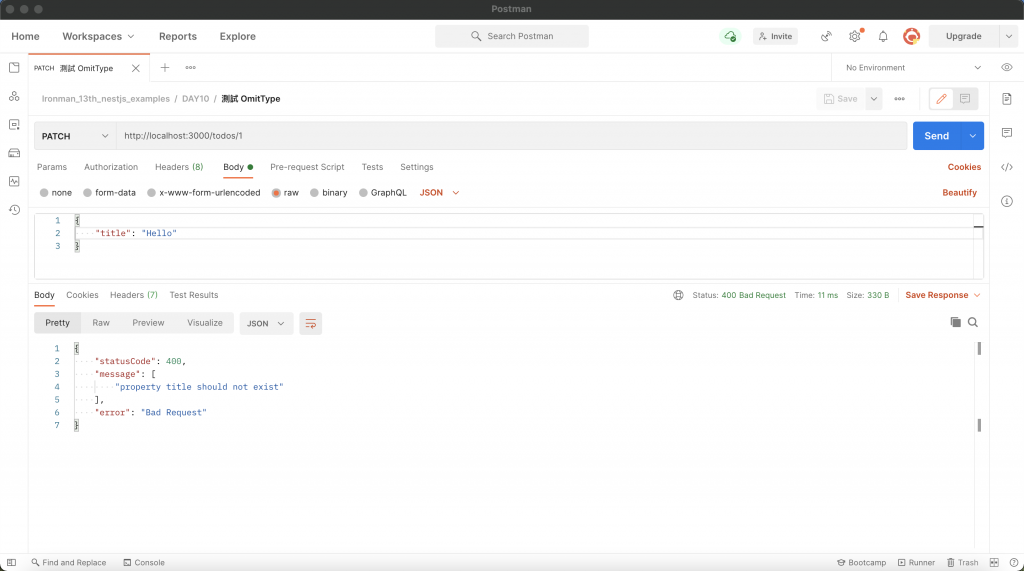
透过 Postman 进行测试,这边我刻意带 title 去存取 PATCH /todos/:id,由於设置了 whitelist 与 forbidNonWhitelisted,所以无法通过验证:
合并套用 (Intersection)
合并套用的意思是用既有的两个 DTO 来合并属性,需要使用到 IntersectionType 这个函式来把要取用的两个 DTO 带进去,并给新的 DTO 继承。这边我们沿用 CreateTodoDto 并在 update-todo.dto.ts 新增一个 MockDto,再让 UpdateTodoDto 去继承这两个的栏位:
import { IntersectionType } from '@nestjs/mapped-types';
import { IsNotEmpty, IsString } from 'class-validator';
import { CreateTodoDto } from './create-todo.dto';

export class MockDto {
    @IsString()
    @IsNotEmpty()
    public readonly information: string;
}

export class UpdateTodoDto extends IntersectionType(CreateTodoDto, MockDto) {
}
其效果等同於:
import { IsNotEmpty, IsOptional, IsString, MaxLength } from 'class-validator';

export class UpdateTodoDto {
  @MaxLength(20)
  @IsString()
  @IsNotEmpty()
  public readonly title: string;

  @IsString()
  @IsOptional()
  public readonly description?: string;

  @IsString()
  @IsNotEmpty()
  public readonly information: string;
}
这里调整一下 todo.controller.ts:
import { Body, Controller, Param, Patch, UsePipes, ValidationPipe } from '@nestjs/common';
import { UpdateTodoDto } from './dto/update-todo.dto';

@Controller('todos')
export class TodoController {
    @Patch(':id')
    @UsePipes(ValidationPipe)
    update(
        @Param('id') id: number,
        @Body() dto: UpdateTodoDto
    ) {
        return {
            id,
            ...dto
        };
    }
}
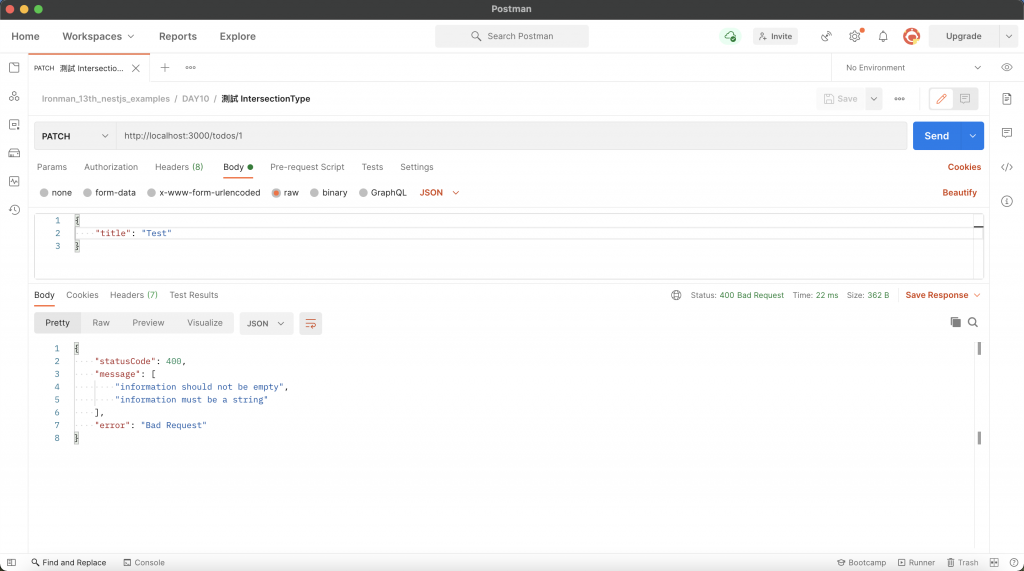
透过 Postman 进行测试,这边我刻意不带 information 去存取 PATCH /todos/:id,所以无法通过验证:
组合应用
上述的四个函式:PartialType、PickType、OmitType、IntersectionType 是可以透过组合的方式来使用的。下方的范例使用 OmitType 将 CreateTodoDto 的 title 栏位去除,并使用 IntersectionType 把 MockDto 与之合并 :
import { IntersectionType, OmitType } from '@nestjs/mapped-types';
import { IsNotEmpty, IsString } from 'class-validator';
import { CreateTodoDto } from './create-todo.dto';

export class MockDto {
    @IsString()
    @IsNotEmpty()
    public readonly information: string;
}

export class UpdateTodoDto extends IntersectionType(
    OmitType(CreateTodoDto, ['title']), MockDto
) {
}
其效果等同於:
import { IsNotEmpty, IsOptional, IsString } from 'class-validator';

export class UpdateTodoDto {
  @IsString()
  @IsOptional()
  public readonly description?: string;

  @IsString()
  @IsNotEmpty()
  public readonly information: string;
}
todo.controller.ts 保持本来的样子:
import { Body, Controller, Param, Patch, UsePipes, ValidationPipe } from '@nestjs/common';
import { UpdateTodoDto } from './dto/update-todo.dto';

@Controller('todos')
export class TodoController {
    @Patch(':id')
    @UsePipes(ValidationPipe)
    update(
        @Param('id') id: number,
        @Body() dto: UpdateTodoDto
    ) {
        return {
            id,
            ...dto
        };
    }
}
透过 Postman 进行测试,这边我不带任何值去存取 PATCH /todos/:id,会发现无法通过验证:

全域 Pipe
ValidationPipe 算是一个蛮常用的功能,因为大多数的情况都会使用到 DTO 的概念,如此一来便可以使用 DTO 验证的方式去检查资料的正确性,所以可以直接将 ValidationPipe 配置在全域,仅需要修改 main.ts 即可:
import { ValidationPipe } from '@nestjs/common';
import { NestFactory } from '@nestjs/core';
import { AppModule } from './app.module';

async function bootstrap() {
  const app = await NestFactory.create(AppModule);
  app.useGlobalPipes(new ValidationPipe());
  await app.listen(3000);
}
bootstrap();
透过 useGlobalPipes 使 ValidationPipe 适用於全域,实在是非常方便!
依赖注入实作全域 Pipe
上面的方法是透过模组外部完成全域配置的,与 Exception filter 一样可以用依赖注入的方式,透过指定 Provider 的 token 为 APP_PIPE 来实现,这里是用 useClass 来指定要建立实例的类别:
import { Module, ValidationPipe } from '@nestjs/common';
import { APP_PIPE } from '@nestjs/core';
import { AppController } from './app.controller';
import { AppService } from './app.service';
import { TodoModule } from './features/todo/todo.module';

@Module({
  imports: [TodoModule],
  controllers: [AppController],
  providers: [
    AppService,
    {
      provide: APP_PIPE,
      useClass: ValidationPipe
    }
  ],
})
export class AppModule {}
小结
ValidationPipe 与 DTO 的验证机制十分好用且重要,任何的 API 都需要做好完善的资料检查,才能够降低带来的风险。这里附上今天的懒人包:
-
ValidationPipe需要安装class-validator及class-transformer。 - 透过
ValidationPipe可以实现 DTO 格式验证。 -
ValidationPipe可以透过disableErrorMessages关闭错误细项。 -
ValidationPipe一样可以透过exceptionFactory自订 Exception。 -
ValidationPipe可以透过whitelist来过滤无效参数,如果接收到无效参数想要回传错误的话,还需要额外启用forbidNonWhitelisted。 -
ValidationPipe可以透过transform来达到自动转换型别的效果。 - 用
ParseArrayPipe解析阵列 DTO 以及查询参数。 - DTO 可以透过
PartialType、PickType、OmitType、IntersectionType这四个函式来重用 DTO 的栏位。 - 全域 Pipe 可以透过依赖注入的方式实作。
<<: Day 10- 物品借用纪录系统 (2) 设定 Calendar
>>: day10: CSS style 规划 - utility CSS(Tailwind)-1
Day 13 - Kotlin的集合(2)
Day 11 - Kotlin的函式(2) 昨天我们讲了list集合,以及如何取得数值,今天我们要继...
前端工程师也能开发全端网页:挑战 30 天用 React 加上 Firebase 打造社群网站|Day16 文章留言区块
连续 30 天不中断每天上传一支教学影片,教你如何用 React 加上 Firebase 打造社群...
【图解演算法】【Hash】 LeetCode 459 Repeated Substring Pattern
Question link: https://leetcode.com/problems/repea...
Day.20 「初步认识 this,中央工厂式的自订物件~」 —— JavaSript 构造函式
如同学习函式一样!有时候我们会一直重复地做一件事, 当还是初学者的我们需要制作大量的个人资料物件时...
Day38 参加职训(机器学习与资料分析工程师培训班),RNN
早上前2堂: RNN X_Data = ['good', 'bad', 'worse', 'so g...