Vue3 ( JsES6、this、指令、OptionAPI ) -1
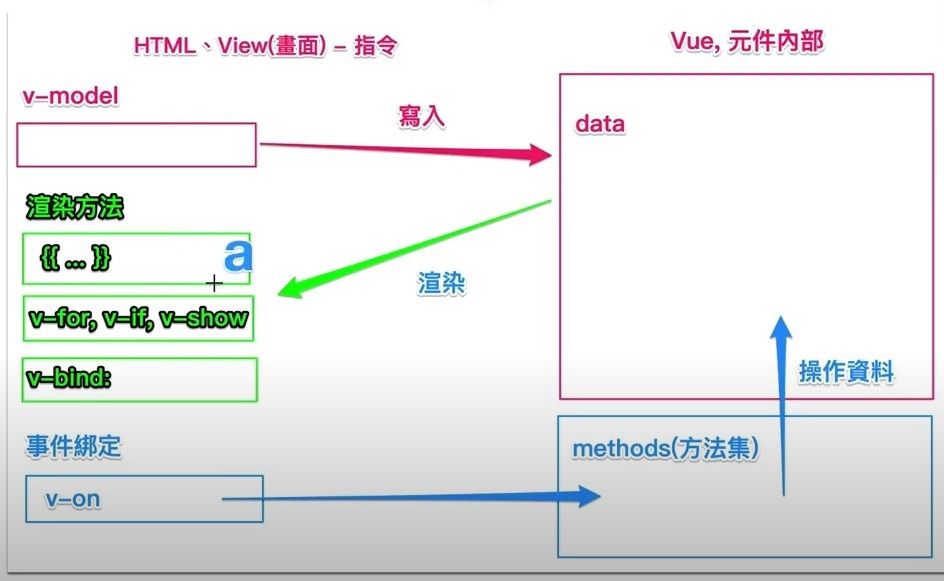
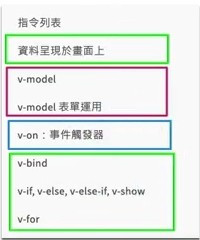
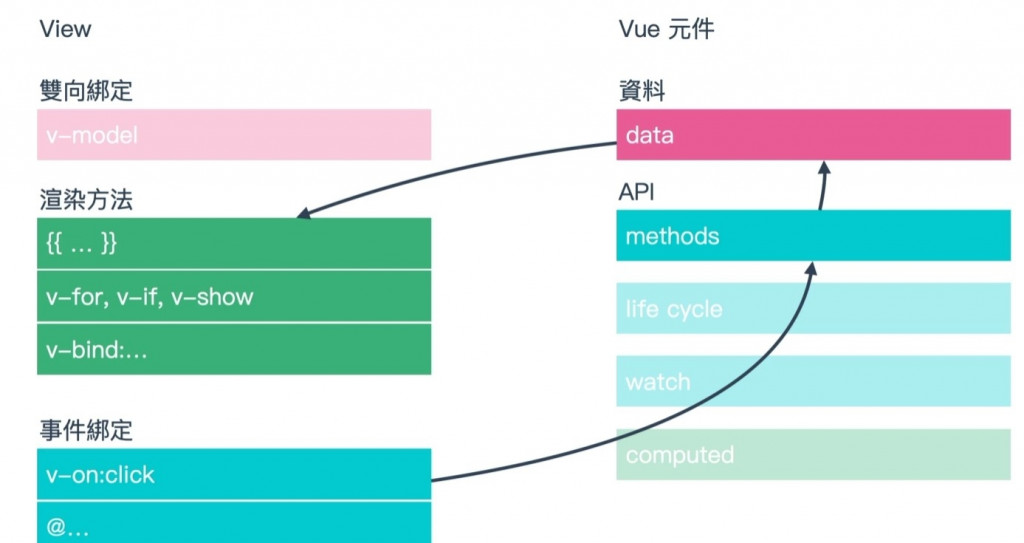
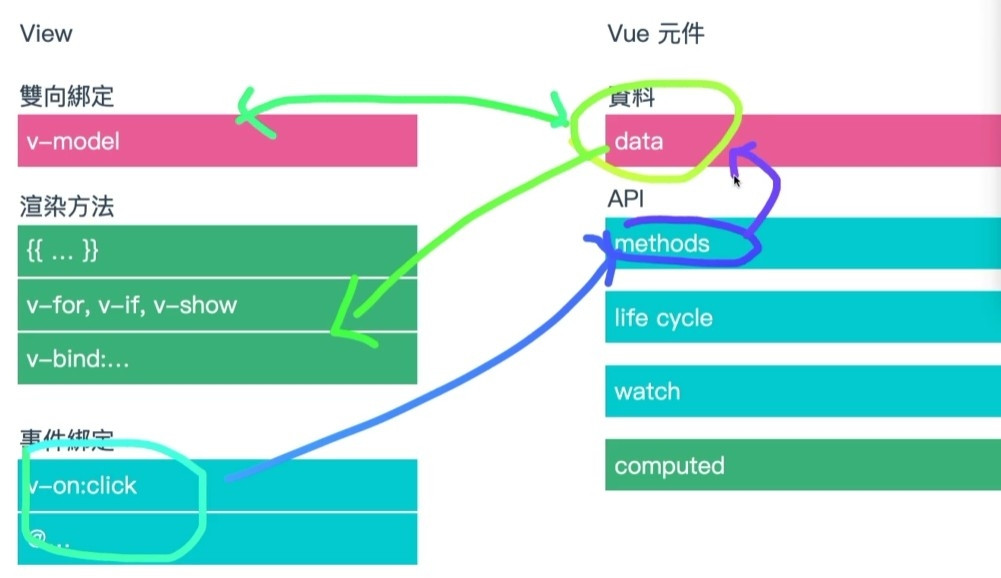
1.v-mould写入、渲染
(1)
(2)
(3)
(4)
(5)
(6)
重点:
1.阵列 与 物件 都可以跑 v-for
2.v-on记得抓前参数
( ex:v-on:click="addTempForm(temp)"
是抓 v-for="(item , key) in tempForm"
此时有东西是因为 tempObj(item) )
3.this通通都是指data return内的东西 (传进来的值(item),无需使用this)
4.标签内渲染 v-for(显示次数)、v-bind(接html标签属性)、v-model(input写入资料,要先有仓库)
5.标签外渲染{{}}
6.class + v-bind:class OK
v-model 绑定方法:checkbox、radio、option 抓 :value
v-model 绑定方法:text、textarea、number 抓输入值
         <input
            v-model="qty"
            type="number"
            class="form-control"
            placeholder="Username"
            aria-label="Username"
            aria-describedby="basic-addon1"
          />
        </div>
2.ES6
(1)this
callback function 内 this 会指向 windows, 用=>指向本身
            var someone = "全域";
            function callSomeone() {
              console.log(this.someone);
            }

            var obj4 = {
              someone: "物件 4",
              fn() {
                setTimeout(function () {
                  console.log(this.someone);
                });
              },
            };

            obj4.fn(); //全域
      var obj4 = {
              someone: "物件 4",
              fn() {
                setTimeout(() => {
                  // callback function this 通常会指向 simple call(全域)
                  console.log(this.someone);
                });
              },
            };

            obj4.fn(); //物件 4
物件内的this会指向本身(物件), 用=>会指向全域
             const obj2 = {
              myName: "888",
              callName() {
                console.log(this.myName);    //=>
              },
            };

            obj2.callName(); //888
(2)汇入
预设汇入,因为预设汇出没有名字,所以可以为它命名
            import newComponent from "./export1.js";
            newComponent.init();
具名汇入
            import { a, b } from "./export2.js";
            console.log(a);
            b();
(3)拷贝
浅层拷贝
            const person2 = Object.assign({}, person); //{}空物件,塞进person的内容
            const person3 = {
              ...person, //展开
            };
深层拷贝,先转成字串,再转成物件
const person2 = JSON.parse(JSON.stringify(person));
(4)Promise 成功then接收、失败catch接收
            const promiseSetTimeout = (status) => {
              return new Promise((resolve, reject) => {
                setTimeout(() => {
                  if (status) {
                    //成功 then接收
                    resolve("promiseSetTimeout 成功");
                  } else {
                    //失败 catch接收
                    reject("promiseSetTimeout 失败");
                  }
                }, 1000);
              });
            };
(5)解析附值 - ES6 新增功能
可以单独抓物件内的属性,将该属性转变数
let apple = {price:123 , name:"偶素萍狗"}
let {price} = apple;

console.log(price)  // 123
旧
let price = apple.price
console.log(price) //123
物件内阵列
let myBee = {priec:123,arr:[1,2,3]}
let {arr} = myBee;

console.log(arr) //[1,2,3]
3.template
v-model 绑定方法:checkbox、radio、option 抓 value
v-model 绑定方法:text、textarea 抓输入值
<h3>5. checkbox 复选框</h3>
<p>你还要吃什麽?</p>
<p>{{ checkAnswer3.join(' ') }}</p>
<div class="form-check">
  <input type="checkbox" v-model="checkAnswer3" class="form-check-input" id="check3" value="蛋饼" />
  <label class="form-check-label" for="check3">蛋饼</label>
</div>
<div class="form-check">
  <input type="checkbox" v-model="checkAnswer3" class="form-check-input" id="check4" value="萝卜糕" />
  <label class="form-check-label" for="check4">萝卜糕</label>
</div>
<div class="form-check">
  <input type="checkbox" v-model="checkAnswer3" class="form-check-input" id="check5" value="豆浆" />
  <label class="form-check-label" for="check5">豆浆</label>
</div>
<input type="text" class="form-control" v-model="name" />
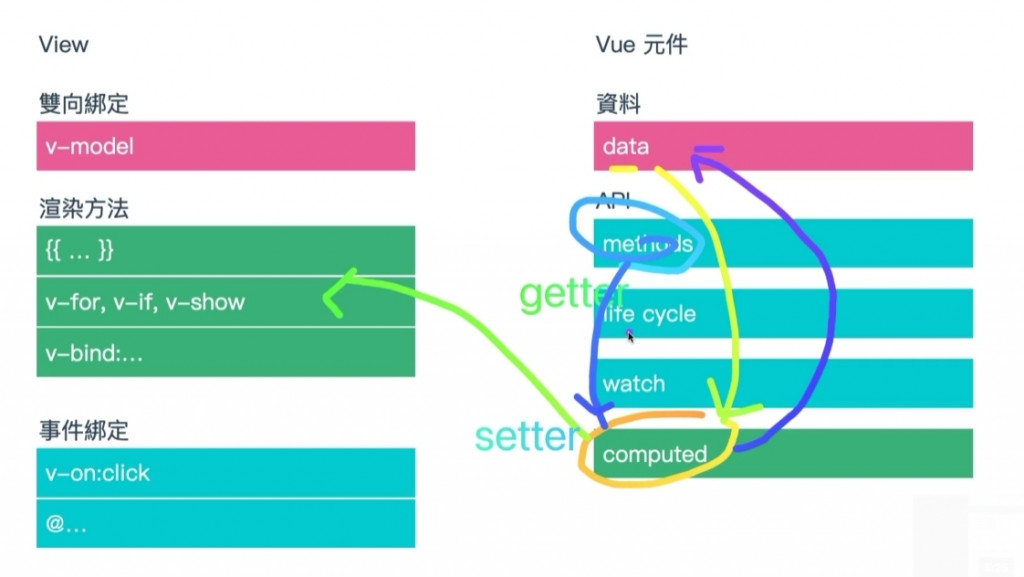
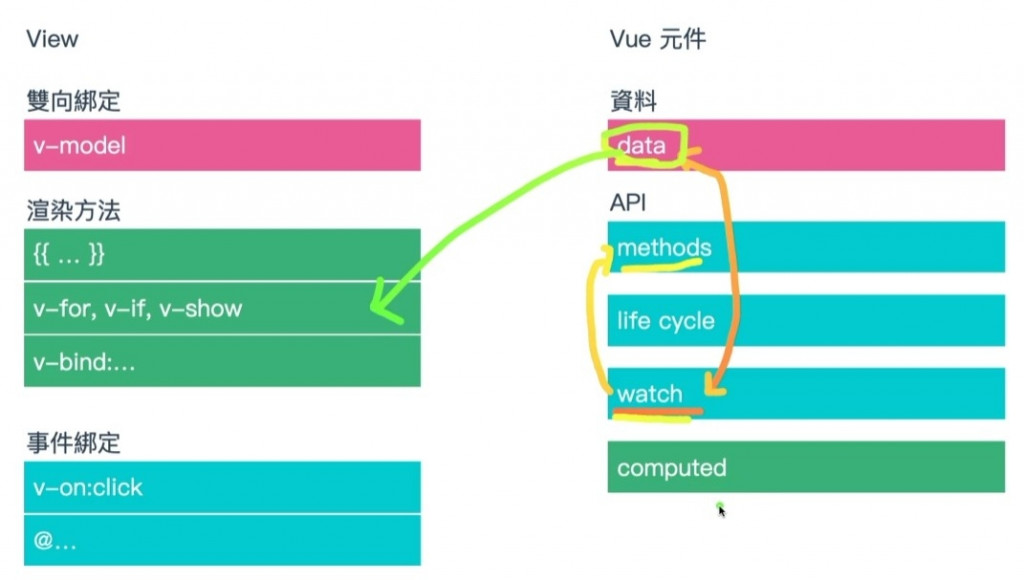
4.optionsApi
(1)利用生命周期被动的特性,先抓API资料
created() {
    const apiUrl = 'https://raw.githubusercontent.com/hexschool/KCGTravel/master/datastore_search.json';
    axios.get(apiUrl).then((res) => {
      this.datastore = res.data.result.records;
    });
 },
(2)搜寻功能,使用computed监听
v-model 写入,需有仓库
        <input
        v-model="search"
        type="text" class="form-control" id="search" placeholder="search" >
          data() {
            return {
              // 仓库
              search: "",  //v-model="search"
            };
          },
  computed: {
      filterData() {
        // 抓this.datastore的全部物件,供配对
        // 第一个return给computed
        return this.datastore.filter((item1) => {
          console.log(item1);
          // search输入的值,有符合item1.name的时候,match配对,回传
          // 第二个return给filter
          return item1.Name.match(this.search);
        });
      },
    },
(3)computed vs watch
a. computed
监听变数(data内无该变数)
productName、productPrice、productVegan,改变会执行 result2()
result2() {
  // v-model 绑了
  return `妈妈买了 ${this.productName},总共花费 ${this.productPrice} 元,另外这 ${
    this.productVegan ? "是" : "不是"
  } 素食的`;
},
b. watch
data内的变数可以拿出来直接监听,使用:放function名称
被监听的data变数改变,执行该function
 productName() {
   this.result3 = `妈妈买了 ${this.productName},总共花费 ${this.productPrice} 元,另外这 ${
     this.productVegan ? "是" : "不是"
   } 素食的`;
 },
(4)生命周期
              // 资料准备完成
              created() {
                console.log(`created! ${this.text}`);
                alert(`created! ${this.text}`);
              },
              // 元素已挂载(方法)
              // Jq、Bs写这里面
              mounted() {
                alert(`mounted! ${this.text}`);
              },
              // 隐藏元件 卸载
              beforeUnmount() {
                console.log(`beforeUnmount! ${this.text}`);
              },
              unmounted() {
                console.log(`unmounted! ${this.text}`);
              },
for vs forEach vs filter
1.for要有起、讫、一次走几个
      for (let index = 0; index < array.length; index++) {
        const element = array[index];
          };
2.forEach无须给长度,依序走访每个阵列内元素,index=第几个
      array=[{name:1},{name:2},{name:3}]
      array.forEach((element,index) => {
          });
3.filter给判断式,回传阵列
      var aaa = array.filter(element=>{
      return
      });
<<: 【从零开始的 C 语言笔记】第九篇-scanf 介绍 & 结合printf的应用 (1)
>>: 【从零开始的 C 语言笔记】第十篇-scanf 介绍 & 结合printf的应用 (2)
[Day30]程序菜鸟自学C++资料结构演算法 – 心得总结
前言:今天是铁人赛的第30天,但实际上花了一个多月的时间准备,因为自认自己的实力还不够好,所以有提前...
Day 03 - jS 微基础之ES6变数: let, const
在前一篇文章中描述了基本的jS操作,这篇要讨论关於变数的定义。 推出很久的ES6(2015)中定义了...
Day 22 - IO Monad
上一章节简单的介绍如何处理 side effect 的其中一个方法 dependency injec...
DAY14: HTPP服务器:Respone对象
在Day13: HTTP这篇的范例中很常看到使用respone对象,而respone对象就是Seve...
[深入浅出MQTT]: v3.1.1与v5 的差异
[深入浅出MQTT]: v3.1.1与v5 的差异 MQTT v3.1.1 与 v5 完全相容,且提...