Day6 用python写UI-聊聊标签Label方法(一)
今天要来聊标签Label方法,这个部分会分成两个主题来讲,今天会先讲widget的共通属性,明天会讲widget共通方法,那我们就开始吧(❁´◡`❁)
♠♣今天的文章大纲♥♦
- Label 的语法
- widget的共通属性
Label 的语法
label(master,options,...)
master是框架的父物件。
options是该标签可以设置的属性。
import tkinter as tk
root = tk.Tk()
root.title('cuteluluWindow')
root.configure(bg="#7AFEC6")
root.iconbitmap( 'heart_green.ico')
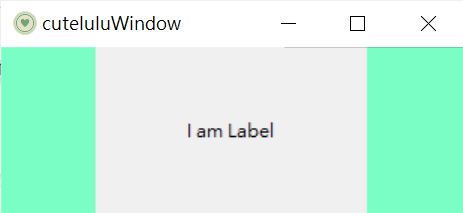
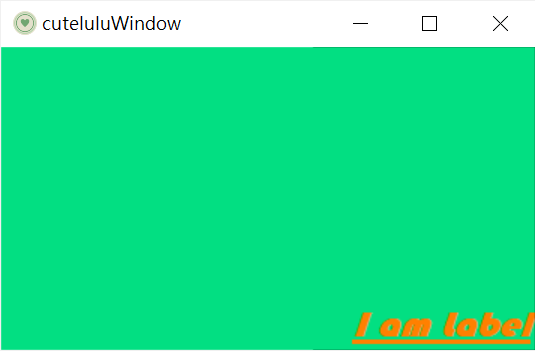
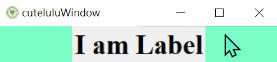
text=tk.Label(root, text='I am Label') #建立标签
text.pack() #包装与定位元件
print(type(text)) #回传Label资料型态
root.mainloop()
建立一个标签,内容写 I am Label,同时回传Label的资料型态在Python Shell 视窗列。
下图为执行结果⬇⬇⬇


widget的共通属性
-
dimensions 大小
height 长度 ,width宽度。
import tkinter as tk
root = tk.Tk()

root.title('cuteluluWindow')
root.configure(bg="#7AFEC6")
root.iconbitmap('heart_green.ico')

text=tk.Label(root, text='I am Label',
              height=7,width=25,) #设定标签高度为7宽度为25
text.pack()

root.mainloop()
执行结果⬇⬇⬇
视窗大小会因标签的宽高而有改变。
-
colors 颜色
bg 背景颜色 ,fg 前景颜色。
import tkinter as tk
root = tk.Tk()

root.title('cuteluluWindow')
root.configure(bg="#7AFEC6")
root.iconbitmap('heart_green.ico')

text=tk.Label(root, text='I am Label',
              height=7,width=25,
              fg="#FF8000",bg="#02DF82") #更改前景与背景的颜色
text.pack()

root.mainloop()
执行结果⬇⬇⬇
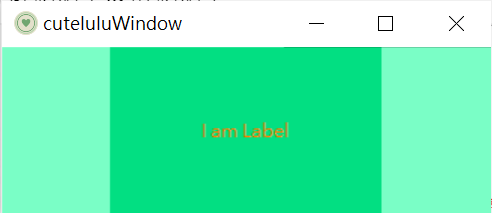
标签背景改成绿色,文字改成橘色。
-
fonts 字型
family 字体 : Times New Roman..
size 大小 : 像素为单位
weight 粗细 : bold、normal
slant 倾斜 : italic、roman
underline 底线 : True、False
overstrike 中间横杠 : True、False
import tkinter as tk
root = tk.Tk()

root.title('cuteluluWindow')
root.configure(bg="#7AFEC6")
root.iconbitmap('heart_green.ico')

text=tk.Label(root, text='I am Label',
              height=7,width=25,
              fg="#FF8000",bg="#02DF82",
              font=("Bauhaus 93",18,"bold","italic","underline")) #设定字型
text.pack()

root.mainloop()
执行结果⬇⬇⬇
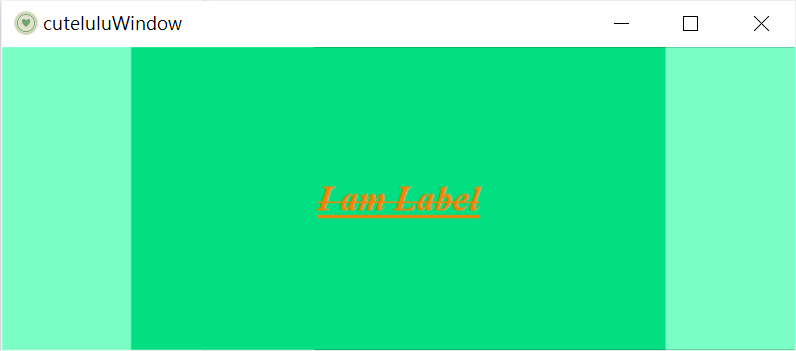
使用Times字型、加粗字体、斜体字以及底线跟中间横杠
-
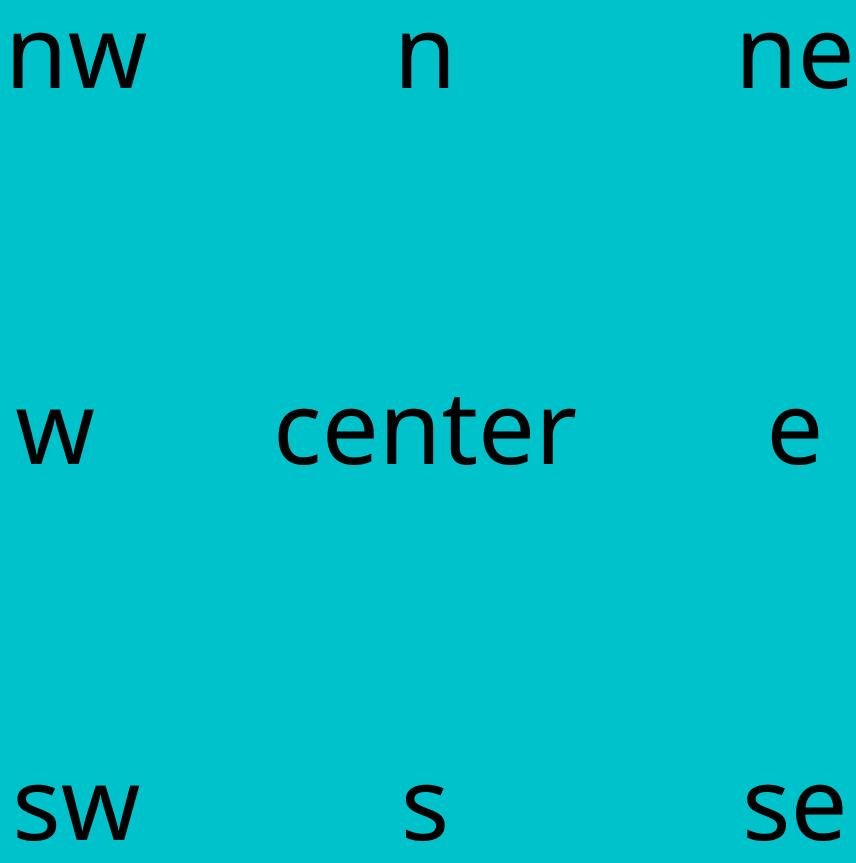
anchor 锚
标签文字在标签位置的设定,预设是在置中的位置
import tkinter as tk
root = tk.Tk()

root.title('cuteluluWindow')
root.configure(bg="#7AFEC6")
root.iconbitmap('heart_green.ico')

text=tk.Label(root, text='I am Label',
              height=7,width=25,
              fg="#FF8000",bg="#02DF82",
              font=("Bauhaus 93",18,"bold","italic","underline"),
              anchor='se') #设定标签位置
text.pack()

root.mainloop()
执行结果⬇⬇⬇
标签在右下位置
-
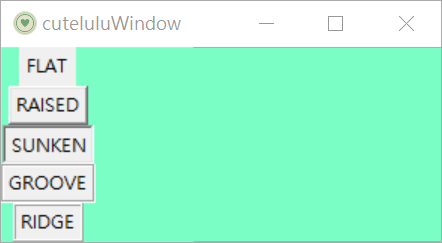
relief styles 边框
有五种标签,分别为flat、raised、sunken、groove、ridge
import tkinter as tk
root = tk.Tk()

root.title('cuteluluWindow')
root.configure(bg="#7AFEC6")
root.iconbitmap('heart_green.ico')

R1 = tk.Button(root, text ="FLAT", relief="flat") #建立flat标签
R2 = tk.Button(root, text ="RAISED", relief="raised") #建立raised标签
R3 = tk.Button(root, text ="SUNKEN", relief="sunken") #建立sunken标签
R4 = tk.Button(root, text ="GROOVE", relief="groove") #建立groove标签
R5 = tk.Button(root, text ="RIDGE", relief="ridge") #建立ridge标签

R1.grid()
R2.grid()
R3.grid()
R4.grid()
R5.grid()

root.mainloop()
执行结果⬇⬇⬇
-
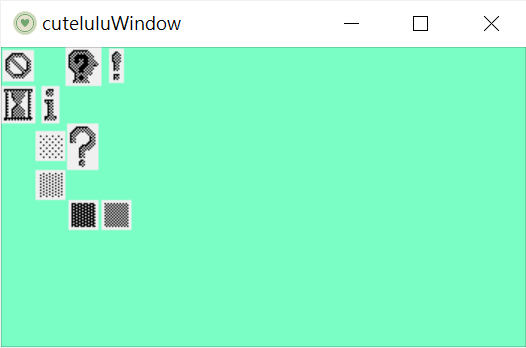
bitmaps位元图
有十种位元图
error、hourglass、info、questhead、question、
warning、gray12、gray25、gray50、gray75
import tkinter as tk
root = tk.Tk()

root.title('cuteluluWindow')
root.configure(bg="#7AFEC6")
root.iconbitmap('heart_green.ico')
root.geometry("350x200+200+300")

B1=tk.Label(root,bitmap="error")    #建立error位元图
B2=tk.Label(root,bitmap="hourglass") #建立hourglass位元图
B3=tk.Label(root,bitmap="info")     #建立info位元图
B4=tk.Label(root,bitmap="questhead") #建立questhead位元图
B5=tk.Label(root,bitmap="question") #建立question位元图
B6=tk.Label(root,bitmap="warning") #建立warning位元图
B7=tk.Label(root,bitmap="gray12") #建立gray12位元图
B8=tk.Label(root,bitmap="gray25") #建立gray25位元图
B9=tk.Label(root,bitmap="gray50") #建立gray50位元图
B10=tk.Label(root,bitmap="gray75") #建立gray75位元图

B1.grid(row=0,column=0)
B2.grid(row=1,column=0)
B3.grid(row=1,column=1)
B4.grid(row=0,column=2)
B5.grid(row=2,column=2)
B6.grid(row=0,column=3)
B7.grid(row=2,column=1)
B8.grid(row=3,column=1)
B9.grid(row=4,column=3)
B10.grid(row=4,column=2)


root.mainloop()
执行结果⬇⬇⬇
-
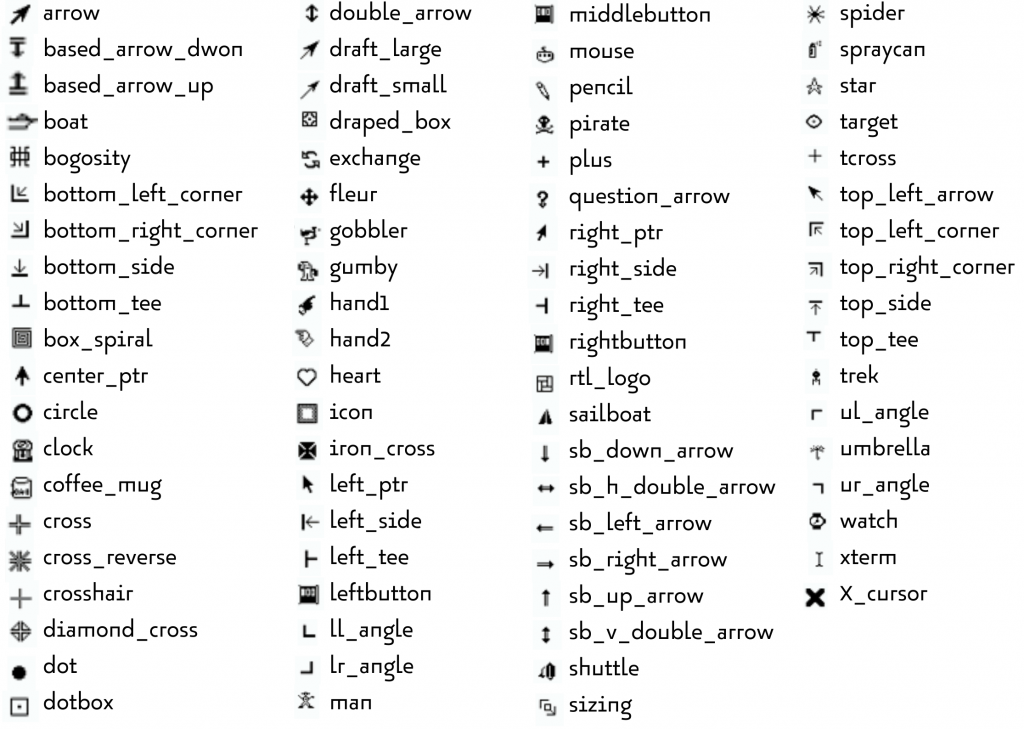
cursors滑鼠外形
设计滑鼠在标签(Label)或按钮(Botton)时的外型
import tkinter as tk
root = tk.Tk()

root.title('cuteluluWindow')
root.configure(bg="#7AFEC6")
root.iconbitmap('heart_green.ico')

text=tk.Label(root, text='I am Label',
              font="Times 25 bold",
              cursor='draped_box') #设定滑鼠移到标签上後会变成星星图案
text.pack()

root.mainloop()
执行结果⬇⬇⬇
滑鼠移到标签上後显示星星图案

以上是label基本介绍以及widget共通属性的使用,明天会再接着介绍widget共通方法的使用
(^U^)ノ~YO

qclipboard 用法
在main中初始化,传给处理模块: ClipBoardManagement clipboardMan...
【Day14】利用Ezyme来跑个小小测试,还有..测试权衡是虾咪东东 (•ө•)!!?
写测试时,我们基本需要三样东西 Enzyme Enzyme跟React沟通的适配器(Adapter)...
不要在 mutation 加工 API 回来的资料
mutation 当作 state 的 setter 使用。 要符合 setter 的使命,挡掉错误...
27. Tech leader的重要战略
前言 这篇的讲者很nice,直接讲了这篇演讲很适合给这几种人看 刚成为TL 还不是TL但你觉得你会...
Day15-Webhook 实作(四)LINEBot 之 MessageBuilder(II)
大家好~ 今天来实作 Imagemap message 与 Template message 吧! ...