[ 卡卡 DAY 5 ] - Style in React Native - inline style vs StyleSheet
在 React Native 提供两种方式引入样式
- 写 inline style
- 运用官方提供的 StyleSheet 的 function 建立一个抽象的 css,来引入
我们先来简单的介绍,再来讲使用哪个好 :)
先来讲讲 style name
React Native 的 样式名称与 css 雷同,但又有点不相同。
- 命名方式
- css - Kebeb Case
- RN - camelCase
以背景颜色来举例: - css -> background-color
- RN -> backgroundColor
- margin/border/padding
- css - 可以一次写四个边
- RN - 直接看例子吧XXD
// css
margin: 20px 40px;
paading: 10px 20px 40px 5px;
border: 1px solid #aaa;

//RN
marginHorizontal: 40, //左右
marginVertical: 20, //上下
paadingTop: 10,
paddingLeft: 5,
paddingRight: 20,
paddingBottom: 40,
borderWidth: 1,
borderColor: "#aaa",
borderStyle: "solid",
当然这个写起来真的会觉得...怎麽那麽多啊啊,之後章节也会教大家如何使用 js 来将一切简化:P
以上种种无法所有都举例出来,但是明显发现还是有小小差异,但原理基本上是与 css 一样的
RN 无需加入单位'px',他的默认为dp。
160PPI下:
1dp = 1px = 1dip
1pt = 1/72in
1pt = 160/72 sp
推导过程
160 PPI = 160px/1in = 160dp/1in
1pt = 1/72in => 1in = 72pt
1pt = 160dp/72
1px = dp * (density / 160)

不同PPI的dp与px的换算关系
160PPI(mdpi) : 1dp = 1px
240PPI(hdpi) : 1dp = 1.5px
320PPI(xhdpi) : 1dp = 2px
iPhone 4, 4S ; iPhone 5, 5c, 5s ; iPhone 6都是这个ppi
480PPI(xxhdpi) : 1dp = 3px
简单来讲,就是自动会帮忙换算单位的意思,所以无需加入单位!
StyleSheet
React Native 提供了 StyleSheet 的 function
creact()
Creates a StyleSheet style reference from the given object.
App.js
const styles = StyleSheet.create({
  sectionContainer: {
    marginTop: 32,
    paddingHorizontal: 24,
  },
  sectionTitle: {
    fontSize: 24,
    fontWeight: '600',
  },
  sectionDescription: {
    marginTop: 8,
    fontSize: 18,
    fontWeight: '400',
    marginHorizontal: 50,
    marginVertical: 0,
  },
  highlight: {
    fontWeight: '700',
  },
});
如程序码来看,建立了四个 style,可提供使用。
App.js
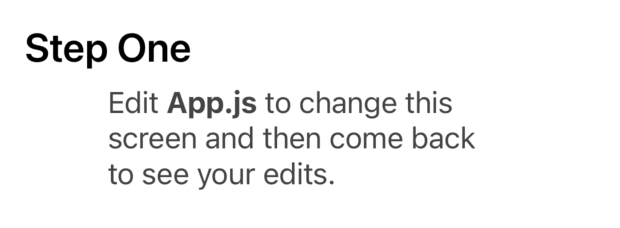
<Section title="Step One">
    Edit <Text style={styles.highlight}>App.js</Text> to change this
    screen and then come back to see your edits.
</Section>
而上面的程序码引入的是
  highlight: {
    fontWeight: '700',
  },
PS.当然一次也可以引用很多个 StyleSheet 的样式,也可以在混用 inlineStyle,只要把标签中的 style 改成阵列方式即可!但是後面的样式将会将前面的样式覆盖掉唷!
inline style 直接把样式写在元件上面
React Native 标签中的 style 是可以写成阵列的!!!什麽意思呢?
App.js
<Section title="Step One">
    Edit <Text style={styles.highlight}>App.js</Text> to change this
    screen and then come back to see your edits.
</Section>
Text 标签中有写着 StyleSheet的style -> styles.highlight
如何在加上新的 inline style 一起使用呢?
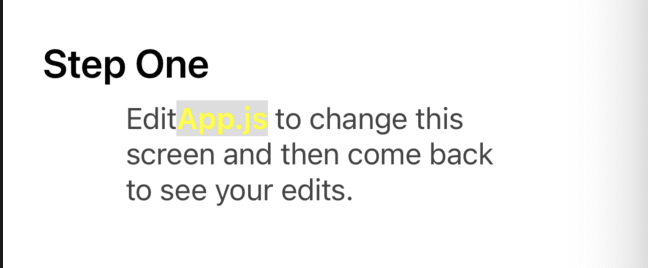
我们来帮他改字的颜色及背景色吧!!!
App.js
<Section title="Step One">
    Edit <Text style={[styles.highlight, {color: 'yellow',backgroundColor:"#ddd"}]}>App.js</Text>{' '}
    to change this screen and then come back to see your edits.
</Section>
将 style 改成阵列的方式,加上自己所要的 style 即可,呈现如下
inline style vs StyleSheet
在深入的找寻中看到有人的分享,在早期的官方文件中,给出了需要使用 StyleSheet 的原因。
Code quality:
- By moving styles away from the render function, you're making the code easier to understand.
- Naming the styles is a good way to add meaning to the low level components in the render function.
Performance:- Making a stylesheet from a style object makes it possible to refer to it by ID instead of creating a new style object every time.
- It also allows to send the style only once through the bridge. All subsequent uses are going to refer an id (not implemented yet).
统整上官方的解释 inline style vs StyleSheet
- 当页面的元素更新,写 inline style 的每次都需要被重新的创建,而 StyleSheet 的不需要重新被创建。
- StyleSheet 可重复被使用又可以赋予有意义的命名,简单易识别。
但 inline style 仍然有被使用的必要,像是在判断的时候 :P
<StatusBar barStyle={isDarkMode ? 'light-content' : 'dark-content'} />
所以简单来讲,要使用哪个写法,要因处境自己做判断,并不是绝对的唷!
Day 5 done 欢迎指教 <3
<<: [Day05] TS:如何把物件型别的所有属性值取出变成 union type?试试 Indexed Access Types
>>: Day-9 Divide-and-Conquer-4 : Quicksort, 随机化Quicksort
Day33 | 赛後中场休息 X 复刊时间
赛後中场休息 X 复刊时间 大家好,我是韦恩,今天开始将会暂缓完赛後的系列的发文,复刊时间约在下下礼...
Docker - Docker 执行 Maven
Docker - Docker 执行 Maven 参考资料 Docker 指令参考: [小抄] Do...
[Day06] 第六章- 开发环境安装(xampp,vscode,composer)
目标 安装环境 勘误修正及补充 1. 前言 到目前为止 已经把永丰的api参数以及相关制作流程做完了...
[Day 22] 谈 test double 的五种类型
昨天我们讲了针对 removeTag() 的单元测试 不过,如果我们考虑到针对 updateUser...
Day21 CSS完成简单的网页排版!
前面我们有了导览列加上banner区块!接下来的排版就可以很快速地套用我们之前所学,display:...