Day31 - JS30 - 16 - Mouse Move Shadow
参考资料:
Alex老师教学
pjchender笔记
JS30-Day16-Mouse Move Shadow
铁人赛30天结束後偷懒了几天才继续来练习。
随滑鼠移动的阴影。
抓取节点并做出监听
const hero = document.querySelector('.hero');
hero.addEventListener('mousemove', shadow);
开始制作内容
let shadow = e => {
        console.log(e);
    };
用滑鼠滑一下可以看到:(框内是要使用的属性)
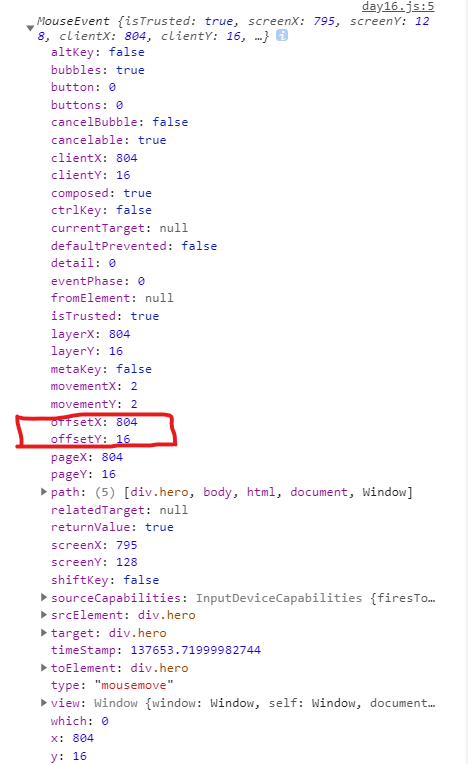
要使用e.offsetX和e.offsetY,有以下几种作法
let shadow = e => {
        // console.log(e);

        // 传统作法
        let x = e.offsetX;
        let y = e.offsetY;

        // 比较新的作法 - 把offsetX, offsetY拆出来
        let { offsetX, offsetY } = e;

        // 更加新的作法- 把offsetX, offsetY拆出来後命名成x,y
        let { offsetX: x, offsetY: y } = e;
    };
看左上角接近(0,0)和右下角接近(1,1)的数值
			console.log(
            offsetX / this.offsetWidth,
            offsetY / this.offsetHeight
            );
但这时会发现只要滑到文字上,数值就会不正确,因为是另一个座标,必须手动把距离加回去
// 触发的座标不是hero而是内层,就补回距离
        if (e.target !== this) {
            offsetX += e.target.offsetLeft;
            offsetY += e.target.offsetTop;
        }
开始制作阴影
const text = document.querySelector('h1'); //要做出阴影的节点
 let moveLength = 100; //阴影移动距离
移动座标
let moveX = Math.floor((offsetX / this.offsetWidth) * moveLength);
let moveY = Math.floor((offsetY / this.offsetHeight) * moveLength);
 // 整数化,无条件舍去
红色阴影*1
			text.style.textShadow=`
        ${moveX}px ${moveY}px 3px rgba(255,0,0,0.8)
        `
绿色阴影,出现位置在滑鼠反方向
text.style.textShadow = `
        ${moveX*-1}px ${moveY*-1}px 3px rgba(0,255,0,0.8)
        `;
修改阴影数据,使滑鼠滑到反方向也可以呈现
let moveX = Math.floor((offsetX / this.offsetWidth) * moveLength) * 2 - moveLength;
let moveY = Math.floor((offsetY / this.offsetHeight) * moveLength) * 2 - moveLength;
// 整数化,无条件舍去
阴影效果
			text.style.textShadow = `
        ${moveX}px ${moveY}px 1px rgba(255,0,0,0.8),
        ${moveX * -1}px ${moveY * -1}px 2px rgba(0,255,0,0.8),
        ${moveX}px ${moveY * -1}px 3px rgba(0,0,255,0.8),
        ${moveX * -1}px ${moveY}px 4px rgba(200,255,255,0.8)
        `;
视差效果
	text.style.textShadow = `
        ${moveX*-0.3}px ${moveY*-0.3}px 1px rgba(255,0,0,0.8),
        ${moveX * -1}px ${moveY * -1}px 2px rgba(0,255,0,0.8),
        ${moveX*-0.6}px ${moveY * -0.6}px 3px rgba(0,0,255,0.8)
        `;
改成箭头函式
(function () {
    const hero = document.querySelector('.hero'); //阴影移动的范围
    const text = document.querySelector('h1'); //要做出阴影的节点
    let moveLength = 100; //阴影移动距离

    let shadow = e => {
        // function shadow(e) {
        // 拆出滑鼠移动的座标
        // 传统作法
        // let x = e.offsetX;
        // let y = e.offsetY;

        // 比较新的作法 - 把offsetX, offsetY拆出来
        // let { offsetX, offsetY } = e;
        let { offsetX, offsetY, target, currentTarget } = e;

        // 更加新的作法 - 把offsetX, offsetY拆出来後命名成x,y
        // let { offsetX: x, offsetY: y } = e;

        // console.log(e.target.offsetLeft);
        // console.log(e.target.offsetTop);

        // 触发的座标不是hero而是内层,就补回距离
        // if (e.target !== this) {
        // 如果用箭头函式,此处this可以换成e.currentTarget
        if (target !== currentTarget) {
            offsetX += target.offsetLeft;
            offsetY += target.offsetTop;
        }

        // let moveX = Math.floor((offsetX / this.offsetWidth) * moveLength) * 2 - moveLength;
        // let moveY = Math.floor((offsetY / this.offsetHeight) * moveLength) * 2 - moveLength;
        let moveX = Math.floor((offsetX / currentTarget.offsetWidth) * moveLength)  * 2 - moveLength;
        let moveY = Math.floor((offsetY / currentTarget.offsetHeight) * moveLength)  * 2 - moveLength;
        // 整数化,无条件舍去

        // text.style.textShadow = `
        // ${moveX}px ${moveY}px 1px rgba(255,0,0,0.8),
        // ${moveX * -0.5}px ${moveY * -2}px 2px rgba(0,255,0,0.8),
        // ${moveX*-0.3}px ${moveY * -0.6}px 3px rgba(0,0,255,0.8),
        // ${moveX * -1.5}px ${moveY*-0.3}px 4px rgba(200,255,255,0.8)
        // `;
        text.style.textShadow = `
        ${moveX * -0.3}px ${moveY * -0.3}px 1px rgba(255,0,0,0.8),
        ${moveX * -1}px ${moveY * -1}px 2px rgba(0,255,0,0.8),
        ${moveX * -0.6}px ${moveY * -0.6}px 3px rgba(0,0,255,0.8)
        `;
    };

    hero.addEventListener('mousemove', shadow);
})();
<<: Rails入门:疑难杂症~~ 无情dubug!! 上传Heroku先从资料库开始 PostgreSQL
>>: Day32 - JS30 - 17 - Sort Without Articles
IOS、Python自学心得30天 Day-4 TensorFlow 资料处理
前言: 到了要开始处理资料的部分,因为影像资料会有档案太大或是大小不一的问题,所以都要先预设成固定的...
#Day20--那些年,我们一起犯的傻
这篇会是一个中场休息,但主要会分享的是,我在踏入实作的那一瞬间,对於写程序所产生的不良习惯,希望可以...
Day.4深入理解连结之Object file
目标文件格式 (Object file) 可重定位目标文件 (Relocatable Object ...
Day2-K8s?
一个技术要火起来有时候不只要有真本事?还需要一点时机,巧合,比如发明平板的其实是微软,但让平板走入大...
Day 17:专案03 - PTT 八卦版爬虫02 | session、post
昨天教到使用cookie让服务器记得我们曾经做过哪些事,但缺点就是每次Request都要加上cook...