<Day29>动手做 Demo App(上)
依据前面几篇所学的,实作一个简单的新增联络人名字Demo App
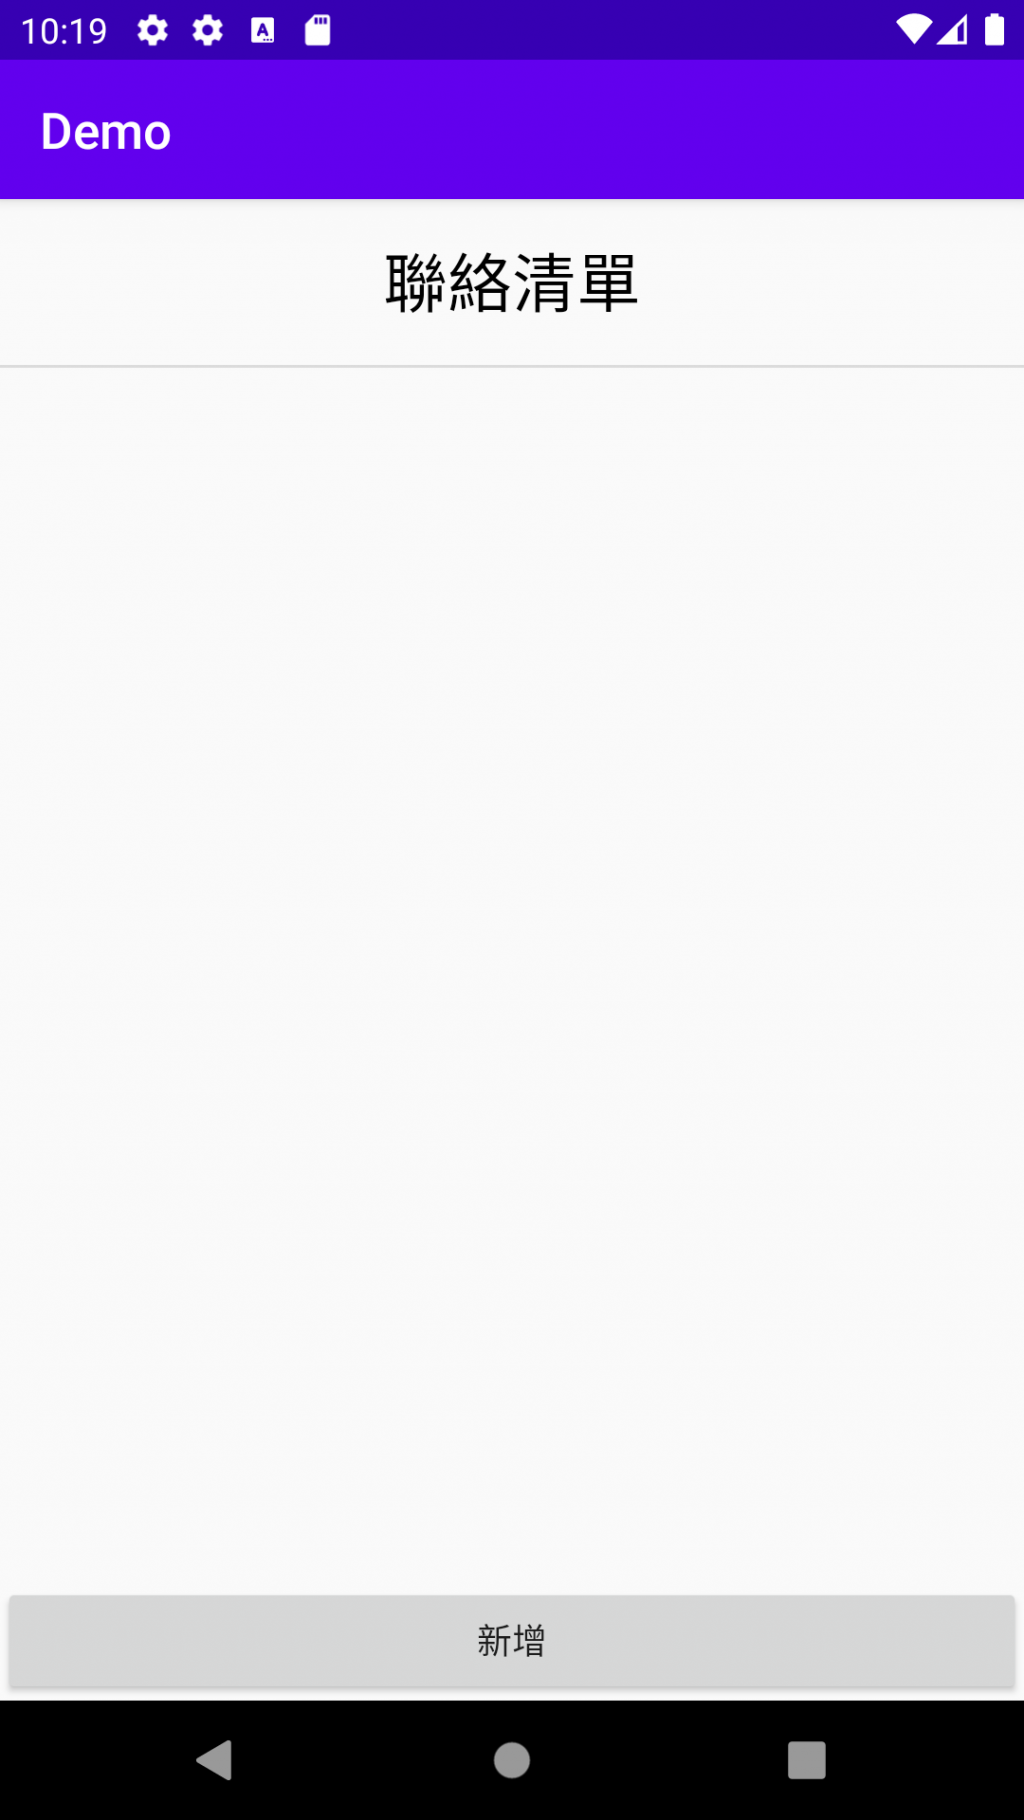
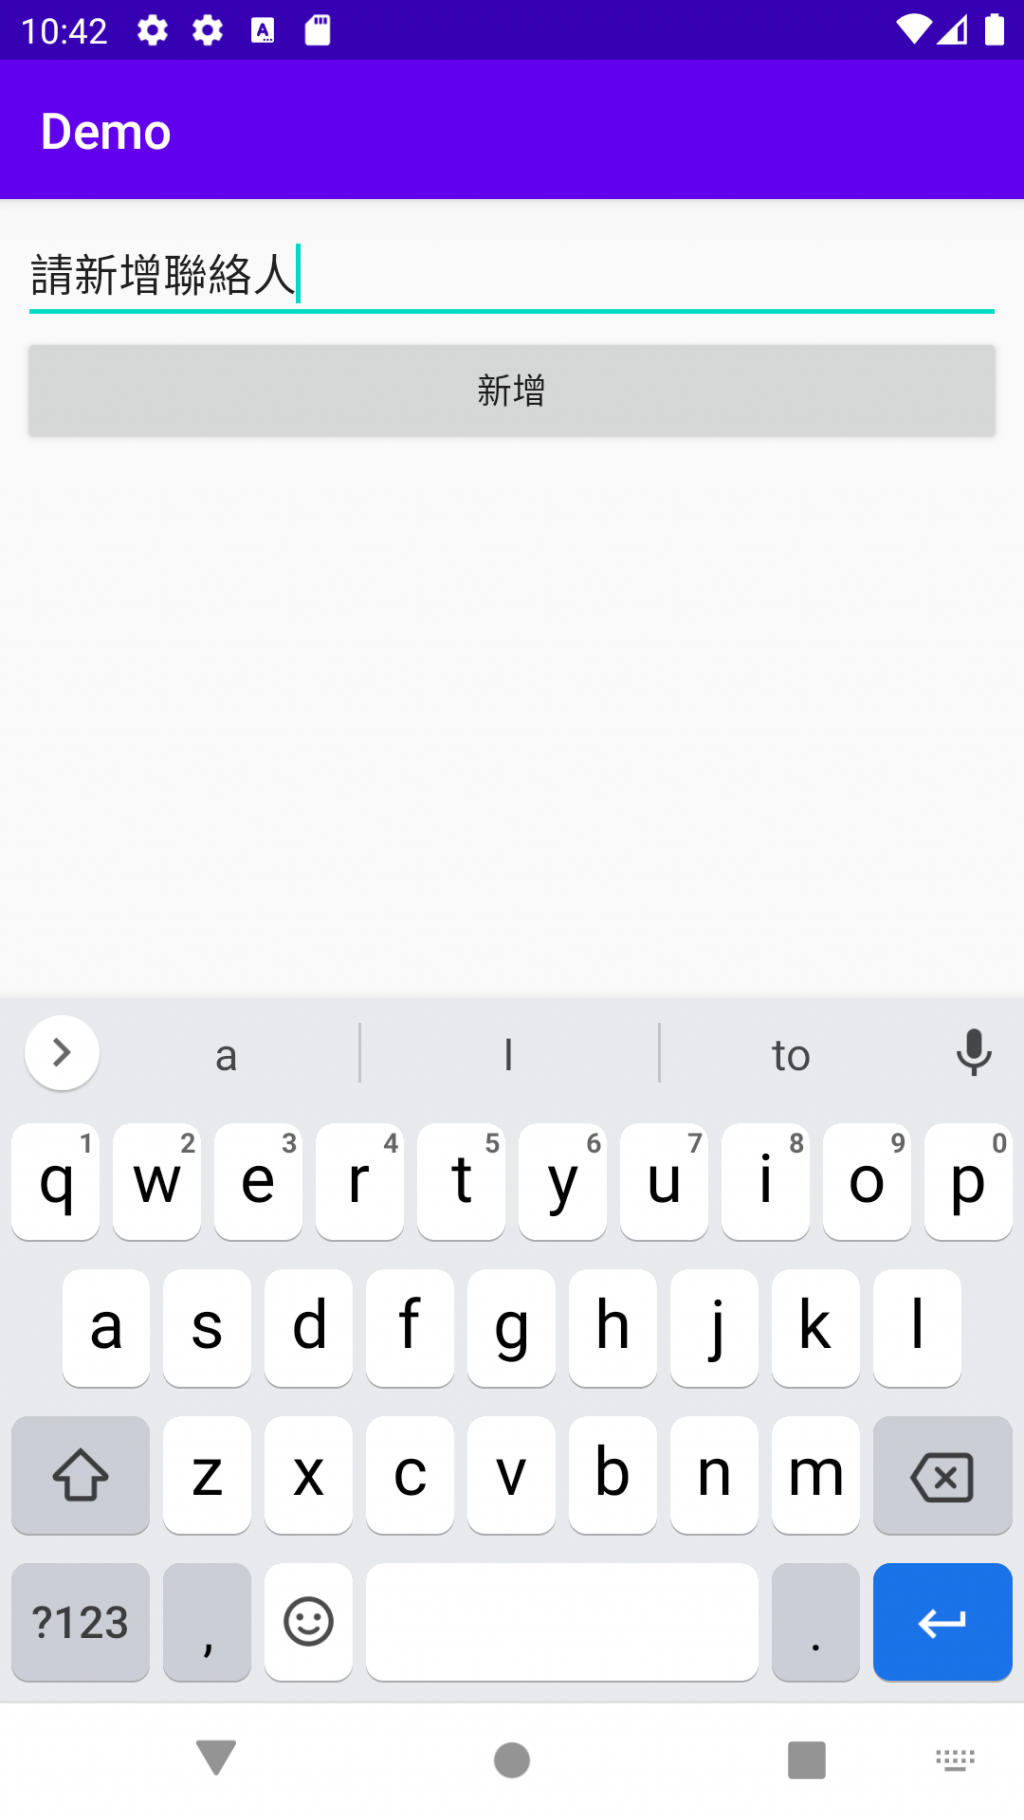
点击新增按钮跳出输入框

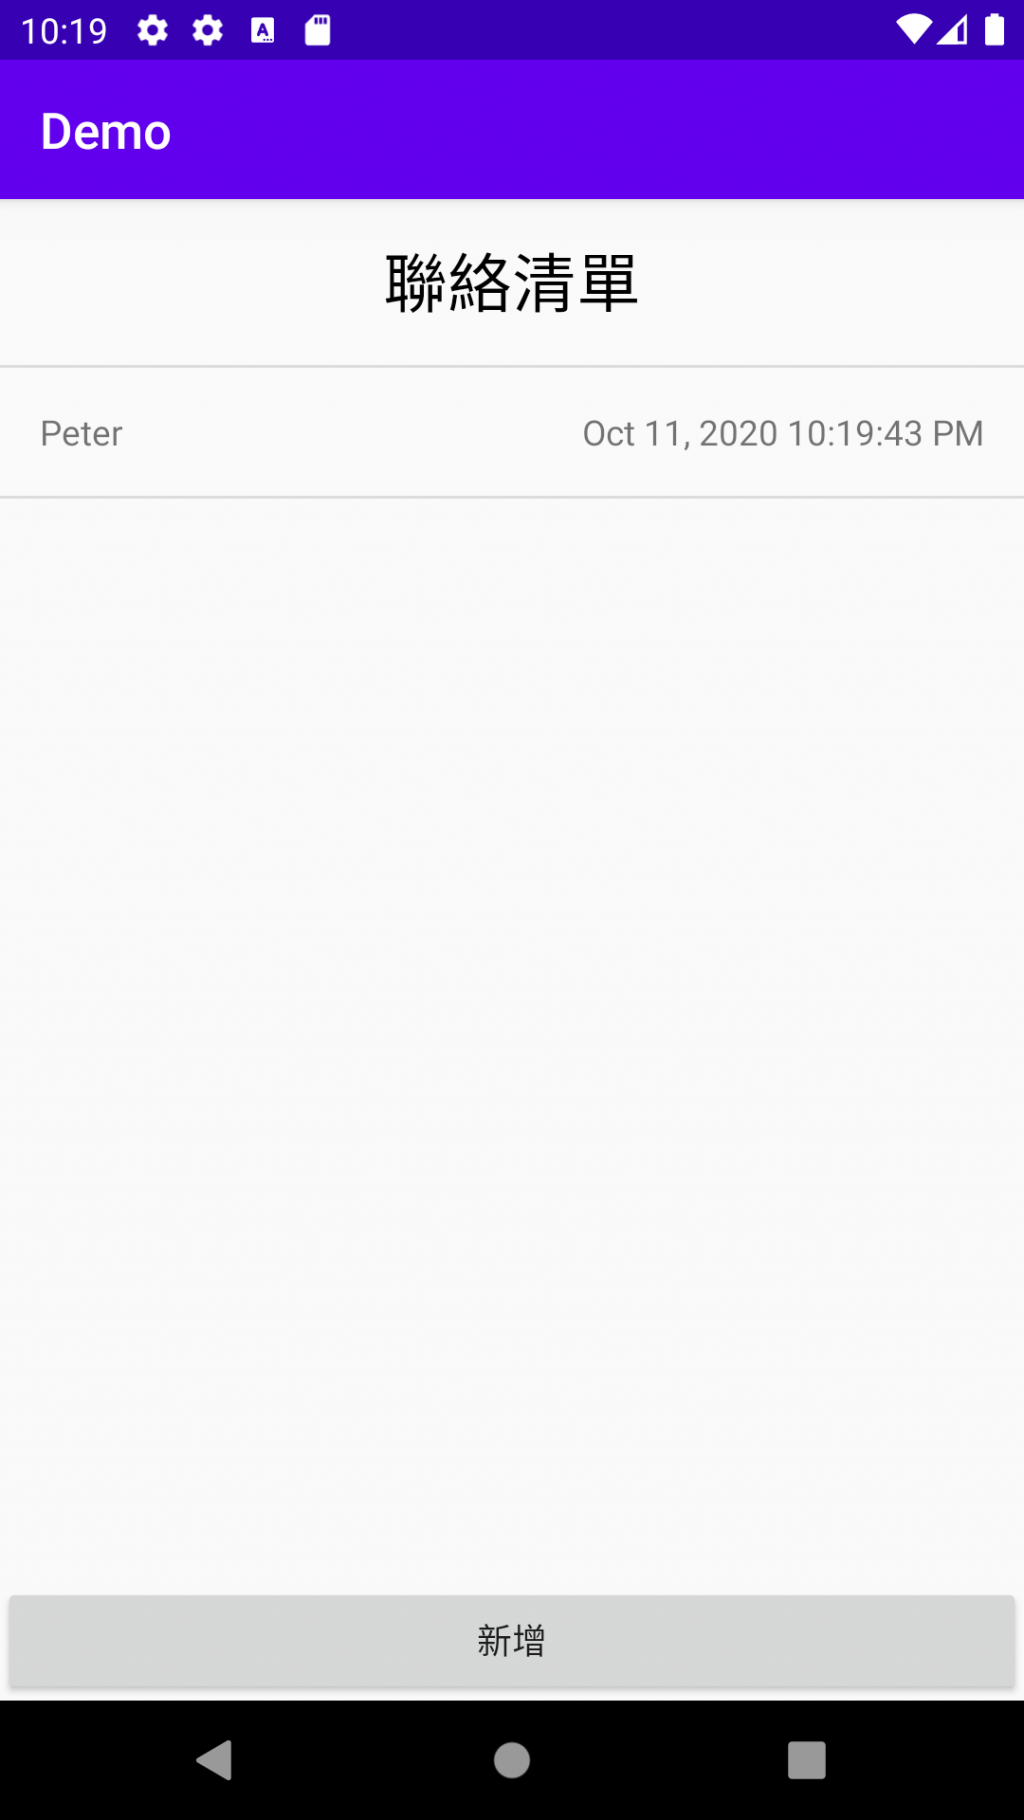
点击新增完成後会回到上一页,显示刚刚输入的Peter
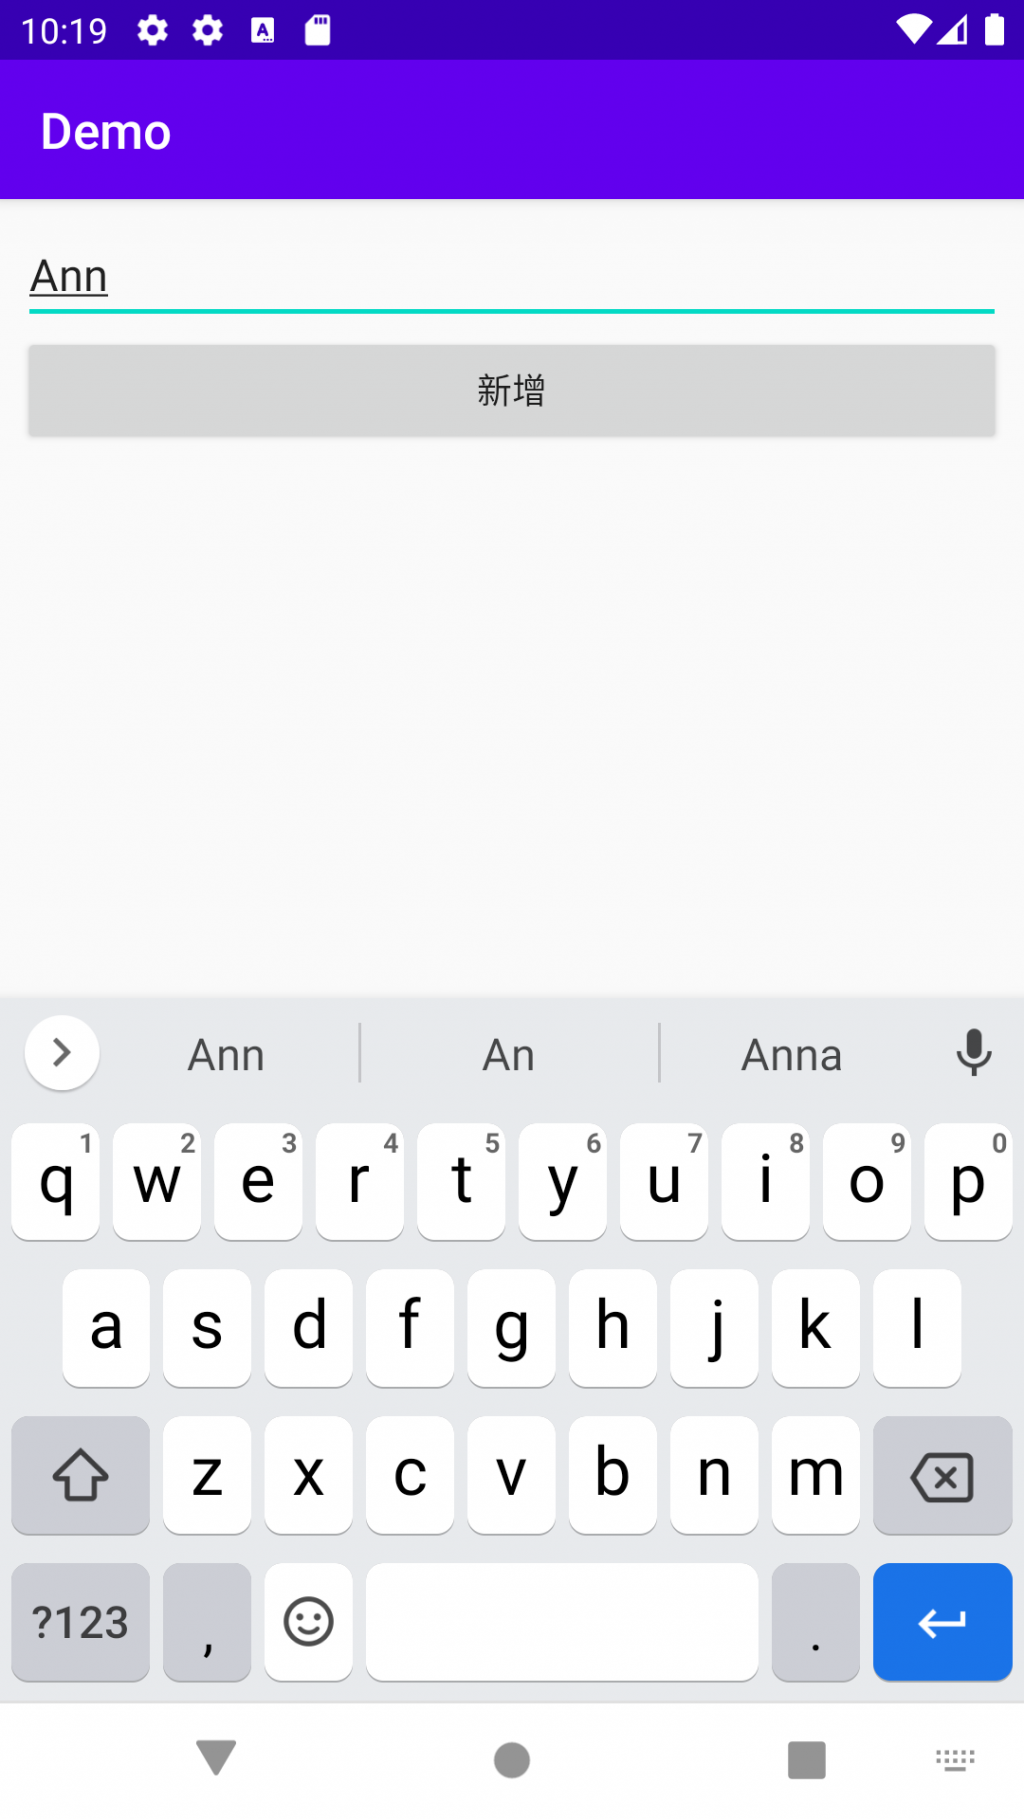
再次新增联络人Ann
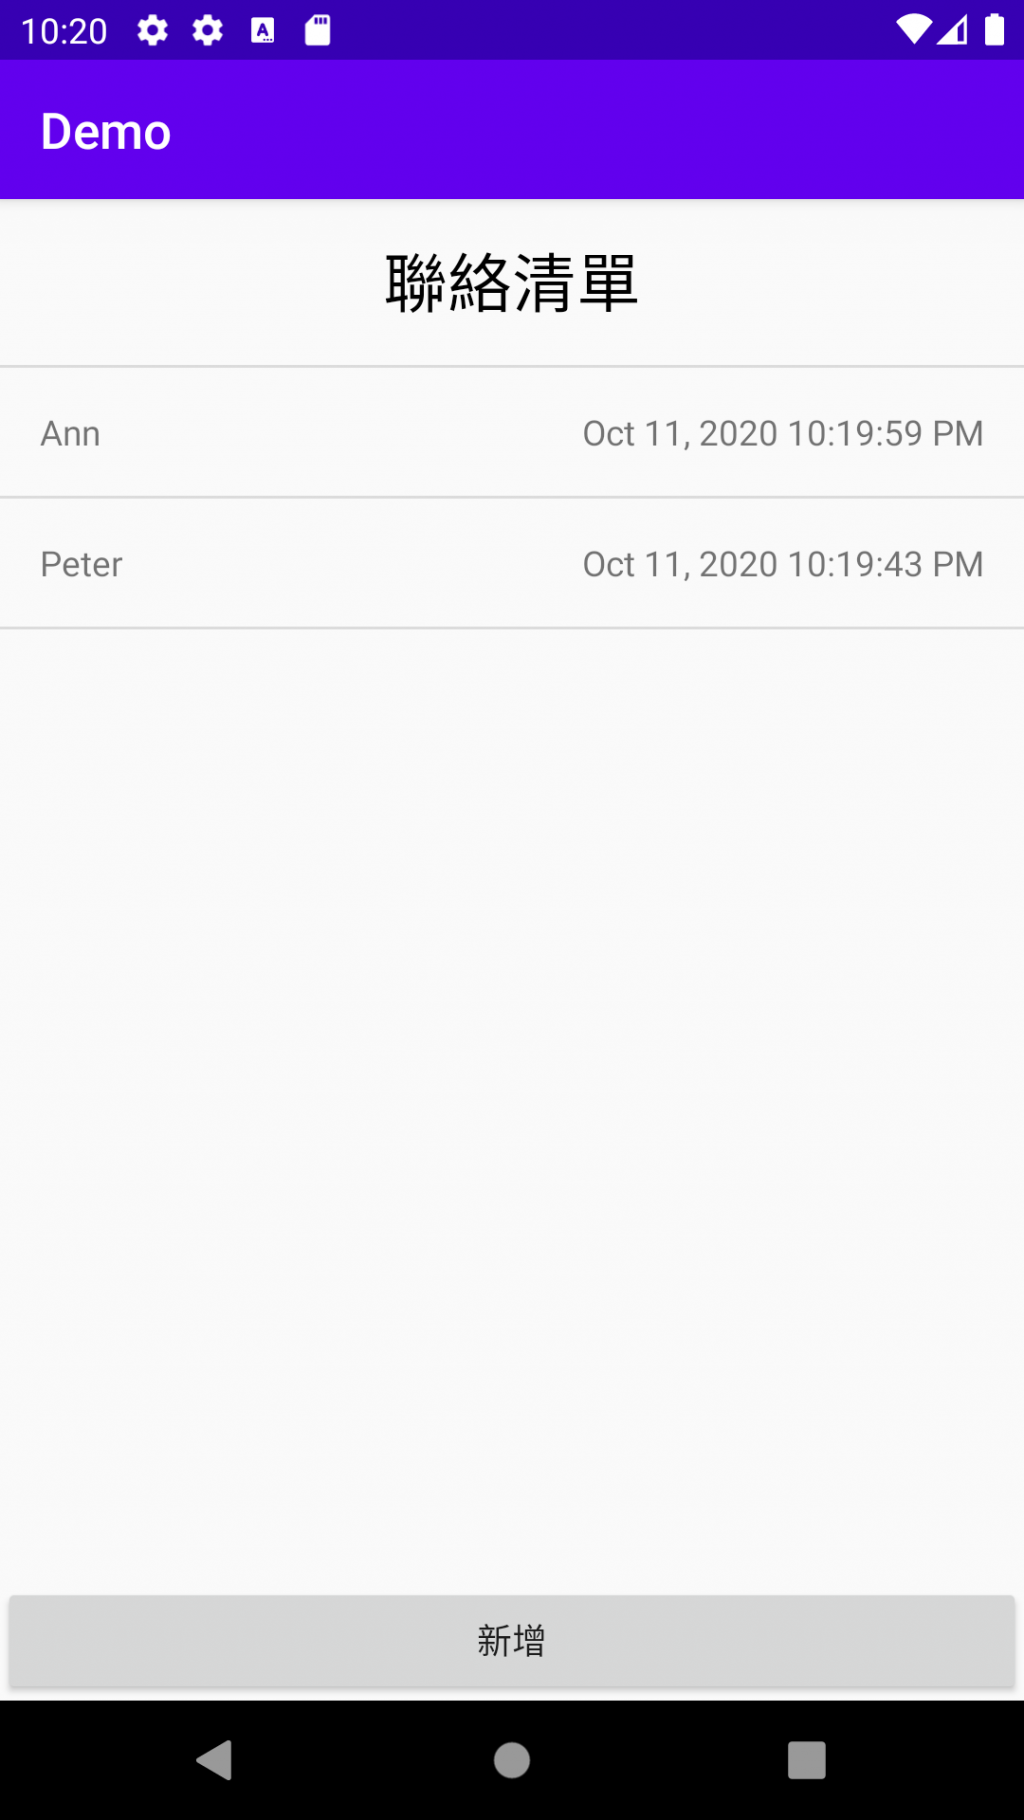
排序为新的资料由上而下排序
本篇会以layout与navigation 为主,下一篇为将资料存在app sql DB。
使用 constraintlayout与recyclerview,需import 在bulid.gradle
apply plugin: "androidx.navigation.safeargs.kotlin"
   dependencies {

    implementation 'androidx.constraintlayout:constraintlayout:1.1.3'
    implementation "androidx.recyclerview:recyclerview:1.1.0"
    // navigation component
    implementation "androidx.navigation:navigation-fragment-ktx:2.3.0"
    implementation "androidx.navigation:navigation-ui-ktx:2.3.0"
  }
首先在 主页 MainActivity 的layout 上 使用navigation ,为之後页面跳转准备
<androidx.constraintlayout.widget.ConstraintLayout xmlns:android="http://schemas.android.com/apk/res/android"
    xmlns:app="http://schemas.android.com/apk/res-auto" >

    <androidx.fragment.app.FragmentContainerView
        android:id="@+id/navHostFragment"
        android:name="androidx.navigation.fragment.NavHostFragment"
        app:defaultNavHost="true"
        app:navGraph="@navigation/nav_graph" />
</androidx.constraintlayout.widget.ConstraintLayout>
建立新增联络人与显示联络人清单Fragment
<navigation xmlns:android="http://schemas.android.com/apk/res/android"
    xmlns:app="http://schemas.android.com/apk/res-auto"
    xmlns:tools="http://schemas.android.com/tools"
    android:id="@+id/nav_graph.xml"
    app:startDestination="@id/mainFragment">

    <fragment
        android:id="@+id/mainFragment"
        ...............>
         ...............
    </fragment>

    <fragment
        android:id="@+id/addTodoFragment"
        .................>
     ...............
    </fragment>

</navigation>
这样就可以新增联络人点选新增後
跳到清单页

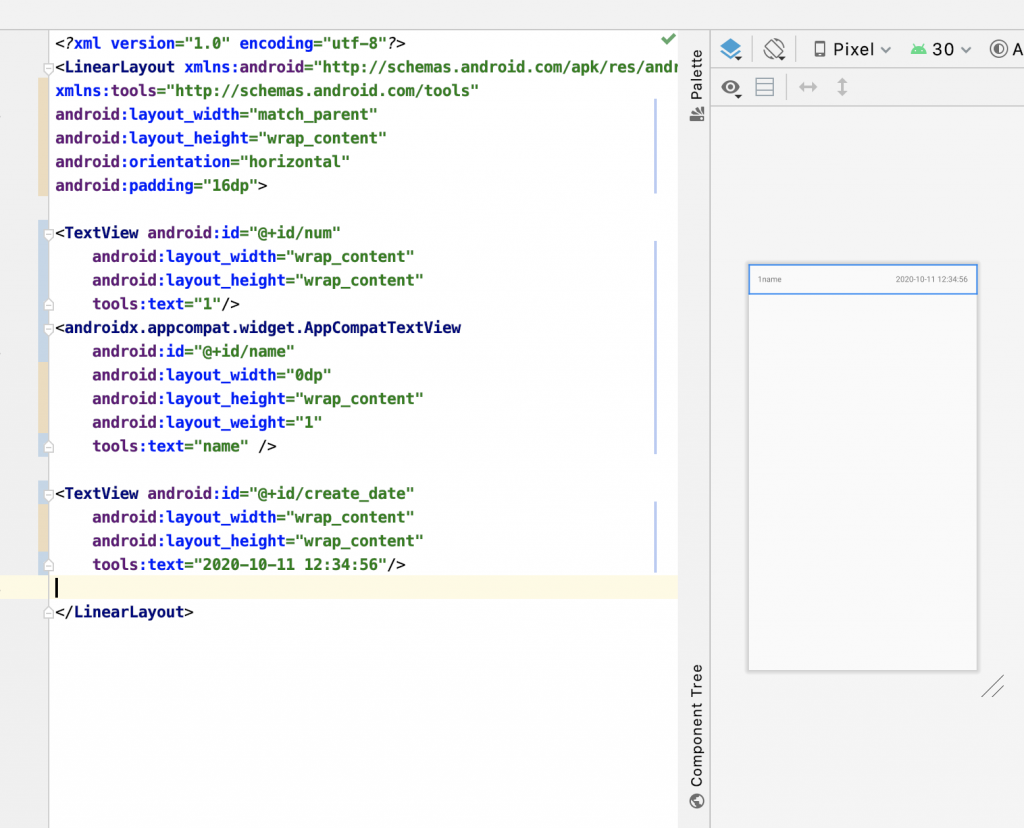
用 recyclerView呈现清单 , 每个item layoput如下图:
新增 layoput如下图:

reference:https://www.notion.so/Navigation-component-9-9-Andy-a1245a1b31c5453fbf1b28f887ec0d73
<<: Day 28 KubeEdge小专题: NodeMCU设定
Day 12 - 为什麽转职是条血泪辛酸路
因为很多东西不懂,学无止尽。 就像我洋洋洒洒的写了那麽多,但是实际要用时还是卡东卡西。 好吧,我承认...
【必收藏系列】查找并清理 Mac 上重复的档案/图片
日常我们在使用 Mac 机时,总是很容易重复下载一些档案或图片,例如 复制整理档案或移动档案时,很容...
Flutter体验 Day 22-Model
Model 资料层 在开发应用程序的过程里,我们通常会定义 Model 的类别用来处理资料结构或是资...
OpenStack 介绍 2
本系列文章同步发布於笔者网站 前一篇文章以比较非技术角度介绍了 OpenStack 这个专案。今天开...
目录 [10.12更新]
前言 (入门~初阶程度) 篇名"登堂入室",写得冠冕堂皇也只是因为喜欢很台的发音...