DAY21 - 进入後端 Nestjs
还记得一开始建立专案时选择的是 Angular + Nestjs 作为专案的前後端语言吗?
什麽是 Nestjs?

Nestjs 简单来说可以想成後端版本的 Angular。继承Angular 种种优点与特性,可以用快速且有价购地建立起一个後端使用的 Nodejs 服务。
Nestjs 的资料夹结构
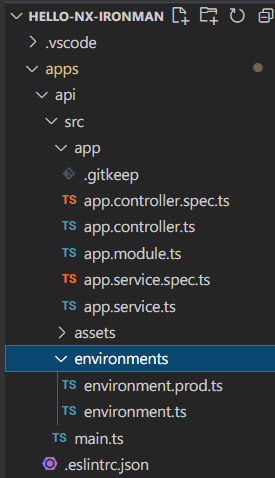
可以看到 Nestjs 的资料夹结构和 Angular 完全一模一样,而应用的概念也几乎和 Angular 相同
- module : 可以依照功能特性不同,建立不同的模组
- controller: API 的进入点,负责接收资料与校对、验证之後
- service: 收到 controller 验证之後,负责处理核心逻辑的地方与操作资料库
基本上可以将所有在 Angular 所学到的各种观念套用在 Nestjs 上面。像是 模组化、 依赖注入、 装饰器、 管道等等,都同样可以应用在 Nestjs 上面
以上是对 Nestjs 非常非常粗浅的介绍,如果要看详细介绍,推荐看看更厉害的夥伴写的 Nestjs 30天挑战赛
不一样的地方 main.ts
import { Logger } from '@nestjs/common';
import { NestFactory } from '@nestjs/core';

import { AppModule } from './app/app.module';

async function bootstrap() {
  const app = await NestFactory.create(AppModule);
  const globalPrefix = 'api';
  // 开始 cors
  app.enableCors()
  app.setGlobalPrefix(globalPrefix);
	// 设定运行的 port
  const port = process.env.PORT || 3333;
  await app.listen(port, () => {
    Logger.log('Listening at http://localhost:' + port + '/' + globalPrefix);
  });
}

bootstrap();
在 angular 当中,几乎不会碰到 main.ts ,但是在 nestjs 要小小修改一下 main.ts
-
app.enableCors(): 先开启前端遇到最烦人的cors 问题,之後再来严格限制 -
const port = process.env.PORT || 3333;将预设的连接端口从 3333 改成吃运行时连接的号码,因为部属上去的时候,不一定都是3333,所以让 nodejs 自动抓取
app.controller
import { Body, Controller, HttpService, HttpStatus, Post,Response } from '@nestjs/common';
import { AppService } from './app.service';

@Controller()
export class AppController {
  constructor(
    private readonly appService: AppService,
  ) {}

  @Post('snedMessageToLineChannel')
  snedMessageToLineChannel(@Body() data,@Response() res) {
    this.appService.pushMessageToLineChannel(data).subscribe(()=>{
      return res.status(HttpStatus.OK).json();
    });
  }

  @Post('snedDayoffMessageToLineChannel')
  snedDayoffMessageToLineChannel(@Body() data,@Response() res) {

    this.appService.pushDayoffMessageToLineChannel(data).subscribe((d)=>{
     return res.status(HttpStatus.OK).json();
    });
  }
}
controller 作为 api 的进入点,由 装饰器 来决定连接的方法与路径,还记得前几天由前端送到後端的打卡资料吗?是利用 post 方法,送到路径 snedMessageToLineChannel 的後端位置,就是送往此处,如果方法与路径都配对到了,就可以使用 @Body() 装饰器去收到api的资料,然後再交由服务去处理,处理完毕之後,也可以使用 @Response() 装饰器回送资料给前端,告诉前端处理的结果是成功还是失败等等。
app.service
import { Injectable } from '@nestjs/common';
import {
  ClientConfig,
  Client,
  TextMessage,
  MessageAPIResponseBase,
  TemplateMessage,
  StickerMessage,
} from '@line/bot-sdk';
import { from, Observable } from 'rxjs';

@Injectable()
export class AppService {
  clientConfig: ClientConfig = {
    channelAccessToken: '你的access token',
    channelSecret: '你的channel secret ',
  };
  client = new Client(this.clientConfig);
  groupId = '传送到群组的id';
  constructor() {}

  pushMessageToLineChannel(
    messageContent: any
  ): Observable<MessageAPIResponseBase> {
    const { imageUrl, name, message, docPath } = messageContent;
    const textMessage = `${name} 预约打卡罗` ;
    const templateMessage: TemplateMessage = {
      type: 'template',
      altText: textMessage,
      template: {
        type: 'buttons',
        thumbnailImageUrl: imageUrl,
        imageAspectRatio: 'rectangle',
        imageSize: 'cover',
        imageBackgroundColor: '#FFFFFF',
        title: textMessage,
        text: `${message}`,
        actions: [
          {
            type: 'uri',
            label: `看看${name}的打卡`,
            uri: `https://challenage90days.web.app/checkin/${docPath}`,
          },
        ],
      },
    };

    return from(this.client.pushMessage(this.groupId, templateMessage));
  }

  pushDayoffMessageToLineChannel({ name }): Observable<MessageAPIResponseBase> {
    const stickerMessage: StickerMessage = {
      type: 'sticker',
      packageId: '6362',
      stickerId: '11087923',
    };
    const textMessage: TextMessage = {
      type: 'text',
      text: `${name} 请假罗`,
    };

    return from(this.client.pushMessage(this.groupId, textMessage));
  }
}
再来就是服务的部分,这部分的程序码和上一篇介绍 line message API 的应用的程序码一模一样,故不再赘述。但是简单来说,就是资料处理完之後,再丢会controller 告诉处理的结果。
也就是说资料处理的流程是这样 API→controller→service→controller→response
这一篇就这样快速介绍Nestjs 与专案的应用,下一篇就要来介绍如何将Nestjs 部属上去,作为一支真正可以在网际网路上使用的 API
<<: Day 22 - WooCommerce: 信用卡付款设定选项 (下)
>>: Day21:终於要进去新手村了-Javascript-函式-建立函式练习
Day29 LineBot总结
linebot其实还有许多功能等待我去了解, 譬如说定时推播及许许多多引用在别的地方的套件, 在这一...
[Day 25] SQL DISTINCT
过滤资料表中column重复的资料。 courses 资料表 c_id course_id stud...
安装程序开发工具(IDE) Visual Studio 2019
Visual Studio 是微软开发的整合开发环境(IDE),简称 VS。 VS 能开发的程序语言...
快乐打包又很坑的pyinstaller
最开心又快速的打包方就是使用pyinstaller,如果是从官方网站直接下载及安装python就不会...
关於 GIMP
关於 GIMP 教学原文参考:关於 GIMP GIMP 是一套免费且跨平台的影像处理软件,也是教育部...