【第十六天 - Flutter Google、Apple、FB Sign in 流程讲解】
前言
今日的程序码 => GITHUB
google_sign_in plugin文件
sign_in_with_apple 文件
今天介绍的程序码是可以运行的,只是在连接 Firebase 的部分,大家要自己连接 Firebase。因此 clone 後,大家还要再进行微调。
这边我只有实作 Google Sign In 的部分。 FB 和 Apple 我没有去实作他。Google 的部分大家只要把 googleService 的档案直接拉到对应的位置就可以了。
Google Sign in
这边会介绍最普遍的 Google Sign In 方式。
Firebase 官方文件
IOS
- 连接 Firebase
- 将
GoogleService-Info.plist 放入ios/Runner -
Info.plist设定
<!-- Put me in the [my_project]/ios/Runner/Info.plist file -->
<!-- Google Sign-in Section -->
<key>CFBundleURLTypes</key>
<array>
	<dict>
		<key>CFBundleTypeRole</key>
		<string>Editor</string>
		<key>CFBundleURLSchemes</key>
		<array>
			<!-- TODO Replace this value: -->
			<!-- Copied from GoogleService-Info.plist key REVERSED_CLIENT_ID -->
			<string>com.googleusercontent.apps.861823949799-vc35cprkp249096uujjn0vvnmcvjppkn</string>
		</array>
	</dict>
</array>
<!-- End of the Google Sign-in Section -->
Android
- 连接 Firebase
- 设定
google-services.json
有的时候会是 kotlin 版本冲突等等要看情况,目前我的有版本冲突,我找到这个 ISSUE,所以需要增加这个
implementation 'com.google.guava:listenablefuture:9999.0-empty-to-avoid-conflict-with-guava'
Sign In With Apple
https://pub.dev/packages/sign_in_with_apple
Firebase Sign In With Apple 官方文件
这边我只有做过 IOS 的部分,没有做过 android 的部分。但是因为目前手头上没有 apple developer account,所以有的是凭印象讲的。
IOS
-
请先付费给 Apple,拿到 apple developer account.
-
创建服务 ID https://developer.apple.com/account/resources/identifiers/list/serviceId
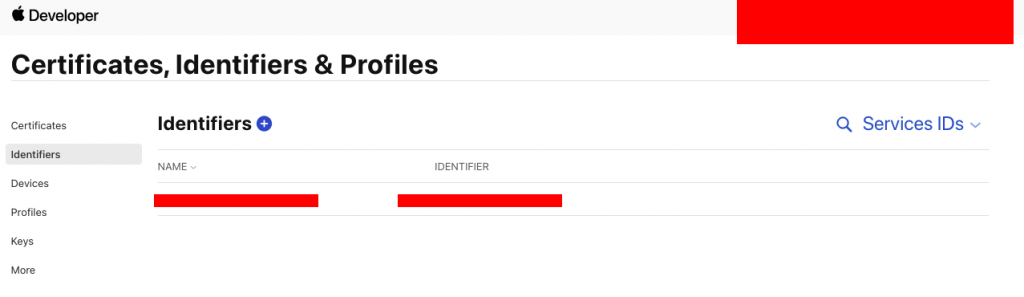
-
选择支援 Sign In With Apple
-
Server 端要记得到 https://developer.apple.com/account/resources/authkeys/list 建立一组支援 Sign in with Apple 的 Key。
-
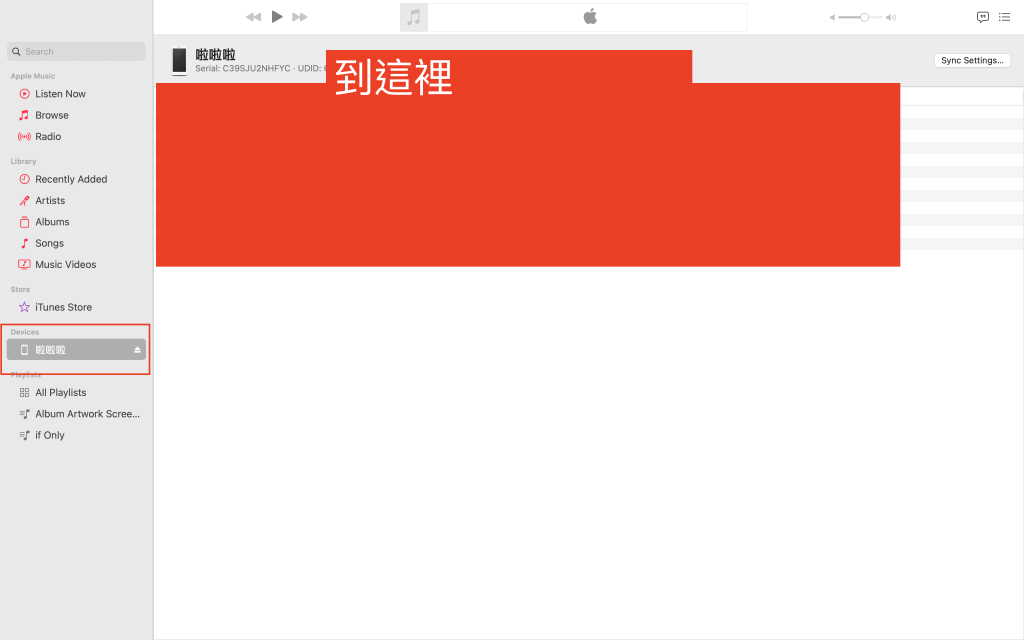
如果手机需要实测的话记得要把 device id 加到 https://developer.apple.com/account/resources/devices/list 。
如何查看自己的手机 device id 的话可以去 Music 里面点击自己的 device。看到 UUID 的选项,并加进去
- 更多细节可以查看 https://pub.dev/packages/sign_in_with_apple
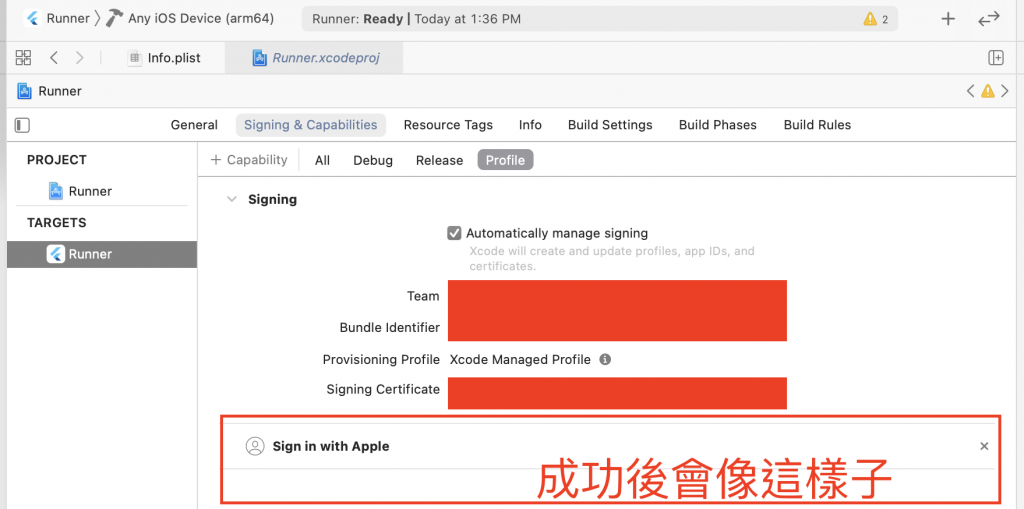
- 在 X-Code 启用 Sign in with Apple。
Flutter Facebook Auth
flutter_facebook_auth 套件
超级详细的 Flutter Facebook Auth 官方文件
注意:
请完全设置 FB(未测试)或将其删除,因为它与 google 插件混淆。会导致 google 登入失败。
AuthProvider
这边我也是大部分都参考 Firebase 的官网 https://firebase.flutter.dev/docs/auth/social/
,这边我定义了一个状态,有登出、登入中、已登入。
初始化 authProvider 的部分,我去监听 user 的资料,并且取得 firebase 的 token,拿到这个 token 後,就可以做後续和後端的串接。这边主要是要看你的专案怎麽规划。
enum ApplicationLoginState { loggedOut, loggedIn, loadding }

class AuthProvider extends ChangeNotifier {
  /// init Firebase
  AuthProvider() {
    init();
  }

  ApplicationLoginState _loginState = ApplicationLoginState.loadding;

  ApplicationLoginState get loginState => _loginState;
  String _token = "";
  String get token => _token;

  User? _user;
  User? get user => _user;
  /// 拿到 TOKEN
  Future<void> init() async {
    await Firebase.initializeApp();

    try {
      FirebaseAuth.instance.authStateChanges().listen((user) async {
        if (user == null) {
          print("NULL USER");
          _loginState = ApplicationLoginState.loggedOut;
          notifyListeners();
        } else {
          _user = user;
           _token = await user.getIdToken(true);
          _loginState = ApplicationLoginState.loggedIn;
          debugPrint("Firebase Token:" + _token.toString(), wrapWidth: 4096);
          notifyListeners();
        }
      });
    } catch (e) {
      print("error from Auth_Provider get User id :$e");
    }
  }

  /// 登出
  void signOut() {
    FirebaseAuth.instance.signOut();
  }

  /// Google
  Future<void> signInWithGoogle() async {
    try {
      print("signInWithGoogle is onPressed");
      // // Trigger the authentication flow
      final googleInUser = await GoogleSignIn(
        scopes: [
          'email',
          'https://www.googleapis.com/auth/contacts.readonly',
        ],
      ).signIn();
      // Obtain the auth details from the request
      final googleAuth = await googleInUser?.authentication;
      // / Create a new credential
      final OAuthCredential credential = GoogleAuthProvider.credential(
          accessToken: googleAuth?.accessToken, idToken: googleAuth?.idToken);
      //use google login with firebase
      await FirebaseAuth.instance.signInWithCredential(credential);
    } on FirebaseAuthException catch (e) {
      // errorCallback(e);
    }
  }

  /// Apple
  Future<void> signInWithApple() async {
    // To prevent replay attacks with the credential returned from Apple, we
    // include a nonce in the credential request. When signing in with
    // Firebase, the nonce in the id token returned by Apple, is expected to
    // match the sha256 hash of `rawNonce`.
    final rawNonce = generateNonce();
    final nonce = sha256ofString(rawNonce);

    // Request credential for the currently signed in Apple account.
    final appleCredential = await SignInWithApple.getAppleIDCredential(
      scopes: [
        AppleIDAuthorizationScopes.email,
        AppleIDAuthorizationScopes.fullName,
      ],
      nonce: nonce,
    );

    // Create an `OAuthCredential` from the credential returned by Apple.
    final oauthCredential = OAuthProvider("apple.com").credential(
      idToken: appleCredential.identityToken,
      rawNonce: rawNonce,
    );
    print(appleCredential);
    print("SIGN IN WITH APPLE");
    // Sign in the user with Firebase. If the nonce we generated earlier does
    // not match the nonce in `appleCredential.identityToken`, sign in will fail.
    await FirebaseAuth.instance.signInWithCredential(oauthCredential);
  }

  /// Generates a cryptographically secure random nonce, to be included in a
  /// credential request.
  String generateNonce([int length = 32]) {
    final charset =
        '0123456789ABCDEFGHIJKLMNOPQRSTUVXYZabcdefghijklmnopqrstuvwxyz-._';
    final random = Random.secure();
    return List.generate(length, (_) => charset[random.nextInt(charset.length)])
        .join();
  }

  /// Returns the sha256 hash of [input] in hex notation.
  String sha256ofString(String input) {
    final bytes = utf8.encode(input);
    final digest = sha256.convert(bytes);
    return digest.toString();
  }

  /// FB
  Future<void> signInWithFacebook() async {
    // Trigger the sign-in flow
    final LoginResult loginResult = await FacebookAuth.instance.login();

    // Create a credential from the access token
    final OAuthCredential facebookAuthCredential =
        FacebookAuthProvider.credential(loginResult.accessToken!.token);

    // Once signed in, return the UserCredential
    await FirebaseAuth.instance.signInWithCredential(facebookAuthCredential);
  }
}
References
- google_sign_in plugin文件
- sign_in_with_apple 文件
- Firebase Google 官方文件
- Firebase Sign In With Apple 官方文件
- flutter_facebook_auth 套件
- 超级详细的 Flutter Facebook Auth 官方文件
- Firebase FaceBook 官方文件
>>: Day 15 - React: setState 计数器之二
Day14 - Google Kubernetes Engine 基础 - Deployment 介绍
什麽是 Deployment ? 前几天的教学中我们使用 Pod 加上 Service 在 Kube...
谁比谁长,回圈和 reduce 用法,Ruby 30 天刷题修行篇第十话
嗨~我是 A Fei,又到了我们愉快的解题时间,让我们马上来看看今天的题目: (题目来源:Codew...
【Day1】简介
这边主要是由於之前想说把上班的东西一部分能公开的拿来当铁人赛的内容,顺便鞭策 自己能往相关领域深入,...
如何在 Angular 获取 URL 资讯
在实作里,很多时後我们会将一些必要资讯记录在网址上,直接在网址里就能得到我们要的讯息 不用再透过组件...
CMMC 2.0 之前世今生
美国国防部在 2020 年1月底公布新规范 「网路安全成熟度模型认证Cybersecurity Ma...