EP13 - 灾难演练,重建你的 VPC
蛤?重建 VPC?
干嘛不调整好现有的架构就好了?
AWS 官方文件有提到,
官方预设都是 172.31.0.0/16,
Internet Gateway 预设是 0.0.0.0/0
所以只要有配置公有 IP,
就可以直接连外,
但现实生活中我们可能会遇到几个问题,
公司内部网路配置不合规或是互相冲突,
与其他使用中的 AWS Account 配置冲突,
因此在不同的 VPC 互相串接时,
就可能因为网路配置,
导致路由不知道该怎麽导...(官方文件也有写到 VPC 互联的部分),
就算没有 VPC 互联的需求,
目前我们使用预设配置会涵盖到 172.31.255.255,
比较好的拆法,
是至少将网段拆成 public 和 private,
private 网段 0.0.0.0 配置 nat gateway,
这样 ssh 进去主机後既可以连外自己上 patch,
外部也连不进来,
不用担心外部可以连到 private 网段的部分,
当然我们可以把 ap-northeast-1d 配置成公开网段,
其他都是配私有网段,
但...其实砍网段和砍 VPC 距离差不多了,
既然都痛一次,
要将资源搬移、网段重建,
不如乾脆把 VPC 砍掉,
重新配置 VPC 和 整个网段的 CIDR,
如果 AWS 使用的资源不多,
则可以将 EC2 take snapshot 资料库备份以後就开始砍了,
那我们就开始吧。
备份
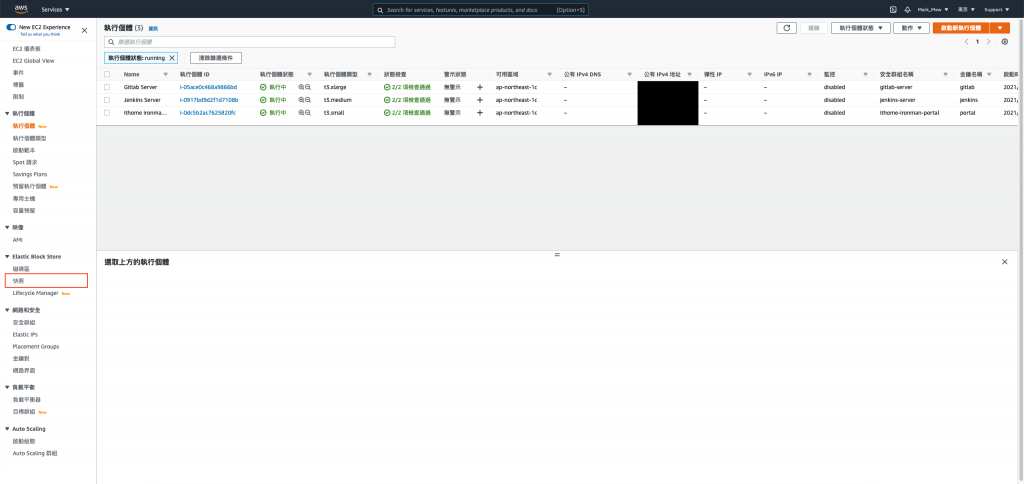
备份 EC2 挂载的 EBS
因为等等就要杀掉了
因此我们这次透过 AWS Cloud Console 去操作
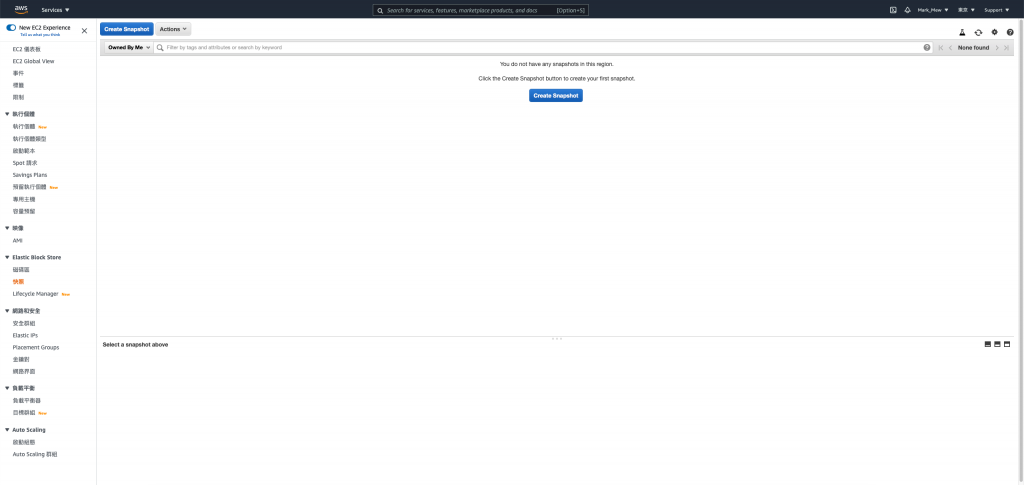
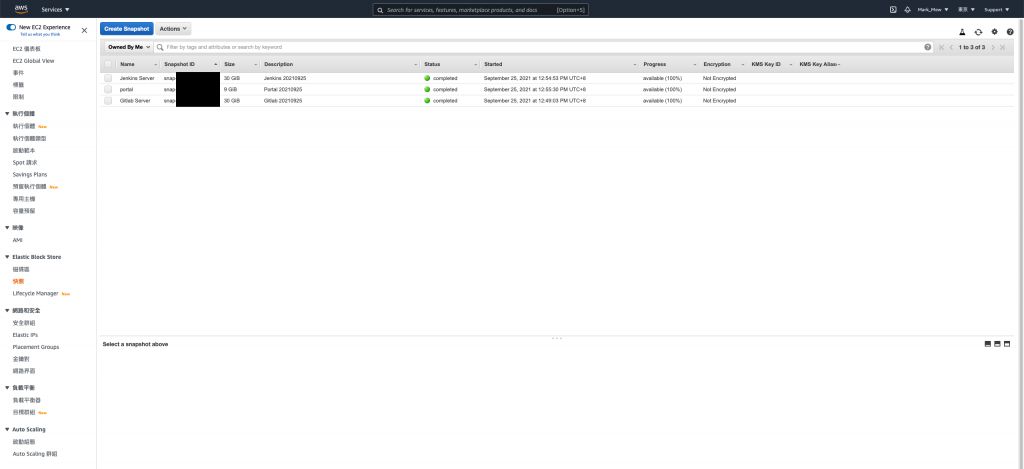
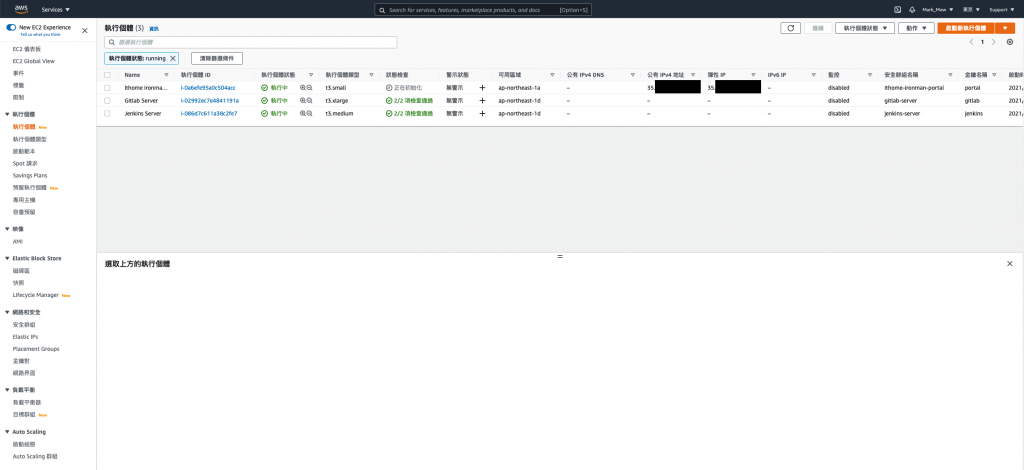
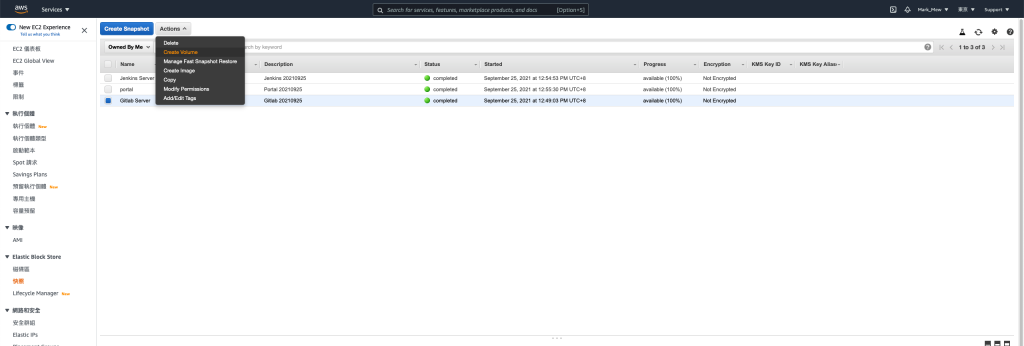
进入 EC2 点选 Elastic Block Store 的快照
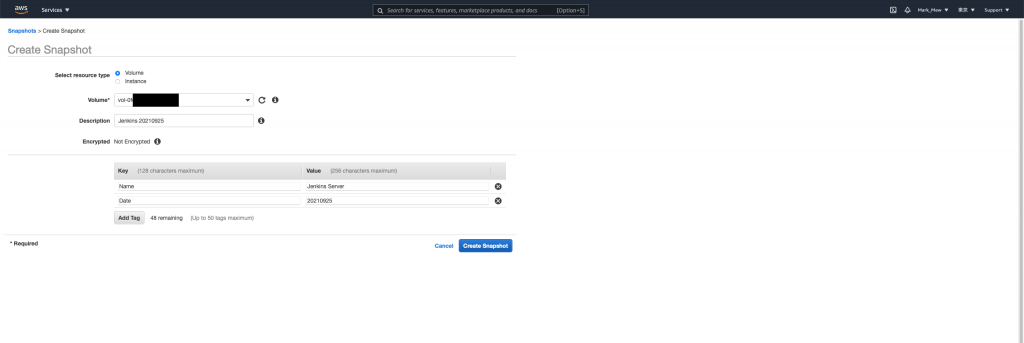
建立快照
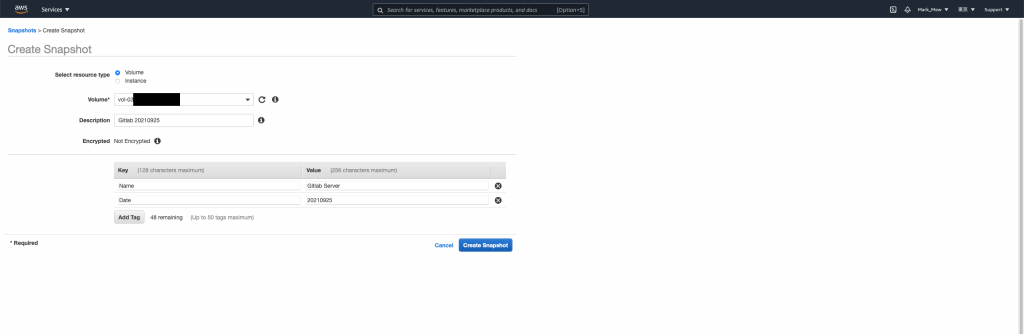
点选「Create Snapshot」
选择 Volume
这边说明一下备份 Instance 和 Volume 的差别
在 EC2 只有挂载一个 Volume 的状况下
选哪一个没有差异
如果 Instance 有挂载多颗 Volume
则备份 Instance 会将挂载的 Volume 全部备份
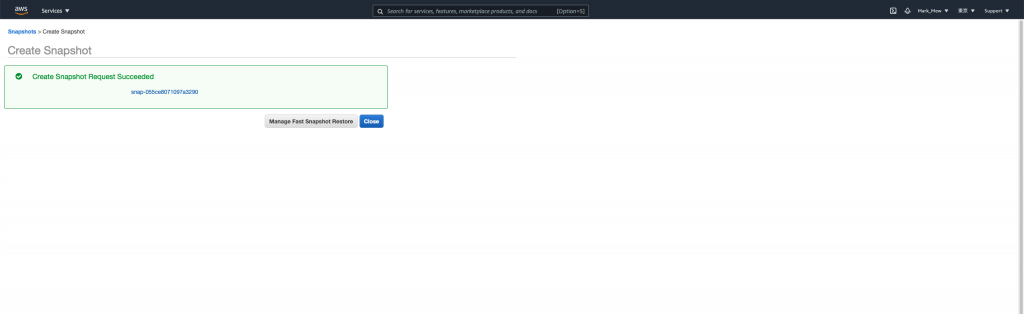
Close
最後请直接关闭就好
千!万!不!要!点!按! Manage Fast Restore
编辑里面的任何属性
都会造成钜额的额外支出
对其他 EC2 挂载的 EBS 执行以上步骤
备份 RDS
进入 RDS 页面
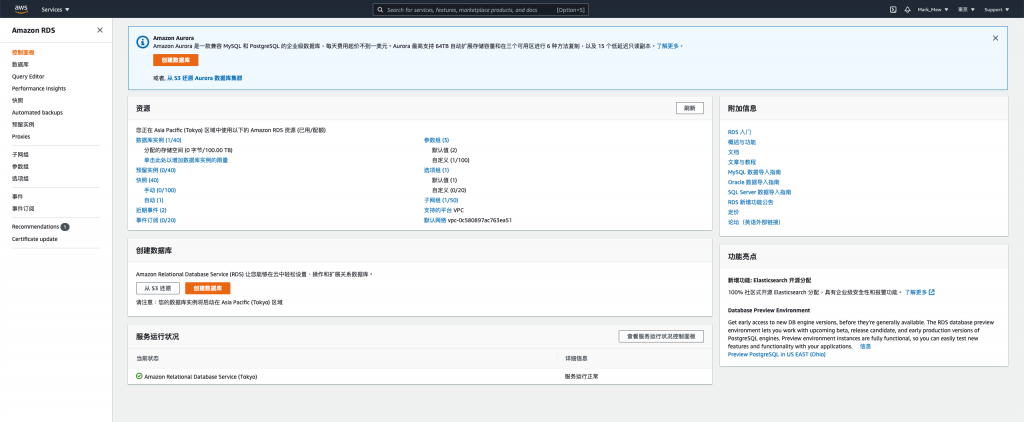
点选数据库实例
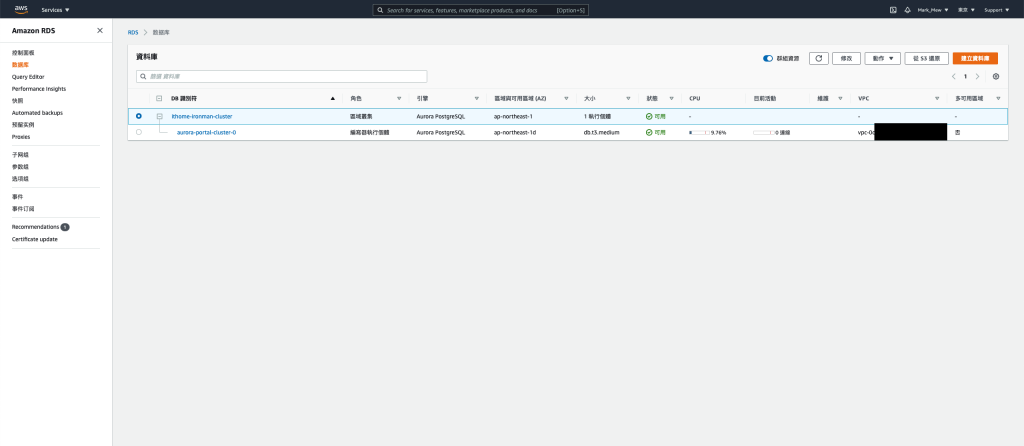
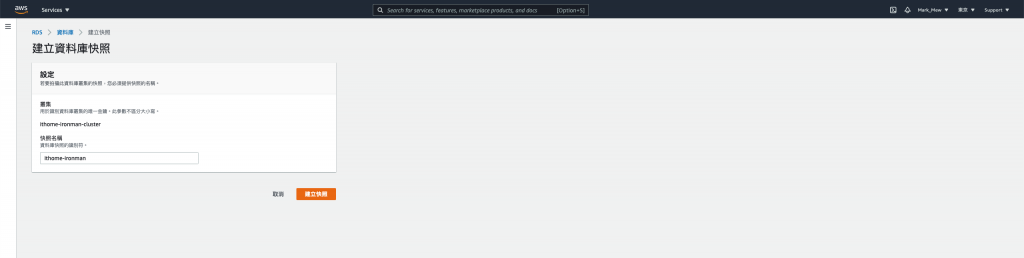
选择实例并点选「动作」选单中的「建立快照」
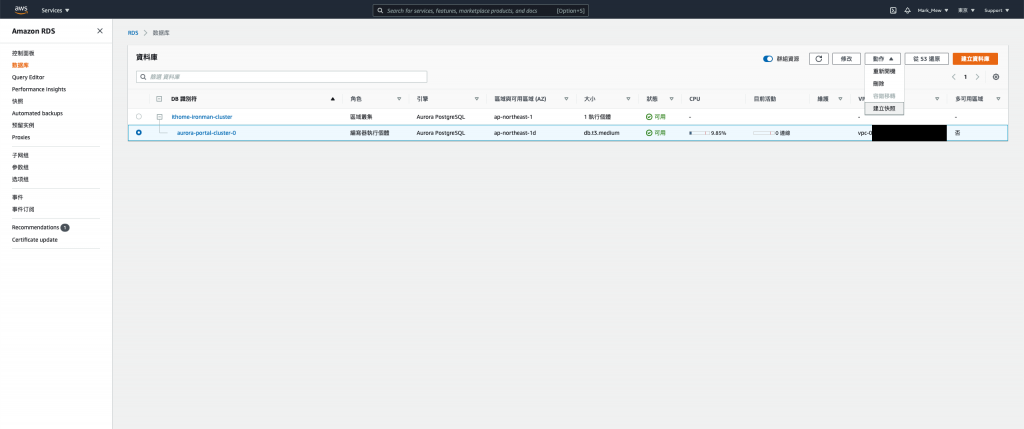
填完资料後并建立
重建 VPC
将程序码注解
将除了 kms、key pair、iam user、code deploy、rds parameter group 和 S3 bucket 以外的程序码都注解
注解完後
terraform apply
登入 AWS 手动移除 VPC
进入 vpc 後选择删除 vpc
输入「delete default vpc」验证讯息以後即可删除 default vpc
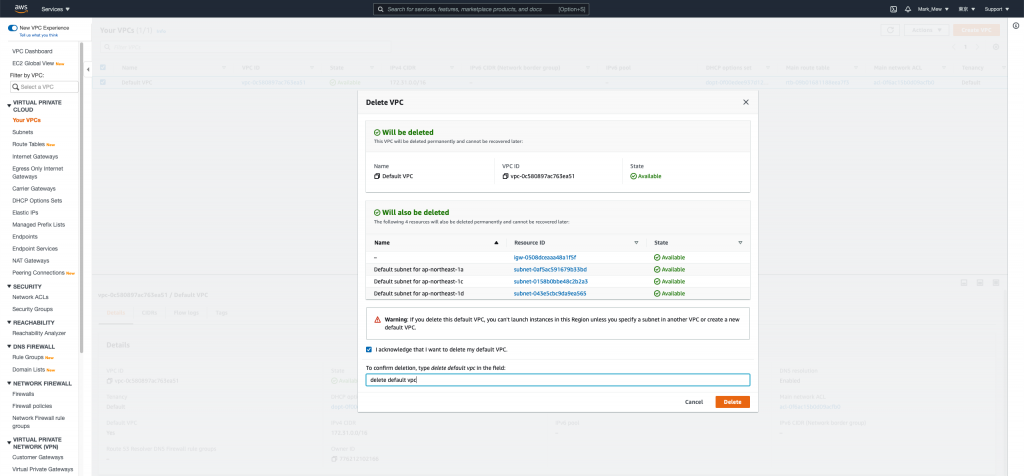
删除完後
可以看到从 vpc、subnet到 internet gateway 都一并被删除了
我们就此躺平
可以准备跑路了

重新配置你的 VPC
新的 VPC 我们假设 172.31.0.0 ~ 172.31.15.255
已经被别的 VPC 占用
为了使管理方便
因此 CIDR 配置 "172.31.16.0/20"
至於 CIDR 详细代表的区间
建议大家可以透过 CIDR 计算机查看
新的 vpc 我们打算配置 "172.31.16.0/20"
有 4096 个 ip 可以用
其中 1a 我们配置 2048
一半公开网段、一半私有网段
1c 和 1d 共 2048
也是一半公开一半私有
路由的部分
我们直接透过 public 网段我是用 internet gateway 绑 0.0.0.0
这样在建立时有配置 ip 就可以连接外网
而 private 网段则是用 nat gateway 绑定 0.0.0.0
这样外部无法直接存取到内网
但是内网存取外网可以透过 nat gateway
废话不多说,我们直接上 code
main.tf
resource "aws_vpc" "stage" {
    cidr_block = "172.31.16.0/20"
    tags       = {
        "Name" = "Stage VPC"
    }
}

resource "aws_subnet" "public_a" {
    vpc_id            = aws_vpc.stage.id
    cidr_block        = "172.31.16.0/22"
    availability_zone = "ap-northeast-1a"
    tags              = {
        "Name"        = "Stage public subnet a"
        "Environment" = "Stage"
        "Usage"       = "public"
        "Zone"        = "ap-northeast-1a"
        "Creator"     = "Terraform"
    }
}

resource "aws_subnet" "public_c" {
    vpc_id            = aws_vpc.stage.id
    cidr_block        = "172.31.20.0/23"
    availability_zone = "ap-northeast-1c"
    tags              = {
        "Name"        = "Stage public subnet c"
        "Environment" = "Stage"
        "Usage"       = "public"
        "Zone"        = "ap-northeast-1c"
        "Creator"     = "Terraform"
    }
}

resource "aws_subnet" "public_d" {
    vpc_id            = aws_vpc.stage.id
    cidr_block        = "172.31.22.0/23"
    availability_zone = "ap-northeast-1d"
    tags              = {
        "Name"        = "Stage public subnet d"
        "Environment" = "Stage"
        "Usage"       = "public"
        "Zone"        = "ap-northeast-1d"
        "Creator"     = "Terraform"
    }
}

resource "aws_subnet" "private_a" {
    vpc_id            = aws_vpc.stage.id
    cidr_block        = "172.31.24.0/22"
    availability_zone = "ap-northeast-1a"
    tags              = {
        "Name"        = "Stage private subnet a"
        "Environment" = "Stage"
        "Usage"       = "private"
        "Zone"        = "ap-northeast-1a"
        "Creator"     = "Terraform"
    }
}

resource "aws_subnet" "private_c" {
    vpc_id            = aws_vpc.stage.id
    cidr_block        = "172.31.28.0/23"
    availability_zone = "ap-northeast-1c"
    tags              = {
        "Name"        = "Stage private subnet c"
        "Environment" = "Stage"
        "Usage"       = "private"
        "Zone"        = "ap-northeast-1c"
        "Creator"     = "Terraform"
    }
}

resource "aws_subnet" "private_d" {
    vpc_id            = aws_vpc.stage.id
    cidr_block        = "172.31.30.0/23"
    availability_zone = "ap-northeast-1d"
    tags              = {
        "Name"        = "Stage private subnet d"
        "Environment" = "Stage"
        "Usage"       = "private"
        "Zone"        = "ap-northeast-1d"
        "Creator"     = "Terraform"
    }
}

resource "aws_internet_gateway" "stage" {
    vpc_id = aws_vpc.stage.id
    tags   = {
      "Name" = "Stage internet gateway"
    }
}

resource "aws_route_table" "stage_public" {
    depends_on = [aws_vpc.stage, aws_internet_gateway.stage]
    vpc_id = aws_vpc.stage.id
    route = [
        {
            carrier_gateway_id         = ""
            cidr_block                 = "0.0.0.0/0"
            destination_prefix_list_id = ""
            egress_only_gateway_id     = ""
            gateway_id                 = aws_internet_gateway.stage.id
            instance_id                = ""
            ipv6_cidr_block            = ""
            local_gateway_id           = ""
            nat_gateway_id             = ""
            network_interface_id       = ""
            transit_gateway_id         = ""
            vpc_endpoint_id            = ""
            vpc_peering_connection_id  = ""
        }
    ]
}

resource "aws_route_table_association" "stg_public_a" {
    depends_on     = [aws_subnet.public_a, aws_route_table.stage_public]
    subnet_id      = aws_subnet.public_a.id
    route_table_id = aws_route_table.stage_public.id
}

resource "aws_route_table_association" "stg_public_c" {
    depends_on     = [aws_subnet.public_c, aws_route_table.stage_public]
    subnet_id      = aws_subnet.public_c.id
    route_table_id = aws_route_table.stage_public.id
}

resource "aws_route_table_association" "stg_public_d" {
    depends_on     = [aws_subnet.public_d, aws_route_table.stage_public]
    subnet_id      = aws_subnet.public_d.id
    route_table_id = aws_route_table.stage_public.id
}

resource "aws_eip" "stg_ngw" {
    network_border_group = "ap-northeast-1"
    public_ipv4_pool     = "amazon"
}

resource "aws_nat_gateway" "stg" {
    depends_on = [ aws_eip.stg_ngw, aws_subnet.public_a ]
    allocation_id = aws_eip.stg_ngw.id
    subnet_id = aws_subnet.public_a.id
}

resource "aws_route_table_association" "stg_private_a" {
    subnet_id      = aws_subnet.private_a.id
    route_table_id = aws_vpc.stage.default_route_table_id
}

resource "aws_route_table_association" "stg_private_c" {
    subnet_id      = aws_subnet.private_c.id
    route_table_id = aws_vpc.stage.default_route_table_id
}

resource "aws_route_table_association" "stg_private_d" {
    subnet_id      = aws_subnet.private_d.id
    route_table_id = aws_vpc.stage.default_route_table_id
}

resource "aws_route" "stg_private_outbound" {
    route_table_id = aws_vpc.stage.default_route_table_id
    destination_cidr_block = "0.0.0.0/0"
    nat_gateway_id = aws_nat_gateway.stg.id
}
在撰写 aws_route_table stage_public 区块时
要特别注意
里面的栏位很多
而且每个都要定义到
这里的设定有点像是资料库的贫血模型(Weak Entity)
只有在栏位有的时候
才会去找相对应的栏位建立关联
执行配置
terraform apply
我们就可以看到我们配置好的基础设施
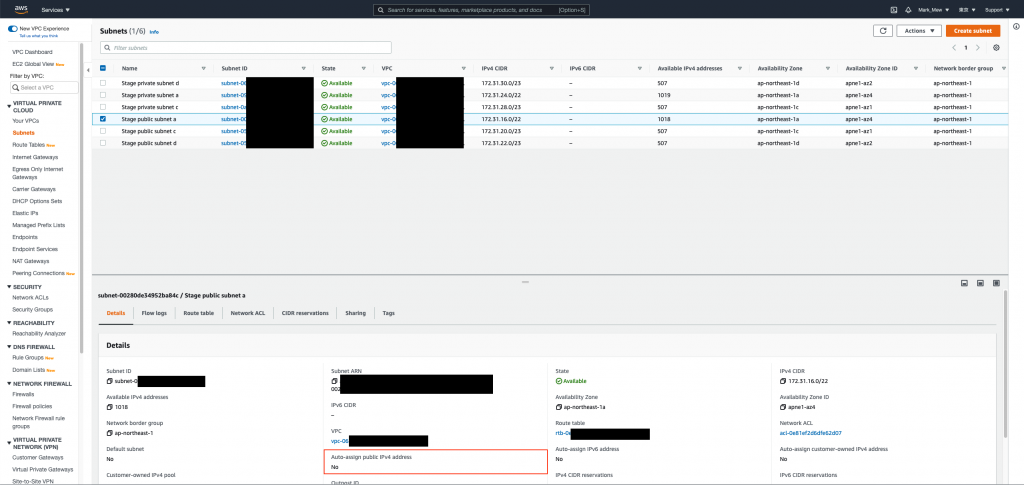
调整 subnet 查询结果
一开始我们只根据 vpc id 来查找
因为 default 没有分网段没差
但是既然重建了当然要把网段拆分好
并且将下 tag 来方便查询
现在我们就可以根据使用方式来找公开网段和私有网段
data "aws_subnet_ids" "private_subnet_ids" {
    vpc_id = aws_vpc.stage.id
    tags   = {
      "Usage" = "private"
    }
}

data "aws_subnet_ids" "public_subnet_ids" {
    vpc_id = aws_vpc.stage.id
    tags   = {
      "Usage" = "public"
    }
}
调整 security group
既然我们已经可以预想 CI/CD 会放在内网
那我们就可以把 outbound 全开
inbound 只锁特定 port 即可
stage/main.tf
gitlab
resource "aws_security_group" "gitlab" {
    name        = "gitlab-server"
    description = "It used for gitlab server."
    vpc_id      = aws_vpc.stage.id
    tags        = { Name = "Gitlab-Server" }
    revoke_rules_on_delete = null
}

resource "aws_security_group_rule" "gitlab_igress_22" {
    type              = "ingress"
    from_port         = 22
    to_port           = 22
    cidr_blocks       = ["0.0.0.0/0",]
    protocol          = "tcp"
    security_group_id = aws_security_group.gitlab.id
}

resource "aws_security_group_rule" "gitlab_igress_80" {
    type              = "ingress"
    from_port         = 80
    to_port           = 80
    cidr_blocks       = ["0.0.0.0/0",]
    protocol          = "tcp"
    security_group_id = aws_security_group.gitlab.id
}

resource "aws_security_group_rule" "gitlab_igress_443" {
    type              = "ingress"
    from_port         = 443
    to_port           = 443
    cidr_blocks       = ["0.0.0.0/0",]
    protocol          = "tcp"
    security_group_id = aws_security_group.gitlab.id
}

resource "aws_security_group_rule" "gitlab_egress" {
    type              = "egress"
    from_port         = 0
    to_port           = 0
    cidr_blocks       = ["0.0.0.0/0",]
    protocol          = "-1"
    security_group_id = aws_security_group.gitlab.id
}
stage/main.tf
jenkins
resource "aws_security_group_rule" "jenkins_igress_22" {
    type              = "ingress"
    from_port         = 22
    to_port           = 22
    cidr_blocks       = ["0.0.0.0/0",]
    protocol          = "tcp"
    security_group_id = aws_security_group.jenkins.id
}

resource "aws_security_group_rule" "jenkins_igress_80" {
    type              = "ingress"
    from_port         = 80
    to_port           = 80
    cidr_blocks       = ["0.0.0.0/0",]
    protocol          = "tcp"
    security_group_id = aws_security_group.jenkins.id
}

resource "aws_security_group_rule" "jenkins_igress_443" {
    type              = "ingress"
    from_port         = 443
    to_port           = 443
    cidr_blocks       = ["0.0.0.0/0",]
    protocol          = "tcp"
    security_group_id = aws_security_group.jenkins.id
}

resource "aws_security_group_rule" "jenkins_igress_8080" {
    type              = "ingress"
    from_port         = 8080
    to_port           = 8080
    cidr_blocks       = ["0.0.0.0/0",]
    protocol          = "tcp"
    security_group_id = aws_security_group.jenkins.id
}

resource "aws_security_group_rule" "jenkins_egress" {
    type              = "egress"
    from_port         = 0
    to_port           = 0
    cidr_blocks       = ["0.0.0.0/0",]
    protocol          = "-1"
    security_group_id = aws_security_group.jenkins.id
}
stage/main.tf
rds
resource "aws_security_group" "rds_portal" {
    name        = "rds-portal"
    description = "It used for RDS."
    vpc_id      = aws_vpc.stage.id
    tags        = { Name = "RDS Postgres" }
    revoke_rules_on_delete = null
}

resource "aws_security_group_rule" "rds_portal_igress_5432" {
    type              = "ingress"
    from_port         = 5432
    to_port           = 5432
    cidr_blocks       = ["0.0.0.0/0",]
    protocol          = "tcp"
    security_group_id = aws_security_group.rds_portal.id
}

resource "aws_security_group_rule" "rds_portal_egress_22" {
    type              = "egress"
    from_port         = 5432
    to_port           = 5432
    cidr_blocks       = ["0.0.0.0/0",]
    protocol          = "tcp"
    security_group_id = aws_security_group.rds_portal.id
}
portal 的部分有些尴尬
毕竟有 22 port
所以 portal 的部分就可不调整
继续维持白名单
或是白名单的部分增加 "172.31.16.0/20"
也就是我们的 vpc 范围
重建 EC2
调整 ec2 模组
为了等等要在 ec2 上绑定 ip
因此 ec2 的模组需要 outputs ip
modules/ec2/outputs.tf
output "id" {
    value = aws_instance.this.id
}
调整 subnet 并重建 ec2
蛤?这样我不就得到一个全新的 EC2
别急,我们稍早有 take snapshot
是可以复原的
回过头来说,我们另外租用一组 eip
而不使用自动配置
是因为自动配置在 EC2 重启後就会消失
module "ec2_gitlab" {
    source                  = "../modules/ec2"
    name                    = "Gitlab Server"
    ami                     = "ami-09ac3ab1b7a1e9444"
    instance_type           = "t3.xlarge"
    subnet_id               = sort(data.aws_subnet_ids.private_subnet_ids.ids)[0]
    key_name                = module.key_pair_gitlab.key_name
    security_groups_id      = [ aws_security_group.gitlab.id ]
    iam_instance_profile    = ""
    volume_size             = 30
    tags                    = {
        Name  = "Gitlab Server"
        Usage = "For SCM"
        Creator = "Terraform"
    }
}

module "ec2_jenkins" {
    source                  = "../modules/ec2"
    name                    = "Jenkins Server"
    ami                     = "ami-09ac3ab1b7a1e9444"
    instance_type           = "t3.medium"
    subnet_id               = sort(data.aws_subnet_ids.private_subnet_ids.ids)[0]
    key_name                = module.key_pair_jenkins.key_name
    security_groups_id      = [ aws_security_group.jenkins.id ]
    iam_instance_profile    = ""
    volume_size             = 30
    tags                    = {
        Name  = "Jenkins Server"
        Usage = "CI Tools"
        Creator = "Terraform"
    }
}

resource "aws_eip" "portal" {
    network_border_group = "ap-northeast-1"
    public_ipv4_pool     = "amazon"
}

resource "aws_eip_association" "portal" {
    depends_on    = [aws_eip.portal, module.ec2_ithome_ironman_portal]
    instance_id   = module.ec2_ithome_ironman_portal.id
    allocation_id = aws_eip.portal.id
}

module "ec2_ithome_ironman_portal" {
    source                  = "../modules/ec2"
    name                    = "ithome ironman 2021 portal"
    ami                     = "ami-09ac3ab1b7a1e9444"
    subnet_id               = sort(data.aws_subnet_ids.public_subnet_ids.ids)[0]
    key_name                = module.key_pair_ithome_ironman_portal.key_name
    security_groups_id      = [ aws_security_group.ithome_ironman_portal.id ]
    iam_instance_profile    = aws_iam_instance_profile.ec2_profile.name
    tags                    = {
        Name  = "ithome ironman 2021 portal"
        Usage = "portal"
        Creator = "Terraform"
    }
}
执行配置後
我们就可以在 EC2 Dashboard 上看到已经绑上的 IP
Snapshot 还原 EC2
AWS 官方有提到要将 EC2 还原有两种方式
一种是将 Snapshot 做成 AMI 後透过 AMI 还原
另一种则是将 Snapshot 制作成 EBS 後再替换掉原始的根目录
两者虽然都可达成
但是意义上不同
如果我们在还原後将制作的 AMI 砍掉
此时 EC2 会无法正常显示作业系统资讯
而 AMI 提过比较接近是 Windows SP 更新或是 ISO 档
如果我们有为作业系统客制环境
这种乾净不包含任何其他档案的环境
比较适合制作成 AMI
(比如说:制作一个 含有 Oracle 11g 的 RHEL 7.0 作业系统)
不然我一律建议使用 EBS 还原
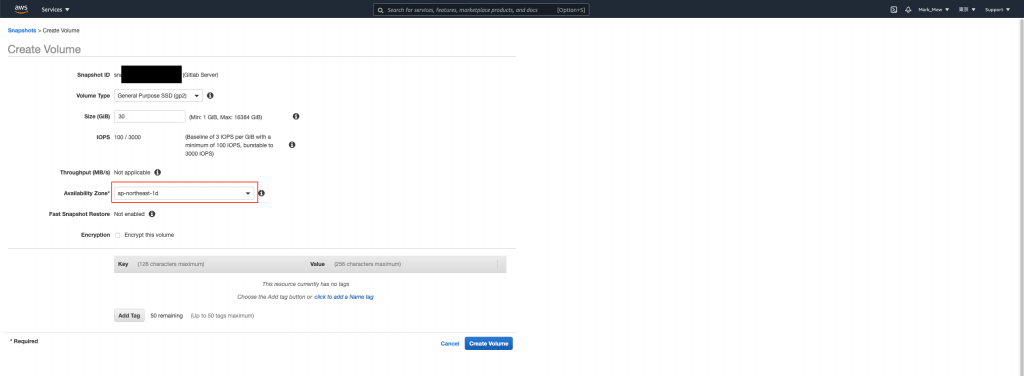
- 进入快照中,选择要还原的快照,在「Action」中选择「Create Volume」
-
选择 EC2 所在的区域,按下 Create Volume
- 到 EC2 Dashboard 将要复原的 EC2 停止(是停止不是终止)

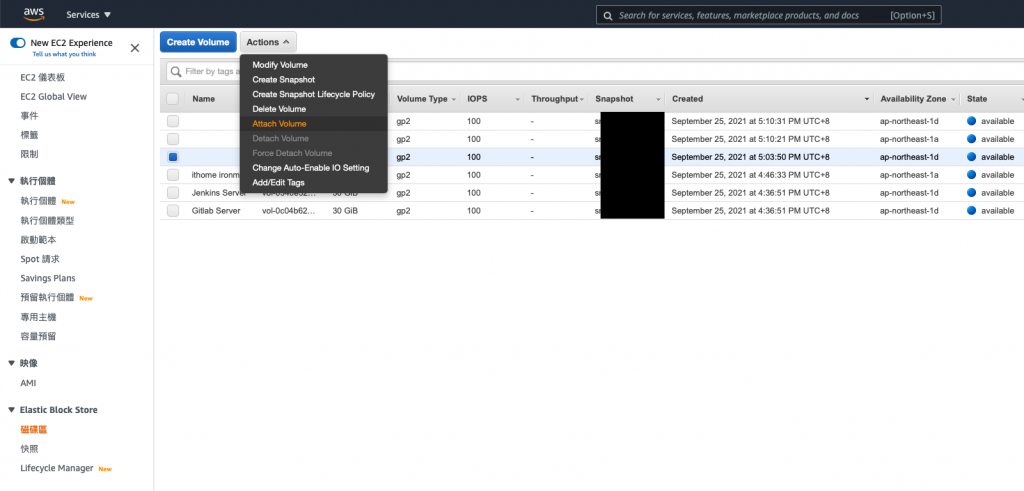
- 在EC2 Elastic Block Store 磁碟区功能表中,选取您要取代的根磁碟区。
选择动作,接着选择分离磁碟区。
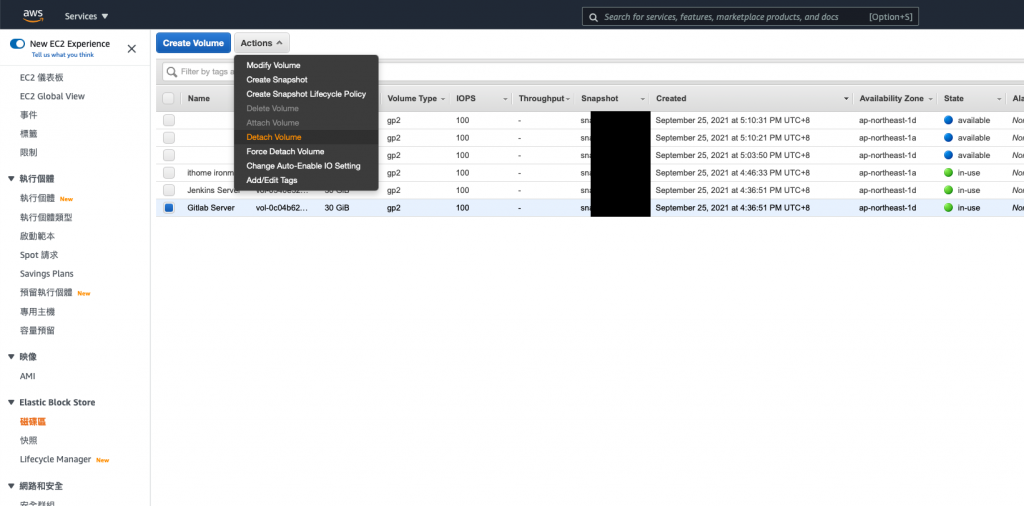
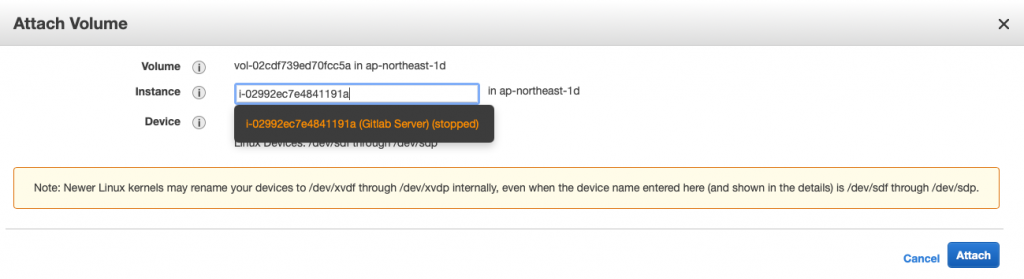
- 在EC2 Elastic Block Store 磁碟区功能表中,选取新磁碟区。
选择动作,接着选择连接磁碟区。
因为我们要覆盖 root
所以下方要填写/dev/sda1
通常会做到这个地步
或是看到这篇
表示可能遇到紧急状况
不建议像我这样
一次还原全部
一次 detach 又 attach
还是一步一步来
确认好每个步骤比较重要
还原 RDS
程序码取消注解外
rds_subnet_group 需要调整一下
resource "aws_db_subnet_group" "rds_subnet_group" {
    name       = "database_subnet_group"
    subnet_ids = sort(data.aws_subnet_ids.private_subnet_ids.ids)

    tags = {
        "Name" = "Database subnet group"
    }
}
重建 Load Balance
因为全部重建的关系
所以我们 Web ACLs 的关联也删除了
既然要重建
那我们也把事情做好一点
将凭证套上
不过我们会使用 AWS 来发证照
并且在 Load Balance 上挂上凭证
这样 DNS 指向 Load Balance 时
就可以直接验证
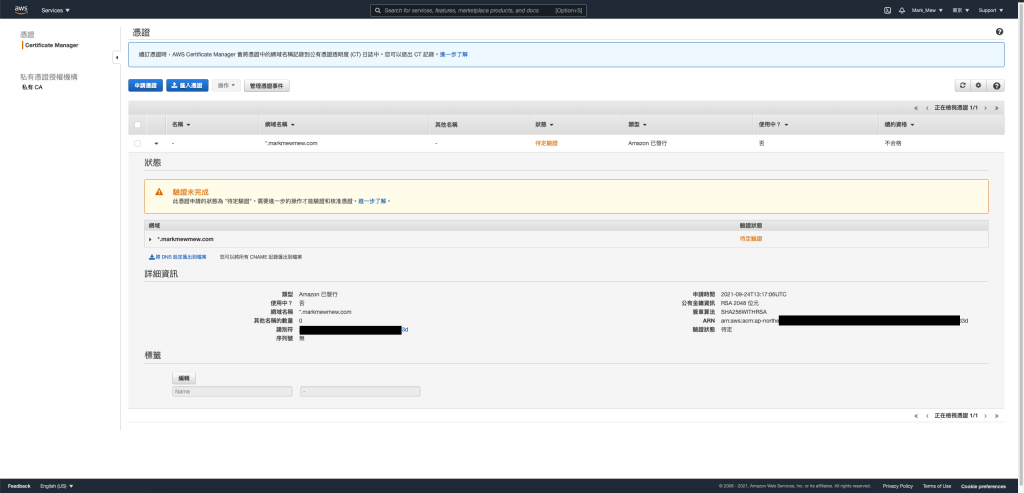
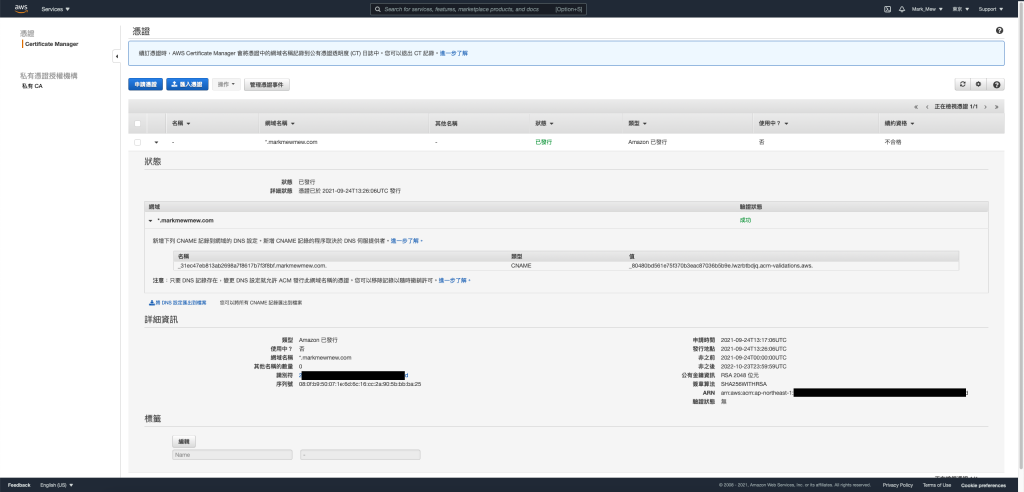
AWS 公发凭证
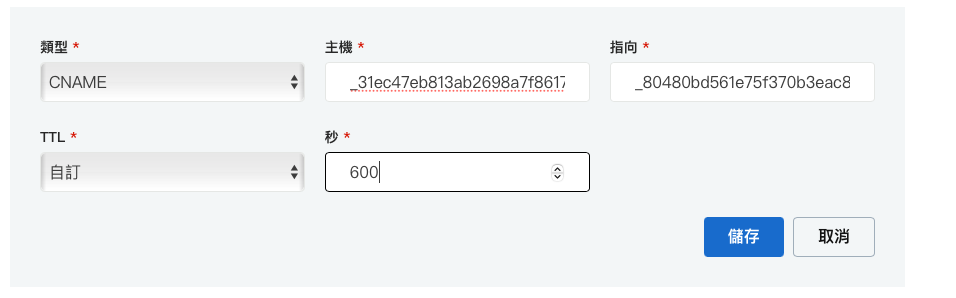
因为我们验证方式是使用 DNS
所以需要透过 DNS 设定 CName Record
resource "aws_acm_certificate" "cert" {
    domain_name       = "*.markmewmew.com"
    validation_method = "DNS"

    lifecycle {
        create_before_destroy = true
    }
}
调整 Load Balance
在建立 Load Balance 时
我们将 80 强制转到 443
而 443 会直接指向内网的 IP
resource "aws_lb" "portal" {
    name               = "ithome-ironman-portal"
    internal           = false
    load_balancer_type = "application"
    security_groups    = [ aws_security_group.ithome_ironman_portal.id ]
    subnets            = data.aws_subnet_ids.public_subnet_ids

    enable_deletion_protection = false

    tags = {
        Creator = "Terraform"
    }
}

resource "aws_lb_target_group" "portal" {
    name        = "ithome-ironman-portal"
    port        = 80
    protocol    = "HTTP"
    target_type = "ip"
    vpc_id      = aws_vpc.stage.id

    stickiness {
        type = "lb_cookie"
    }
}

resource "aws_lb_target_group_attachment" "portal01" {
    target_group_arn = aws_lb_target_group.portal.arn
    target_id        = module.ec2_ithome_ironman_portal.private_ip
}

resource "aws_lb_listener" "portal_port443" {
    load_balancer_arn = aws_lb.octopus_deploy.arn
    port              = "443"
    protocol          = "HTTPS"
    ssl_policy        = "ELBSecurityPolicy-2016-08"
    certificate_arn   = data.aws_acm_certificate.cert.arn

    default_action {
        type             = "forward"
        target_group_arn = aws_lb_target_group.portal.arn
    }
}

resource "aws_lb_listener" "portal_port80" {
    load_balancer_arn = aws_lb.portal.arn
    port              = "80"
    protocol          = "HTTP"

    default_action {
        type             = "redirect"
        target_group_arn = aws_lb_target_group.portal.arn

        redirect {
            port        = "443"
            protocol    = "HTTPS"
            status_code = "HTTP_301"
        }
    }
}
web acls 不要忘了挂上去
resource "aws_wafv2_web_acl_association" "portal" {
    resource_arn = aws_lb.portal.arn
    web_acl_arn  = aws_wafv2_web_acl.fundamental_acl.arn
}
DNS 指向
查看 Load Balance 的 Host
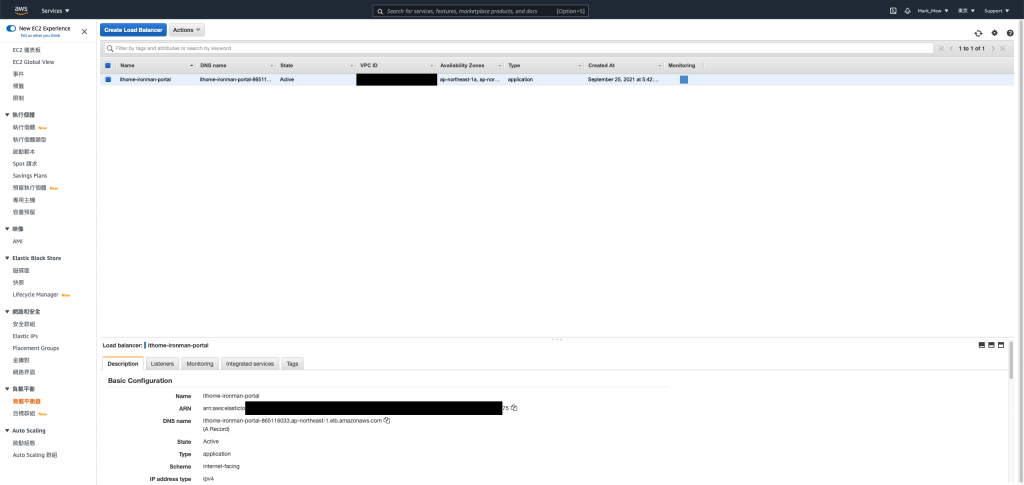
到 DNS Server 去设定指向
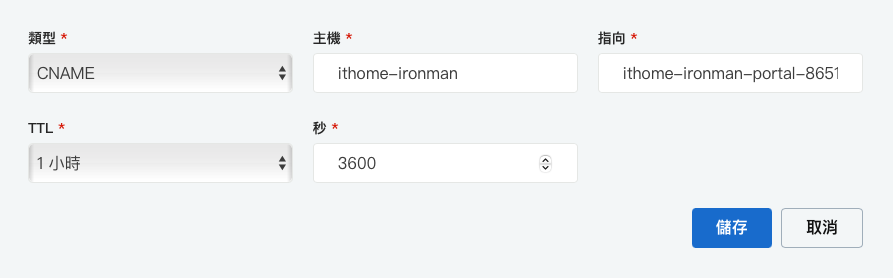
铁人赛的测试网站就这样挂上 Load Balance 和凭证了
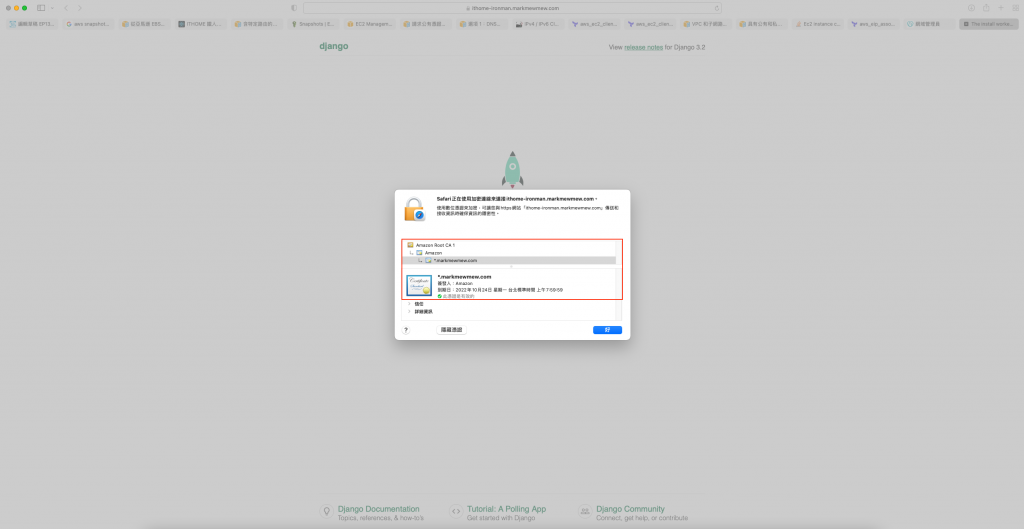
今天我们体验了一下
从删库到跑路的过程
重新整理架构的过程
让网站重新复活
不过还有些事情还蛮调整完
就是 Jenkins 和 Gitlab 目前还算是半残
因为架在 private 网段的关系
所以我们本机也连不进去
目前我顷向的做法是 Gitlab 比照 Portal 挂 Load Balance 这样外网也可以连到
而 Jenkins 则是架设跳板机来使用
但,我累了
明天再说好了
在下方留言的朋友
我帐号还没走完新手任务
还没办法回覆大家
敬请见谅
参考资料:
- 预设 VPC 和预设子网路
- 含特定路由的组态
- Ec2 instance creation using terraform assigns public IP
- 从亚马逊 EBS 快照或 AMI 恢复
- 请求公有凭证
- 选项 1:DNS 验证
<<: Unity与Photon的新手相遇旅途 | Day10-角色攻击
>>: Day 10 :Longest Palindromic Substring
Youtube Analytics API 教学 - OAuth2.0 开放授权 (2)
「鲑鱼均,因为一场鲑鱼之乱被主管称为鲑鱼世代,广义来说以年龄和脸蛋分类的话这应该算是一种 KNN 的...
Day11. UX/UI 设计流程之一: Functional Map (以 Axure RP 实作)
有了 User Story,已经能够了解产品会有哪些角色、他们的需求及功能价值。但缺少的是这些需求...
Day 27 Redux 接入 component
第 27 天 ! 昨天我们把 redux 给接入到我们的专案上, 那今天试着把 store 的 st...
Day29 procfs, sysfs, debugfs
前言 讲完了复杂了中断处理,铁人赛的倒数第二天,要来看看一些虚拟的文件系统了,首先是 procfs ...
Day22 火焰文字
火焰文字 教学原文参考:火焰文字 这篇文章会介绍在 GIMP 里使用涂抹工具、渐层映对、文字...等...