Python & GCP 学习笔记_Gmail API 操作
最近在一个偶然的情况下接触到 Gmail API
因此找了一个周末来好好研究一下该怎麽操作他
以下是学习纪录,如果有错或是有更好的写法,欢迎留言讨论喔
简单目录
一、GCP设定教学以及取得 credentials.json
二、取得 token.json
三、利用 yagmail 寄送 email
四、参考资源
一、GCP 设定教学
首先,要使用和 google 各项服务相关的话必须到 Google_Cloud_Platform 建立帐户以及专案
,才可以取得各项服务相关的 API
(一)、Google Cloud Platform (GCP)
前往 这个网址 并登入 GCP
(二)、建立一个专案并启用 API
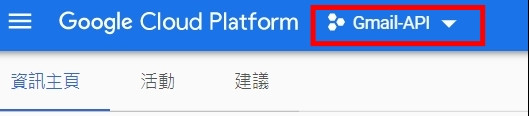
- 点选上方专案部分,可以建立 or 选择一个专案
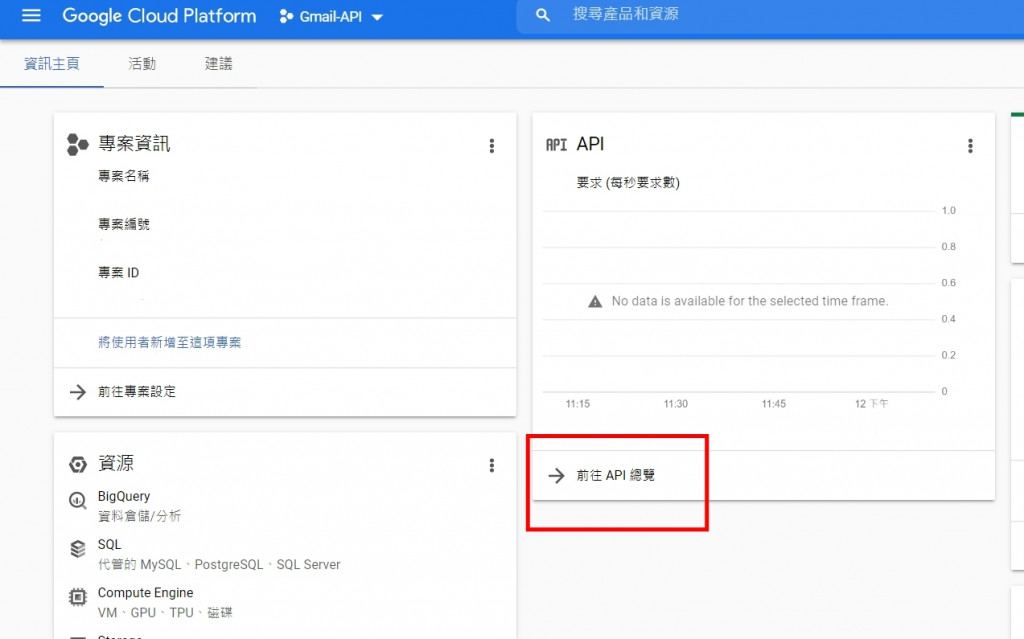
- 进入专案後,点选 "前往 API 总览" 并点选 启用 API 和服务

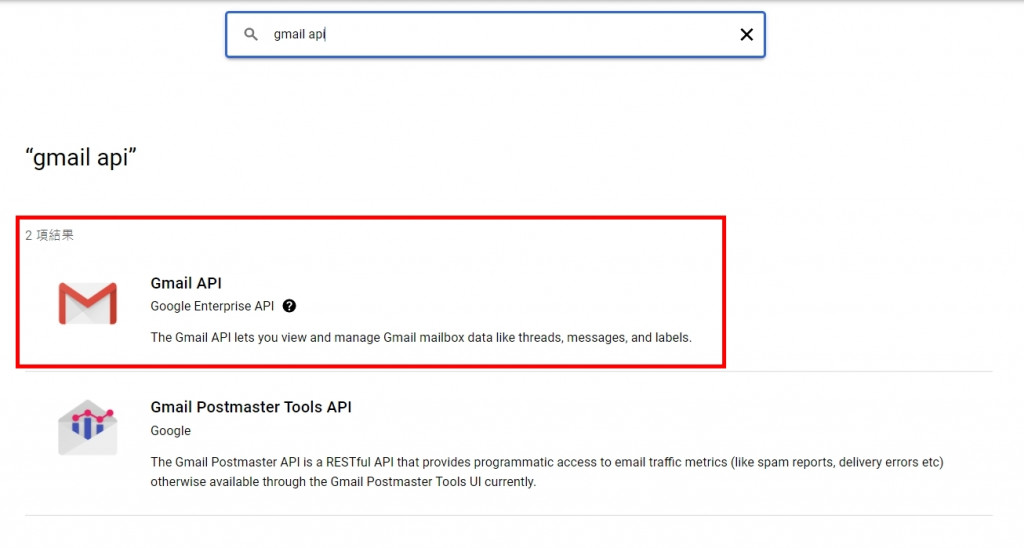
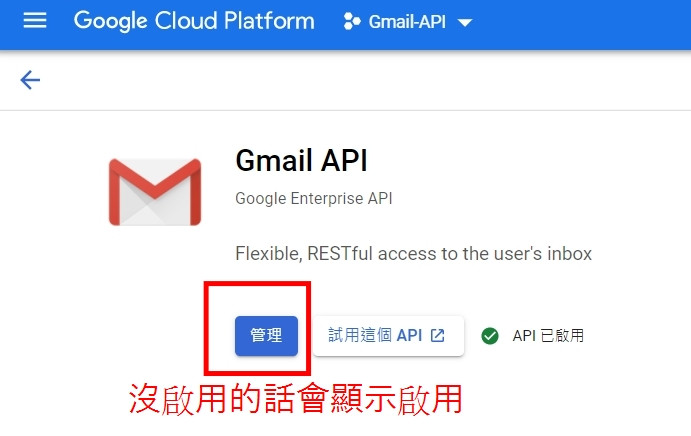
- 之後会进入到一个搜寻页面,搜寻 gmail api 点选进入後选择启用
(三)、取得凭证和 credentials.json
- 回到主页并选取左上方的三条线,并选择 "API 和服务"
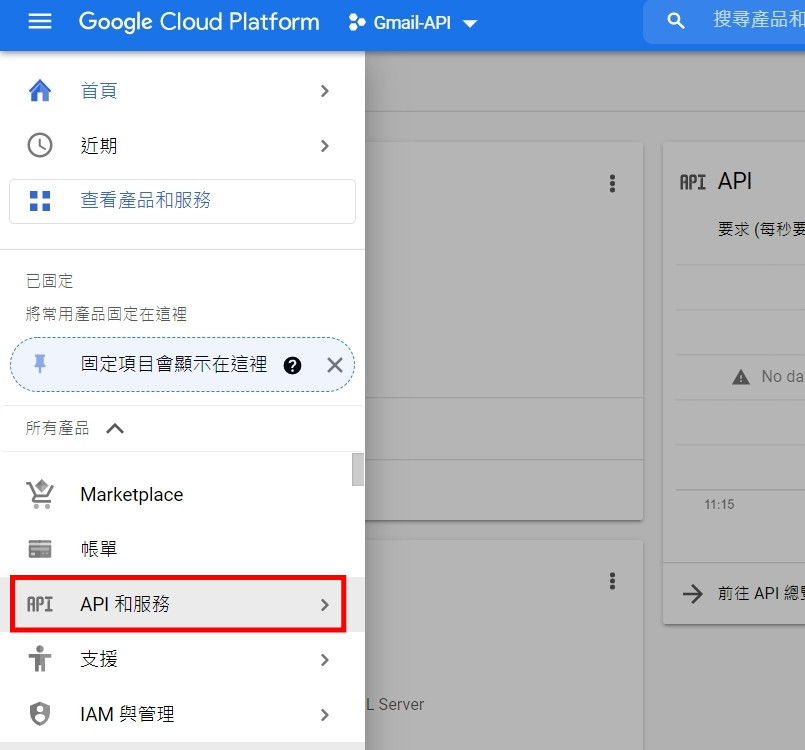
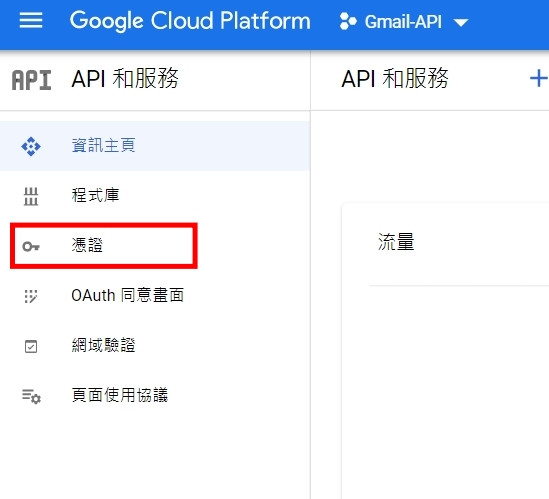
- 进入後选择凭证
- 点选上方的建立凭证,并依序建立 "API 金钥" 以及 "OAuth 2.0 用户端 ID"
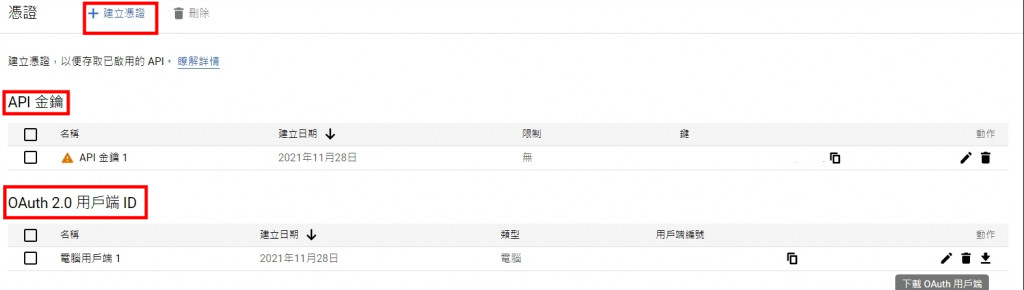
- 点选 "OAuth 2.0 用户端 ID" "动作" 栏位下方的下载按钮,会挑出一个弹跳视窗,接着点选 下载 JSON

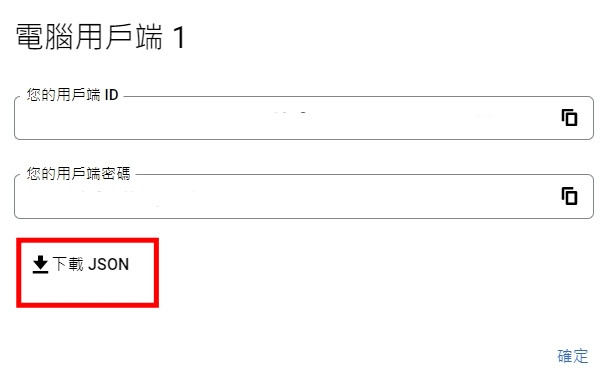
- 将下载下来的档案命名为 credentials.json,留着备用
二、取得 token.json
以下操作皆於 pycharm 底下进行,事前需要先建立一个空专案
(一)、安装必要套件
根据 官方文件 说明,
我们必须利用下面这个指令安装必要的套件
pip install --upgrade google-api-python-client google-auth-httplib2 google-auth-oauthlib
(二)、建立 "quickstart.py"
接着在专案目录底下建立一个名为 "quickstart.py" 的档案,并将下面的程序码复制贴上
from __future__ import print_function
import os.path
from googleapiclient.discovery import build
from google_auth_oauthlib.flow import InstalledAppFlow
from google.auth.transport.requests import Request
from google.oauth2.credentials import Credentials

# If modifying these scopes, delete the file token.json.
SCOPES = ['https://www.googleapis.com/auth/gmail.readonly']

def main():
    """Shows basic usage of the Gmail API.
    Lists the user's Gmail labels.
    """
    creds = None
    # The file token.json stores the user's access and refresh tokens, and is
    # created automatically when the authorization flow completes for the first
    # time.
    if os.path.exists('token.json'):
        creds = Credentials.from_authorized_user_file('token.json', SCOPES)
    # If there are no (valid) credentials available, let the user log in.
    if not creds or not creds.valid:
        if creds and creds.expired and creds.refresh_token:
            creds.refresh(Request())
        else:
            flow = InstalledAppFlow.from_client_secrets_file(
                'credentials.json', SCOPES)
            creds = flow.run_local_server(port=0)
        # Save the credentials for the next run
        with open('token.json', 'w') as token:
            token.write(creds.to_json())

    service = build('gmail', 'v1', credentials=creds)

    # Call the Gmail API
    results = service.users().labels().list(userId='me').execute()
    labels = results.get('labels', [])

    if not labels:
        print('No labels found.')
    else:
        print('Labels:')
        for label in labels:
            print(label['name'])

if __name__ == '__main__':
    main()
(三)、修改 SCOPES
由於一些权限问题,会造成 mail 无法寄送,因此我们需要替换下面这行程序码
- before:
SCOPES = ['https://www.googleapis.com/auth/gmail.readonly'] - after:
SCOPES = ['https://mail.google.com/']
(四)、移动 credentials.json
接着将刚刚备用的 credentials.json 档案移动到专案资料夹底下
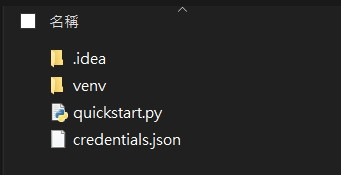
(五)、执行 quickstart.py
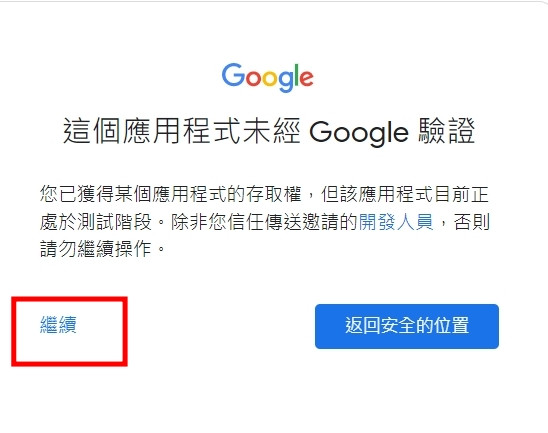
接着执行 "quickstart.py" 会自动跳出浏览器视窗要你选择 or 登入帐号
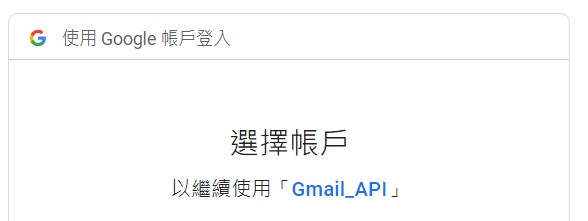
接着按照流程点选继续 -> 继续,全部结束後会跳出文字题是可以关闭视窗
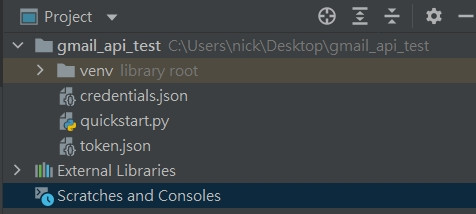
回到专案资料夹内你会发现专案资料夹内多了一个 "token.json" 的档案
到这边为止所有的设定就完成成了,接下来要开始正式寄信了!!
三、利用 yagmail 寄送 email
如果按照官方文件的步骤寄出一封 mail 会需要许多的步骤,笔者这边找到一个叫 yagmail 的套件
,可以协助我们处理 mail 的寄送
(一)、安装 yahmail
pip install yagmail[all]
(二)、建立一个新的 python 档案
建立一个新的 python 档案,并将以下程序码复制进去
import yagmail

file = ['runtime.txt', 'debug.log']  # 传送多个档案 以list型态
yag = yagmail.SMTP("[email protected]", oauth2_file="credentials.json")
yag.send(
    to="[email protected]",
    subject="subject",
    contents="contents",
    attachments=file
)
- 解释:
- file 的部分取决於有没有要传送档案,如果只有一个,则直接指定档案路径,若有多个,可以用 list 包起来
- yagmail.SMTP,第一个参数为 mail 的撰写者, oauth2_file 则是前面有提到过的 credentials.json 档案
- yag.send(),to 参数为 mail 的收件者,同样如果要指定多个收件者,可使用 list 包起来
- 其他三个参数分别为,主旨、内容、附件
(三)、寄送 email
将上面的档案编辑好後,就可以执行该档案来实际寄送 email 了,如果是第一次寄送会需要进行下面的步骤
- terminal 会提示你输入你的 email

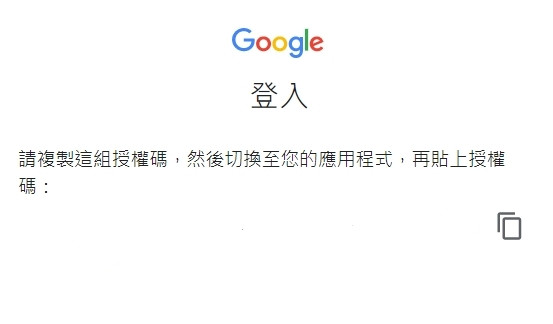
- 输入之後会秀出一段网址,请点击该网址并选择 or 登入帐户,并依序案两次继续
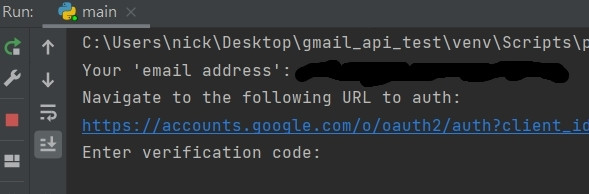
- 取得验证码,并复制
- 回到 terminal 中贴上验证码在 "Enter verification code" 的後面并 Enter
- 寄信成功
备注: 目前测试下来是每个专案只需要进行上述步骤一次,後续都不需要再进行
四、参考资源
Day28 Gin with SMTP Server
What is an SMTP Server? SMTP 全名为Simple Mail Transf...
Trouble with Distributed Systems (3-2) - Unreliable Clocks
接续 Day 10 时钟同步和精度 (CLock Synchronization and Accu...
Elastic Kibana Infographic: 资讯图像化可以炫技到什麽程度 (31)
在经过一个月的学习之後,操作上只是理解有非常多可以客制化的部分,难免会想资讯图像化的部分到底可以炫技...
Day 20 : Linux - 安装Linux的VM虚拟机part_2,如何自己手动分割硬碟?分割区跟挂载点又该如何做选择?
如标题,这篇想教大家如何自己手动分割硬碟 Windows有C槽、D槽、E槽……等,但linux没有w...
{DAY 18} Pandas 学习笔记part.4
前言 今天要接续DataFrame的介绍 这篇文章会分成两个部分: 资料的删除 资料的新增 会利用k...