Vue3 ( 进阶 API ) -3
1.Refs 似 Document.getElementById()
(1)直操作DOM
<input type="text" ref="inputDom" />
跟元素内制作生命周期抓ref,并使用方法
//生命周期 画面载入完成(created会抓不到)
mounted() {
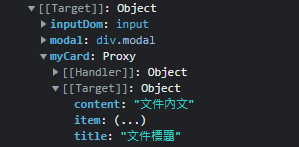
// 1-2 取得ref的全部资讯(Target)
console.log(this.$refs);
// 1-2 取得input 的 inputDom
console.log(this.$refs.inputDom);
// 1-3 直接focus
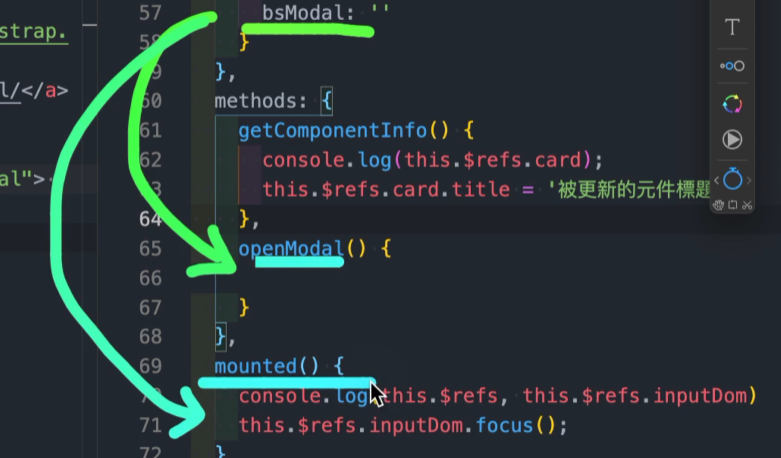
this.$refs.inputDom.focus();
},
(2)元件内资料调整
     <card ref="myCard"></card>
     <button type="button" @click="getComponentInfo">取得元件资讯</button>
          app.component("card", {
               data() {
                 return {
                   // 2-2 Target内会显示该资料,接下来制作按按钮使其变更
                   title: "文件标题",
                   content: "文件内文",
                 };
跟元素内制作methods,并使用方法
              methods: {
                getComponentInfo() {

                  // 写方法变更title
                  this.$refs.myCard.title = "被更新後的元件标题YO";
                  this.$refs.myCard.content = "被更新後的内容YO";
                },
(3)操作BS元件
制作 ref 在 BS的语法里面
<div class="modal" tabindex="-1" ref="modal">
新增click事件,让该ref="modal"变更资料
<button @click="openModal">开启 Bootstrap Modal</button>
看官方API如何用JS使用BS套件
var myModal = new bootstrap.Modal(document.getElementById('myModal'), options)
在跟元素内制作BS仓库及方法
              data() {
                return {
                  // 做一个BS套件仓库
                  bsModal: "",
                };
              },

              mounted() {

                // 在BS套件仓库 放入 被bootstrap.Modal抓取的$refs.modal
                this.bsModal = new bootstrap.Modal(this.$refs.modal);
              },
观看官方文件,内文提到用.show()就可以展示BS,把方法加到按钮方法里面
                openModal() {
                  // 3-5 观看官方文件,内文提到用.show()就可以展示BS
                  this.bsModal.show();
                },
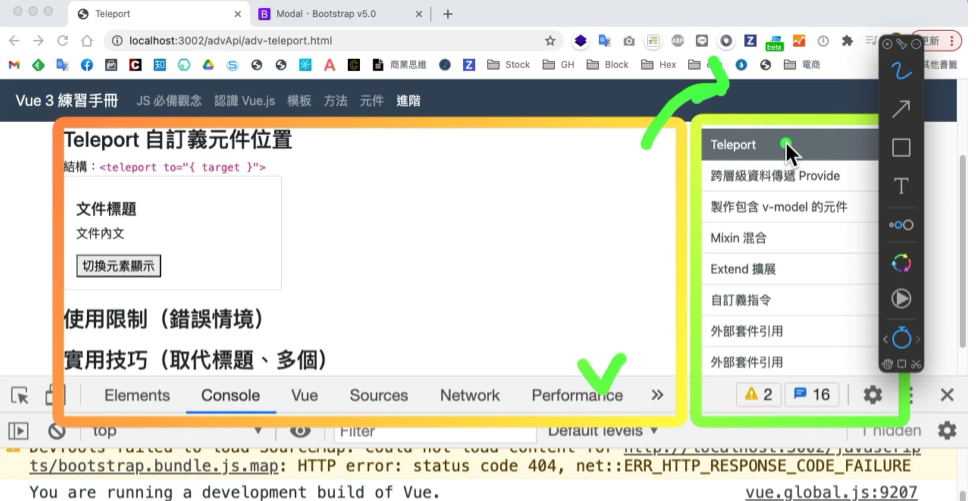
2.teleport 自订元件生成位置
可以两处都使用同一个元件
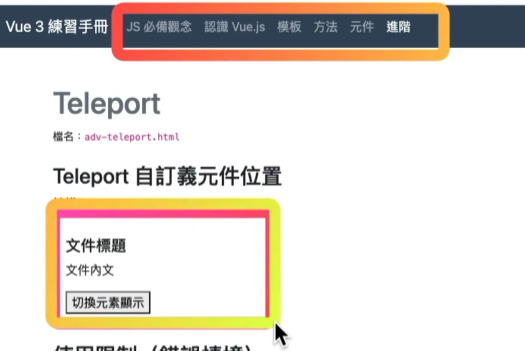
(1)用法:
想显示的地方
<div id="target"></div>
别的元素内制作,并用teleport + to="where"包起来
            app.component("card", {
              data() {
                return {
                  title: "文件标题",
                  content: "文件内文",
                  toggle: false,
                };
              },
              template: `

      1.先把要移动的资料包在teleport标签内 并指定位置to="#target"
      <teleport to="#target">
        <div v-if="toggle" class="alert alert-danger">*我是目标*被招唤的元素</div>
      </teleport>
    `,
(2)放太前面还没抓到 会错误

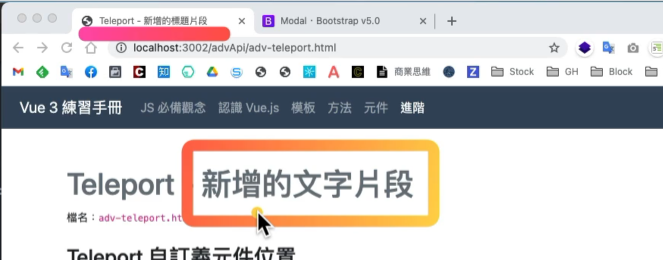
(3)实用技巧(取代标题、多个)
            <h1 class="mt-0 text-muted">Teleport</h1>
            <new-title></new-title>

            app.component("new-title", {
              template: `
              <teleport to="title"> - 新增的标题片段</teleport> //取代标题
              <teleport to="h1"> - 新增的文字片段</teleport>`,
            });
3.provide 跨层级资料传递
如果外层传入只有一层可以用props
但很多层时,使用provide(使用时机:登入验证)
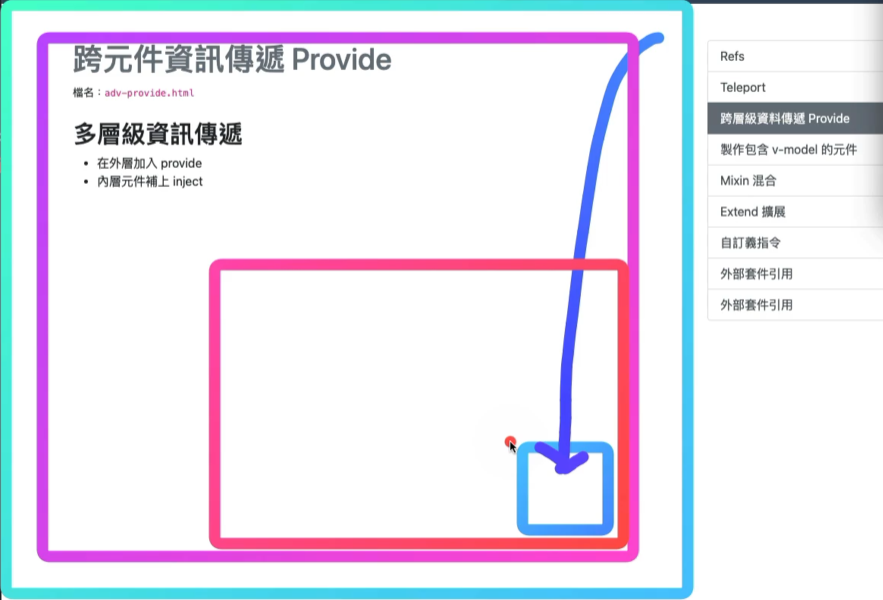
跟元件
子元件
子元件内的区域注册
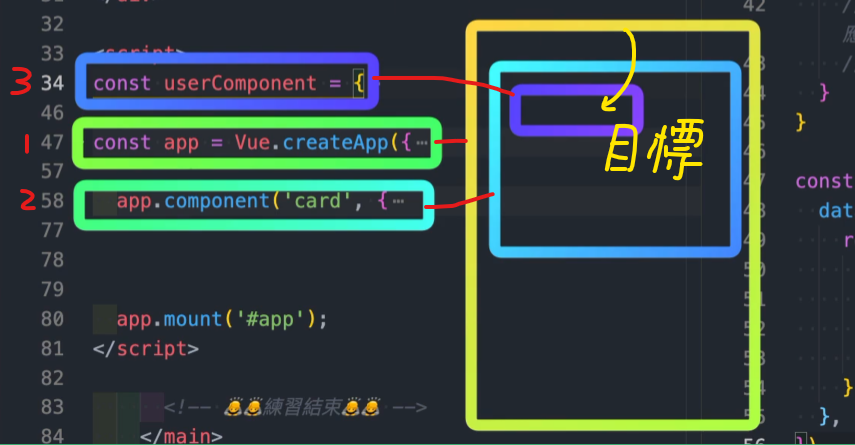
目标:把最外层的Vue.createApp data资料给最内层的区域注册userComponent
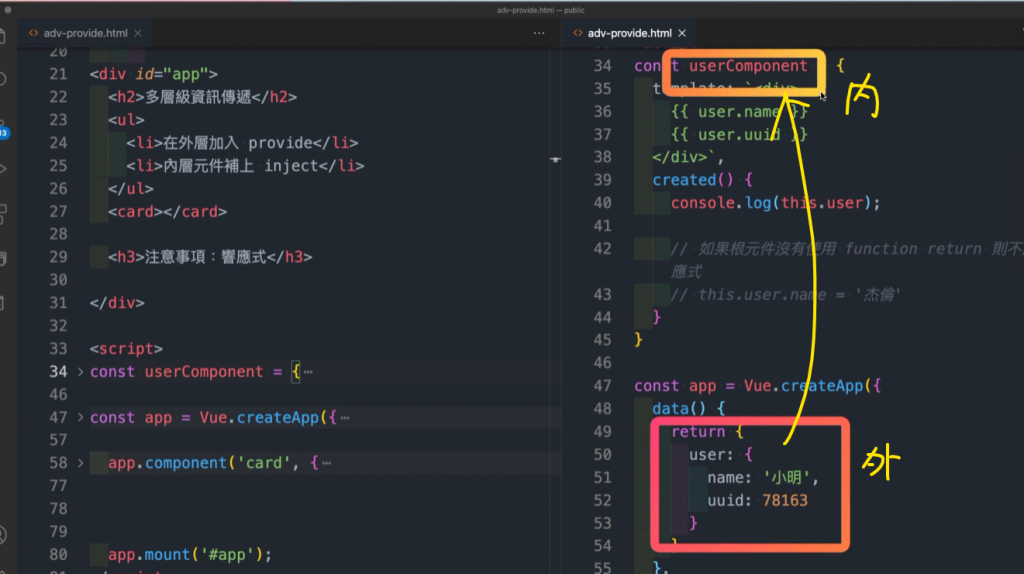
(1)在外层加入 provide 函式 or 物件
             const app = Vue.createApp({
              data() {
                return {
                  user: {
                    name: "小明",
                    uuid: 78163,
                  },
                };
              },
              // 在外层加入 provide 函式 or 物件
              // 放入要传递的资料
              provide: {
                user: {
                  name: "小明",
                  uuid: 78163,
                },
(2)内层元件补上 inject
            const userComponent = {
              template: `<div>
              {{ user.name }}
              {{ user.uuid }}
            </div>`,
              // 2. 内层元件补上 inject
              // 对应 provide: { user: {
              inject: ["user"],
(3)注意,收值处变更值,若跟目录传递时使用provide:{}无法传递
实务上经常直接使用provide(){return}
           const userComponent = {

                // 3.如果根元件没有使用 function return 则不能使用响应式
                // 响应式:这里更改值,外层不会改变
                this.user.name = "杰伦";
              },
            };
需将根元素
           const app = Vue.createApp({

              // 1.在外层加入 provide 函式() or 物件{}
              // 放入要传递的资料
              provide: {
                user: {
                  name: "小明",
                  uuid: 78163,
                },
              },
            });
改为
            const app = Vue.createApp({

              provide() {
                return {
                  user: this.user,
                };
              },
            });
此时外层也会收到
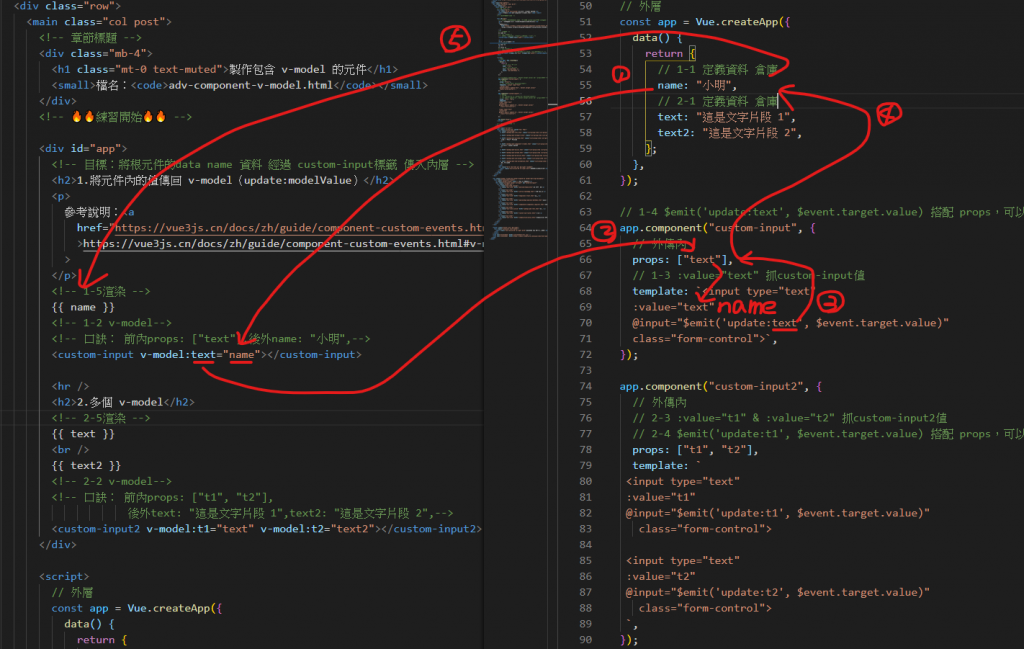
4. 制作包含v-model的元件
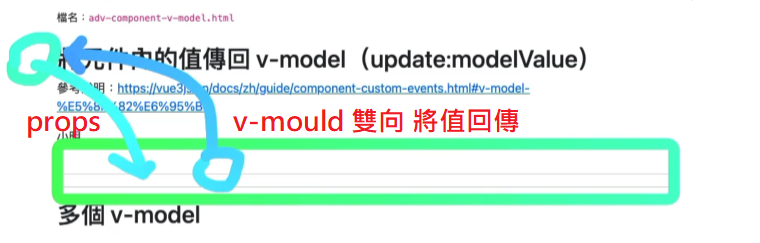
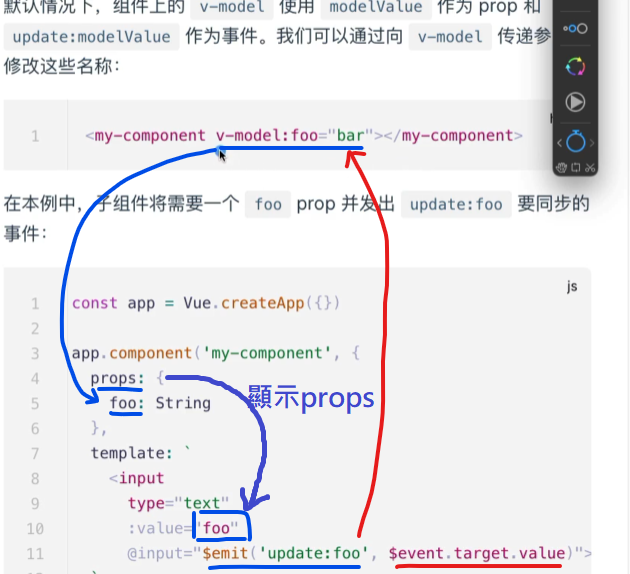
目标:将根元件的data name 资料 经过 custom-input标签 传入内层

5. mixins 混合元件方法
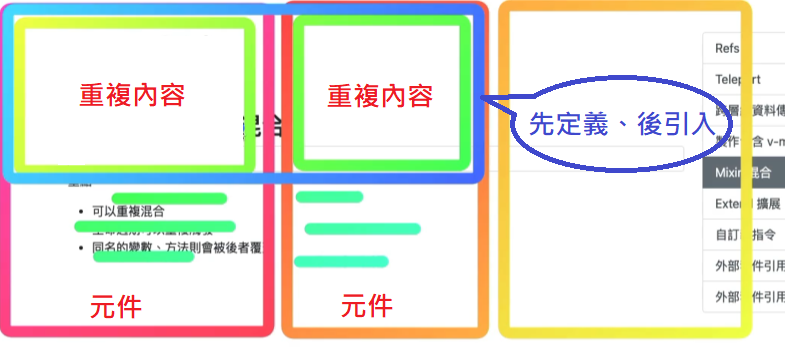
6. extend 扩展元件方法(似mixins)
无法一次extend多个元件
与差异mixins
extend 单一拓展
mixins 多个混合
权重:元件属性 > mixins > extend
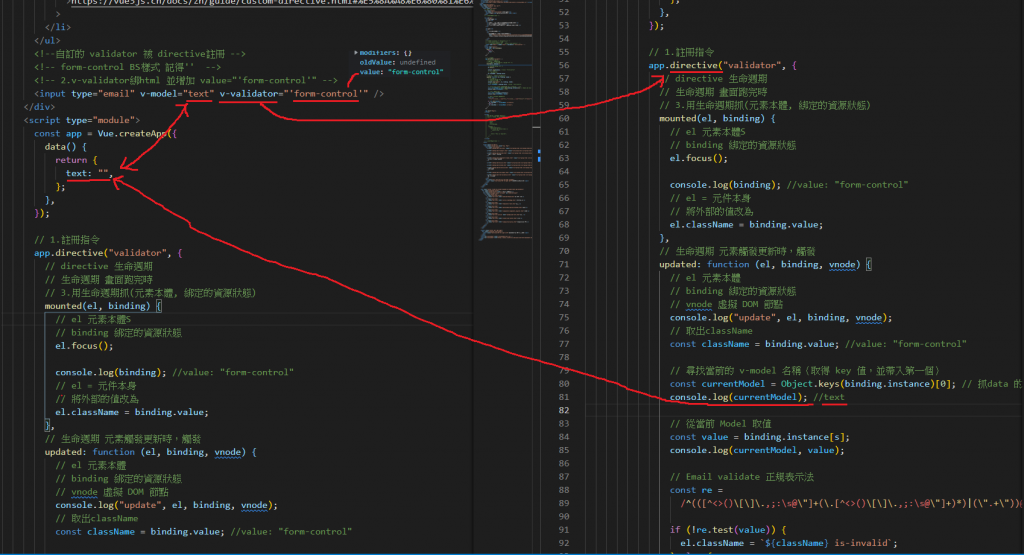
7. directive 自订义指令
注册
components vs directive
components注册元件
             const app = Vue.createApp({
              data() {
                return {
                  text: "外部元件文字",
                };
              },
              // 3.显示-方法1 区域注册
              components: {
                alert3,
                // 4.到跟元素注册
                alert4,
              },
directive注册指令
app.directive("validator", {
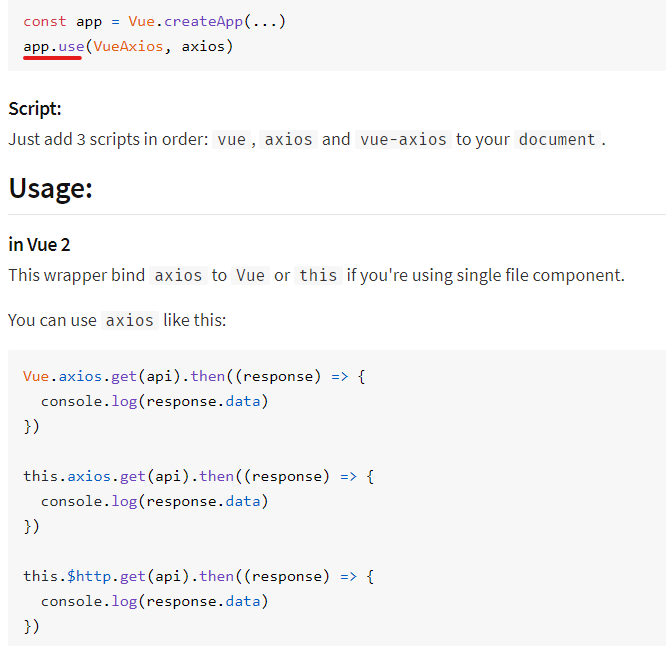
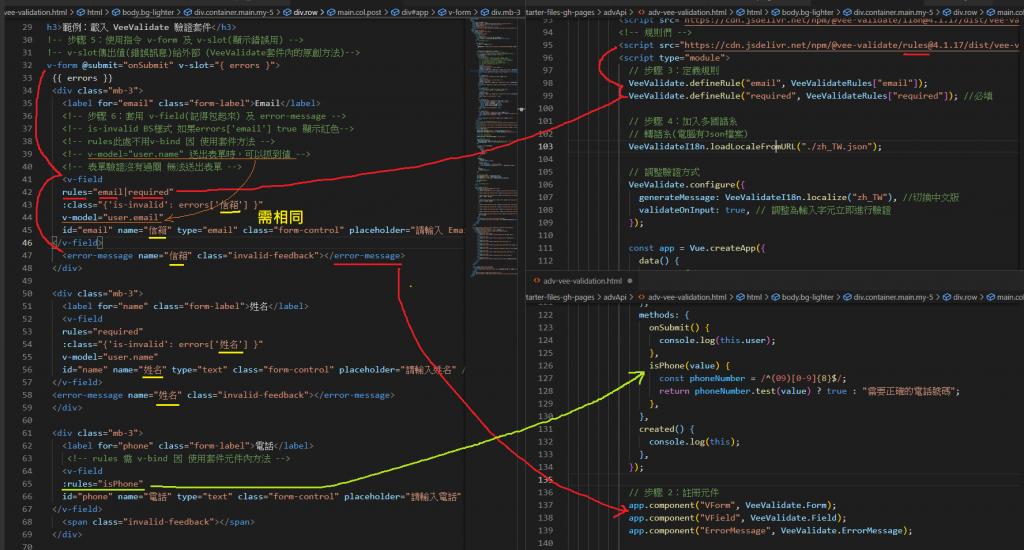
8. plugins 扩充插件
表单验证常使用
要注意版本(vue与套件),不同版本可能会无法使用
并注意使用人次(多)及更新频率(高)
(1)两种方式
(a)app.use() 或 元件的形式载入
app.use()
(b)元件的形式载入
<template>
  <Form>
    <Field name="field" :rules="isRequired" />  //元件的形式载入
    <ErrorMessage name="field" />
  </Form>
</template>
<script>

import { Field, Form, ErrorMessage } from 'vee-validate'; //元件的形式载入
export default {
  components: {
    Field,
    Form,
    ErrorMessage,
  },
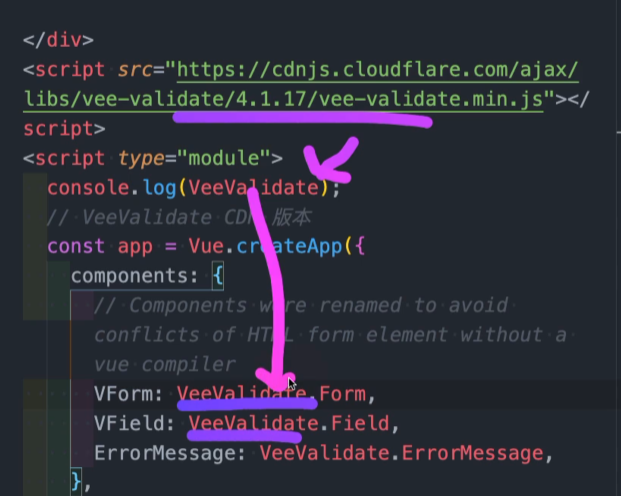
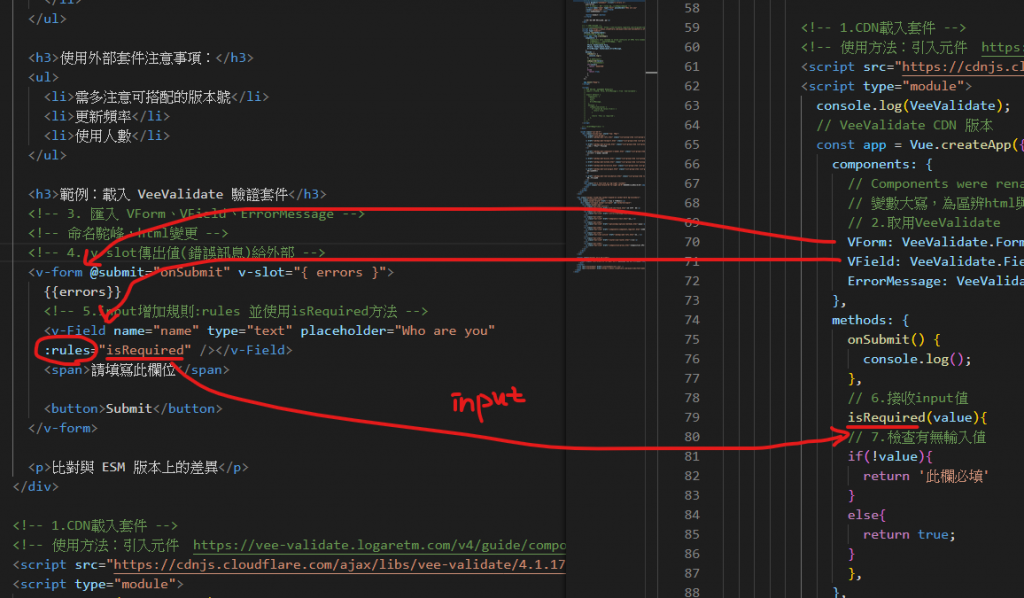
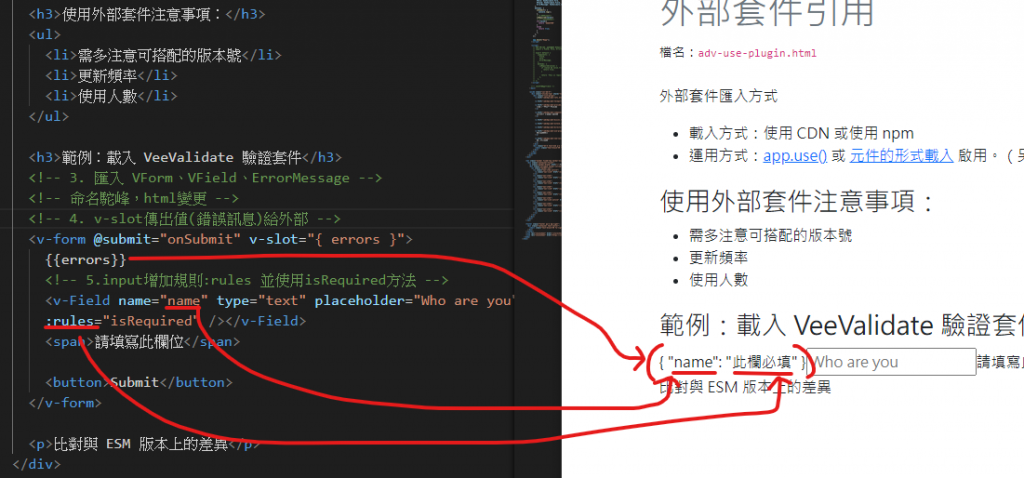
9. vee-validation 表单验证套件
>>: 用 Python 畅玩 Line bot - 28:Line Notify(一)
我们的基因体时代-AI, Data和生物资讯 Day23- 基因注释资料在Bioconductor中视觉化之呈现:Gviz
上一篇我们的基因体时代-AI, Data和生物资讯 Day22- 基因注释资料在Bioconduct...
【第二天 - Stack 介绍】
Q1. Stack 是什麽 一种资料结构的概念,假设有一个容器是装马克杯的盒子 (这个盒子下面是封死...
Day24 - 在 Kamigo 使用 Kamiflex
LINE Developers:https://developers.line.biz/zh-ha...
Day-1 杰哥的考研纪录
杰哥的考研纪录 tags: IT铁人 首先先跟各位打个招呼! 欢迎来到杰哥的考研小天地~ 这篇会简单...
[Day-23] R语言 - 分群应用(四) 建构新特徵 ( generate feature by clustering in R.Studio )
您的订阅是我制作影片的动力 订阅点这里~ 影片程序码 ## 应用四: 建构特徵 #### # 用GM...