Day09 SwiftUI 02 - 在 SwiftUI 上设计画面
预设已经帮我们建立一个 Text 元件"Hello world",且会看到Automatic Preview,这是一个执行预览的的区块,当我们打完程序码的同时,该区块就会立即呈现结果,可点击 Resume 启动 Automatic Preview,会从 Automatic Preview 看到"Hello world"。
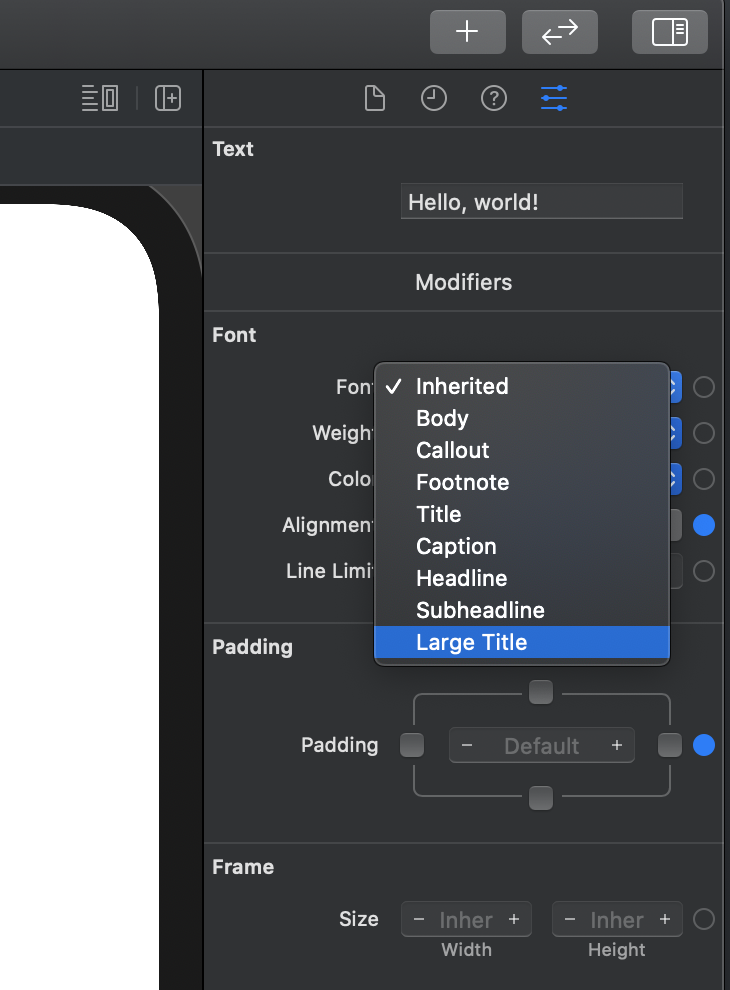
此时可以在工具区( Utility Area )下点选属性检阅器( Attributes Inspector ),对预设的Text 编辑属性,会看到程序区块的编辑区也将会同步更改
像是在 Automatic Preview 上选取预设的Text 後,在 Attributes Inspector 对 Font 进行编辑,选择为 Large Title,预设的Text 就会标题就会变大
一样的方式,换在 Attributes Inspector 对 Color 进行编辑,预设的Text 颜色就会更新至您选的颜色
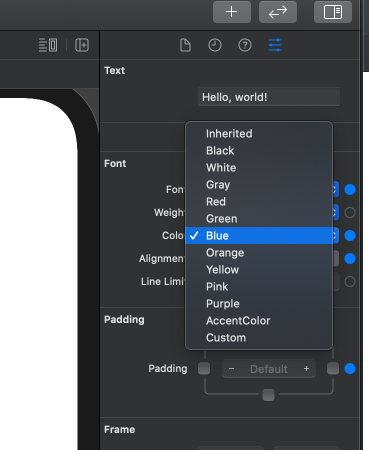
并且我们这边编辑的结果,程序区块的编辑区也会更新
struct ContentView: View {
    var body: some View {
        Text("Hello, world!")
            .font(.largeTitle)
            .foregroundColor(Color.blue)
            .multilineTextAlignment(.center)
            .padding()
    }
}
接下来我们来新增看看 Attributes Inspector 上没有的属性,首先点选 Xcode 右上角的元件库(+)按钮来显示元件库,类型选择 Modifiers,搜寻 border 并拖拉至 Automatic Preview 的"Hello World" Text 上
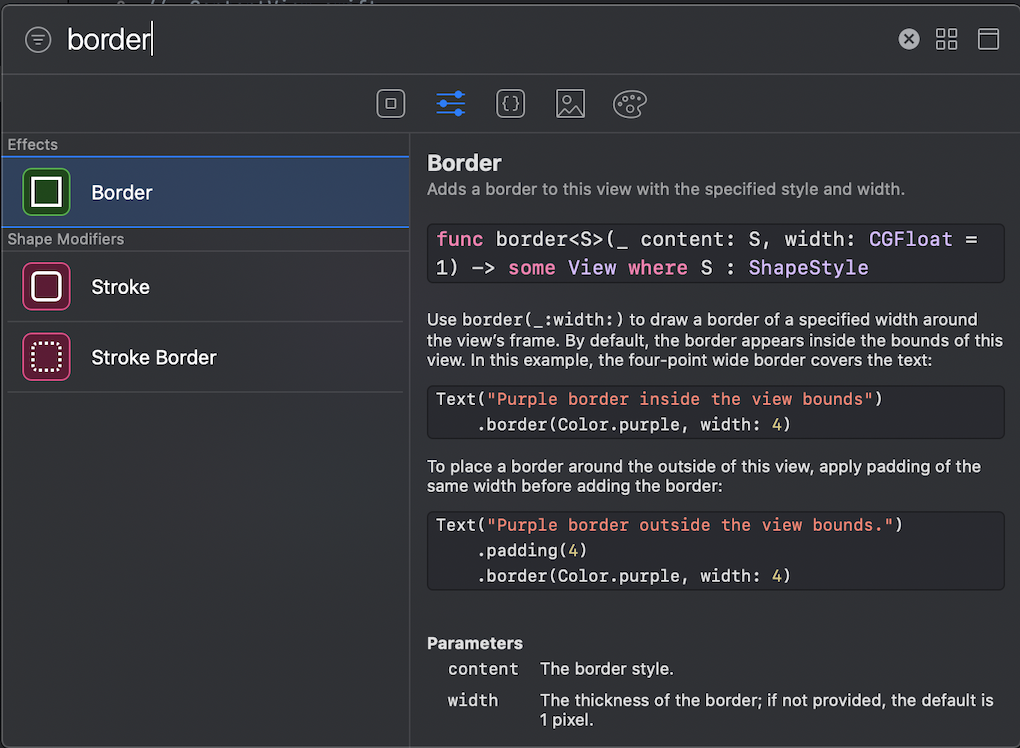
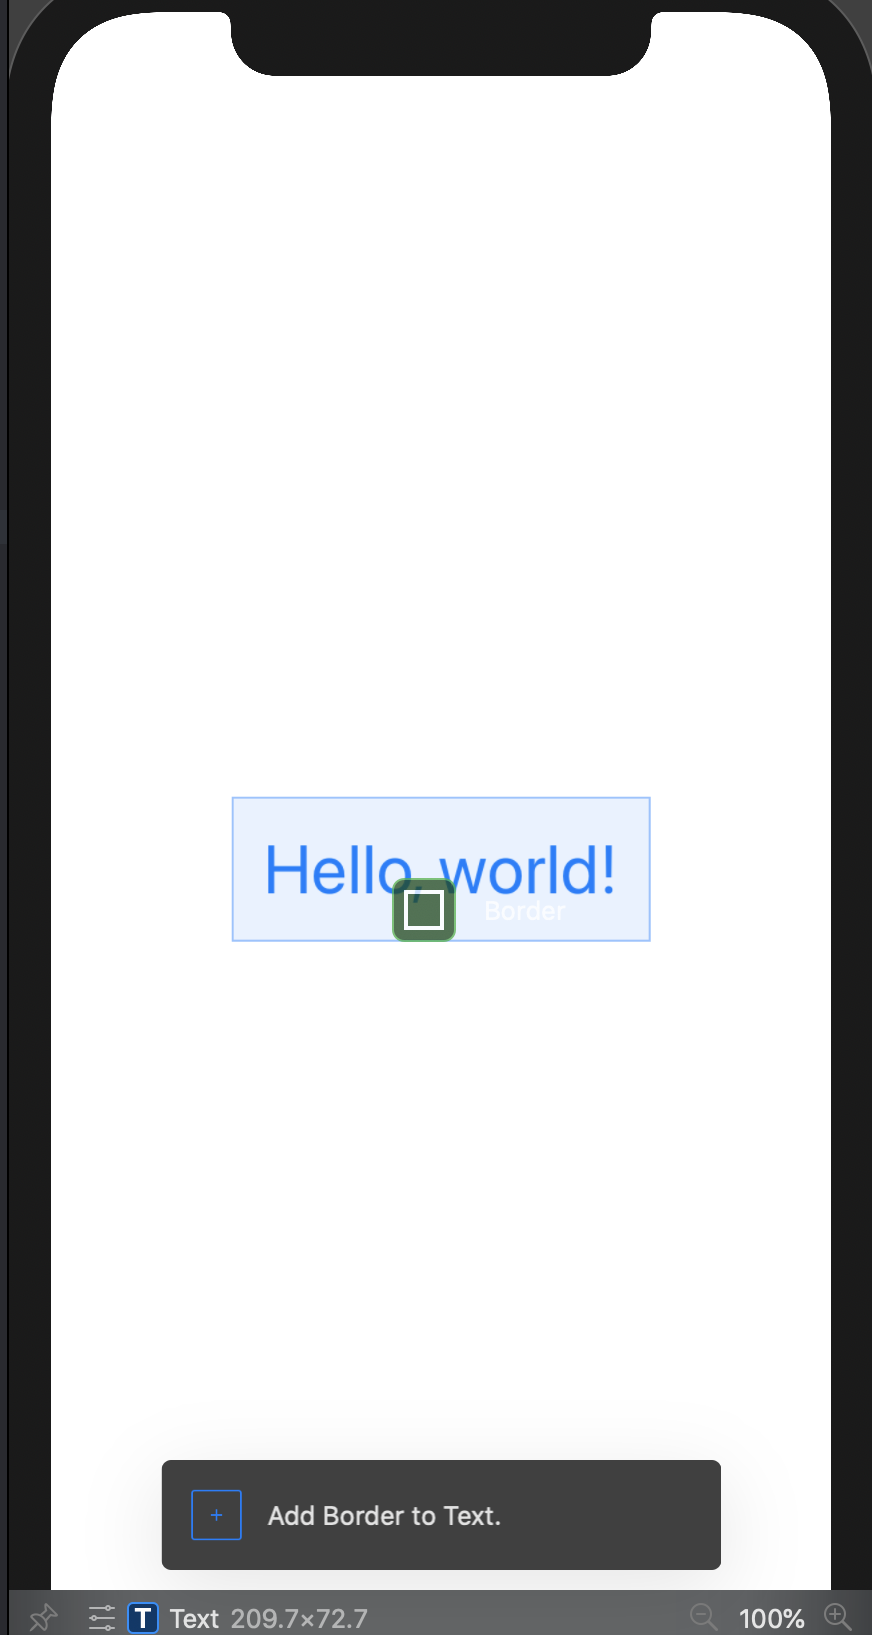
这样就成功加上 border 这个属性至 Text 上了
接下来我们试着从 Text 下方再加入一个 Text,首先一样在 Xcode 右上角的元件库(+)按钮来显示元件库,类型选择 Views,然後搜寻 Text,并拖拉至 Automatic Preview 预设的"Hello World" Text ,会依你拖曳至的位置,帮你预览说新的 Text 会放在此 View(预设的HelloWorld Text)的哪个位置,如下图
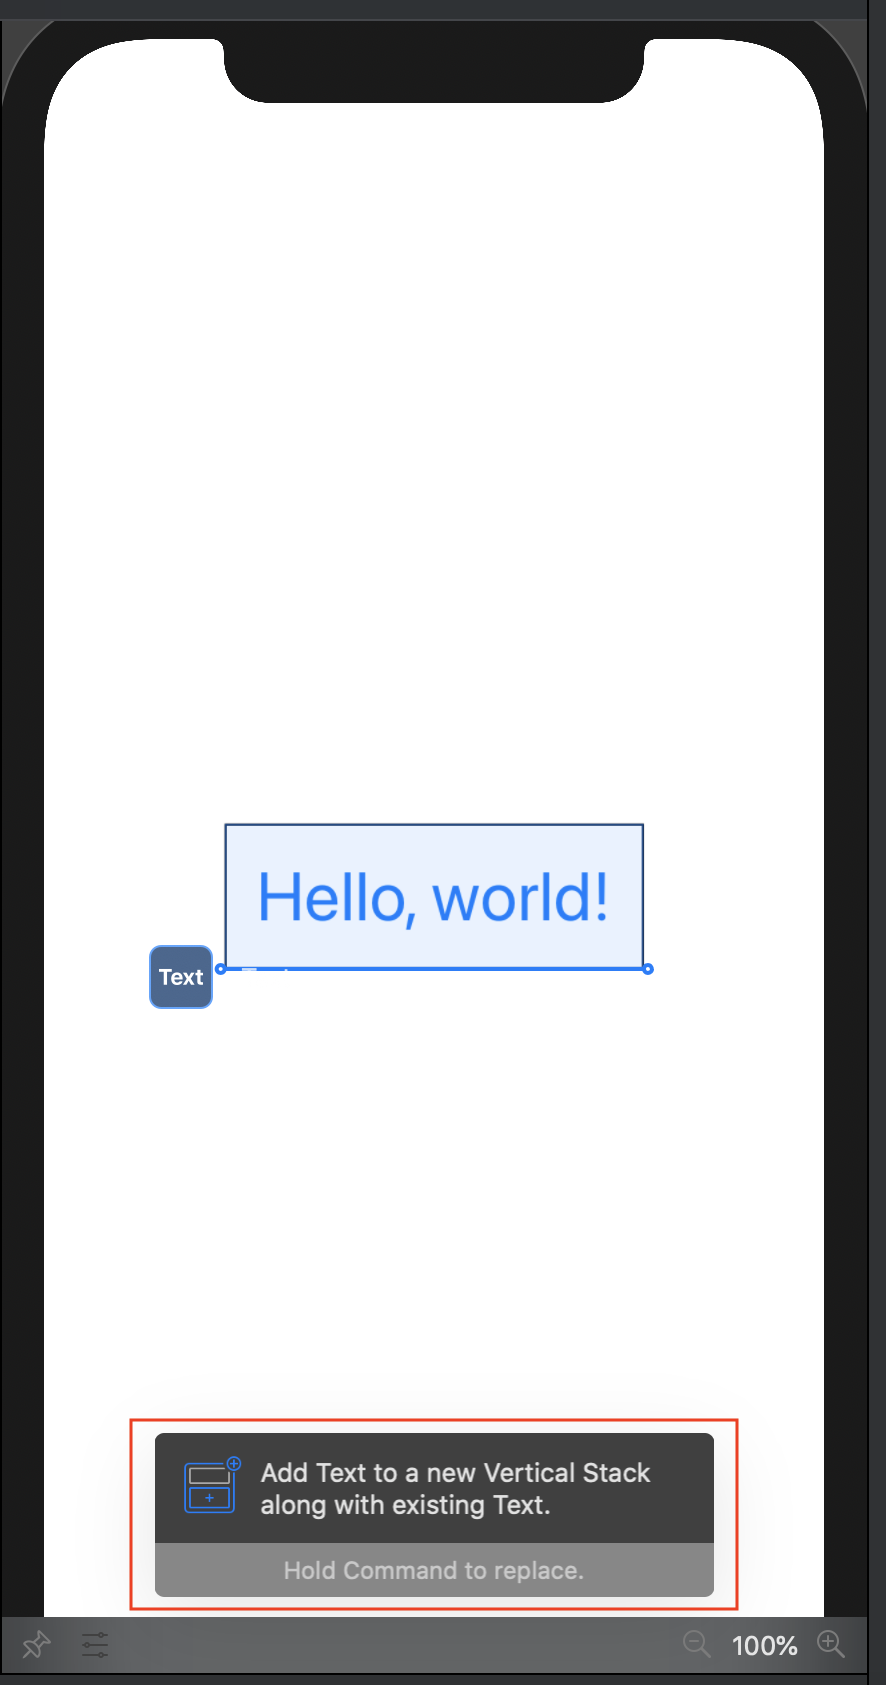
它会自动帮你依的拖曳完的位置,帮我们加上了 Vstack(垂直排列) 或 Hstack(水平排列),以作为ContentView的 body View物件
从元件库拉进去後,程序区块会帮我们产生预设的程序码,有些地方会需要我们自行再去设计编辑,Xcode 会帮我们标注起来,如下图
这边直接点击它并编辑成我们要显示的文字即可

struct ContentView: View {
    var body: some View {
        VStack {
            Text("Hello, world!")
                .font(.largeTitle)
                .foregroundColor(Color.blue)
                .multilineTextAlignment(.center)
                .padding()
                .border(Color.black, width: 1)
            Text("Test")
        }
    }
}
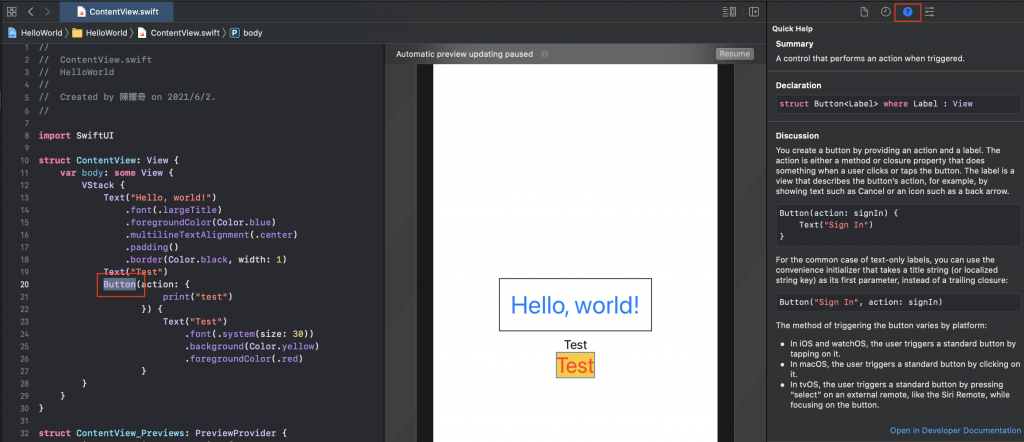
一样的做法,我们来新增一个按钮,在元件库的Views 搜寻Button 并拖曳至您要的位置後,我们会发现,我们需要再去设定按钮的 Action 点击事件以及 Content 显示的内容,这边我们将按钮设计如下
struct ContentView: View {
    var body: some View {
        VStack {
            Text("Hello, world!")
                .font(.largeTitle)
                .foregroundColor(Color.blue)
                .multilineTextAlignment(.center)
                .padding()
                .border(Color.black, width: 1)
            Text("Test")
            Button(action: {
                       print("test")
                   }) {
                       Text("Test")
                           .font(.system(size: 25))
                           .background(Color.yellow)
                           .foregroundColor(.red)
                   }
        }
    }
}
Xcode 还有个工具,可以让我们看元件的一些介绍文件,在工具区( Utility Area )下点选Quick Help,就会显示关於现在点击或选取的元件简介
以此类推就可以设计我们SwiftUI 下的画面了
在介绍多页面的转换前,下面想先跟大家介绍一下 SwiftUI 的数据流向控制
【Tableau Desktop入门】免费2小时基础操作体验
一、Tableau 是什麽 简单来说,Tableau是一个任何专业背景、任何年纪都可以学得会的大数据...
Day3 众里寻它千百度
Filter 在海量的数据中如果想要快速找到特定关键字的资料,我们需要filter这个很实用的功能...
4.移转 Aras PLM大小事-Agile 汇出 Part & BOM (2)
第4话 Agile 汇出 Part & BOM (2) 本篇讲解如何汇出BOM表 主料BOM...
企划实现(17)
跳转到IG、youtube 常常会看到许多程序有一个可以跳转到他们自己的ig、youtube的功能,...
D24 - 走!去浏览器偷听 Capturing & Bubbling
前言 这篇介绍 DOM Event Listener - 事件监听 (总觉得监听这个翻译很有抓奸的画...