JWT实作(三)(Day7)
我们现在设定两种权限,管理员(ADMIN)&正常(NORMAL)
要实作权限功能,我们先在users表单新增 AUTHORITY栏位,预设如果没有输入的话是 NORMAL权限
ALTER TABLE `stockapi`.`users`
ADD COLUMN `AUTHORITY` VARCHAR(45) NOT NULL DEFAULT 'NORMAL' COMMENT '权限' AFTER `PASSWORD`;
修改User 类别的属性, 新增authority,再加上无参数的建构子不然BeanRowMapper无法初始化
package com.stockAPI.model;

import lombok.Getter;
import lombok.Setter;

@Getter
@Setter
public class User {

	private Integer id;

	private String account;

	private String name;

	private String password;

	private String authority;

  //需加入无参数的建构子,不然BeanRowMapper无法初始化
	public User(){

	}


	public User(String account,String name,String password,String authority) {
		this.account=account;
		this.name=name;
		this.password=password;
	}

}
修改StockUser的getAuthorities() 方法,之前是预设回传空阵列
package com.stockAPI.model;

import java.util.ArrayList;
import java.util.Collection;
import java.util.List;
import org.springframework.security.core.GrantedAuthority;
import org.springframework.security.core.authority.SimpleGrantedAuthority;
import org.springframework.security.core.userdetails.UserDetails;


import lombok.Getter;
import lombok.Setter;

@Getter
@Setter
public class StockUser implements UserDetails {

	private static final long serialVersionUID = 1L;


	private User user;


	public StockUser(User user) {
		this.user=user;
	}


	//取得此帐号的权限
	@Override
	public Collection<? extends GrantedAuthority> getAuthorities() {
		List<SimpleGrantedAuthority> authority_list = new ArrayList<SimpleGrantedAuthority>();
		authority_list.add(new SimpleGrantedAuthority(user.getAuthority()));
		return authority_list;
	}

	@Override
	public String getPassword() {
		return user.getPassword();
	}

	@Override
	public String getUsername() {
		return user.getAccount();
	}

	//验证此帐号是否未过期,目前没有要用到先设return true
	@Override
	public boolean isAccountNonExpired() {
		return true;
	}

	//验证此帐号是否未被封锁,目前没有要用到先设return true
	@Override
	public boolean isAccountNonLocked() {
		return true;
	}

	//验证此帐号凭证是否未过期,目前没有要用到先设return true
	@Override
	public boolean isCredentialsNonExpired() {
		return true;
	}

	//验证此帐号是否可以使用,目前没有要用到先设return true
	@Override
	public boolean isEnabled() {
		return true;
	}

}
接着为了与新增会员的权限作区别(只有管理员可以新增会员)
我们实作一个新功能是根据帐号查询自己资料(大家都可以使用)
在StockUserService新增一个方法是 getOwnData
package com.stockAPI.service;

import org.springframework.beans.factory.annotation.Autowired;
import org.springframework.security.core.userdetails.UserDetails;
import org.springframework.security.core.userdetails.UserDetailsService;
import org.springframework.security.core.userdetails.UsernameNotFoundException;
import org.springframework.security.crypto.bcrypt.BCryptPasswordEncoder;
import org.springframework.stereotype.Service;

import com.stockAPI.model.StockUser;
import com.stockAPI.model.User;
import com.stockAPI.repository.UserRepository;

@Service
public class StockUserService implements UserDetailsService {

	@Autowired
	UserRepository userRepository;

	//载入套件的加密器
	@Autowired
	BCryptPasswordEncoder bCryptPasswordEncoder;

	@Override
	public UserDetails loadUserByUsername(String username) throws UsernameNotFoundException {
		User user= userRepository.getDataByAccount(username);
		return new StockUser(user);

	}

	public Integer addUser(User user) {
		user.setPassword(bCryptPasswordEncoder.encode(user.getPassword()));
		Integer user_id = userRepository.add(user);
		return user_id;
	}

	public StockUser getOwnData(String account){
		User user= userRepository.getDataByAccount(account);
		//资料内不可以含有密码资讯
		user.setPassword(null);
		return new StockUser(user);
	}
}
在UserController 新增查询连结
package com.stockAPI.controller;

import java.util.HashMap;
import java.util.Map;

import org.springframework.beans.factory.annotation.Autowired;
import org.springframework.web.bind.annotation.GetMapping;
import org.springframework.web.bind.annotation.PathVariable;
import org.springframework.web.bind.annotation.PostMapping;
import org.springframework.web.bind.annotation.RequestBody;
import org.springframework.web.bind.annotation.RequestMapping;
import org.springframework.web.bind.annotation.RestController;

import com.stockAPI.model.APIReturnObject;
import com.stockAPI.model.StockUser;
import com.stockAPI.model.User;
import com.stockAPI.service.StockUserService;

@RestController
@RequestMapping("user")
public class UserController {

	@Autowired
	StockUserService stockUserService;

	@GetMapping("testBlock")
	public String testBlock() {
		return "testBlock";
	}

	@GetMapping("testUnblock")
	public String testUnblock() {
		return "testUnblock";
	}

	@GetMapping("search/{account}")
	public APIReturnObject search(@PathVariable(name="account") String account) {
		APIReturnObject result = new APIReturnObject();
		Map<String, Object> data = new HashMap<String, Object>();
		StockUser  stockUser = stockUserService.getOwnData(account);
		data.put("userData", stockUser.getUser());
		result.setMessage("用户资料查询成功");
		result.setData(data);
		return result;

	}

	@PostMapping("create")
	public APIReturnObject create(@RequestBody User user) {
		APIReturnObject result = new APIReturnObject();
		Map<String, Object> data = new HashMap<String, Object>();
		Integer user_id = stockUserService.addUser(user);
		data.put("user_id", user_id);
		result.setMessage("用户资料新增成功");
		result.setData(data);
		return result;
	}

}
再来是我们修改Security的设定,并设定查询连结是所有人都可以使用的
package com.stockAPI.config;

import org.springframework.beans.factory.annotation.Autowired;
import org.springframework.context.annotation.Bean;
import org.springframework.security.config.annotation.authentication.builders.AuthenticationManagerBuilder;
import org.springframework.security.config.annotation.web.builders.HttpSecurity;
import org.springframework.security.config.annotation.web.configuration.EnableWebSecurity;
import org.springframework.security.config.annotation.web.configuration.WebSecurityConfigurerAdapter;
import org.springframework.security.crypto.bcrypt.BCryptPasswordEncoder;

import com.stockAPI.service.StockUserService;

@EnableWebSecurity
public class SecurityConfig extends WebSecurityConfigurerAdapter {

	@Autowired
	StockUserService stockUserService;

	@Override
    protected void configure(AuthenticationManagerBuilder auth) throws Exception {

    }

    @Override
    protected void configure(HttpSecurity http) throws Exception {
    	http
    		.authorizeRequests()
    		.antMatchers("/user/testUnblock").permitAll()
    		.antMatchers("/user/create").hasAuthority("ADMIN") //管理员可以新增使用者资料
    		.antMatchers("/user/search/**").permitAll() //大家都可以查询资料
    		.and()
    		.csrf().disable();

    }

    //先把加密器注入容器
    @Bean
    public BCryptPasswordEncoder bCryptPasswordEncoder() {
        return new BCryptPasswordEncoder();
    }
}
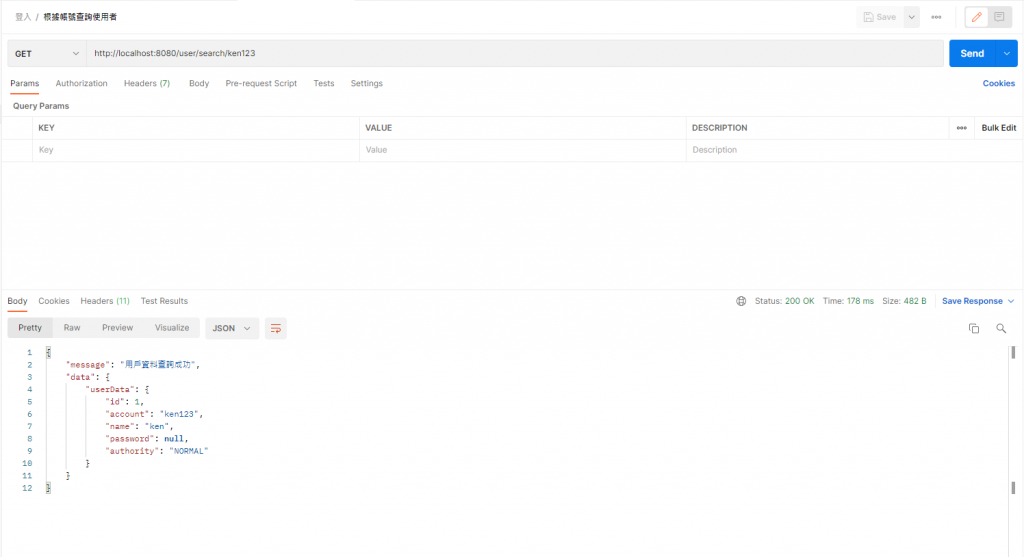
这时候让我们用postman 测试一下
url:http://localhost:8080/user/search/ken123
method:GET
就可以看到资料出现罗
然後再试着执行我们之前创建使用者的请求,就会发现因为设定权限所以我们已经不能请求成功了喔
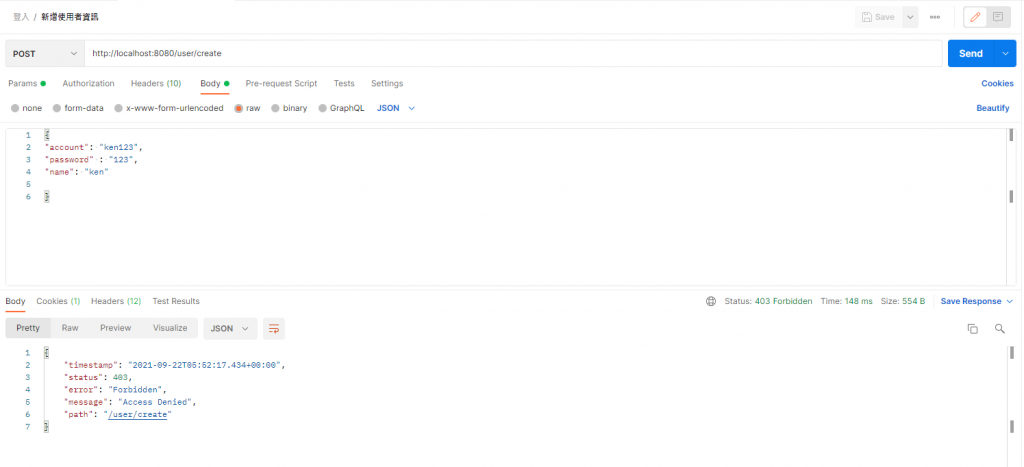
咦! 那我们要怎麽让系统去辨认我们的权限呢?
这就与我们明天要实作的登入功能有关罗~!!
<<: 常见网路问题(二):为什麽明明连上了 Wi-Fi,却还是上不了网?
Delegate的使用法 Day8
完蛋了今天,今天比昨天打完更严重,睡到晚上3点,被身体热醒,起床量个温度37.3好像又不是很高,但热...
Best Spring Assisted Knife For 2021
Spring-assisted knives also called assisted openin...
5. STM32-NVIC Timer中断
前面文章有介绍到Delay的用法,Delay虽然也可以做到延迟或控制时间的效果,但严格来说透过De...
Day 19 - 相等判断与型别转换
前言 昨天我们介绍了 undefined、null、NaN,也带到了如何将这些特别的值判断出来。 今...
OWASP SAMM-安全冠军(Security Champion)
-SAMM 概述(来源:https : //owaspsamm.org) 文化有不同的背景或层次,...