Day22. 谁说画面只能写在Erb - 一起在helper写画面
今天要开始介绍,如何做自定义helper,并使用。
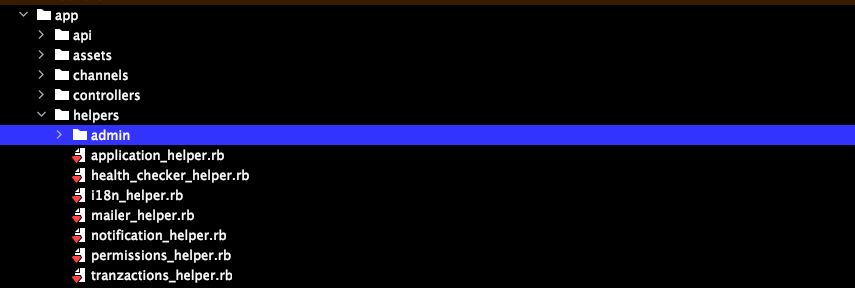
helpers依照惯例会写在app/helpers里面,并且不管写在哪个档案,view都读得懂。我们不用知道在Rails Application 是怎麽样载入helper,只需要知道写在helper的东西都可以取用就好了。helper在rails为module,我们在Day14介绍如何使用module#include 继承里面的方法,而我们只要有初步的认知是这些helper 在Rails是被继承的就好,至於是怎麽继承的,有兴趣再深入了解 ?
下面的样式有部分出自sb-admin-2,读者们可以参考下载连结内部的样式并取用。
卡片
以下为卡片以及相关的 helper
module ApplicationHelper
  # 版型规格
  def grid_div(left = 1, right = 2, style: '')
    tag.div(style: "display:grid; grid-template-columns: #{left}fr #{right}fr; grid-auto-rows: minmax(50px, auto); #{style}") {yield if block_given?}
  end


  # card, card_header, card_body, card_footer 为卡片样式公用规格
  def card(controller: nil, data: nil)
    data_attribute = data.present? ?
      { controller: controller }.merge(data) :
      { controller: controller }

    content_tag(:div, class: 'card shadow mb-4', data: data_attribute) do
      yield if block_given?
    end
  end

  def card_header(title:, &block)
    content_tag(:div, class: 'card-header py-3') do
      content_tag(:h6, class: 'h6 m-0 font-weight-bold text-primary d-flex align-items-center') do
        content_tag(:span, title) + (capture(&block) if block_given?)
      end
    end
  end

  def card_body
    content_tag(:div, class: 'card-body') { yield if block_given? }
  end

  def card_footer
    content_tag(:div, class: 'card-footer') { yield if block_given? }
  end
end
= card do
  = card_header(title: '母订单列表') do
  = card_body do
    = tag.div '卡片内容'
  = card_footer do
    = tag.div '卡片footer'

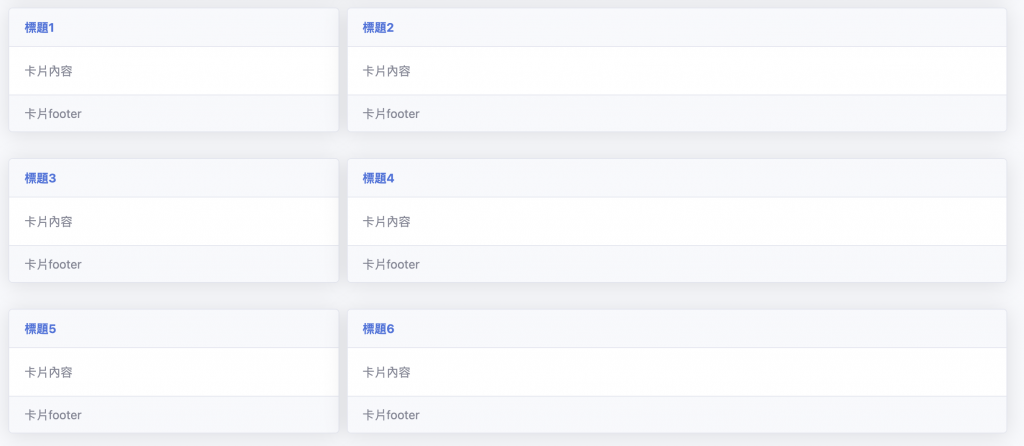
= grid_div(style: 'row-gap: 10px; column-gap: 10px') do
  - (1..8).each do |num|
    = card do
      = card_header(title: "标题#{num}") do
      = card_body do
        = tag.div '卡片内容'
      = card_footer do
        = tag.div '卡片footer'
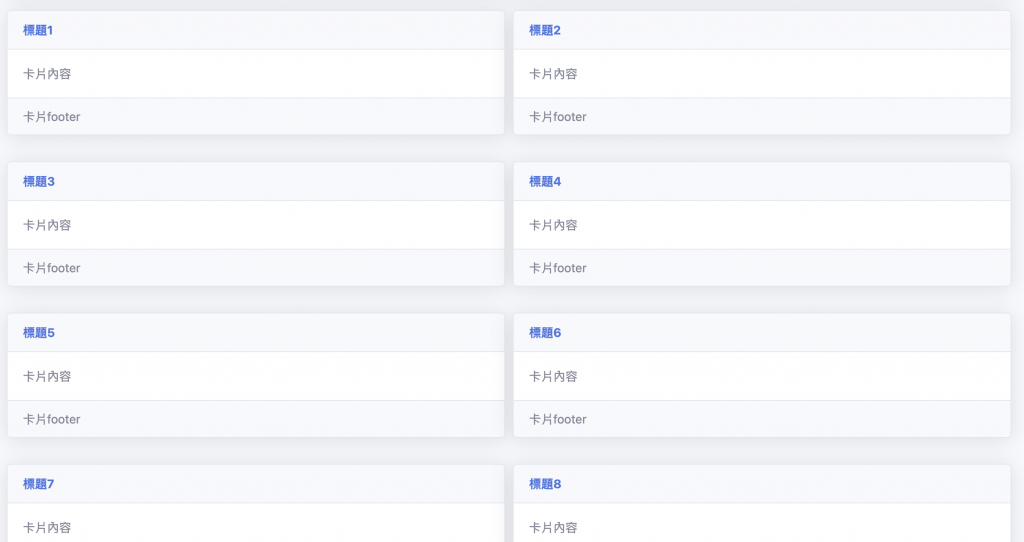
若改为左右比1:1的话,效果如下
= grid_div(1, 1, style: 'row-gap: 10px; column-gap: 10px') do
  / ...
弹跳视窗
弹跳视窗相关的 helper
module ApplicationHelper
    def modal(id: nil, confirm_wording: '确认', confirm_form:,
              confirm_target: nil, title: nil, controller: nil,
              close_btn: '取消')
    content_tag :div, id: id, class: 'modal fade',
                tabindex: -1, role: 'dialog', aria: { hidden: true },
                data: { "#{controller}-target": 'modal' } do
      content_tag :div, role: 'document', class: 'modal-dialog' do
        content_tag :div, class: 'modal-content' do
          # Header
          content_tag(:div, class: 'modal-header') do
            content_tag(:strong, title) +
            button_tag(type: 'button', class: 'close',
                       data: { dismiss: 'modal' }, aria: { label: 'Close' }) do
              content_tag :span, '×', aria: { hidden: true }
            end
          end +
            # Body: 自定义内容交给 yield
            content_tag(:div, class: 'modal-body') { yield if block_given? } +
            # Footer
            content_tag(:div, class: 'modal-footer') do
              button_tag(close_btn, type: 'button', class: 'btn btn-warning',
                               data: { dismiss: 'modal' }, aria: { label: 'Close' }) +
              (confirm_wording && button_tag(confirm_wording,
                type: 'submit', class: 'btn btn-primary',
                "data-#{controller}-target": confirm_target,
                 form: confirm_form, data: { confirm: "是否确定要送出编辑?\n请注意!送出後无法复原!", disable_with: "载入中..." }))
            end
        end
      end
    end
  end
end
= link_to '编辑', '#',
class:'btn btn-primary mx-1 mb-3',
data: { toggle: 'modal', target: '#edit-modal' }
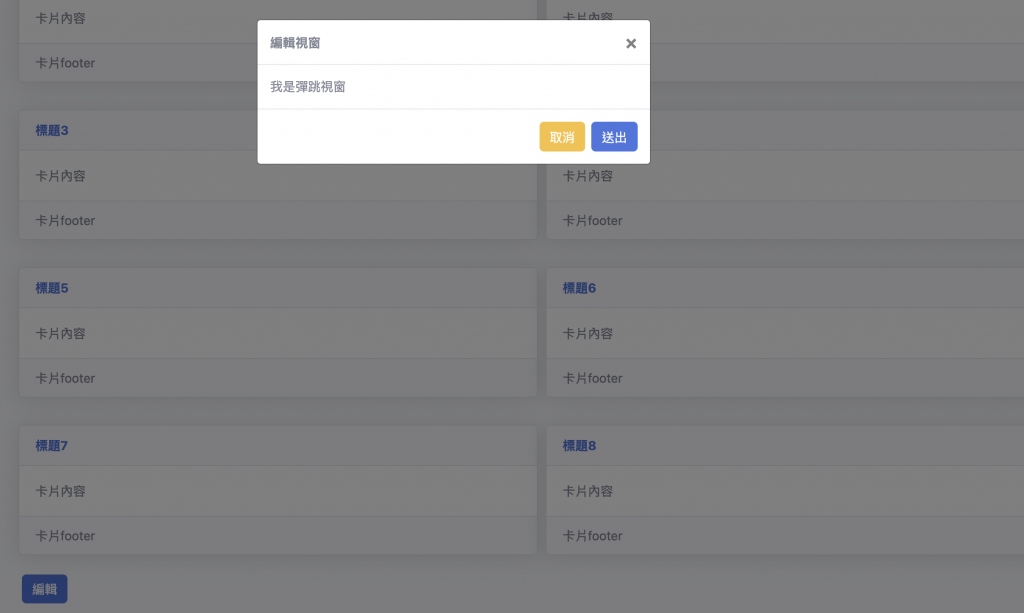
= modal(id: 'edit-modal', confirm_wording: '送出',
confirm_form: 'edit_modal', title: '编辑视窗') do
= tag.div "我是弹跳视窗"
其中 tag.div "我是弹跳视窗"为自定义内容,其他都为 modal 方法(元件)的一部分。
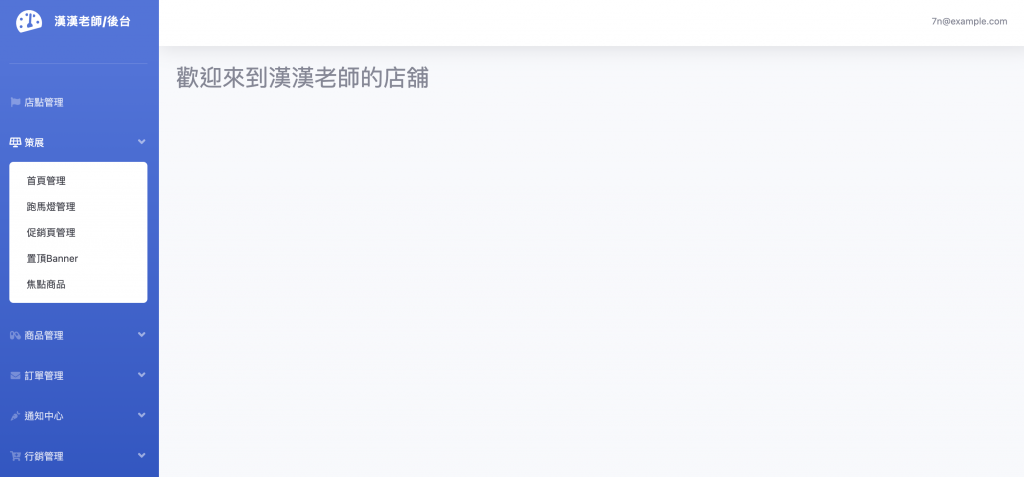
侧边栏 Helper
module ApplicationHelper
    def admin_sidebar_block(topic:, genre:, icon: 'fa-solar-panel')
    content_tag(:li, class: 'nav-item') do
      content_tag(:a, class: 'nav-link', href: '#', data: { toggle: 'collapse',
                 target: "##{genre}" }, aria: { expanded: true, controls: genre }) do
        content_tag(:i, nil, class: "fas fa-fw #{icon}") + content_tag(:span, topic)
      end + \
      content_tag(:div, class: 'collapse', data: { parent: '#accordionSidebar' },
                  aria: { labelledby: genre }, id: genre) do
        content_tag(:div, class: 'bg-white py-2 collapse-inner rounded') { yield if block_given? }
      end
    end
  end

  def sidebar_link_to(path, wording = nil)
    if wording
      link_to(content_tag(:span, wording), path, class: 'collapse-item')
    else
      link_to(path, class: 'collapse-item') { yield if block_given? }
    end
  end
end
使用方式为
= admin_sidebar_block topic: '策展', genre: 'curation', icon: 'fa-solar-panel' do
  = sidebar_link_to admin_brand_home_pages_path(current_brand), '首页管理'
  = sidebar_link_to admin_brand_scrolling_texts_path(current_brand), '跑马灯管理'
  = sidebar_link_to admin_brand_event_pages_path(current_brand), '促销页管理'
  = sidebar_link_to admin_brand_top_banners_path(current_brand), '置顶Banner'
  = sidebar_link_to admin_brand_shop_the_looks_path(current_brand), '焦点商品'
= admin_sidebar_block topic: '商品管理', genre: 'products', icon: 'fa-capsules' do
  = sidebar_link_to import_export_admin_brand_products_path(current_brand), '汇入/汇出'
  = sidebar_link_to admin_brand_products_path(current_brand), '商品总览'
  = sidebar_link_to admin_brand_series_index_path(current_brand), '系列'
  = sidebar_link_to admin_brand_categories_path(current_brand), '大类管理'
  = sidebar_link_to admin_brand_collections_path(current_brand), '中类管理'
  = sidebar_link_to admin_brand_sub_collections_path(current_brand), '小类管理'
= admin_sidebar_block topic: '订单管理', genre: 'orders', icon: 'fa-envelope' do
  - if can_edit?(:user)
    = sidebar_link_to admin_orders_path, '母订单列表'
  = sidebar_link_to admin_brand_sub_orders_path(current_brand) do
    = tag.span '订单总览'
  = sidebar_link_to admin_unshipped_orders_path do
    = tag.span '待出货订单'
    = tag.span unshipped_order_count, class: 'badge badge-secondary ml-1'
  = sidebar_link_to admin_return_orders_path do
    = tag.span '退货订单'
    = tag.span return_orders_count, class: 'badge badge-secondary ml-1'
  - if can_edit? :user
    = sidebar_link_to admin_pay_failed_orders_path do
      = tag.span '刷退失败订单'
      = tag.span pay_failed_orders, class: 'badge badge-secondary ml-1'
= admin_sidebar_block topic: '通知中心', genre: 'notifications', icon: 'fa-carrot' do
  = sidebar_link_to admin_brand_push_notifications_path(current_brand), '推播列表'
= admin_sidebar_block topic: '行销管理', genre: 'promotions', icon: 'fa-cart-plus' do
  = sidebar_link_to admin_brand_promotions_path(current_brand), '品牌折扣'
  = sidebar_link_to admin_target_price_discounts_path, '全馆满额'
时间区间
以下为时间区间的helper
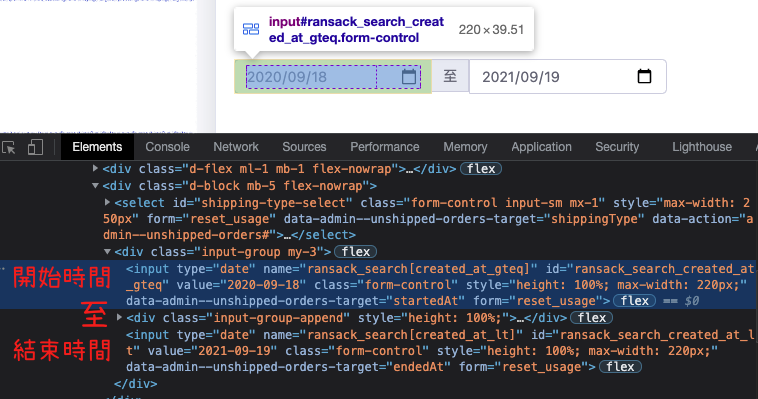
表单内常见的搜寻时间区间,我也有做相对应的helper 以方便好作取用。
关於里面的参数内容我们先忽略。一个与表单有关、另外一个为stimulus所取用的框架。
= search_interval(controller: 'orders', form: 'export-orders')
以下为 search_interval的内容,而我们用了datatable_date_tag 来对原本的date_field_tagy 做加工。
module ApplicationHelper
    def search_interval(controller: nil, form: nil)
      tag.div class: 'input-group mb-3' do
          # 开始时间
          datatable_date_tag(controller: controller, target: 'startedAt',
                             value: Date.today - 1.year, form: form,
                             name: 'ransack_search[created_at_gteq]') +
          # 到
          tag.div(class: 'input-group-append',
                  style: 'height: 100%;') { tag.label '至', class: 'input-group-text' } +
          # 结束时间
          datatable_date_tag(controller: controller, target: 'endedAt',
                             value: Date.today + 1.day, form: form,
                             name: 'ransack_search[created_at_lt]')
    end

    def datatable_date_tag(options = {})
      stimulus_data = (options[:controller] &&
        { "#{options[:controller]}-target": options[:target] }).presence || {}

      date_field_tag((options[:name] || options[:target]&.to_sym),
        options[:value], class: 'form-control', style: 'height: 100%; max-width: 220px;',
        data: stimulus_data.merge(options[:data].presence || {}),
        form: options[:form],
        disabled: options[:disabled] || false)
    end
  end
end
页签
虽然bootstrap本身已经做足了优化,但将其作为helper使用,可以让我们更便利使用。
= title '自我介绍'

= card do
  = card_header(title: '关於我')
  = card_body do
    = tab_list(me_genre)
    = tab_contents do
      / 当前显示内容
      = tab_active_content(me_genre.first[:id]) do
        / 页签1内容
        = tag.span "我的兴趣"
      / 隐藏内容
      = tab_content(me_genre.second[:id]) do
        / 页签2内容
        = tag.span "我的专长"
      / 隐藏内容
      = tab_content(me_genre.third[:id]) do
        / 页签3内容
        = tag.span "如何联络我"

而上述的helper 於下方
module ApplicationHelper
    # 页签列表与页签内容
  # @param [Hash] list
  # @example: tab_list([{id: 'han001', wording: '汉汉1号'}, {id: 'han002', wording: '汉汉2号'}])
  def tab_list(list)
    data_attr = -> (content) { content.try(:[], :data).presence || {} }

    content_tag :ul, class: 'nav nav-tabs', role: 'tablist' do
      list.each_with_index.map do |content, index|
        if index.zero?
          content_tag(:li,
                      content_tag(:a, content[:wording], href: "##{content[:id]}-tab",
                             class: 'nav-link active', data: { toggle: 'tab',
                               **data_attr.(content) },
                             aria: { controls: "#{content[:id]}-tab", selected: 'true' }),
                      class: 'nav-item', role: 'presentation')
        else
          content_tag(:li,
                      content_tag(:a, content[:wording], href: "##{content[:id]}-tab",
                             class: 'nav-link', data: { toggle: 'tab',
                               **data_attr.(content) },
                             aria: { controls: "#{content[:id]}-tab", selected: 'false' }),
                      class: 'nav-item', role: 'presentation')
        end
      end .join.html_safe
    end
  end

  def tab_contents
    content_tag(:div, class: 'tab-content') { yield }
  end

  # 隐藏内容
  def tab_content(id, options = {})
    active_class, basic_class = 'show active', 'tab-pane fade'

    content_tag(:div,
      class: ((options[:active] || false) ?
      (basic_class + active_class) : basic_class),
      id: "#{id}-tab", role: 'tabpanel', data: options[:data]) { yield }
  end

  # 当前显示内容
  def tab_active_content(id, options = {})
    options = options.merge(active: true)

    tab_content(id, options) { yield }
  end
end
页签内容在下方
module MeHelper
  def me_genre
    [
      { id: 'interest', wording: '我的兴趣' },
      { id: 'skillSet', wording: '我的专长' },
      { id: 'contactMe', wording: '与我联系' },
    ]
  end
end
编译完的html 如下
<div class="card shadow mb-4">
  <div class="card-header py-3">
    <h6 class="h6 m-0 font-weight-bold text-primary d-flex align-items-center">
      <span>关於我</span>
    </h6>
  </div>
  <div class="card-body">
    <ul class="nav nav-tabs" role="tablist">
      <li class="nav-item" role="presentation">
        <a
          href="#interest-tab"
          class="nav-link"
          data-toggle="tab"
          aria-controls="interest-tab"
          aria-selected="true">我的兴趣</a>
      </li>
      <li class="nav-item" role="presentation">
        <a
          href="#skillSet-tab"
          class="nav-link"
          data-toggle="tab"
          aria-controls="skillSet-tab"
          aria-selected="false">我的专长</a>
      </li>
      <li class="nav-item" role="presentation">
        <a
          href="#contactMe-tab"
          class="nav-link active"
          data-toggle="tab"
          aria-controls="contactMe-tab"
          aria-selected="false">与我联系</a>
      </li>
    </ul>
    <div class="tab-content">
      <div class="tab-pane fadeshow" id="interest-tab" role="tabpanel">
        <span>我的兴趣</span>
      </div>
      <div class="tab-pane fade" id="skillSet-tab" role="tabpanel">
        <span>我的专长</span>
      </div>
      <div class="tab-pane fade active show" id="contactMe-tab" role="tabpanel">
        <span>如何联络我</span>
      </div>
    </div>
  </div>
</div>
Partial
除了写在helper以外,另外常见的用法为将画面抽换成 partial。我们习惯会在被抽离的模板前面加底线,并且使用render方法,使用前面为底线的档案。例如,我们最常使用的方式为将新增、编辑的画面输入框的部分抽共用成_form.html.slim,并且在编辑/新增使用。
= render partial: 'form', locals: { path: <路径>, method: :<方法> }
再来介绍使用区块的例子。下列为 shared/_export_xlsx.html.slim,一共有两个yield,各会被插去客制化的区块
.row
  .col-lg-12
    .ibox.float-e-margins
      .ibox-title
        h5
          | 福利中心
      .ibox-content
        / 预设区块
        = yield
      .ibox-content
        = yield :a_section
若我们渲染画面时要使用 block 时,使用render 字眼会产生错误,因此如果有block出现要改用layout。
'nil' is not an ActiveModel-compatible object. It must implement :to_partial_path.
以下为使用上述partial档案的方法
= render layout: 'shared/export_xlsx',
         locals: { path: "/import_example.xlsx" } do
  // 插入 a_section
  = content_for :a_section do
    a.btn.btn-info.m-l-sm href="export.xlsx" 汇出商品
  // 插入预设区块
  = tag.span "预设区块"
结尾
今天介绍了自定义的helper,以及partail的用法,这些Rails小技巧能够让我们的画面更简洁,而画面的部分大致上介绍到这里。明天开始,会开始介绍表单。
<<: Day 09:今天又想不出标题了!tmux plugin 和 mouse mode
Day 4 - 透过 RKE 架设第一套 Rancher(上)
本文将於赛後同步刊登於笔者部落格 有兴趣学习更多 Kubernetes/DevOps/Linux 相...
情绪 - 管理者最大的敌人
最近真的忙翻了。所以容许我今天偷懒一点。 承接昨天的讨论,希望你能了解在知识经济中,一个能提供员工安...
[Day11] 智慧指标
老实说我还真的想不到要写啥了,有关基础语法,真的很难想欸QQ 拜托来个人给我点想法吧 QQQQQQQ...
DAY20 图片处理套件-OpenCV
昨天我们介绍了深度学习的概念和应用,今天来介绍一下图片的处理,前一章我们有提到,一张图片对於神经网路...
第44天~
这个得上一篇:https://ithelp.ithome.com.tw/articles/10258...