EP06 - 从零开始,在 AWS 上建置 Jenkins 使用 Terraform
前几天我们使用 terraform 配置好 gitlab 环境,
会单纯使用 gitlab 来管理程序码,
而另外建 Jenkins 来处理 CI,
是因为大家使用的 Source Code Management (SCM) 可能不同,
早期可能使用 SVN,
後来可能是自建 Git Server、Github 或是 Gitlab,
会各别拆开,
只是表示 CI/CD 有各种可能,
如果 SCM 不是大家目前使用的,
只需单纯将 gitlab 替换成自己使用的即可,
再加上 gitlab 免费版跑 CI/CD 有限制(以月计算),
因此如果不愿意付钱购买 License,
但是又无法预估 CI/CD 执行时间,
建立 Jenkins 仍是个理想的选择。
配置 Jenkins
重构程序码
昨天我们配置 inbound/outbound 的时候
是使用白名单的方式
配置完我们发现自己的 IP 已经在多处重复使用到
此时会建议重构建立 gitlab 配置的这段程序码
variables.tf
variable "personal_cidr" {
    description = "the default vpc id when inital the aws"
    default = "你的IP/32"
}
main.tf
将 inbound/outbound 的 CIDR blocks 替换成 var.personal_cidr
resource "aws_security_group_rule" "gitlab_igress_22" {
    type              = "ingress"
    from_port         = 22
    to_port           = 22
    cidr_blocks       = [var.personal_cidr,]
    protocol          = "tcp"
    security_group_id = aws_security_group.gitlab.id
}

resource "aws_security_group_rule" "gitlab_egress_22" {
    type              = "egress"
    from_port         = 22
    to_port           = 22
    cidr_blocks       = [var.personal_cidr,]
    protocol          = "tcp"
    security_group_id = aws_security_group.gitlab.id
}

resource "aws_security_group_rule" "gitlab_igress_80" {
    type              = "ingress"
    from_port         = 80
    to_port           = 80
    cidr_blocks       = [var.personal_cidr,]
    protocol          = "tcp"
    security_group_id = aws_security_group.gitlab.id
}

resource "aws_security_group_rule" "gitlab_egress_80" {
    type              = "egress"
    from_port         = 80
    to_port           = 80
    cidr_blocks       = ["0.0.0.0/0",]
    protocol          = "tcp"
    security_group_id = aws_security_group.gitlab.id
}

resource "aws_security_group_rule" "gitlab_igress_443" {
    type              = "ingress"
    from_port         = 443
    to_port           = 443
    cidr_blocks       = [var.personal_cidr,]
    protocol          = "tcp"
    security_group_id = aws_security_group.gitlab.id
}

resource "aws_security_group_rule" "gitlab_egress_443" {
    type              = "egress"
    from_port         = 443
    to_port           = 443
    cidr_blocks       = ["0.0.0.0/0",]
    protocol          = "tcp"
    security_group_id = aws_security_group.gitlab.id
}
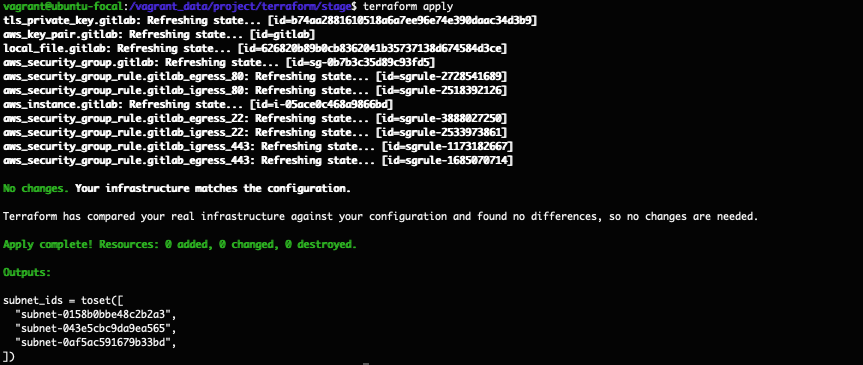
执行配置
回到 console 中输入
terraform apply
理论上不会有什麽变动
或是 pem key 重新产生而已
terraform 撰写
有了昨天 gitlab 配置的训练
我们知道我们会建立一台 EC2
会有个 Security Group 以及 Security Group Rule
以及绑定 SSH Key 到 EC2 上
这边我们就一次全部撰写
不再分段介绍
与 gitlab 不同的是
Jenkins 因为是 Java 的服务
所以有多设置 8080 port
没用到的 80 port 目前暂不移除
使用的经验上 EC2 的规格可先配置 t3.medium
如果未来不敷使用
再往上升即可
resource "aws_security_group" "jenkins" {
    name        = "jenkins-server"
    description = "It used for Jenkins server."
    vpc_id      = data.aws_vpc.default.id
    tags        = { Name = "Jenkins-Server" }
    revoke_rules_on_delete = null
}

resource "aws_security_group_rule" "jenkins_igress_22" {
    type              = "ingress"
    from_port         = 22
    to_port           = 22
    cidr_blocks       = [var.personal_cidr,]
    protocol          = "tcp"
    security_group_id = aws_security_group.jenkins.id
}

resource "aws_security_group_rule" "jenkins_egress_22" {
    type              = "egress"
    from_port         = 22
    to_port           = 22
    cidr_blocks       = [var.personal_cidr,]
    protocol          = "tcp"
    security_group_id = aws_security_group.jenkins.id
}

resource "aws_security_group_rule" "jenkins_igress_80" {
    type              = "ingress"
    from_port         = 80
    to_port           = 80
    cidr_blocks       = [var.personal_cidr,]
    protocol          = "tcp"
    security_group_id = aws_security_group.jenkins.id
}

resource "aws_security_group_rule" "jenkins_egress_80" {
    type              = "egress"
    from_port         = 80
    to_port           = 80
    cidr_blocks       = ["0.0.0.0/0",]
    protocol          = "tcp"
    security_group_id = aws_security_group.jenkins.id
}

resource "aws_security_group_rule" "jenkins_igress_443" {
    type              = "ingress"
    from_port         = 443
    to_port           = 443
    cidr_blocks       = [var.personal_cidr,]
    protocol          = "tcp"
    security_group_id = aws_security_group.jenkins.id
}

resource "aws_security_group_rule" "jenkins_egress_443" {
    type              = "egress"
    from_port         = 443
    to_port           = 443
    cidr_blocks       = ["0.0.0.0/0",]
    protocol          = "tcp"
    security_group_id = aws_security_group.jenkins.id
}

resource "aws_security_group_rule" "jenkins_igress_8080" {
    type              = "ingress"
    from_port         = 8080
    to_port           = 8080
    cidr_blocks       = [var.personal_cidr,]
    protocol          = "tcp"
    security_group_id = aws_security_group.jenkins.id
}

resource "aws_security_group_rule" "jenkins_egress_8080" {
    type              = "egress"
    from_port         = 8080
    to_port           = 8080
    cidr_blocks       = [var.personal_cidr,]
    protocol          = "tcp"
    security_group_id = aws_security_group.jenkins.id
}

resource "tls_private_key" "jenkins" {
    algorithm = "RSA"
    rsa_bits  = 4096
}

resource "aws_key_pair" "jenkins" {
    key_name   = "jenkins"
    public_key = tls_private_key.jenkins.public_key_openssh
}

resource "local_file" "jenkins" {
    content  = tls_private_key.jenkins.private_key_pem
    filename = format("%s.pem", aws_key_pair.jenkins.key_name)
}

resource "aws_instance" "jenkins" {
    ami                     = data.aws_ami.ubuntu.id
    instance_type           = "t3.medium"
    subnet_id               = sort(data.aws_subnet_ids.subnet_ids.ids)[0]
    key_name                = aws_key_pair.jenkins.key_name
    vpc_security_group_ids  = [ aws_security_group.jenkins.id ]
    disable_api_termination = false
    ebs_optimized           = true
    hibernation             = false

    tags = {
        Name  = "Jenkins Server"
        Usage = "CI Tools"
        Creator = "Terraform"
    }

    root_block_device {
        delete_on_termination = true
        encrypted             = false
        throughput            = 0
        volume_size           = 30
        volume_type           = "gp2"
        tags                  = {
            Name     = "Jenkins Server"
            Attached = "Jenkins Server"
        }
    }
}
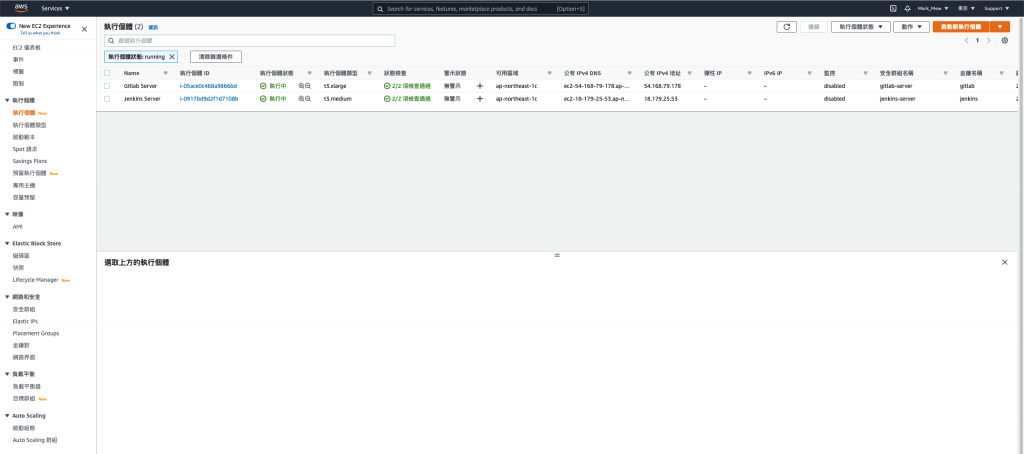
建立完成後
我们可以透过 aws 的 console 看到之前建立 gitlab server
以及刚刚建立好的 jenkins server
变更权限
同昨天的教学
要变更读写权限
sudo chmod 400 jenkins.pem
连到 Jenkins Server
ssh -i "jenkins.pem" ubuntu@你的主机
更新
sudo apt-get update
sudo apt-get upgrade -y
安装 Java
因为 Jenkins 是由 Java 编写的开源持续整合工具
因此在安装 Jenkins 之前需要安装 Java
Java 版本的选择选择 Java 11
会选择 Java 11 的原因是因为 LTS
而 Java 17 又太新
不过如果没有要在 Jenkins Server 做其他的操作
其实版本应该是不需要太在意(?)
sudo apt-get install openjdk-11-jdk
添加 repository key
在安装时我喜欢安装最新版本
尤其许多套件可能也会跟着 Jenkins 版本再走
因此下方是安装最新版本的 Jenkins 而不是稳定版本
如果想要安装稳定版本的
可以参考 Digital Ocean 的这篇文章
sudo wget -q -O - https://pkg.jenkins.io/debian/jenkins.io.key | sudo apt-key add -
sudo sh -c 'echo deb http://pkg.jenkins.io/debian binary/ > /etc/apt/sources.list.d/jenkins.list'
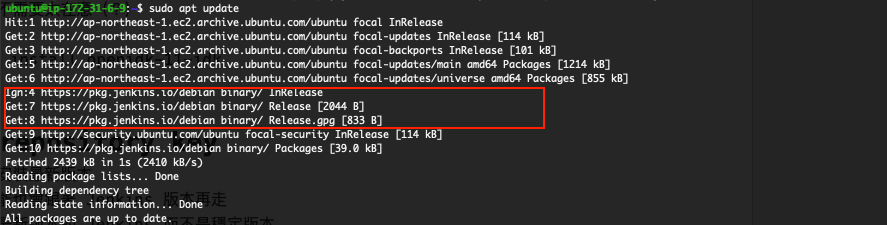
添加完後
记得要先 update 更新清单
sudo apt update
更新完後
可以看到列表中出现 jenkins
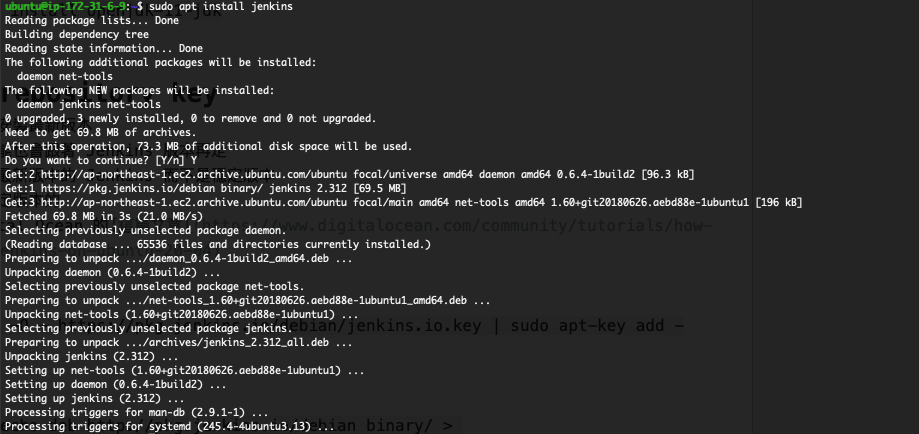
安装 jenkins
sudo apt install jenkins
启动 jenkins
sudo systemctl start jenkins
启动後可以输入以下指令
确定 jenkins 启动状况
sudo systemctl status jenkins

设定 Jenkins
目前已经有使用 security group 去管 inbound/outbound
因此就不会开启 ubunut 内建的 firewall
在浏览器中输入下列网址
http:// your_server_ip_or_domain :8080
就可以开始设定 jenkins 了
有看到画面
表示 Jenkins 服务有正常启动
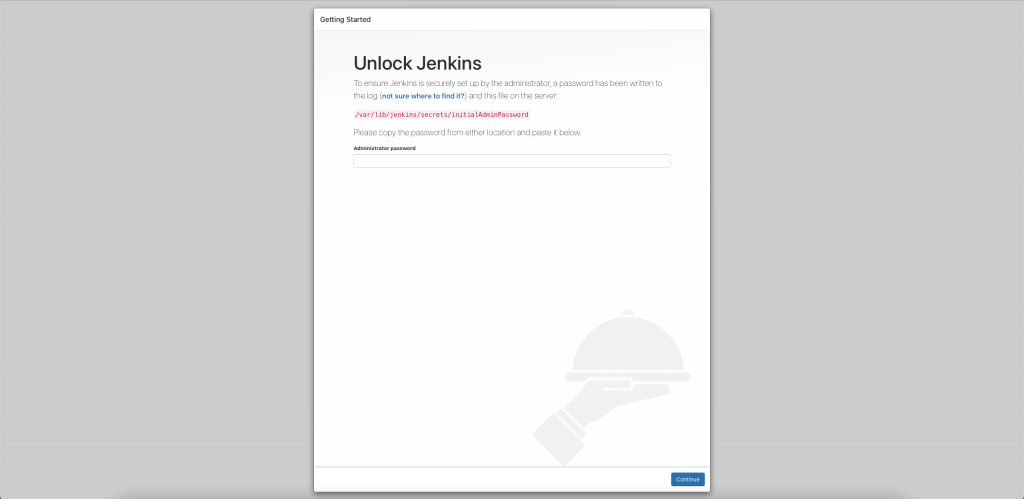
取得密码
输入指令取得密码後贴上以继续设定
sudo cat /var/lib/jenkins/secrets/initialAdminPassword
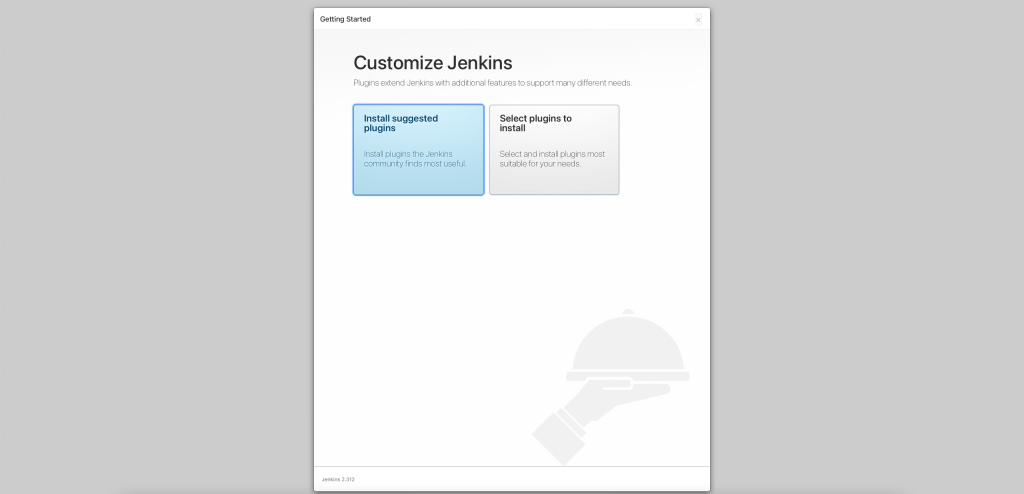
继续设定
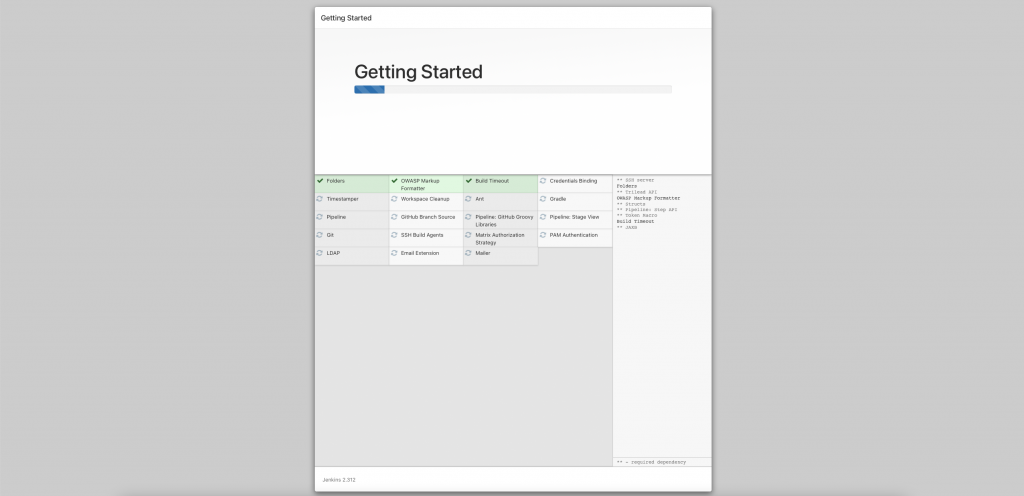
选择建议的扩充套件後
接下来就是等待安装的过程
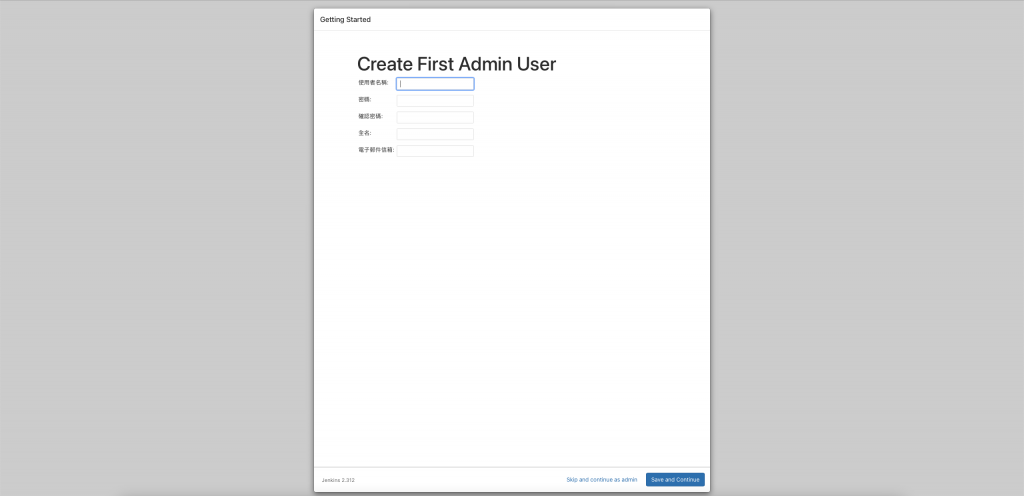
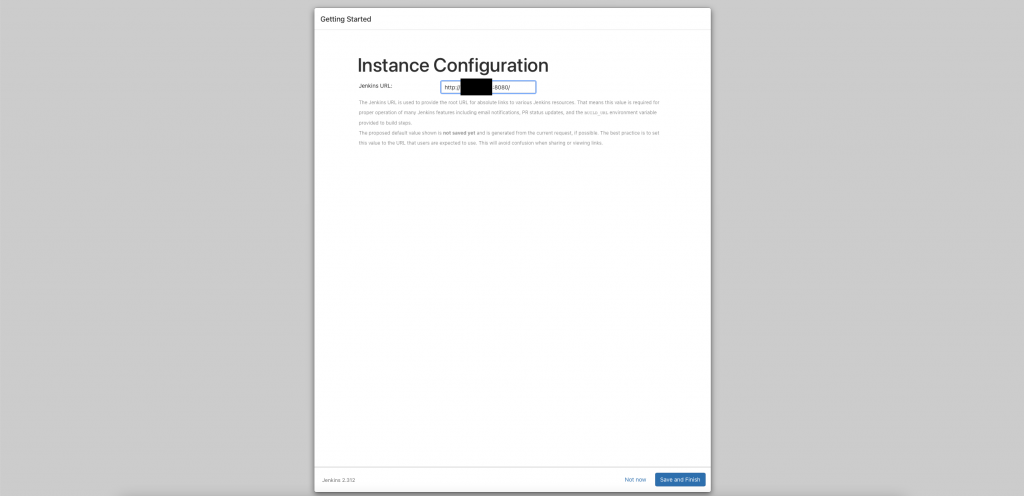
配置 admin
设置网址
此步骤可於日後更改
如果网址设定不正确
则会一直跳出警示
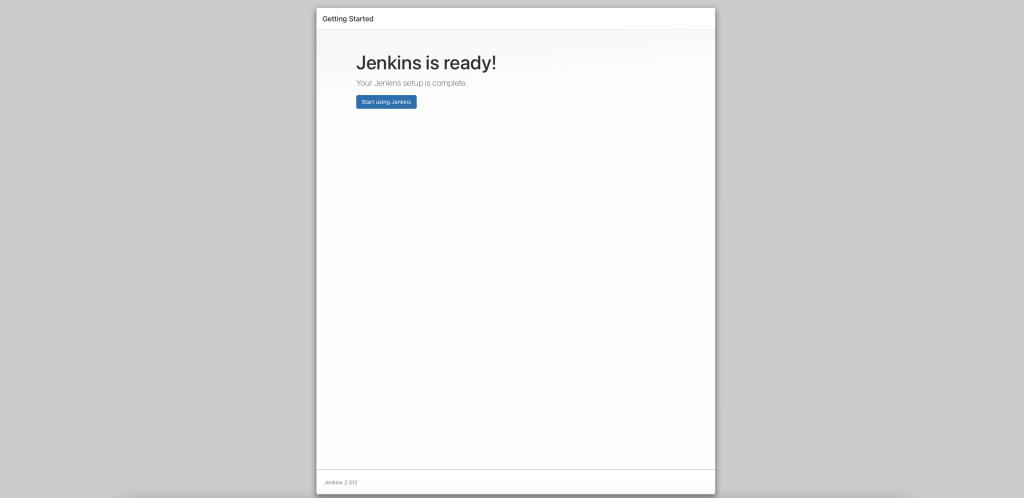
结束安装
储存後就结束整个安装的过程
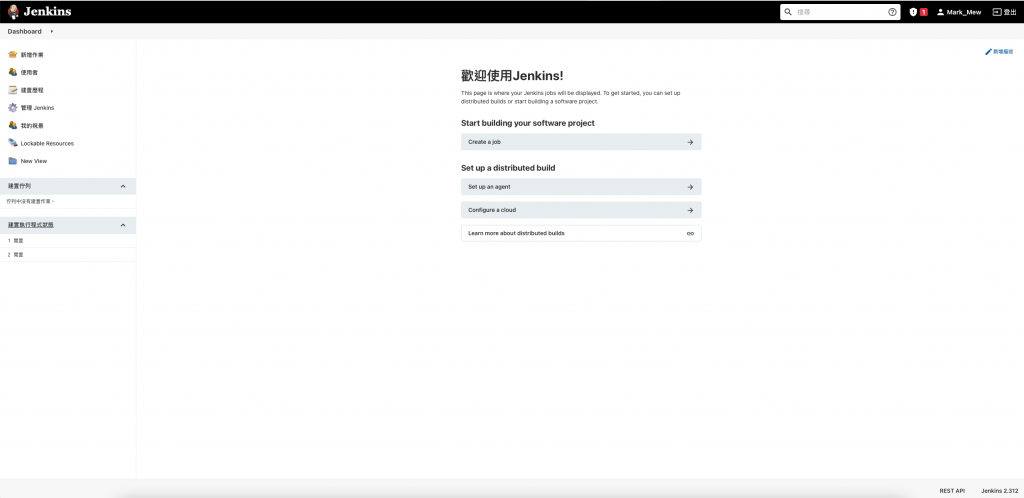
也会自动跳转到主页面
tfstate 放到 S3 托管
这两天我们用 terraform 建立好两台 EC2
此时也许会开始有两个人进行协作
但也如同前几天说的 tfstate 是重要的档案
它记录全部配置的状态
但是同时可能也包含机密资讯
因此不适合放在 git 做管理
常见的作法则是将这档案放到 S3 做管理
新增 S3 bucket
创建 S3 bucket 时要注意
bucket 的名称必须是全世界独一无二的
因此尽量避免菜市场命名
resource "aws_s3_bucket" "tfstate" {
    bucket = "ithome-ironman-markmew-tfstate"
    acl    = "private"

    tags = {
        Name     = "My bucket"
        Creator  = "Terraform"
    }

    versioning {
        enabled = true
    }
}
配置 tfstate backend
最初我们做了一个设置
表示我们 terraform 撰写时
使用的套件来源和版本
terraform {
    required_providers {
        aws = {
            source  = "hashicorp/aws"
            version = "~>3.0"
        }
    }
}
程序码需添加 backend
来告知我们 tfstate 要放在哪个位置
terraform {
    required_providers {
        aws = {
            source  = "hashicorp/aws"
            version = "~>3.0"
        }
    }

    backend "s3" {
        bucket = "ithome-ironman-markmew-tfstate"
        key    = "ithome-ironman.tfstate"
        region = "ap-northeast-1"
    }
}
配置完後
需要初始化配置
terraform init
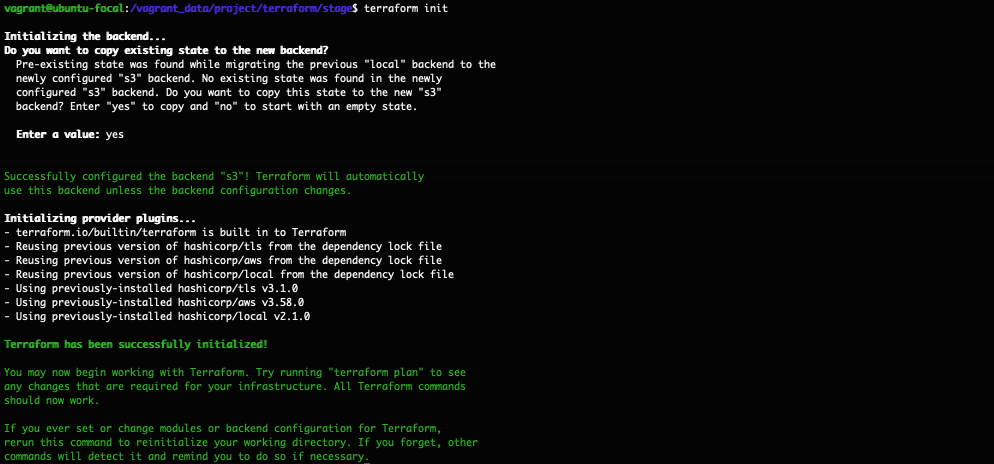
配置完後
在 aws 的 s3 就可以看到我们的tfstate档案已经建立好了
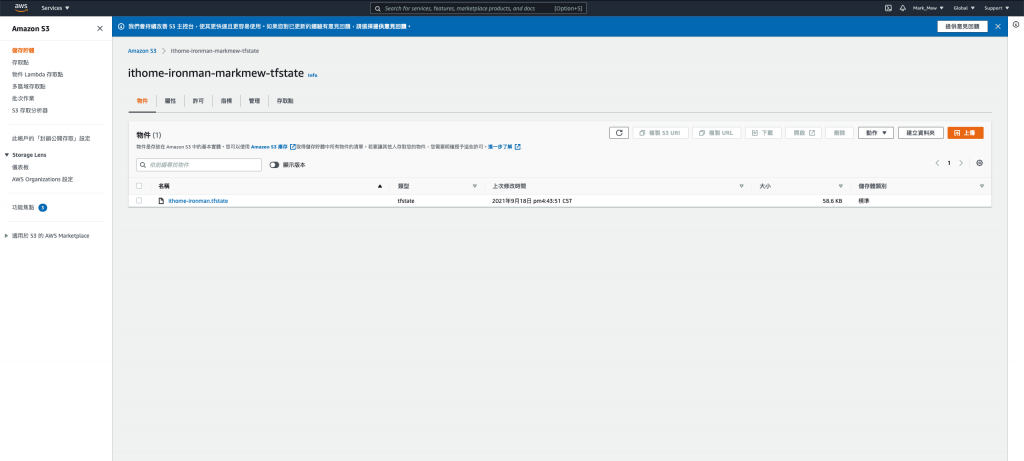
但是还没结束
我们的 tfstate 移动到 s3
同样的我们也必须设定 tfstate 要从 s3 抓取
在 main.tf 中增加
data "terraform_remote_state" "tfstate" {
    backend = "s3"
    config  = {
        bucket = "ithome-ironman-markmew-tfstate"
        key    = "ithome-ironman.tfstate"
        region = "ap-northeast-1"
    }
}
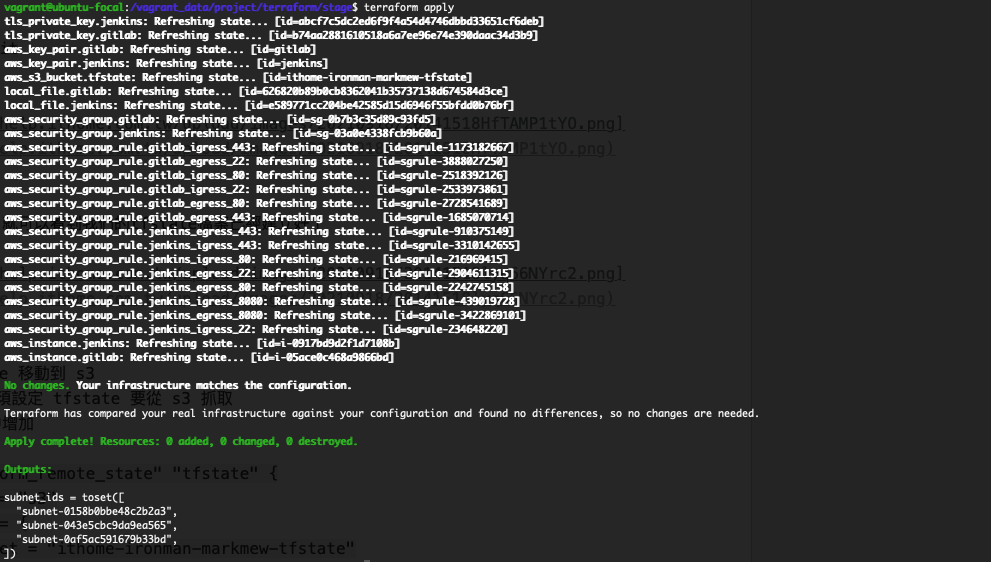
新增完後再 apply 一次
terraform apply
正常状况应该会是没有任何变更
check-in code
选择变更的档案
git add stage/main.tf
git add stage/variables.tf
撰写变更描述(我承认我写得不好QQ)
git commit -m "1. add jenkins server\n 2. refactor white list settings\n 3. migrate tfstate to s3"
push
git push
回顾一下我们今天做的
我们使用 terraform 建立第二个 EC2
白名单的设定上
用简单的方式重构程序码
让我们不需要重复输入自己 IP
并且为了能够多人协作
也将 tfstate 档案放到 s3 上
最後也别忘了程序码要记得 push
参考资料:
<<: 不只懂 Vue 语法:为何元件里的 data 必须是函式?建立 data 时能否使用箭头函式?
[Day 04] - 用Spring Boot连接Mongo DB
今天一开始 先来新增spring boot的连线设定 Spring Boot的设定档 applica...
Day 30-完赛结论,所有公有云的问题,我一率建议 Terraform
本篇是 30 天铁人赛的最後一篇,本篇做个小节与心得 课程内容与代码会放在 Github 上: ht...
D12 - 如何用 Apps Script 寄出客制化的表单并搜集分散在 Google Sheet 中的回应?(二)大幅度客制你的 Google Form
今天的目标 很多时候我们会需要搜集些不同的资料。像是 Marketing 在做大规模但针对不同组织的...
物件的建构与物件实体语法
物件 物件简单来说是值与属性的配对,属性也可以是另一个物件。 之前有稍微提过建立物件有两种方法: 1...
05. Feature Test x HTTP Test x API Test
打开 tests/Feature 让我们来场激烈的 http test 吧! http test 基...