【Day2】Splash画面X变更AppIconX字型自订
今天我们要来完成
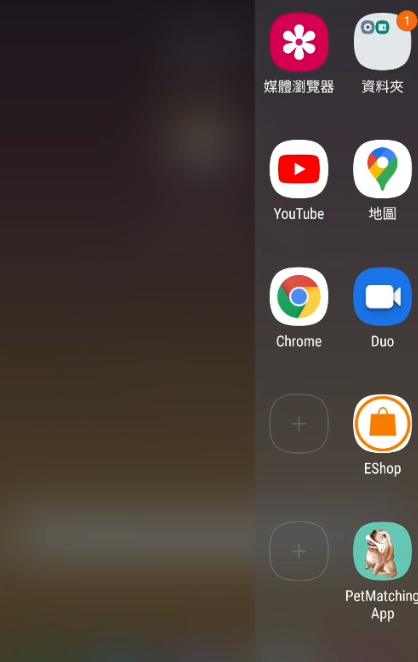
- splash画面,也就是启动时App会跳出短暂的画面。
- 变更AppIcon的图示
- 自定义字型
1.登入画面制作

一、首先我们创立一个空的新专案,并且把里面原本预设的MainActivity删掉,并且创立另外两个Activity,【SplashActivity】跟【AccountActivity】。
二、由於是开启画面,所以我们如果有ActionBar,会着实有点监介,所以我们要把它拿掉,我们先来到manifests来看。
<application
        android:allowBackup="true"
        android:icon="@mipmap/ic_launcher"
        android:label="@string/app_name"
        android:roundIcon="@mipmap/ic_launcher_round"
        android:supportsRtl="true"
        android:theme="@style/Theme.PetMatchingApp">
        <activity android:name=".ui.activity.AccountActivity">

        </activity>

        <activity android:name=".ui.activity.SplashActivity"
            android:theme="@style/Theme.AppCompat.NoActionBar">
            <intent-filter>
                <action android:name="android.intent.action.MAIN" />


            </intent-filter>
        </activity>
    </application>
★我们要确保 Splash的Activity下面有以下这一串,才代表按下app icon的,最先开启的是SplashActivity。
<category android:name="android.intent.category.LAUNCHER" />
★加上Theme,确保没有ActionBar,可以点进去看他的叙述,就是把ActionBar+title关掉
android:theme="@style/Theme.AppCompat.NoActionBar"
三、隐藏status栏位
接下来我们来到SplashActivity的onCreate新增以下判断
@Suppress("DEPRECATION")
if(Build.VERSION.SDK_INT>= Build.VERSION_CODES.R){
val controller =window.insetsController
controller?.hide(WindowManager.LayoutParams.TYPE_STATUS_BAR)
}else{
    window.setFlags(WindowManager.LayoutParams.FLAG_FULLSCREEN,
    WindowManager.LayoutParams.FLAG_FULLSCREEN)
}
★由於FLAG_FULLSCREEN已经弃用了,所以我们在这边加个判断式,如果现在的使用者手机版本是大於等於 Api30的话,则我们用WindowInsetsController,来控制window的控制类,关於windows控制,除了可以调整状态栏,还可以调整萤幕控制/软键盘,详细可以参考以下link
windowInsetsController文章:https://bbs.huaweicloud.com/blogs/detail/227893
window的其他参数:https://developer.android.com/reference/android/view/WindowManager.LayoutParams#fields
四、让Splash飞一会
一样,我们在SplashActivity里面的onCreate,新增以下
  Handler(Looper.getMainLooper()).postDelayed(
            {
                startActivity(Intent(this@SplashActivity,AccountActivity::class.java))
                finish()
            },
        2000
        )
★接下来我们要实例化一个 Handler的类别,里面传入,Looper,并且用postDelayed的funtion。
我们可以注意到,postDelayed里面有两个参数
-Runnable:可以把它想成要做的事情,我们这边再透过startIntent来转换Activity。
-delayMillis:这边则填入要延迟的毫秒数(千分之一秒)
★Intent: 我们可以透过Intent来转换Activity或是传送资料到其他Activity,而这次示范的是转换Activity,参数如下
-packageContext:要从哪个Activity出发,也就是传入当前的 activity
-第二个参数:填入要转换的目的地Activity
五、最後别忘了要在Layout加入可爱的画面罗!
好的,接下来我们要找可爱的照片,但是无奈我不会制图。所以我推荐大家我一个常去下载免费PNG素材的网站 https://zh.pngtree.com/pay/pay-event-page?b=62
你可以选择成为尊荣不凡的VIP,但我没有,因为我是免费仔,所以有下载限制跟要注明着作者。
而因为我们要创造关於宠物的App,於是我找到下面的图片。
小狗 PNG由588ku设计 Pngtree.com
之後把档案加入到values→res→drawable,并且新增一个叫做 dimen的xml。
dimen顾名思义就是尺寸,可以透过在dimen设定尺寸,并且透过呼叫的方式达到统一/重用的好处。
我就直接贴code罗
<resources>

    <dimen name="splash_title_textSize">40sp</dimen>
    <dimen name="splash_title_marginBottom">10dp</dimen>
    <dimen name="splash_logo_weight">200dp</dimen>
    <dimen name="splash_logo_height">180dp</dimen>

</resources>
然後在values→res → string 一样新增 title
<string name="app_name_chinese">宠物约散</string>
然後再color 新增
<color name="grey_light">#E1E1E1</color>
layout Code 直接附上
<?xml version="1.0" encoding="utf-8"?>
<androidx.constraintlayout.widget.ConstraintLayout xmlns:android="http://schemas.android.com/apk/res/android"
    xmlns:app="http://schemas.android.com/apk/res-auto"
    xmlns:tools="http://schemas.android.com/tools"
    android:layout_width="match_parent"
    android:layout_height="match_parent"
    android:background="@color/white"
    tools:context=".ui.activity.SplashActivity">


    <TextView
        android:id="@+id/tv_app_name"
        android:layout_width="wrap_content"
        android:layout_height="wrap_content"
        android:text="@string/app_name_chinese"
        android:textSize="@dimen/splash_title_textSize"
        android:textStyle="bold"
        android:textColor="@color/grey_light"
        app:layout_constraintBottom_toTopOf="@id/iv_app_logo"
        app:layout_constraintStart_toStartOf="parent"
        app:layout_constraintEnd_toEndOf="parent"
        android:layout_marginBottom="@dimen/splash_title_marginBottom">

    </TextView>


    <ImageView
        android:id="@+id/iv_app_logo"
        android:layout_width="@dimen/splash_logo_weight"
        android:layout_height="@dimen/splash_logo_height"
        android:src="@drawable/icon_dog"
        app:layout_constraintBottom_toBottomOf="parent"
        app:layout_constraintEnd_toEndOf="parent"
        app:layout_constraintStart_toStartOf="parent"
        app:layout_constraintTop_toTopOf="parent"/>


</androidx.constraintlayout.widget.ConstraintLayout>
2.变更AppIcon
一、我们打开 File→New→Image Asset
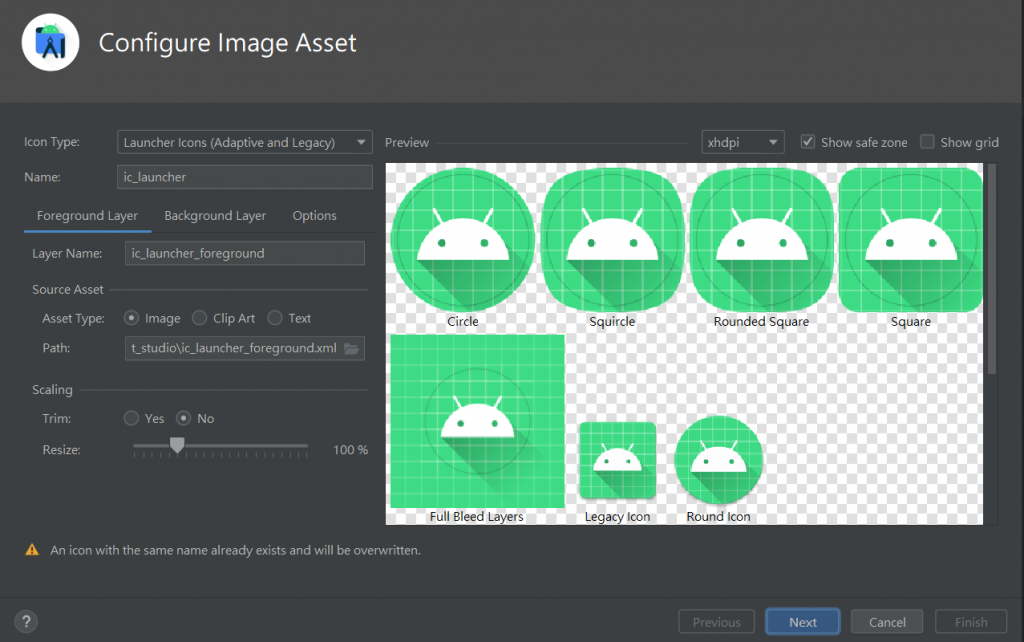
二、在 Foreground Layer,的地方 Source Asset Type的地方选择 Image,并且把刚刚的点选,path,把刚刚的狗狗图片位置指定进去。
★Asset Type的 Chip Art代表用 Android 内建的 icon,Text则代表用文字当作icon。
★下面的Scaling,可以调整size。
三、在 Background Layer,调整背景颜色,我们把背景颜色改成符合宠物的高雄暖南绿-63C7B3,按Next之後,就完成啦。
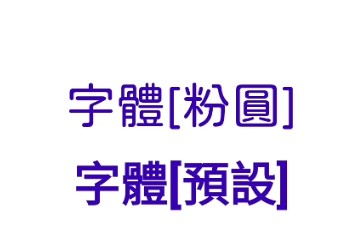
3.自定义TextView
好的,如果不满意字型的话,可以去网路上下载字型呦,但是切记要注意使用权限喔!!
这次笔者使用jf 字型是来自 open粉圆所下载的 https://justfont.com/huninn/
非常符合尊爵不凡的可爱气质APP,那废话就不多说了
一、把刚刚下载的字型加入到专案
New→Folder→Asset 再把刚刚的字型丢进去该资料夹
二、 创立一个 Custom TextView class
class JFTextView(context: Context,attrs: AttributeSet): AppCompatTextView(context, attrs) {

init{
applyFont()
    }


//这一行传入刚刚放在asset的字型
private fun applyFont(){
val typeface: Typeface = Typeface.createFromAsset(context.assets,"jf-openhuninn-1.1.ttf")
setTypeface(typeface)
    }
}
★後面继承的类,会因为要客制化的view不一样,而继承不同的类,例如EdText就会是继承AppCompatEditText,Button就是继承AppCompatButton。
三、建立好类别後,就可以直接在layout引用啦
接下来到activity.splash.xml 把原本的TextView修改刚刚定义的class。
<com.example.petsmatchingapp.ui.JFTextView
    android:id="@+id/tv_app_name1"
    android:layout_width="wrap_content"
    android:layout_height="wrap_content"
    android:text="字体[粉圆]"
    android:textSize="@dimen/splash_title_textSize"
    android:textStyle="bold"
    android:textColor="@color/design_default_color_primary_dark"
    app:layout_constraintBottom_toTopOf="@id/tv_app_name"
    app:layout_constraintStart_toStartOf="parent"
    app:layout_constraintEnd_toEndOf="parent"
    android:layout_marginBottom="@dimen/splash_title_marginBottom"/>
大功告成!!
那就明天见啦~ へけ
【图解演算法教学】还在用古老的二元搜寻法?是时候跟上「Hash Search」的车尾灯了!
Youtube连结:https://bit.ly/2Uv2sBf 在我们还没学资料结构前,通常都用...
D22 - Grafana Monitor
前面用TiUP安装时,也已经将Grafana监控的部分一并安装完成。 在监控这部分大致上分为几个分类...
Day 20 - 浅谈气候变迁与净零碳排
过去几个月, 各大商业杂志的封面不约而同地都出现同样主题的内容, 即"零碳",...
【履历要点 ii】不要放这些在履历上
上一篇讲了要放什麽,今天这篇讲一下不要放的东西。 Summary 这应该是有点争议的,至少我会有点想...
#17 Automation (5)
今天处里剩下的部分:checker 函式和它注入页面的辅助函式。 checker checker 函...