Day 11 - 边框使用方式
威尔猪在一开始学 CSS 时,蛮常会用到边框来厘清观念跟跑版问题,边框可以用来判断区块、元素位置、重叠问题等,尤其学到 Position、Display 跟 Float 时,切身之痛啊,所以不要以为它只能拿来当装饰用,那我们来看看在 Tailwind 上,边框该如何使用。
边框宽度
各位看官都知道,在萤幕上边宽最基本的宽度为 1px ,不过有些设计师会说,我这边宽只有 0.5px,你用 1px 这样看起来很重。拜托不要这样搞工程师了好吗?威尔猪也知道有差,但一般人不会特别注意这 0.5px 的,虽然还是可以用邪魔歪道来实现,但这效能不好,未来也不好维护。
在 Tailwind 也一样,DEFAULT 最小为 1px,再来就是 2px、4px、6px、8px,为何都是偶数,是因为基数容易有锯齿状的情况发生,Tailwind 才会这麽设定。使用方式为:border-({ t | r | b | l })-{width}。方向和间距一样,如果四周都有边框 1px,使用 border 即可,如果只有单边上方有 1px 边框,则为 border-t。
| class | border-width |
|---|---|
| border-0 | 0px |
| border | 1px |
| border-2 | 2px |
| border-4 | 4px |
| border-6 | 6px |
| border-8 | 8px |
边框预设的颜色为:
#E5E7EB。
子元素分隔线
这功能非常好用,设计师可能会在列表上增加分隔线,我们只要在父层上加一个边框就可以了,不用像以往一样写 CSS 还要想办法让线段重叠或删除。使用方式:divid-{ x | y }-{width},x 即为分隔水平的子元素,y 为分隔垂直的子元素。范例如下:
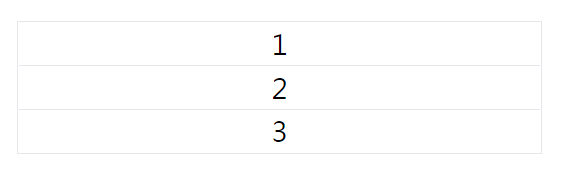
- 水平子元素分割:
<ul class="w-[300px] flex text-center border divide-x">
    <li class="w-1/3">1</li>
    <li class="w-1/3">2</li>
    <li class="w-1/3">3</li>
</ul>

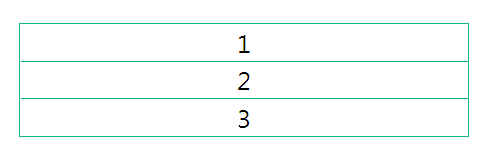
- 垂直子元素分隔:
<ul class="w-[300px] text-center border divide-y">
    <li>1</li>
    <li>2</li>
    <li>3</li>
</ul>
边框颜色
不管是边框还是分隔线,颜色的使用方式都文字一样,{对象}-{颜色}-{明度}。例如边框和分隔线为绿色,即为 border-green-500、divide-green-500,使用上面垂直子元素为范例:
<ul class="w-[300px] text-center border border-green-500 divide-y divide-green-500">
    <li>1</li>
    <li>2</li>
    <li>3</li>
</ul>
表格边框
不过表格分隔线可千万不要使用 divide- 来做,直接在 tr、td 上写 border 就好了,Tailwind 很聪明,预设已经使用 border-collapse,表格会让相邻的线段合并为同一条线,但如果你想让表格的线段分开,只要在标格上写 border-separate,范例如下:
<table class="border border-separate">
    <thead>
      <tr>
        <th class="border">TITLE</th>
        <th class="border">TITLE</th>
      </tr>
    </thead>
    <tbody>
      <tr>
        <td class="border">data</td>
        <td class="border">data</td>
      </tr>
      <tr>
        <td class="border">data</td>
        <td class="border">data</td>
      </tr>
    </tbody>
</table>

当然边框想自定义,还是使用 tailiwind.config.js 里的 theme.borderWidth:
// tailwind.config.js
module.exports = {
  ...
  theme: {
  ... ,
    borderWidth: {
      '0': '0',
      DEFAULT: '1px',
      '2': '2px',
      '3': '3px',
      '4': '4px',
      '6': '6px',
      '8': '8px',
      '10': '10px',
      ...
    },
    ...
  },
  ...
}
边框样式
使用方式:border-{style},和 CSS 差不多,就是後面加上需要的样式,Tailwind 提供了 border-solid、border-dashed、border-dotted、border-double、border-none,基本上绝对够用,不过还是记得要有 border 的宽度才能使用。但如果只单一写 Border,预设会为:1px solid #E5E7EB。
<button class="border-4 border-green-500 border-solid">border-solid</button>
<button class="border-4 border-green-500 border-dashed">border-dashed</button>
<button class="border-4 border-green-500 border-dotted">border-dotted</button>
<button class="border-4 border-green-500 border-double">border-double</button>
<button class="border-4 border-green-500 border-none">border-none</button>

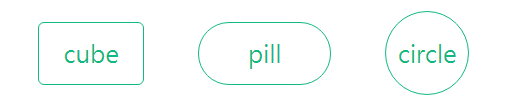
圆角使用
使用方式: rounded-({ t | r | b | l })-{size}。和间距一样,圆角也分上右下左,不写方向就是四周围圆角,至於圆角大小就参照下表,威尔猪都整理成 px 让同学们比较好对照。至於圆形或药丸形,则使用 rounded-full 就可以了,并没有 rounded-pill 这种 class。
| class | border-radius | px |
|---|---|---|
| rounded-none | 0px | |
| rounded-sm | 0.125rem | 2px |
| rounded | 0.25rem | 4px |
| rounded-md | 0.375rem | 6px |
| rounded-lg | 0.5rem | 8px |
| rounded-xl | 0.75rem | 12px |
| rounded-2xl | 1rem | 16px |
| rounded-3xl | 1.5rem | 24px |
| rounded-full | 9999px |
<div class="px-4 py-2 text-green-500 border border-green-500 rounded">cube</div>
<div class="px-8 py-2 text-green-500 border border-green-500 rounded-full">pill</div>
<div class="h-14 w-14 text-green-500 border border-green-500 rounded-full">circle</div>
当然觉得预设的圆角不符需求,也是可以自定义的,相信有看过前面的同学应该都知道在哪修改了,我们编辑 Tailwind.config.js 中的 theme.borderRadius 部分来修改,新增或删除。
// tailwind.config.js

  module.exports = {
    ...
    theme: {
      ...
      borderRadius: {
        'none': '0',
        'sm': '0.125rem',
        DEFAULT: '0.25rem',
        'md': '0.375rem',
        'lg': '0.5rem',
        'xl': '0.75rem',
        'full': '9999px',
      },
      ...
    },
    ...
  }
以上为今天边框的大致介绍,咱们明天见。
<<: 33岁转职者的前端笔记-DAY 11 一些网页切版技巧的小笔记-Part 2
>>: python 好用套件:利用 glob 抓取路径下档案名称
#番外-让你的CSS好读起来!CSS命名方法论笔记
你有以下困扰吗? 常常不知道要怎麽命名Class吗?(还一直去 Google 英文字的是你ㄇ ?) ...
【从零开始的 C 语言笔记】第十七篇-if条件式
不怎麽重要的前言 上一篇介绍了二维阵列的概念,基本上阵列的使用方法都不会差太多,应该不算太难理解? ...
Day 2. 关於前端
刚开始写程序的初学者,本人强烈建议你一定要先学个基本的HTML、CSS、JS 为什麽? 因为比起写个...
Day30 换脸效果 ( 你全家都同一张脸 )
换脸效果 ( 你全家都同一张脸 ) 教学原文参考:换脸效果 ( 同一张脸 ) 这篇文章会介绍使用 G...
[ 卡卡 DAY 17 ] - React Native 用 Animated 来做简单骨架屏
上一章节讲了 Animated 的使用 我们运用 start() 来做个骨架屏唷! 制作 bann...