@Day2 | C# WixToolset + WPF 帅到不行的安装包 [使用参考专案打包的方式]
在开始前,我们必须的事前准备
- 要打包的程序
程序了话,我们就先准备一个.net core 的Hello world
https://github.com/Aslan7826/defaultMVC - 安装WixToolset
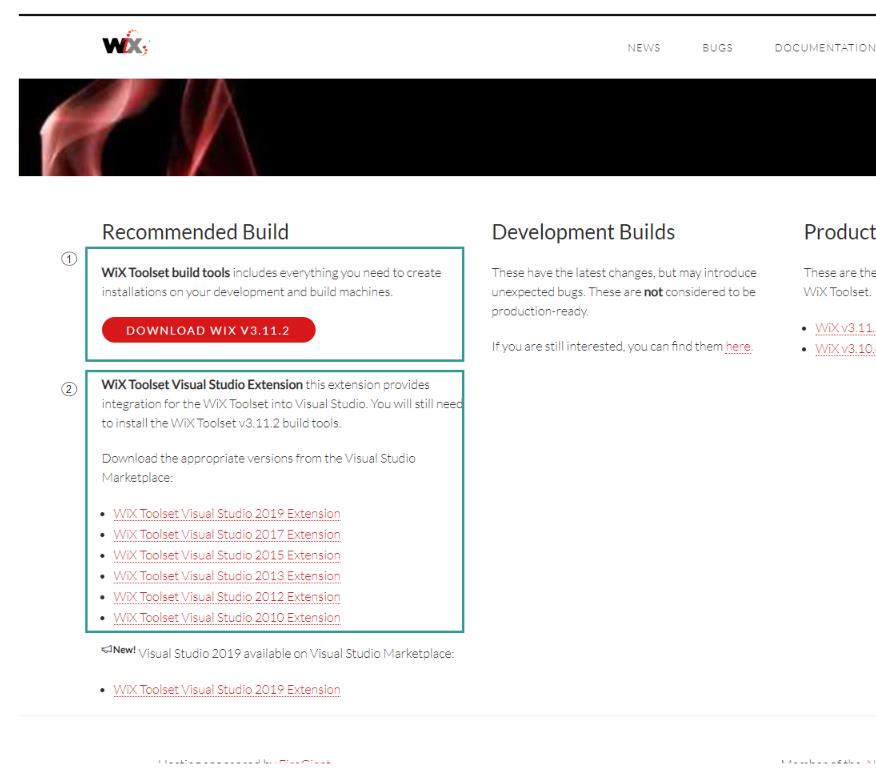
1.需安装WixToolset 的主要工具 : 这里面有许多需要参考的dll以及内建的资料夹快速建置 Heat.exe 工具。
2.VS2019扩充工具:可以在vs 上专案列表看到wix toolset的专案
如下↓↓↓
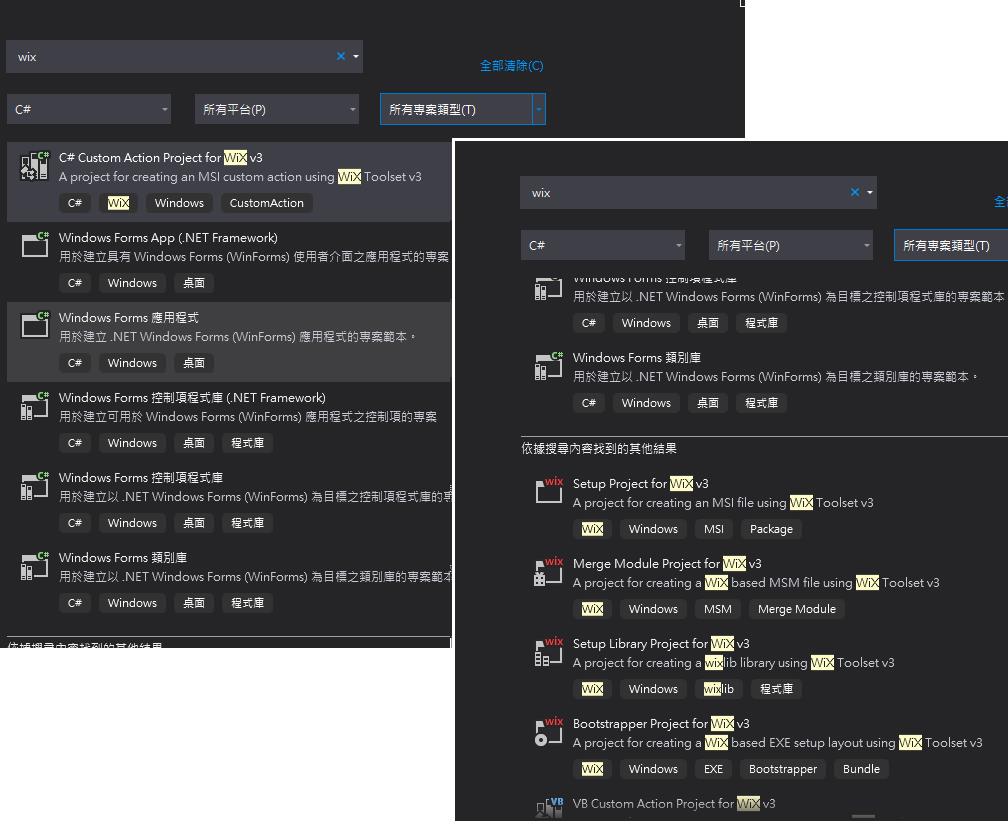
准备好了话!!!
我们来先简单的使用参考专案打包的方式
首先我们将要打包的程序方案上,增加一个Wix ToolSet 的专案,
使用Setup Project for WiX v3 的专案
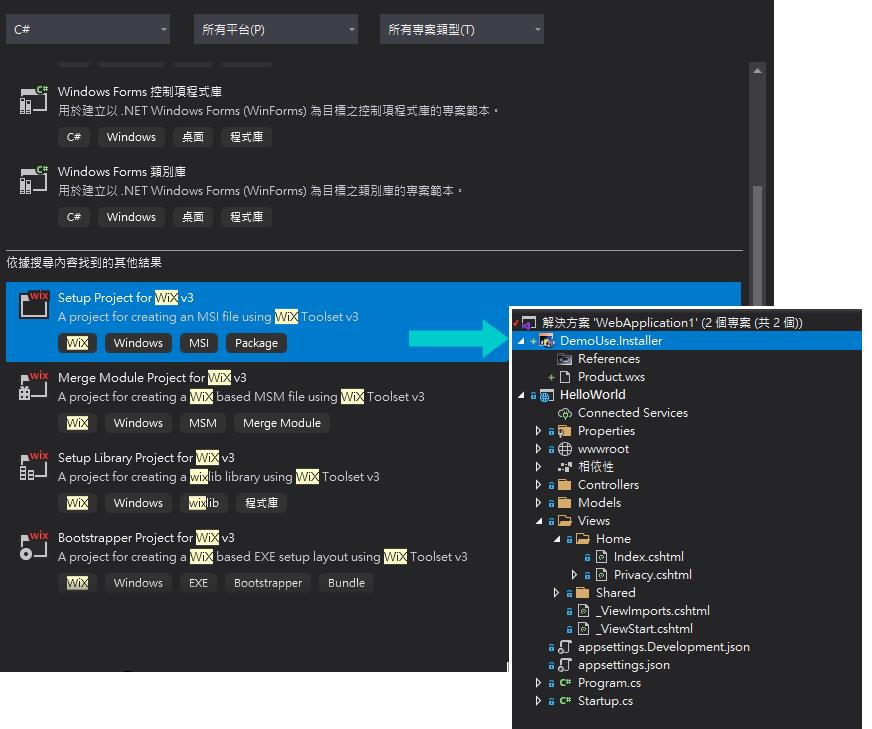
可以看得出新建的Wix 参考的资料夹(References)带有自己的风格↗
我们在Wix ToolSet的引用参考部分加入要发布的专案
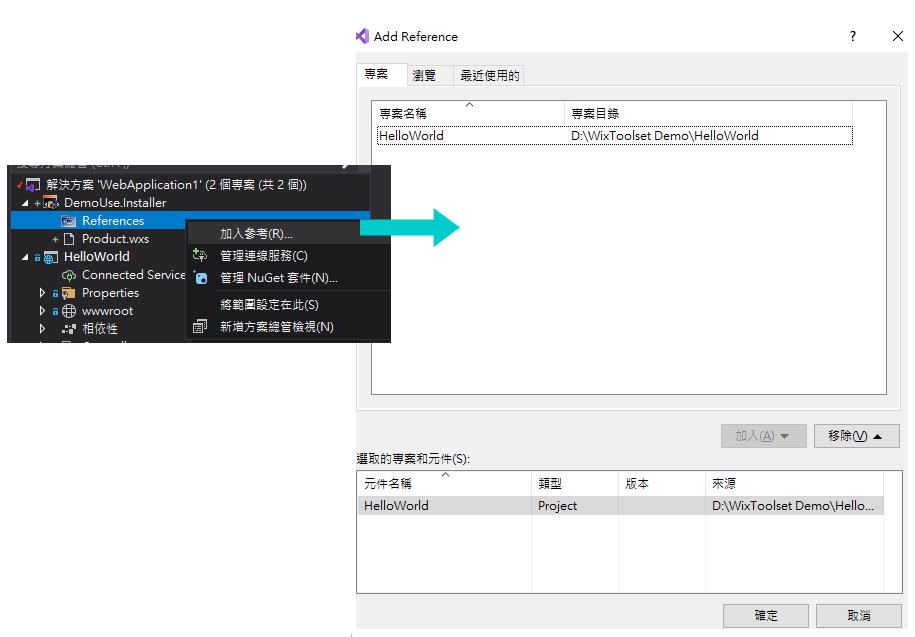
打开我们新建出来专案内的Product.wxs,长这样↓↓↓
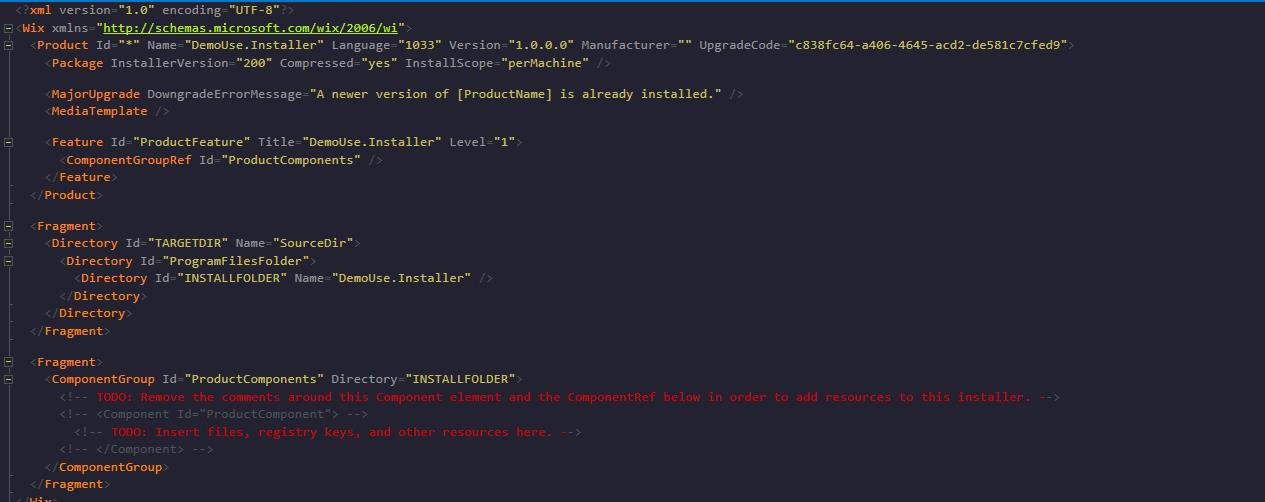
而WixToolset比较让人觉得麻烦的部分是,
要发布的Dll 或exe 之类的所有内容都必须写在Product.wxs部分宣告出来,
这样他的安装包才会去抓取。
目前直接依照HelloWorld 内部,
我想让他打包出目前有的档案了话,
我们先用手动加入的方式加入每一个档案,
写法了话 一个档案包一个Component,就像酱↓
<Component>
    <File Source="$(var.HelloWorld.TargetDir)\HelloWorld.deps.json" />
</Component>
然後写在ComponentGroup内,
<?xml version="1.0" encoding="UTF-8"?>
<Wix xmlns="http://schemas.microsoft.com/wix/2006/wi">
  <Product Id="*" Name="DemoUse.Installer" Language="1033" Version="1.0.0.0" Manufacturer="Demo" UpgradeCode="a5d1057e-17be-46b0-b865-51d067292c7f">
    <Package InstallerVersion="200" Compressed="yes" InstallScope="perMachine" />

    <MajorUpgrade DowngradeErrorMessage="A newer version of [ProductName] is already installed." />
    <MediaTemplate />

    <Feature Id="ProductFeature" Title="DemoUse.Installer" Level="1">
      <ComponentGroupRef Id="ProductComponents" />
    </Feature>
  </Product>

  <Fragment>
    <Directory Id="TARGETDIR" Name="SourceDir">
      <Directory Id="ProgramFilesFolder">
        <Directory Id="INSTALLFOLDER" Name="DemoUse.Installer" />
      </Directory>
    </Directory>
  </Fragment>

  <Fragment>
    <ComponentGroup Id="ProductComponents" Directory="INSTALLFOLDER">
      <!-- TODO: Remove the comments around this Component element and the ComponentRef below in order to add resources to this installer. -->
      <Component>
        <File Source="$(var.HelloWorld.TargetDir)\HelloWorld.deps.json" />
      </Component>
      <Component>
        <File Source="$(var.HelloWorld.TargetDir)\appsettings.json" />
      </Component>
      <Component>
        <File Source="$(var.HelloWorld.TargetDir)\HelloWorld.dll" />
      </Component>
      <Component>
        <File Source="$(var.HelloWorld.TargetDir)\HelloWorld.exe" />
      </Component>
            <Component>
        <File Source="$(var.HelloWorld.TargetDir)\HelloWorld.pdb" />
      </Component>
            <Component>
        <File Source="$(var.HelloWorld.TargetDir)\HelloWorld.runtimeconfig.dev.json" />
      </Component>
            <Component>
        <File Source="$(var.HelloWorld.TargetDir)\HelloWorld.runtimeconfig.json" />
      </Component>
            <Component>
        <File Source="$(var.HelloWorld.TargetDir)\HelloWorld.Views.dll" />
      </Component>
            <Component>
        <File Source="$(var.HelloWorld.TargetDir)\HelloWorld.Views.pdb" />
      </Component>
    </ComponentGroup>
  </Fragment>
</Wix>
注意 这边第三行内的 Manufacturer=""没有指定了话,建置时会出现告警讯息

都搞定後,专案给他建置下去!!!
然後到我们的专案资料夹内
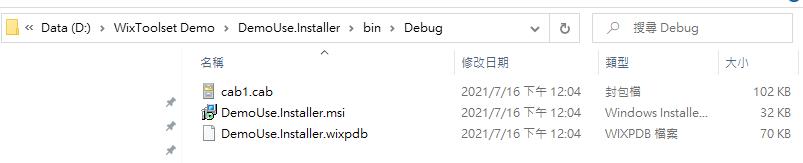
点DemoUse.Imstaller.msi之後,安装程序会自顾自的安装完毕…

别怕! 後面我们会谈到选择路径UI以及如何自订页面。
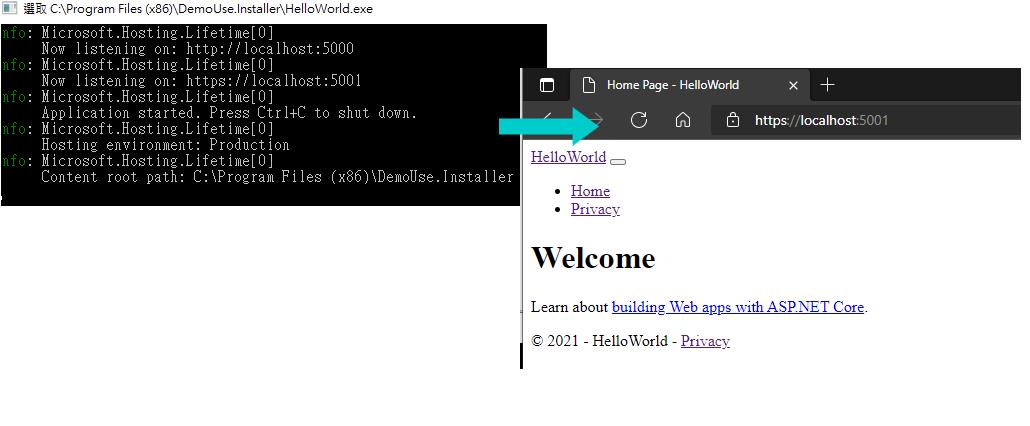
那我们先来看他安装到什麽地方??
一般会在C:\Program Files (x86) 里面

那我们看能不能执行,开启HelloWorld.exe档TryTry
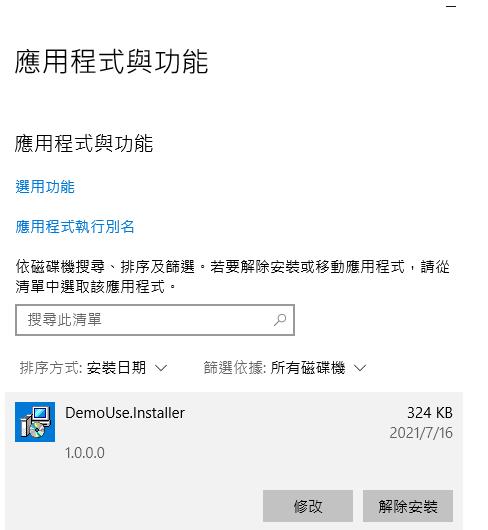
如果想解除安装了话,
可以直接使用新增移除程序,
里面就可以解除我们刚刚装的程序。
- 後记
今天的Product.wxs我相信基本上没接触过的人都会怕怕的,里面的栏位以及一些变数应用,
我在刚接触时也是很怕我Delay这个专案,
最後我爬了很多文章,写得最好的是左岸的 stoneniqiu
看他的东西收获很多!
https://www.cnblogs.com/stoneniqiu/p/3355086.html
有些解释的部分我会直接引用他的资料,毕竟我要写了话也只会类似的解释,
真的硬要讲了话,我也只是站在巨人肩膀上纪录碰到的问题。
而使用参考打包的方式,是我初学时别人使用WindowsFrom 简单的教学,
但现在前後端分离的时代下,简单教学的东西就没那麽实用了!
所以你可以看到我们目前产出的没有UI,这个要改为直接将发布完後再将档案参考的方式。
Day2程序码
https://github.com/Aslan7826/defaultMVC/commits/Day02
<<: Day2. Ruby 的基本介绍 - 让大家认识并爱上Ruby
App生命周期使用时机 Day 30
生命周期分为最重要的五个阶段: viewDidLoad: 画面已经(Did)载入记忆体会使用 载入只...
React-依视窗大小改变DOM
在class component上 一开始必须得在construtor上导入state判断视窗大小 ...
Day13 - Button(三)
前几篇我们学会了TextView和Button基本用法 今天我们把两个结合在一起 做3颗按钮: 其中...
基础建设: 系统监控与告警
系统架构 系统监控是维护资源可靠性、可用性与效能的重要环节。 指标计算 即时计算:即时的本地服务指标...
Android studio 实现选项卡功能
实现所需要的class跟xml 1.本身的activity 配戴着xml 2.需要几个选项 就new...