Day-30 学习 Helm (上)
前言
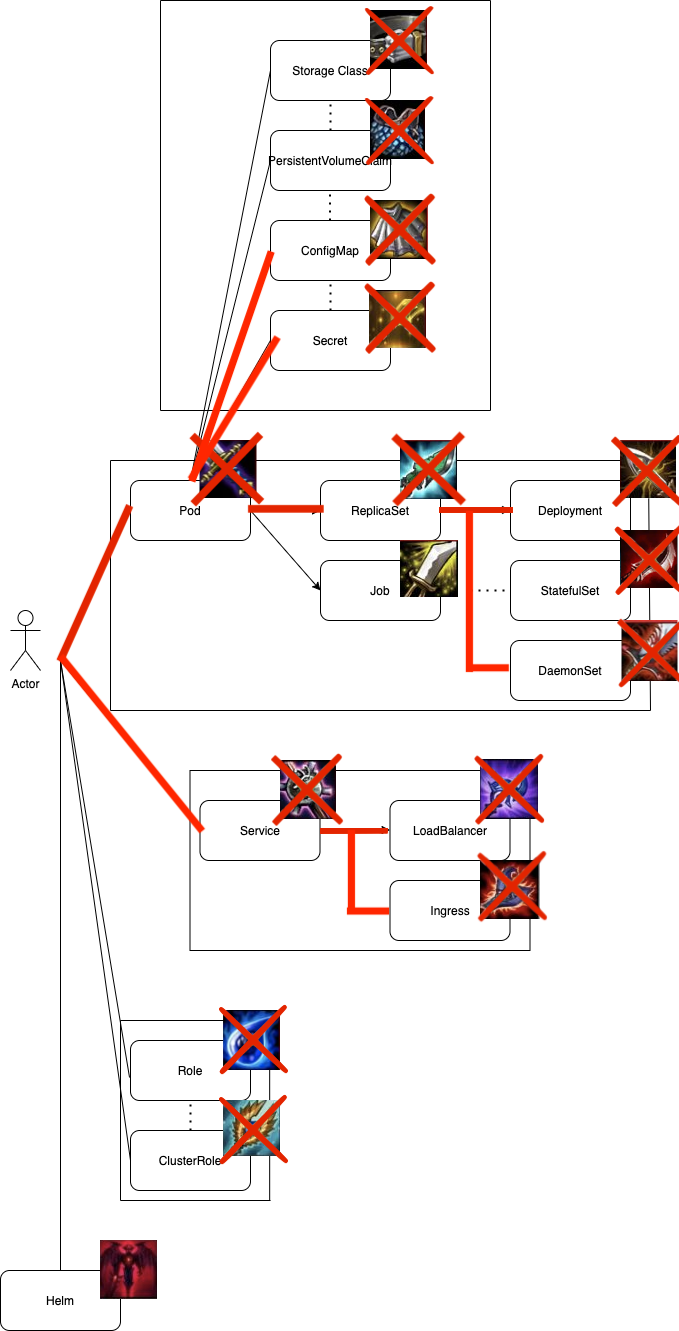
Kubernetes是一个可以帮助我们管理微服务的系统,为了因应功能项的不同,Kubernetes中也衍生出了各式各样的objects,并透过yaml来部署与管理这些objects。
因为在Cluster当中,有着许多不同功能项的objects再加上不同的环境需要不同的变数与设定档,导致我们需要维护相当多的yaml。
此外,有些功能性常见的服务,像是database存在於Cluster当中,也会需要相当多的yaml,这时我们也会希望有个registry能够直接去pull这些yaml下来直接使用。
基於种种理由,我们现在要来介绍Helm为何何物!
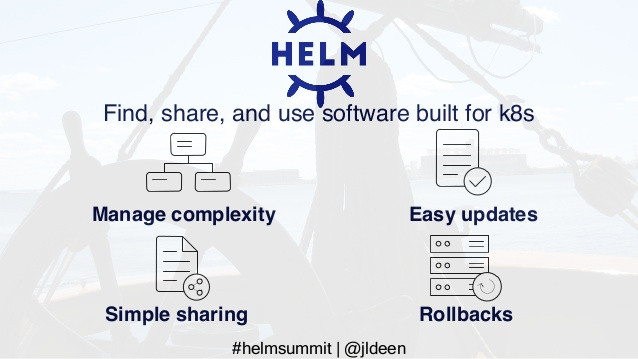
What is Helm ?
Helm简单来说就是个管理诸多kubernetes设定档的工具,他会把一个Kubernetes 服务中许许多多的yaml档都打包成一个名为chart的集合。再透过给定参数的方式去管理这些所有的yaml档。
这样说好像有点抽象,下面我们会来解说helm的workflow,并讲解每个parts所做的事情。
Workflow of Helm
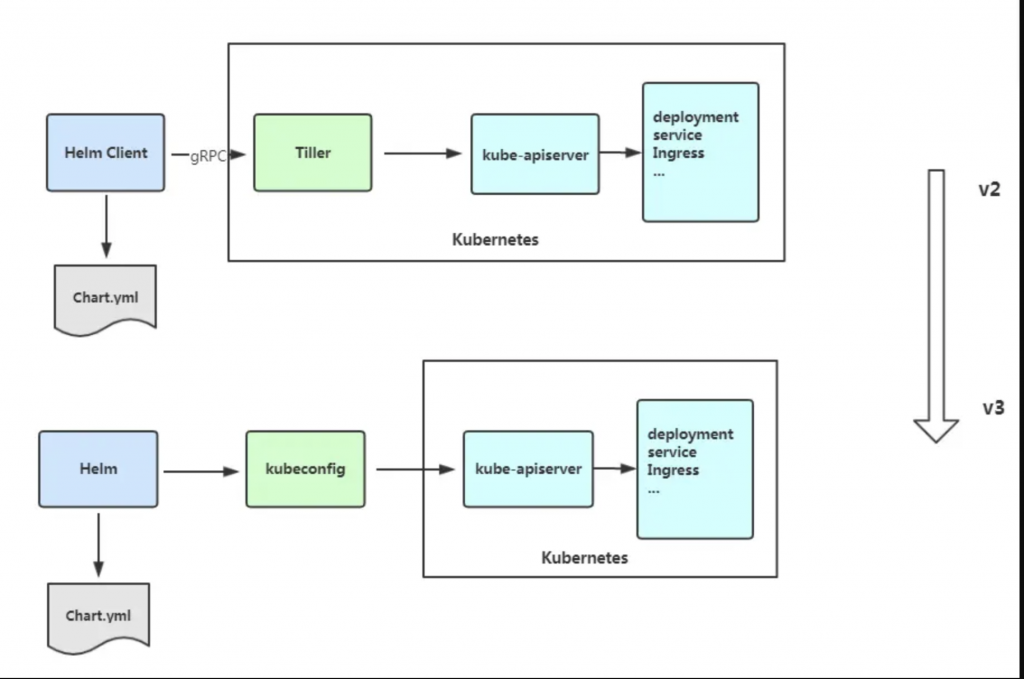
首先,Helm正处於V2到V3的过渡期,因此本篇文会以Helm3为主来解说。
Difference between Helm2 and Helm3
由2到3最大的差异就在於Helm3不在需要透过Tiller去与Kubernetes进行沟通,现在Helm会直接透过kubeconfig用类似於kubectl的方法去直接的与kube-apiserver进行访问,因此以後不需要再用helm init来初始helm,也不用在遇到因为Tiller所产生的坑了。
- Tiller: Tiller 是 Helm2 用来与 API server 沟通,并使用 chart 在 k8s cluster 上建立服务的Service。
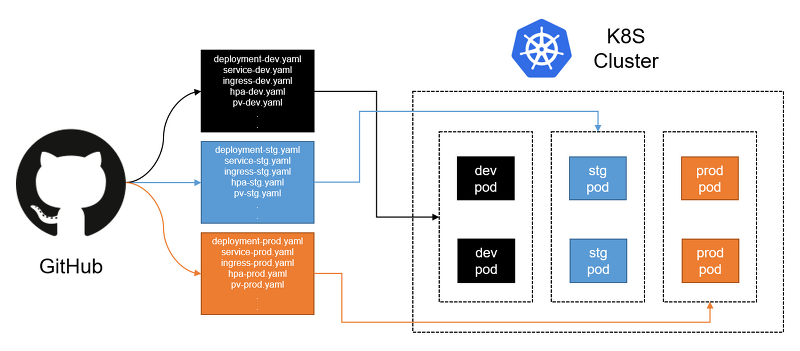
Process of deployment kubernetes service through Helm
- Old:
原先,我们可能会透过不同branch的切换,来部署特定服务在不同的environments上。
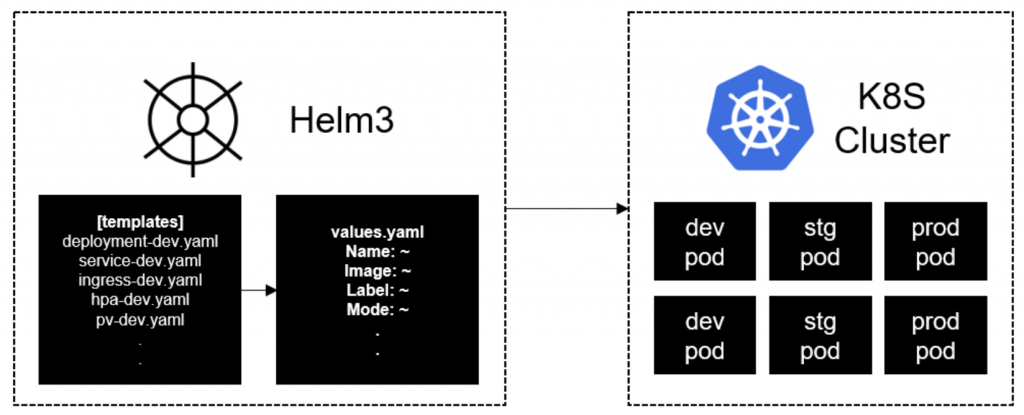
- Now:
现在,我们则是透过Chart来维护同一份yaml档,并透过Helm来进行部署,这也大大降低了维护不同环境所带来的复杂性。
Installation
- Mac
Through brew
$ brew install kubernetes-helm
- Windows
Through choco
$ choco install kubernetes-helm
- Ubuntu/Debian
$ curl https://baltocdn.com/helm/signing.asc | sudo apt-key add -
$ sudo apt-get install apt-transport-https --yes
$ echo "deb https://baltocdn.com/helm/stable/debian/ all main" | sudo tee /etc/apt/sources.list.d/helm-stable-debian.list
$ sudo apt-get update
$ sudo apt-get install helm
- Check
$ helm version
version.BuildInfo{Version:"v3.3.4", GitCommit:"a61ce5633af99708171414353ed49547cf05013d", GitTreeState:"dirty", GoVersion:"go1.15.2"}
Downloading and using existing helm
Add a repo
helm repo add
$ helm repo add official https://kubernetes-charts.storage.googleapis.com
"official" has been added to your repositories
$ helm repo list
NAME    	URL
official	https://kubernetes-charts.storage.googleapis.com
Search chart
helm search repo
这边我们以jenkins为例
$ helm search repo jenkins
NAME            	CHART VERSION	APP VERSION	DESCRIPTION
official/jenkins	2.5.4        	lts        	DEPRECATED - Open source continuous integration...
Get chart values
helm show values /
$ helm show values official/jenkins
# Default values for jenkins.
# This is a YAML-formatted file.
# Declare name/value pairs to be passed into your templates.
# name: value

## Overrides for generated resource names
# See templates/_helpers.tpl
# nameOverride:
# fullnameOverride:
# namespaceOverride:

# For FQDN resolving of the master service. Change this value to match your existing configuration.
# ref: https://github.com/kubernetes/dns/blob/master/docs/specification.md
...etc
Install chart
helm install /<chart_path>
- Through registry
$ helm install jenkins official/jenkins
WARNING: This chart is deprecated
NAME: jenkins
LAST DEPLOYED: Thu Oct 15 10:37:09 2020
NAMESPACE: default
STATUS: deployed
REVISION: 1
NOTES:
*******************
****DEPRECATED*****
*******************
* The Jenkins chart is deprecated. Future development has been moved to https://github.com/jenkinsci/helm-charts

1. Get your 'admin' user password by running:
  printf $(kubectl get secret --namespace default jenkins -o jsonpath="{.data.jenkins-admin-password}" | base64 --decode);echo
2. Get the Jenkins URL to visit by running these commands in the same shell:
  export POD_NAME=$(kubectl get pods --namespace default -l "app.kubernetes.io/component=jenkins-master" -l "app.kubernetes.io/instance=jenkins" -o jsonpath="{.items[0].metadata.name}")
  echo http://127.0.0.1:8080
  kubectl --namespace default port-forward $POD_NAME 8080:8080

3. Login with the password from step 1 and the username: admin

4. Use Jenkins Configuration as Code by specifying configScripts in your values.yaml file, see documentation: http:///configuration-as-code and examples: https://github.com/jenkinsci/configuration-as-code-plugin/tree/master/demos

For more information on running Jenkins on Kubernetes, visit:
https://cloud.google.com/solutions/jenkins-on-container-engine
For more information about Jenkins Configuration as Code, visit:
https://jenkins.io/projects/jcasc/
Check current chart
helm list
$ helm list
NAME   	NAMESPACE	REVISION	UPDATED                             	STATUS  	CHART        	APP VERSION
jenkins	default  	1       	2020-10-15 10:37:09.212025 +0800 CST	deployed	jenkins-2.5.4	lts
$ kubectl get pod --watch
NAME                       READY   STATUS              RESTARTS   AGE
jenkins-75867f68c8-nv45m   1/2     Running             0          117s
jenkins-75867f68c8-nv45m   2/2     Running             0          2m20s
Download exist chart
$ helm fetch official/jenkins
$ ls -l
total 240
-rw-r--r--   1 flynnsun  staff    473 10  5 17:48 Dockerfile
-rw-r--r--   1 flynnsun  staff     14 10  5 17:48 README.md
drwxr-xr-x   4 flynnsun  staff    128 10  5 17:48 app
-rw-r--r--   1 flynnsun  staff    795 10  5 17:48 base.yaml
-rw-r--r--   1 flynnsun  staff   3397 10  6 13:08 convert.py
-rwxr-xr-x   1 flynnsun  staff    287 10  5 17:48 create_image.sh
-rwxr-xr-x   1 flynnsun  staff     63 10  5 17:48 docker-entrypoint.sh
-rw-r--r--   1 flynnsun  staff  53303 10 15 10:52 jenkins-2.5.4.tgz
$ tar -xvf jenkins-2.5.4.tgz
这样我们就能下载了Jenkins chart的code,之後也能够透过更改values去匹配我们GCP的其他物件。
Delete chart
helm uninstall
$ helm uninstall jenkins
release "jenkins" uninstalled
Create a new chart
$ helm create ironman
Creating ironman
这时我们就建立了一个名为ironman的sample chart
Parse the chart
Chart components
$ cd ironman
$ tree
.
├── Chart.yaml
├── charts
├── templates
│   ├── NOTES.txt
│   ├── _helpers.tpl
│   ├── deployment.yaml
│   ├── hpa.yaml
│   ├── ingress.yaml
│   ├── service.yaml
│   ├── serviceaccount.yaml
│   └── tests
│       └── test-connection.yaml
└── values.yaml

3 directories, 10 files
- Chart.yaml: 定义这个chart的metadata. 包含Chart的版本号, 名称与叙述等
- charts: 在这folder当中可以放其他的charts.简称为subchart.
- templates:定义该chart的kubernetes元件。但我们并不会将各元件的参数写死在这,而是用参数的方式代入。
- values.yaml: 定义这个chart的所有参数,这些参数都会被代入templates的元件当中。例如我们会定义nodePorts给service.yaml. 定义replicaCount给deployment.yaml. 定义hosts给ingress.yaml...等
从上面档案结构可以看到,我们透过编辑values.yaml,就可以对所有的yaml档做到版控与管理,并透过install/delete的方式做到一键部署/删除。
後记
虽然铁人赛到了尾声(第三十篇),但Kubernetes世界很大,所以我们的旅程依然会继续(但可能不会维持日更了),Helm的部分由於篇幅关系,我们会在下章节继续解说如何将目前Kubernetes components yaml转换成使用helm的chart来维护与部署,有兴趣的读者能够期待day-31。

虽然铁人赛即将落幕,但我们的Kubernetes兽依然会持续的强化并加强配备,期许我们能够在devOps能够习得更多的技能!
Reference
https://helm.sh/docs/intro/install/
<<: Day30 深入解析Elasticsearch Query DSL Match query Part3
Day 10:云端服务
前言 云端服务层级可分为三种: SaaS(软件即服务):提供给一般用户或商务使用的软件,如:Goog...
以Postgresql为主,再聊聊资料库 PostgreSQL last N in-table cache 探讨
PostgreSQL last N in-table cache 探讨 前些天对悠游卡储值时,加值机...
[13th][Day14] docker port
dockerfile 中的每一个步骤都会 commit 一次,docker history 可以看 ...
一个人在一年写一套ERP程序
一个人在一年写一套ERP程序, 可能吗? 笔者是朝正面且乐观看待此事,认为一个人在一年内写一套ERP...
Day10 - 如何查询委托单状态
又到了每天把玩Python API的时间了,还记得Day8的文章吗? 我们对於下单的状态讯息做了示范...