Day29 vue.js网页 团队介绍 管理员功能
延续昨日
今天我们来实现 管理者帐号跟团队介绍
其实这两点应该可以同时执行
因为只有管理者可以新增跟删减团队人员
这样子首先我们需要先有一个teams.vue
然後把route加上去
以下是程序码
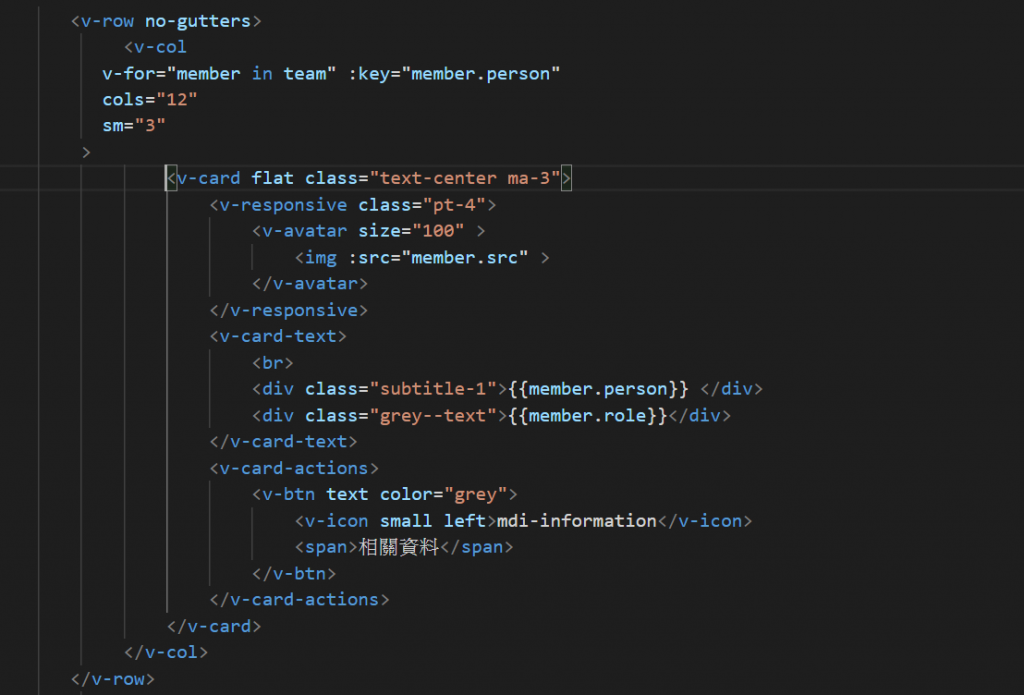
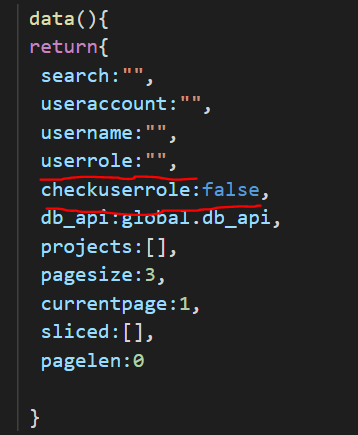
data(){
return{
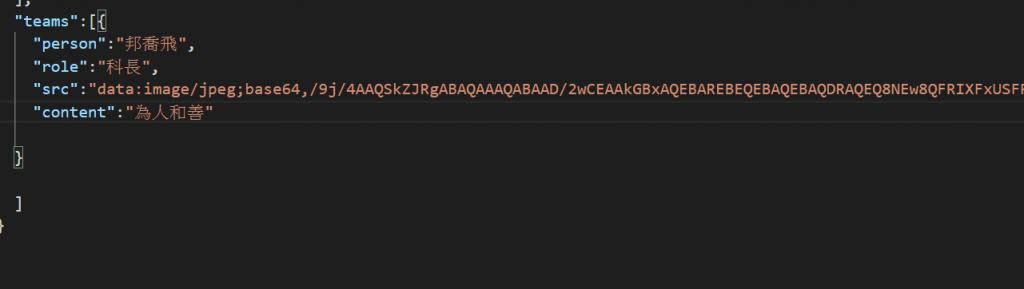
team:[
{person:'邦乔飞 ',role:'科长',src:require('../assets/avatar.png')},
{person:'邦乔飞',role:'科长',src:require('../assets/avatar.png')},
{person:'邦乔飞',role:'科长',src:require('../assets/avatar.png')},
{person:'邦乔飞',role:'科长',src:require('../assets/avatar.png')},
{person:'邦乔飞',role:'科长',src:require('../assets/avatar.png')},
]
}
},
}
然後做一点修改
等等会设定成只有管理员可以看到这些按钮
然後我npm insatall sweet alert 让alert比较好看
(https://sweetalert.js.org/guides/#advanced-examples)
接下来来看看layout吧!
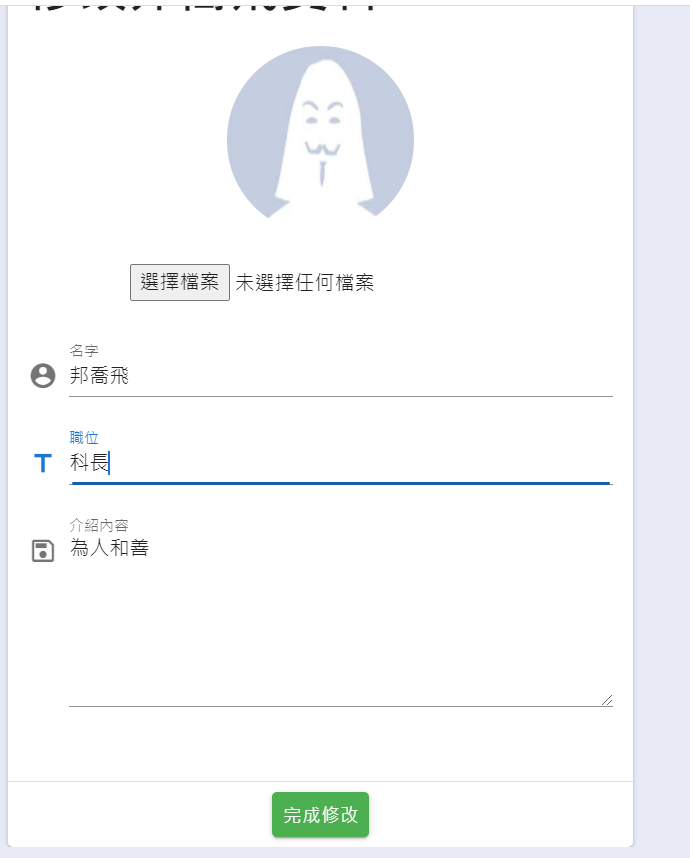
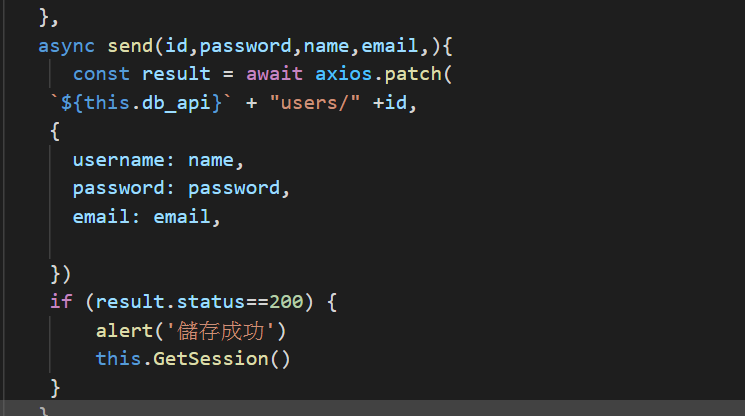
再来是点选修改後预计是可以跟修改帐户名称一样
接着去处理资料库
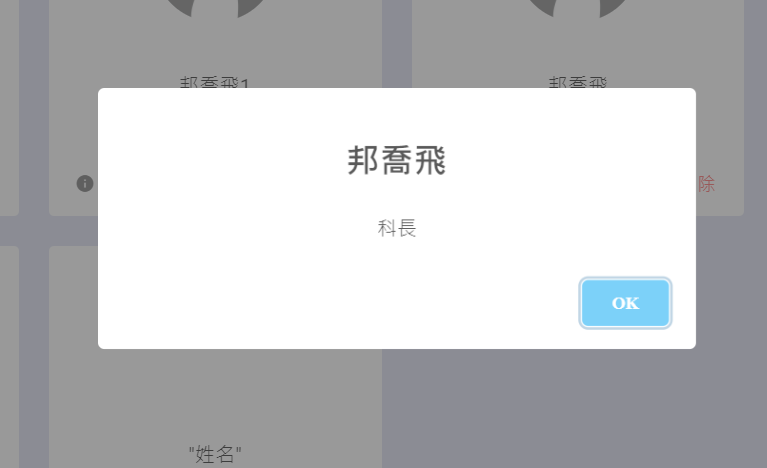
先处理最简单的删除按钮(照抄projects.vue的删除)
  GetInfo(v,v2){
       swal(v,v2)
    },
    async  GetSession(){
          let teams =await axios.get(`${this.db_api}`+"teams")
          this.team=teams.data
    }
},
async mounted(){
     this.GetSession()
}
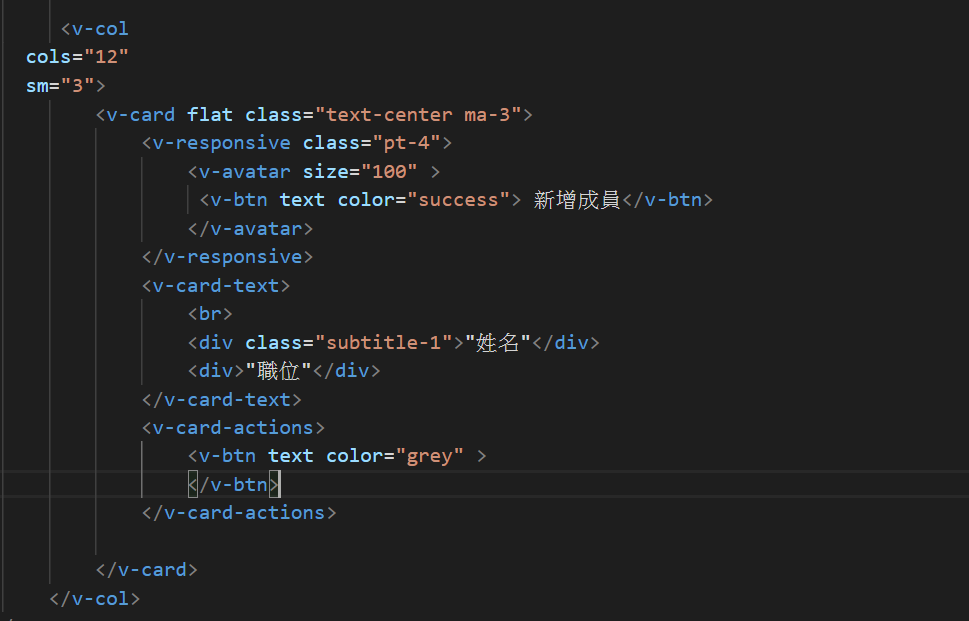
接着处理新增成员功能
这样我们会需要一个addteam.vue 完全照抄後修改
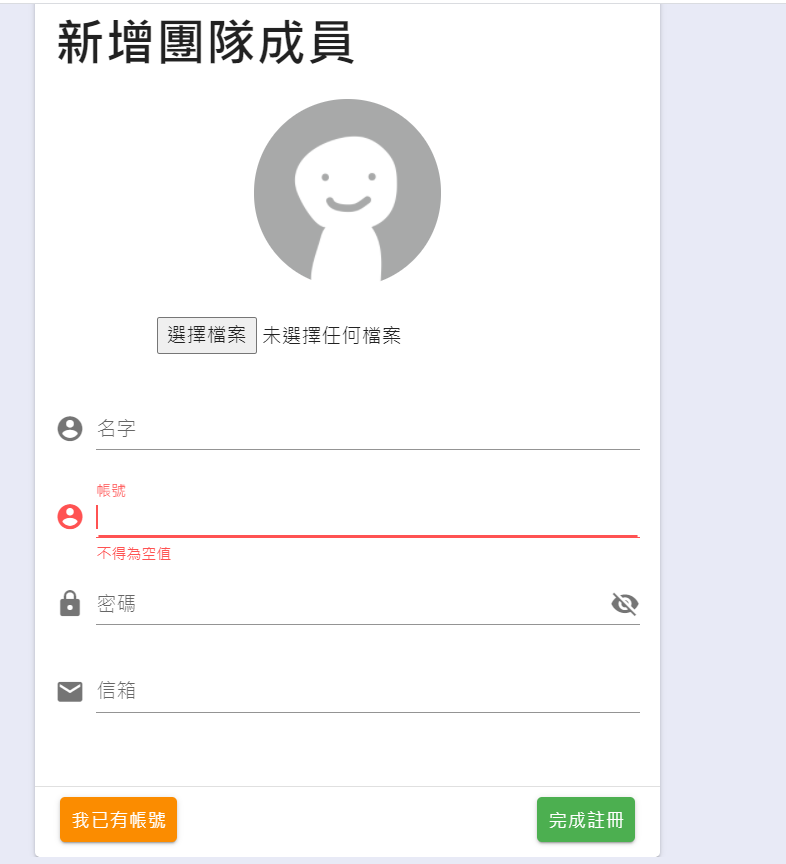
就修改部分内容就好完全和注册一模一样参考day14和day27(就不多赘述了)
接着创一个changeteam.vue 以及一个带id的path
完成後跟修改帐户一样(所以不多做赘述了)
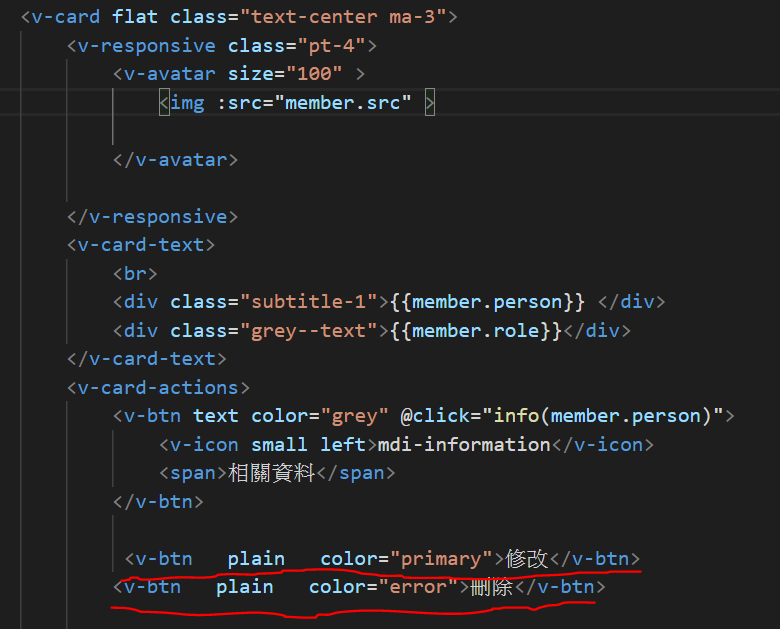
再来则是让管理者才可以去新增修改删除
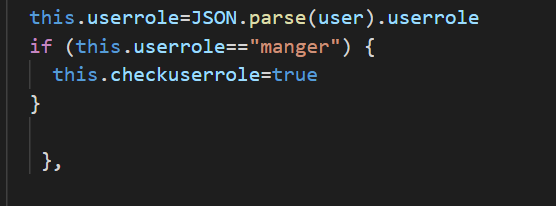
这边要先去db.json里面新增一个管理者
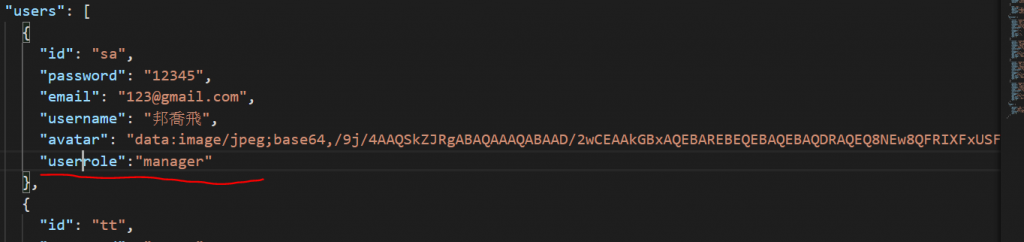
在getsession function里面设定
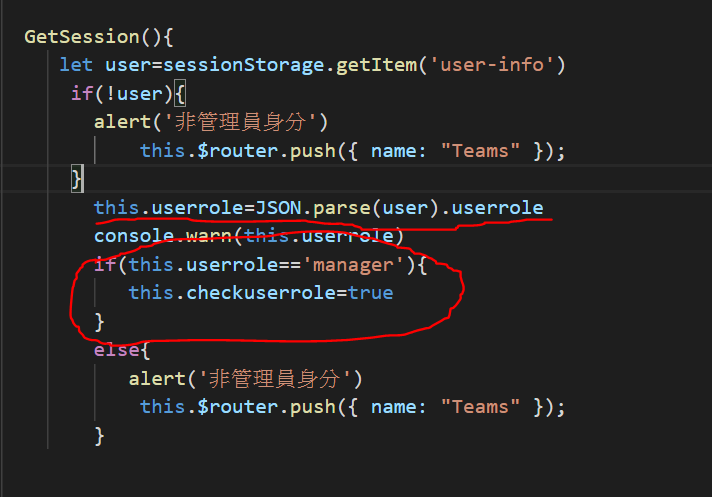
这样就可以实现 只有管理员能修改
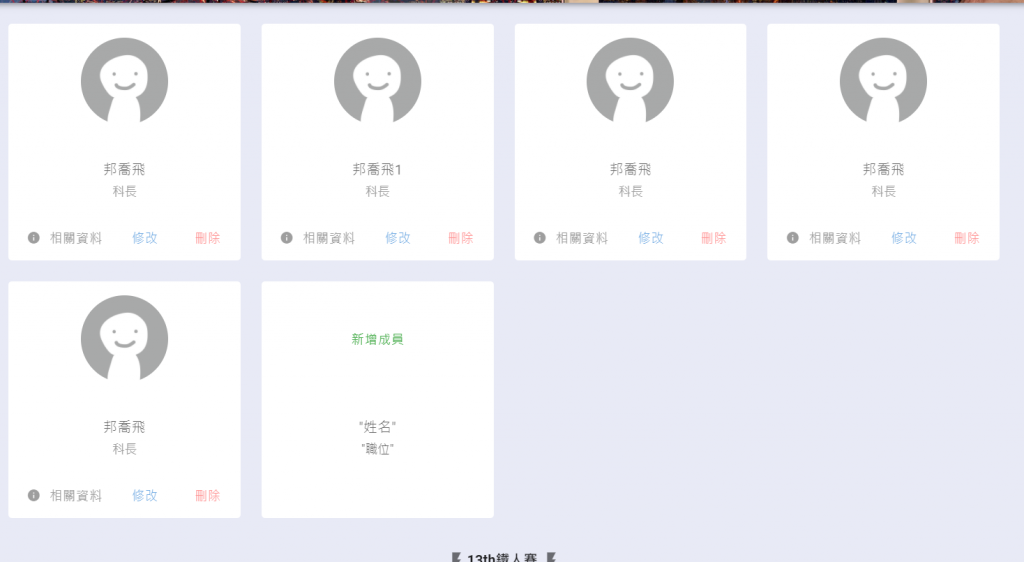
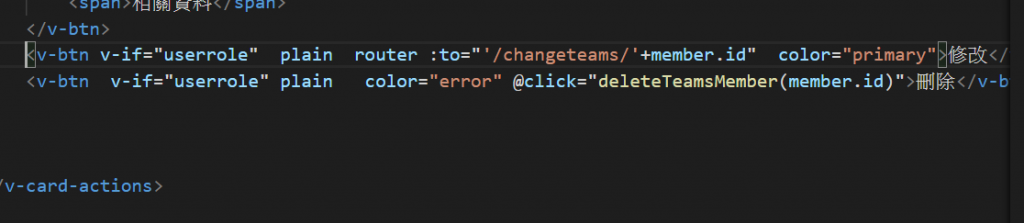
回到teams.vue把 修改删除的btn给一个v-if(还有新增的画面也要给一个v-if)
确认是管理者的情况下才会显示出来
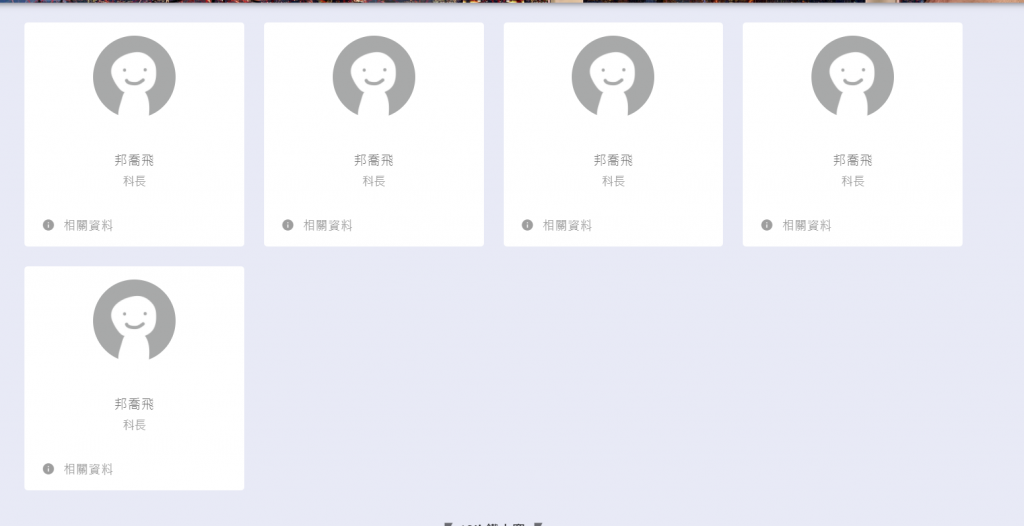
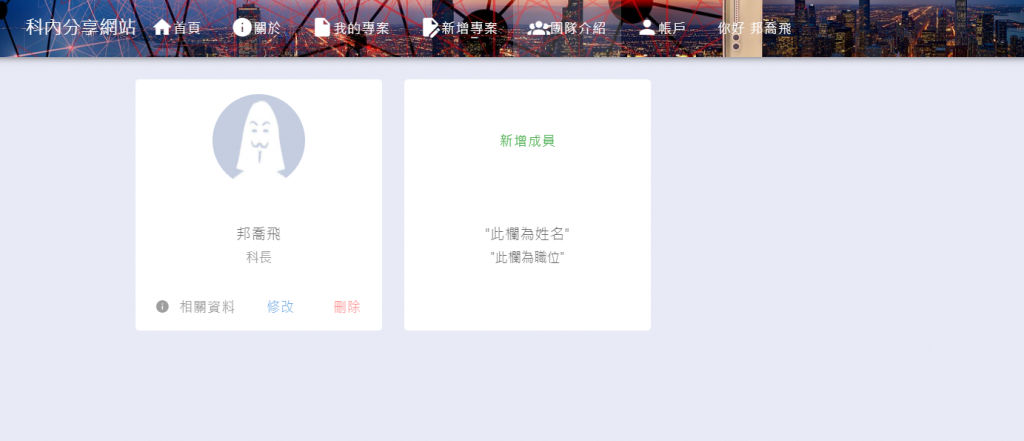
所以这就是目前的介面(非管理者)

以下就是登入後判定为管理员後的介面
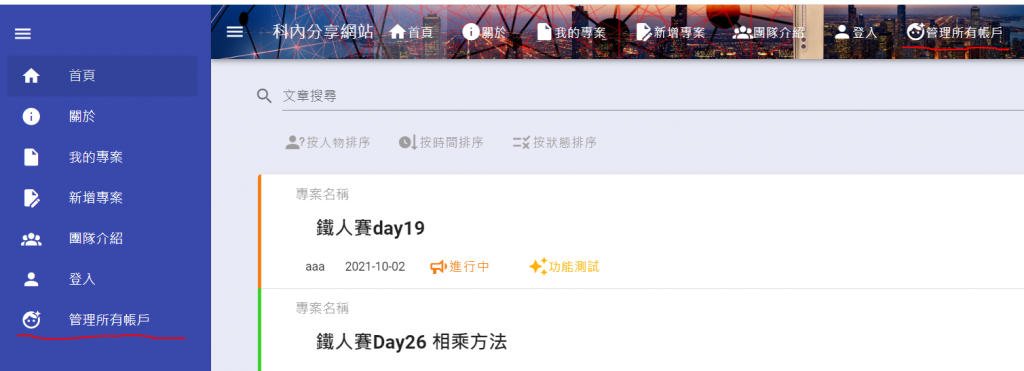
回到首页
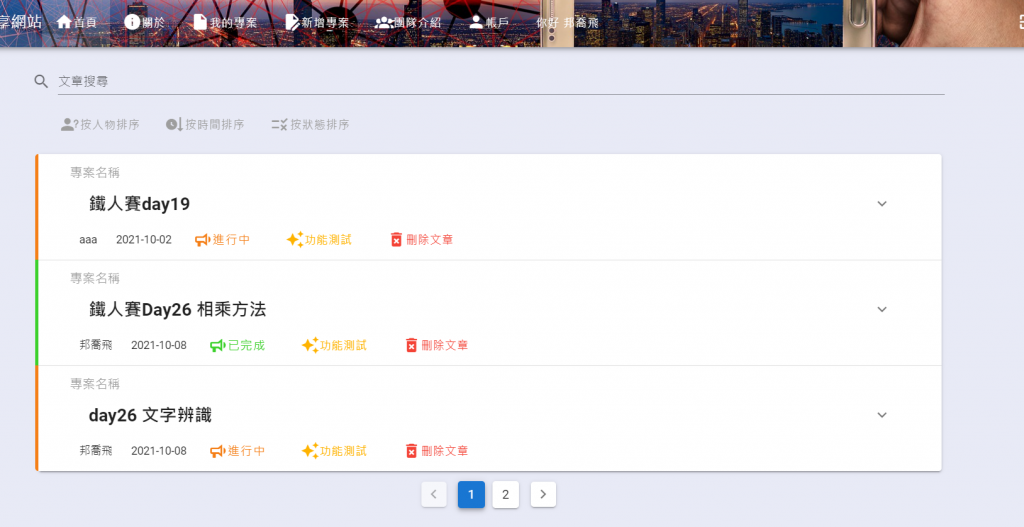
我们的管理者要可以删除所有文章
所以先在home页面加一个删除的按钮

直接照抄 project.vue的删除按钮
async deleteArticles(val){
      let result =await axios.delete(`${this.db_api}`+"articles/"+val);

     if(result.status==200){
       alert('已删除')
       this.GetSession();
     }
    },
Function也照抄
一样新增2个data
最後在btn上面加一个v-if就完成啦!
一般人的页面
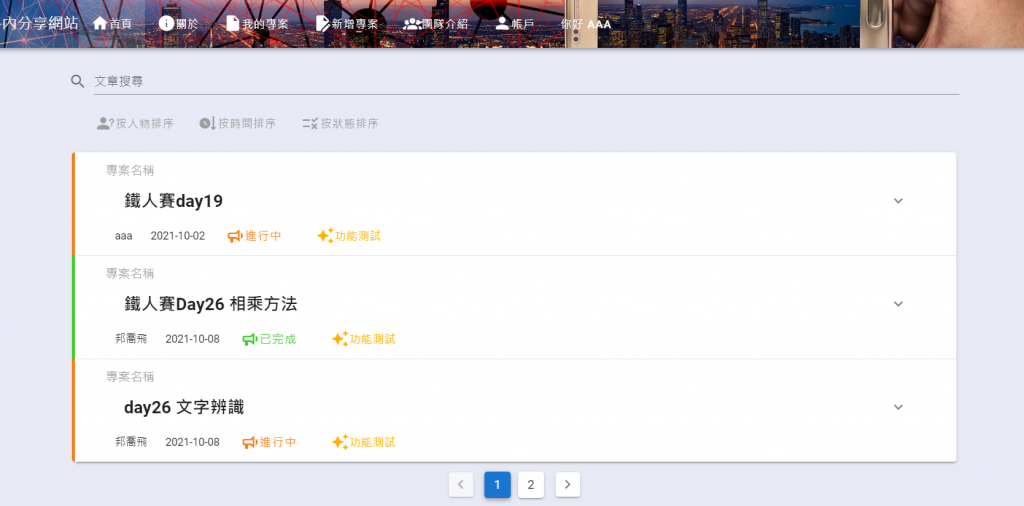
管理者的页面
然後我删除1篇文章之後发现我的最大page数还是2
原来是当时设定的问题
this.pagelen=parseInt(this.projects.length/this.pagesize)+1
改成这样就是无条件进位 所以整除的话最大页数就是1(参考day28)
this.pagelen=Math.ceil(this.projects.length/this.pagesize)
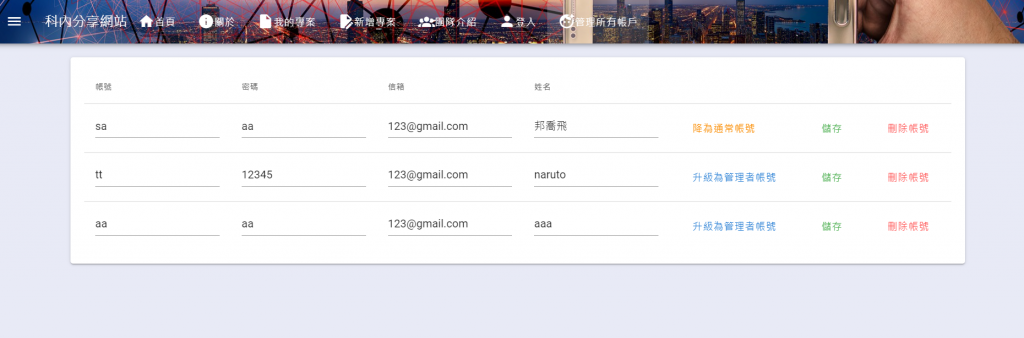
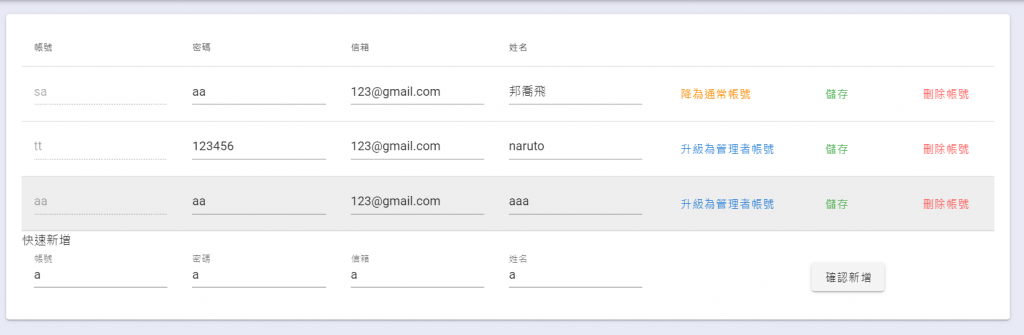
再来就是设定一个管理所有帐户的按钮
并创立manageraccount.vue
再来就是简单的tr td
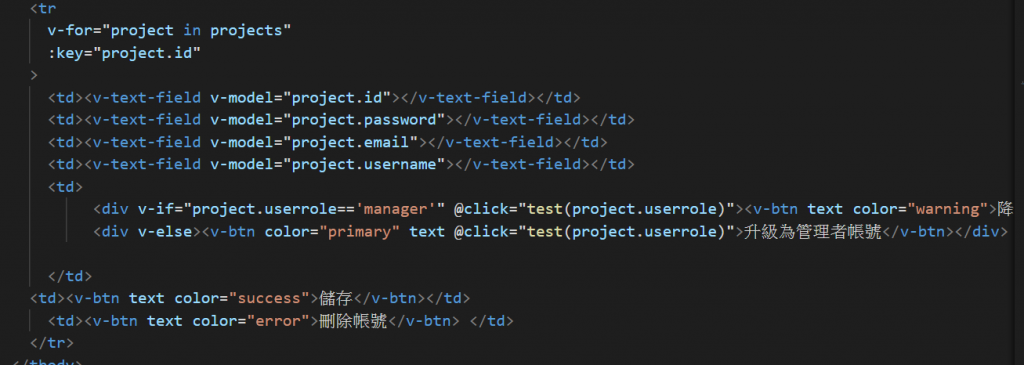
一样在网站设定防止想要用route进来的人

一个简易的传接值作为基本讯息的修改和删除帐号


再让管理者可以快速新增帐号
全部照抄 注册页的东西要记得创data用v-model绑定(就不赘述了)
async add(){
         try {
        //用try catch的目的是为了检测帐号是否重复
        if(this.$refs.id.validate()) {
         let result = await axios.post(`${this.db_api}`+"users",{
        id:this.nuseraccount,
        password:this.nuserpassword,
        email:this.nuseremail,
        username:this.nusername,
        avatar:this.nuseravatar

      })
          if(result.status==201){
            alert("新增成功")
            this.GetSession()

      }
      }

      } catch (error) {
          console.warn(error)
           alert('帐号不得重复')
      }
     },
最後则是新增成管理员帐号 或降为一般帐号

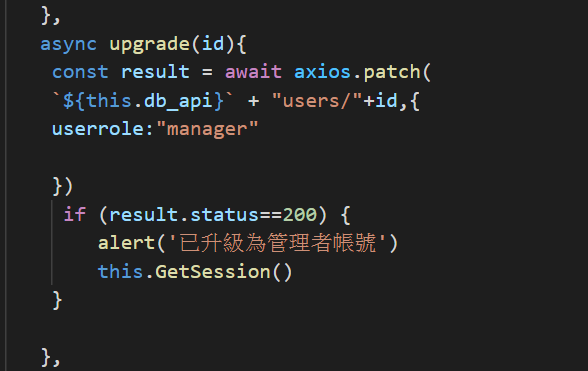
降级也是同一个道理只是把userrole改为:” ”
这样我们网站的所有功能就完成了!!!
今天弄超多东西的
但其实都跟之前做过的很类似
最後则是把所有东西包成docker啦!
我们明天见
<<: 【Day 26】我们与 1102 的距离 - Bypass Clear Log Event
>>: Day26 ATT&CK for ICS - Collection(2)
【PHP Telegram Bot】Day15 - 基础(4):阵列处理、JSON
阵列就像是个大柜子,可以存放好多好多的东西 阵列赋值、取值 可以由两种格式产生(两者相等): $a...
模型架构--1
GoogLeNet Google提出的GoogLeNet,层数比较多,运算的效率相当好,超参数数量比...
[Day28]- 新手的Web系列JSON Injection 0x1
Day28- 新手的Web系列JSON Injection 0x1 正文 JSON 介绍 JSON ...
Day 1. Pre-Start × 微前言
行前导读 第一次参加铁人赛的你,先礼貌性来个自我介绍吧?! 嗨大家好! This is Ian ,...
DAY07 - API架构分享
其实大家可能都有自己的API架构方式,不过我这边就是分享我目前在Web端撰写API时,在架构上和开发...