[ 卡卡 DAY 24 ] - React Native 表单套件用 Formik 搭配 Yup 验证 (下)
经过 Day23 的讲解,大家应该都有初步的了解及安装完毕吧 XD
今天我们来运用 Formik 搭配 Yup 做个简单表单画面吧!
建立 Formik UI 画面
- components/ Button.js
import React from 'react';
import {TouchableOpacity, Text, StyleSheet} from 'react-native';

const Button = ({label, onPress}) => {
  return (
    <TouchableOpacity style={styles.btn} activeOpacity={0.7} onPress={onPress}>
      <Text style={styles.btnText}>{label}</Text>
    </TouchableOpacity>
  );
};

const styles = StyleSheet.create({
  btn: {
    borderRadius: 8,
    height: 50,
    width: '100%',
    justifyContent: 'center',
    alignItems: 'center',
    backgroundColor: 'black',
    marginTop: 20,
  },
  btnText: {fontSize: 18, color: 'white', textTransform: 'uppercase'},
});

export default Button;
- components/ Input.js
想更了解 TextInput 可以看看这个!
import React from 'react';
import {TextInput as RNTextInput, View, StyleSheet, Text} from 'react-native';

// ...otherProps 是除了label其他没提到的 props(ES9)
const Input = ({label, ...otherProps}) => {
    const validationColor =  '#223e4b';
    return (
        <View style={[styles.input,{borderColor:validationColor}]}>
        <View style={{padding: 8}}>
            <Text>{label}</Text>
        </View>
        <View style={{flex: 1}}>
            <RNTextInput
            underlineColorAndroid="transparent"
            placeholderTextColor="#ccc"
            {...otherProps}
            />
        </View>
        </View>
    );
};
const styles = StyleSheet.create({
  input: {
    flexDirection: 'row',
    alignItems: 'center',
    height: 48,
    borderRadius: 8,
    borderWidth: StyleSheet.hairlineWidth,
    padding: 8,
    marginVertical: 10,
  },
});

export default Input;
- screens/ Formik.js
这次来试试用 useFormik 的方式
import React from 'react';
import {StyleSheet, View, Text, ScrollView} from 'react-native';
import {fonts} from '@src/constants';
import Input from '@src/components/Input';
import Button from '@src/components/Button';
import * as yup from 'yup';
// 引入 useFormik
import {useFormik} from 'formik';
const Formik = () => {
// 使用 useFormik
const {handleChange, handleSubmit, values} = useFormik({
initialValues: {name: '', email: '', password: ''},
onSubmit: values =>
alert(
`Name: ${values.name},Email: ${values.email}, Password: ${values.password}`,
),
});
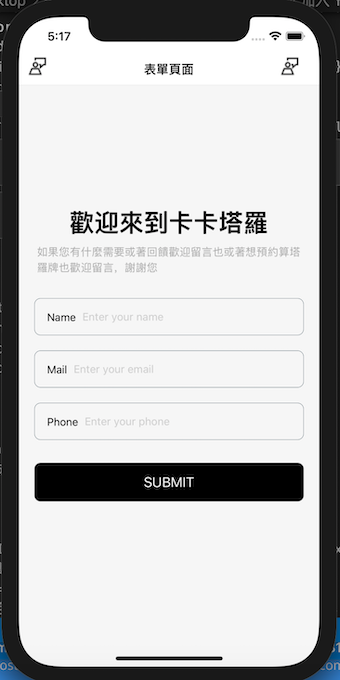
return (
<ScrollView style={styles.container}>
<View style={styles.textBox}>
<Text style={[styles.text, fonts.h1]}>欢迎来到卡卡塔罗</Text>
<Text style={(fonts.p, styles.textContent)}>
如果您有什麽需要或着回馈欢迎留言也或着想预约算塔罗牌也欢迎留言,谢谢您
</Text>
</View>
<View style={styles.formBox}>
<Input
onChangeText={handleChange('name')}
label="Name"
placeholder="Enter your name"
autoCapitalize="none"
autoCompleteType="email"
keyboardType="default"
keyboardAppearance="dark"
returnKeyType="next"
returnKeyLabel="next"
/>
<Input
onChangeText={handleChange('email')}
label="Mail"
placeholder="Enter your email"
autoCapitalize="none"
autoCompleteType="email"
keyboardType="email-address"
keyboardAppearance="dark"
returnKeyType="next"
returnKeyLabel="next"
/>
<Input
onChangeText={handleChange('phone')}
label="Phone"
placeholder="Enter your phone"
secureTextEntry
autoCompleteType="phone-pad"
autoCapitalize="none"
keyboardAppearance="dark"
returnKeyType="go"
returnKeyLabel="go"
/>
<Button label="submit" color="maroon" onPress={handleSubmit} />
</View>
</ScrollView>
);
};
const styles = StyleSheet.create({
container: {
flex: 1,
backgroundColor: 'rgb(246,246,246)',
paddingHorizontal: 20,
},
textBox: {
justifyContent: 'center',
alignItems: 'center',
paddingVertical: 50,
},
textTitle: {color: '#aaa'},
textContent: {color: '#aaa', lineHeight: 20, marginTop: 10},
formBox: {
width: '100%',
alignItems: 'center',
justifyContent: 'center',
},
input: {
width: '100%',
textAlign: 'center',
borderWidth: 1,
borderColor: '#ddd',
padding: 10,
fontSize: 18,
margin: 10,
},
errorText: {
textAlign: 'center',
color: 'crimson',
marginBottom: 10,
},
});
export default Formik;
加入 Yup 验证机制
- 引入
import {
  number as yupNumber,
  object as yupObject,
  string as yupString,
  ValidationError,
} from 'yup';
- 建立验证规则
用堆叠的方式来验证,如下面的 code
name:字串 必填
email:字串 email 验证必填
phone:字串 符合 phoneRegExp 必填
  const phoneRegExp =
    /^((\\+[1-9]{1,4}[ \\-]*)|(\\([0-9]{2,3}\\)[ \\-]*)|([0-9]{2,4})[ \\-]*)*?[0-9]{3,4}?[ \\-]*[0-9]{3,4}?$/;

  const Schema = yupObject().shape({
    name: yupString().required('Required'),
    email: yupString().email('Invalid email').required('Required'),
    phone: yupString()
      .matches(phoneRegExp, 'Phone number is not valid')
      .required('Required'),
  });
- 加入验证机制 及 errors, touched, and handleBlur
    // errors, touched, handleBlur
    const {handleChange, handleSubmit, handleBlur, values, errors, touched} =
        useFormik({
        validationSchema: Schema, // 加入验证机制
        initialValues: {name: '', email: '', phone: ''},
        onSubmit: values =>
            alert(
            `Name: ${values.name},Email: ${values.email}, phone: ${values.phone}`,
            ),
    });
- 於所有 Input 加入 errors, touched, handleBlur
<Input
  // ... rest remains same
  onBlur={handleBlur('email')} // 要记得改成正确的name
  error={errors.email} // 要记得改成正确的name
  touched={touched.email} // 要记得改成正确的name
/>
- 到 Components/ Input.js 加入 touched, error 的 props
判断验证是否成功来改变 input 外框的颜色
import React from 'react';
import {TextInput as RNTextInput, View, StyleSheet, Text} from 'react-native';
    // 加入参数
const Input = ({label, error, touched, ...otherProps}) => {
    // 判断颜色
    const validationColor = !touched ? '#223e4b' : error ? '#FF5A5F' : '#223e4b';
    return (
        <View style={[styles.input, {borderColor: validationColor}]}>
        <View style={{padding: 8}}>
            <Text>{label}</Text>
        </View>
        <View style={{flex: 1}}>
            <RNTextInput
            underlineColorAndroid="transparent"
            placeholderTextColor="#ccc"
            {...otherProps}
            />
        </View>
    </View>
  );
});
const styles = StyleSheet.create({
  input: {
    flexDirection: 'row',
    alignItems: 'center',
    height: 48,
    borderRadius: 8,
    borderWidth: StyleSheet.hairlineWidth,
    padding: 8,
    marginVertical: 10,
  },
});

export default Input;
- 目前的 Formik.js
import React from 'react';
import {StyleSheet, View, Text, ScrollView} from 'react-native';
import {fonts} from '@src/constants';
import {useFormik} from 'formik';
import Input from '../components/Input';
import Button from '../components/Button';
import {object as yupObject, string as yupString, ValidationError} from 'yup';

const Formik = () => {
  const phoneRegExp =
    /^((\\+[1-9]{1,4}[ \\-]*)|(\\([0-9]{2,3}\\)[ \\-]*)|([0-9]{2,4})[ \\-]*)*?[0-9]{3,4}?[ \\-]*[0-9]{3,4}?$/;

  const Schema = yupObject().shape({
    name: yupString().required('Required'),
    email: yupString().email('Invalid email').required('Required'),
    phone: yupString()
      .matches(phoneRegExp, 'Phone number is not valid')
      .required('Required'),
  });
  const {handleChange, handleSubmit, handleBlur, values, errors, touched} =
    useFormik({
      validationSchema: Schema,
      initialValues: {name: '', email: '', phone: ''},
      onSubmit: values =>
        alert(
          `Name: ${values.name},Email: ${values.email}, phone: ${values.phone}`,
        ),
    });
  return (
    <ScrollView style={styles.container}>
      <View style={styles.textBox}>
        <Text style={[styles.text, fonts.h1]}>欢迎来到卡卡塔罗</Text>
        <Text style={(fonts.p, styles.textContent)}>
          如果您有什麽需要或着回馈欢迎留言也或着想预约算塔罗牌也欢迎留言,谢谢您
        </Text>
      </View>

      <View style={styles.formBox}>
        <Input
          onChangeText={handleChange('name')}
          label="Name"
          placeholder="Enter your name"
          autoCapitalize="none"
          autoCompleteType="email"
          keyboardType="default"
          keyboardAppearance="dark"
          onBlur={handleBlur('name')}
          error={errors.name}
          touched={touched.name}
          returnKeyType="next"
          returnKeyLabel="next"
        />
        <Input
          onChangeText={handleChange('email')}
          label="Mail"
          placeholder="Enter your email"
          autoCapitalize="none"
          autoCompleteType="email"
          keyboardType="email-address"
          keyboardAppearance="dark"
          onBlur={handleBlur('email')}
          error={errors.email}
          touched={touched.email}
          returnKeyType="next"
          returnKeyLabel="next"
        />
        <Input
          onChangeText={handleChange('phone')}
          label="Phone"
          placeholder="Enter your phone"
          autoCompleteType="phone-pad"
          autoCapitalize="none"
          keyboardAppearance="dark"
          onBlur={handleBlur('phone')}
          error={errors.phone}
          touched={touched.phone}
          returnKeyType="go"
          returnKeyLabel="go"
        />
        <Button label="submit" color="maroon" onPress={handleSubmit} />
      </View>
    </ScrollView>
  );
};

const styles = StyleSheet.create({
  container: {
    flex: 1,
    backgroundColor: 'rgb(246,246,246)',
    paddingHorizontal: 20,
  },
  textBox: {
    justifyContent: 'center',
    alignItems: 'center',
    paddingVertical: 50,
  },
  textTitle: {color: '#aaa'},
  textContent: {color: '#aaa', lineHeight: 20, marginTop: 10},
  formBox: {
    width: '100%',
    alignItems: 'center',
    justifyContent: 'center',
  },
  input: {
    width: '100%',
    textAlign: 'center',
    borderWidth: 1,
    borderColor: '#ddd',
    padding: 10,
    fontSize: 18,
    margin: 10,
  },
  errorText: {
    textAlign: 'center',
    color: 'crimson',
    marginBottom: 10,
  },
});

export default Formik;
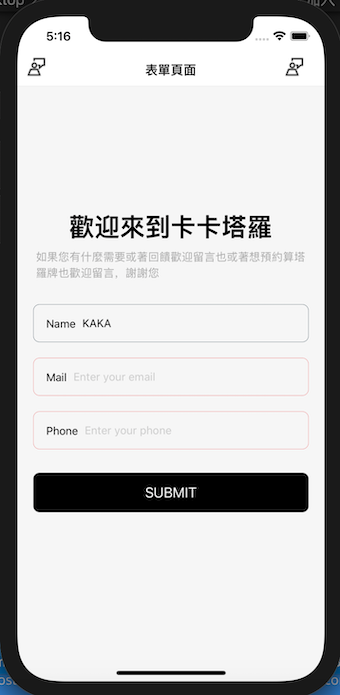
一切超不顺对吧!别担心我们还有一些东西要处理~~ 但至少现在可以确定的是验证机制完成了 XD
Day 24 今日先到这边:P 接下来应该会是
Day 25 手机装置 keyboard 右下角的 next and go 怎麽设定关联性
Day 26 如何点击装置萤幕就让 keyboard 收起来 + 如何不让 keyboard 挡住 input
参考文件:
Creating and Validating React Native Forms with Formik
[note] Yup 笔记
Formik doc
让我们继续走下去 :{}
Day 17 : Add Two Numbers
这一题题目会给我们两个Linked Lists,分别代表两个非负整数。题目要我们把两个数相加後回传一...
如何取出物件中重复/不重复的值
在上一篇中写了关於阵列的做法 假如今天我们将阵列改成物件,该怎麽去实现它呢? 先给一个全域值: co...
[GAS] Genero GAS 控制台网页版 (3.20後套件提供)
在设定 GAS demos.html 时,我们能看到3.20後的版本多了一个区块 此区块即为新增的网...
Alpine Linux Porting (1.999) The light at the end of tunnel
一样先上进度log: + exec /bin/busybox switch_root /sysroo...
[Day 13] Update 更新资料
现在有几个collection在ProductController.php中 public func...