第18天~SharedPreference常被使用於资料储存
SharedPreference常被使用於资料储存,很适合做一些简单的资料存取
先配置按钮-因为是要输入所以选Plain Text + button要绑onClick

两个是一组的~
SharedPreferences shared; //纪录偏好设定
SharedPreferences.Editor editor //利用编辑器去写入资料
package com.huang.my_sharedpreference;
import androidx.appcompat.app.AppCompatActivity;
import android.content.SharedPreferences;
import android.os.Bundle;
import android.view.View;
import android.widget.EditText;
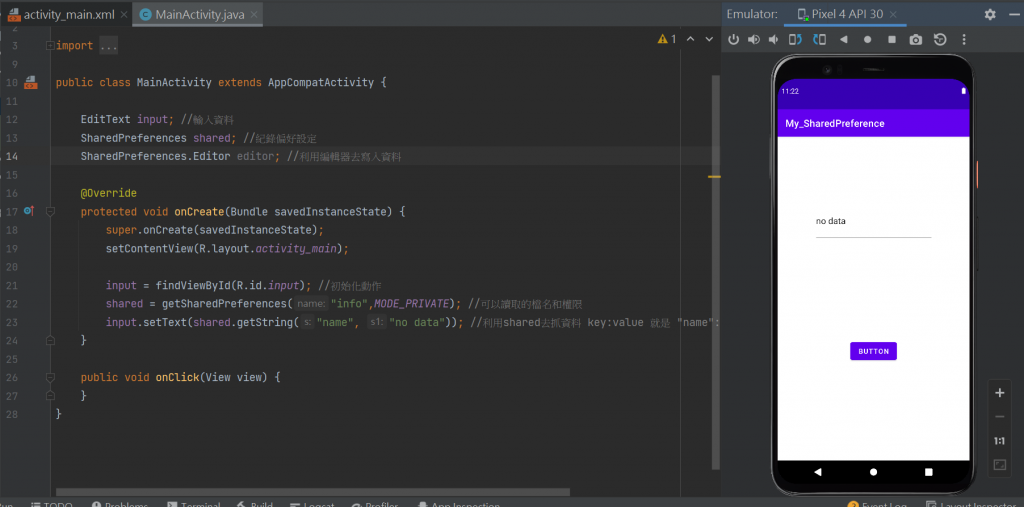
public class MainActivity extends AppCompatActivity {
EditText input; //输入资料
SharedPreferences shared; //纪录偏好设定
SharedPreferences.Editor editor; //利用编辑器去写入资料
@Override
protected void onCreate(Bundle savedInstanceState) {
super.onCreate(savedInstanceState);
setContentView(R.layout.activity_main);
input = findViewById(R.id.input); //初始化动作
shared = getSharedPreferences("info",MODE_PRIVATE); //可以读取的档名和权限
input.setText(shared.getString("name", "no data")); //利用shared去抓资料 key:value 就是 "name":" ".no data是预设值 若无
}
public void onClick(View view) {
}
}
来写button-
package com.huang.my_sharedpreference;

import androidx.appcompat.app.AppCompatActivity;

import android.content.SharedPreferences;
import android.os.Bundle;
import android.view.View;
import android.widget.EditText;

public class MainActivity extends AppCompatActivity {

    EditText input; //输入资料
    SharedPreferences shared; //纪录偏好设定
    SharedPreferences.Editor editor; //利用编辑器去写入资料

    @Override
    protected void onCreate(Bundle savedInstanceState) {
        super.onCreate(savedInstanceState);
        setContentView(R.layout.activity_main);

        input = findViewById(R.id.input); //初始化动作
        shared = getSharedPreferences("info",MODE_PRIVATE); //可以读取的档名和权限
        input.setText(shared.getString("name", "no data")); //利用shared去抓资料 key:value 就是 "name":" ".no data是预设值 若无
    }

    public void onClick(View view) {
        editor = shared.edit();

        String s1 = input.getText().toString().trim();//trim()是把前後的空白拿掉

        editor.putString("name",s1);//拿到资料
        editor.commit();//送出储存.原来输入的东西还是在
    }

    //清除资料button


}
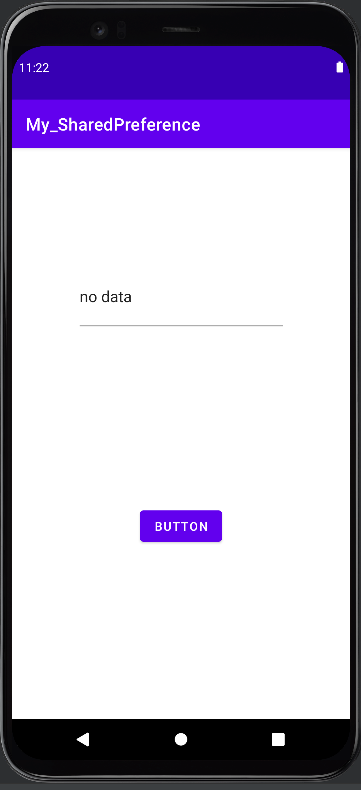
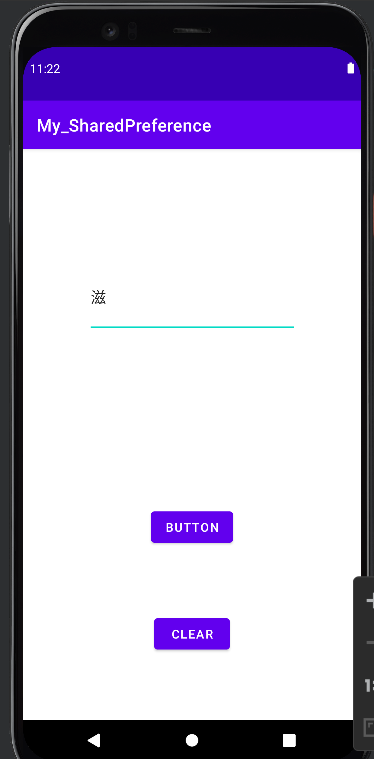
目前模拟器的样子
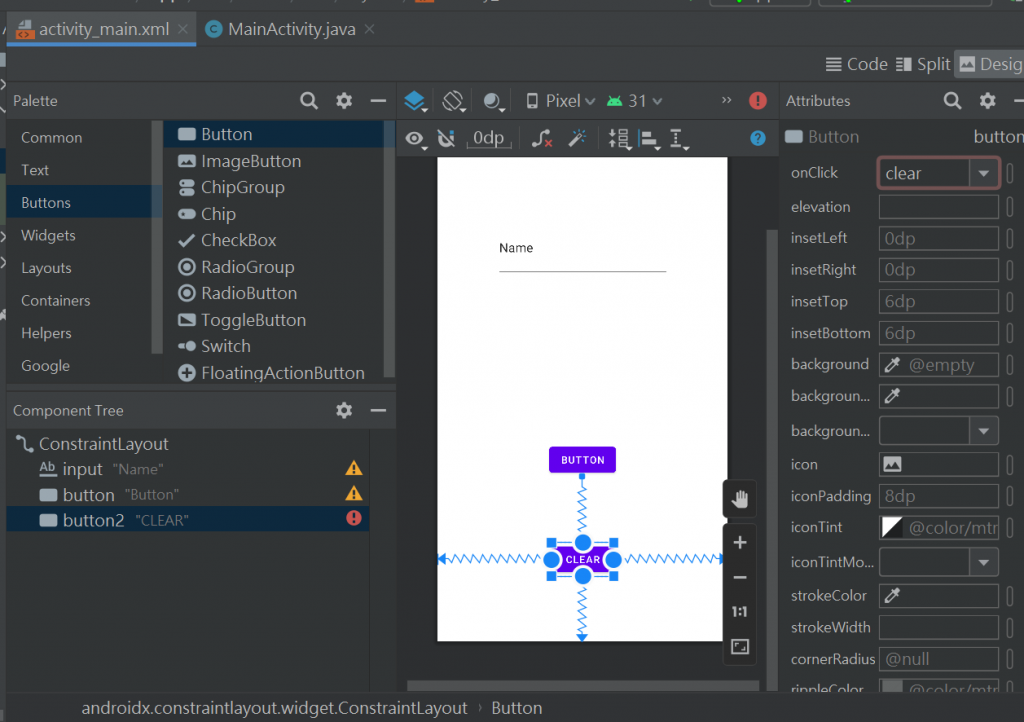
加入清除的资料-
onClick是绑clear

package com.huang.my_sharedpreference;

import androidx.appcompat.app.AppCompatActivity;

import android.content.SharedPreferences;
import android.os.Bundle;
import android.view.View;
import android.widget.EditText;

public class MainActivity extends AppCompatActivity {

    EditText input; //输入资料
    SharedPreferences shared; //纪录偏好设定
    SharedPreferences.Editor editor; //利用编辑器去写入资料

    @Override
    protected void onCreate(Bundle savedInstanceState) {
        super.onCreate(savedInstanceState);
        setContentView(R.layout.activity_main);

        input = findViewById(R.id.input); //初始化动作
        shared = getSharedPreferences("info",MODE_PRIVATE); //可以读取的档名和权限
        input.setText(shared.getString("name", "no data")); //利用shared去抓资料 key:value 就是 "name":" ".no data是预设值 若无
    }

    public void onClick(View view) {
        editor = shared.edit();

        String s1 = input.getText().toString().trim();//trim()是把前後的空白拿掉

        editor.putString("name",s1);//拿到资料
        editor.commit();//送出储存.原来输入的东西还是在
    }

    //清除资料button

    public void clear(View view) {
       shared.edit().clear().commit(); //清除资料之後重新近来没资料
        finish();

    }
}
button的code
<?xml version="1.0" encoding="utf-8"?>
<androidx.constraintlayout.widget.ConstraintLayout xmlns:android="http://schemas.android.com/apk/res/android"
    xmlns:app="http://schemas.android.com/apk/res-auto"
    xmlns:tools="http://schemas.android.com/tools"
    android:layout_width="match_parent"
    android:layout_height="match_parent"
    tools:context=".MainActivity">

    <EditText
        android:id="@+id/input"
        android:layout_width="244dp"
        android:layout_height="85dp"
        android:layout_marginTop="130dp"
        android:ems="10"
        android:inputType="textPersonName"
        android:text="Name"
        app:layout_constraintEnd_toEndOf="parent"
        app:layout_constraintStart_toStartOf="parent"
        app:layout_constraintTop_toTopOf="parent" />

    <Button
        android:id="@+id/button"
        android:layout_width="wrap_content"
        android:layout_height="wrap_content"
        android:onClick="onClick"
        android:text="Button"
        app:layout_constraintBottom_toBottomOf="parent"
        app:layout_constraintEnd_toEndOf="parent"
        app:layout_constraintStart_toStartOf="parent"
        app:layout_constraintTop_toBottomOf="@+id/input" />

    <Button
        android:id="@+id/button2"
        android:layout_width="wrap_content"
        android:layout_height="wrap_content"
        android:onClick="clear"
        android:text="CLEAR"
        app:layout_constraintBottom_toBottomOf="parent"
        app:layout_constraintEnd_toEndOf="parent"
        app:layout_constraintStart_toStartOf="parent"
        app:layout_constraintTop_toBottomOf="@+id/button" />
</androidx.constraintlayout.widget.ConstraintLayout>
这里都是使用到map格式~
後面的json也是
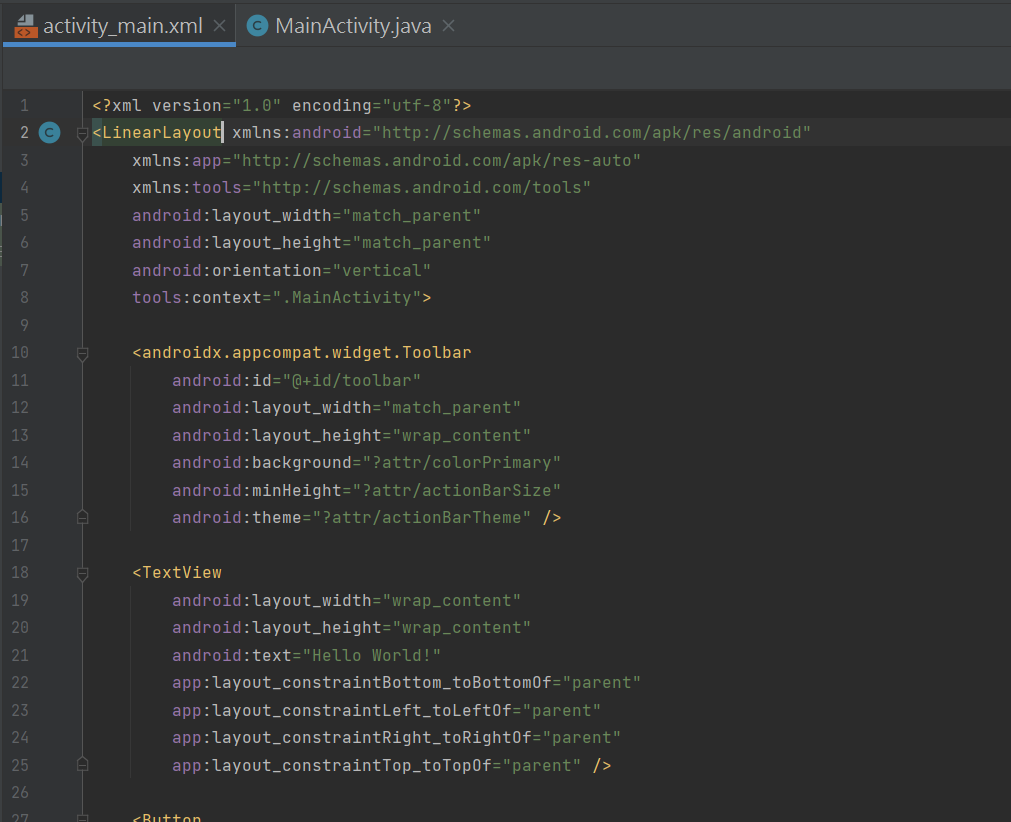
再练一个开新专案-xml档的布置:
删掉androidx.constraintlayout.widget.ConstraintLayout改成LinearLayout
也是都要绑onclick
//不要乱注解 不然程序码会反红 0.0
package com.huang.myshared2;
import androidx.appcompat.app.AppCompatActivity;
import androidx.appcompat.widget.Toolbar;
import android.content.SharedPreferences;
import android.os.Bundle;
import android.view.View;
public class MainActivity extends AppCompatActivity {
Toolbar toolbar;
SharedPreferences shared;
SharedPreferences.Editor editor;
@Override
protected void onCreate(Bundle savedInstanceState) {
super.onCreate(savedInstanceState);
setContentView(R.layout.activity_main);
toolbar = findViewById(R.id.toolbar);
toolbar.setTitle("请选颜色");
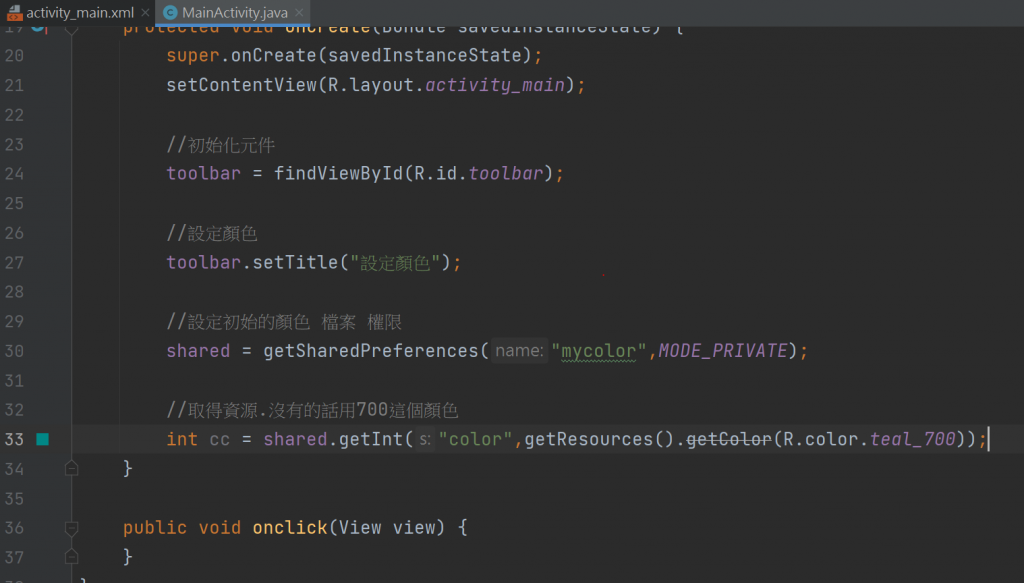
shared = getSharedPreferences("mycolor", MODE_PRIVATE);
int cc = shared.getInt("color", getResources().getColor(R.color.teal_700));
toolbar.setBackgroundColor(cc);
getWindow().setStatusBarColor(cc);
}
//储存颜色
void saveColor(int c){
shared = getSharedPreferences("mycolor", MODE_PRIVATE);
//再初始化一次
editor = shared.edit(); //编辑颜色
editor.putInt("color", c); //设定颜色
editor.commit();
}
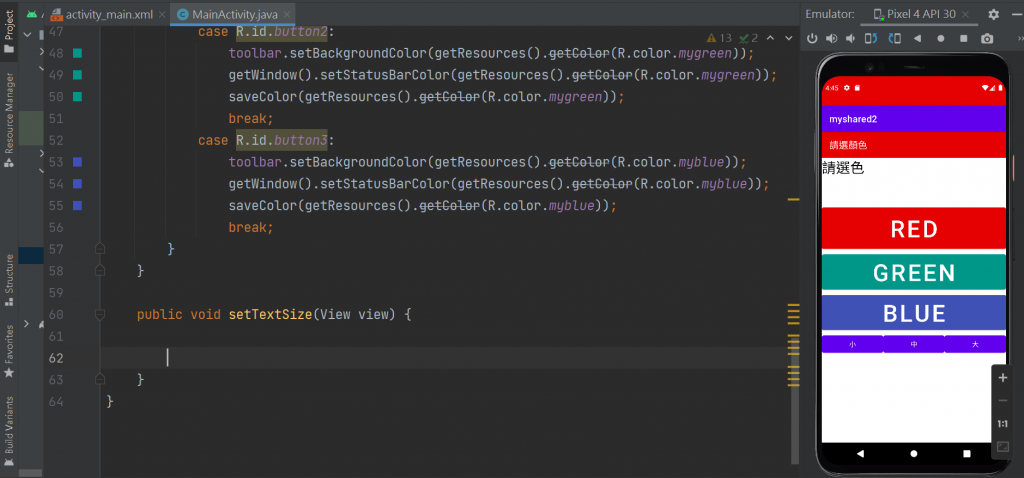
public void onclick(View view) {
switch(view.getId()){
case R.id.button:
toolbar.setBackgroundColor(getResources().getColor(R.color.myred));
getWindow().setStatusBarColor(getResources().getColor(R.color.myred));
saveColor(getResources().getColor(R.color.myred));
break;
case R.id.button2:
toolbar.setBackgroundColor(getResources().getColor(R.color.mygreen));
getWindow().setStatusBarColor(getResources().getColor(R.color.mygreen));
saveColor(getResources().getColor(R.color.mygreen));
break;
case R.id.button3:
toolbar.setBackgroundColor(getResources().getColor(R.color.myblue));
getWindow().setStatusBarColor(getResources().getColor(R.color.myblue));
saveColor(getResources().getColor(R.color.myblue));
break;
}
}
}
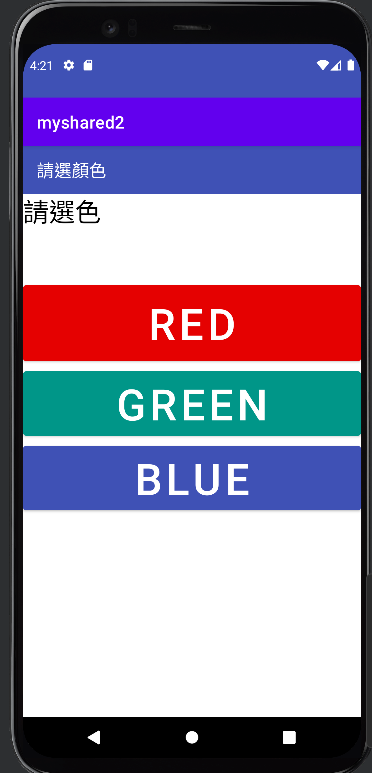
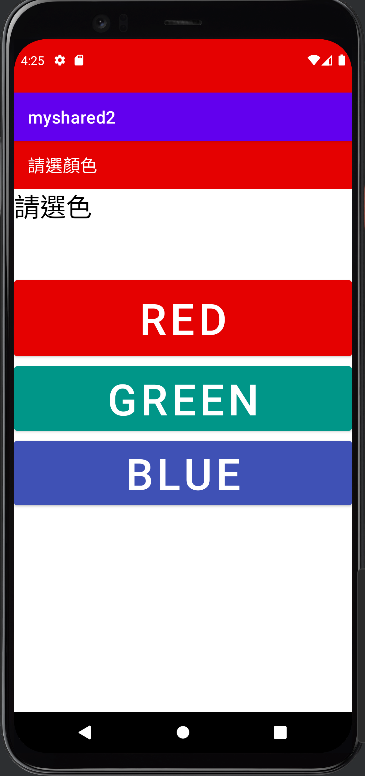
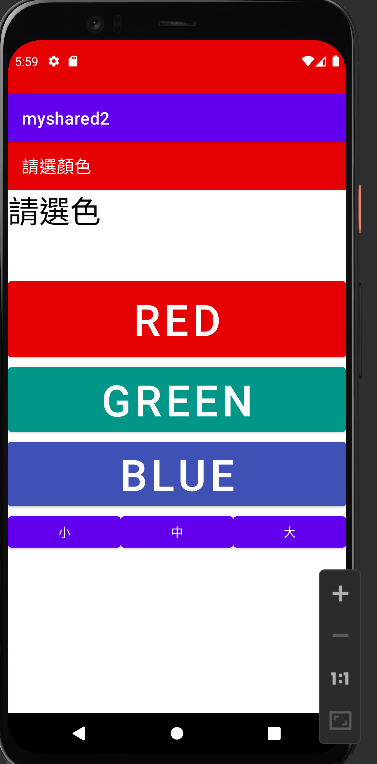
选到颜色
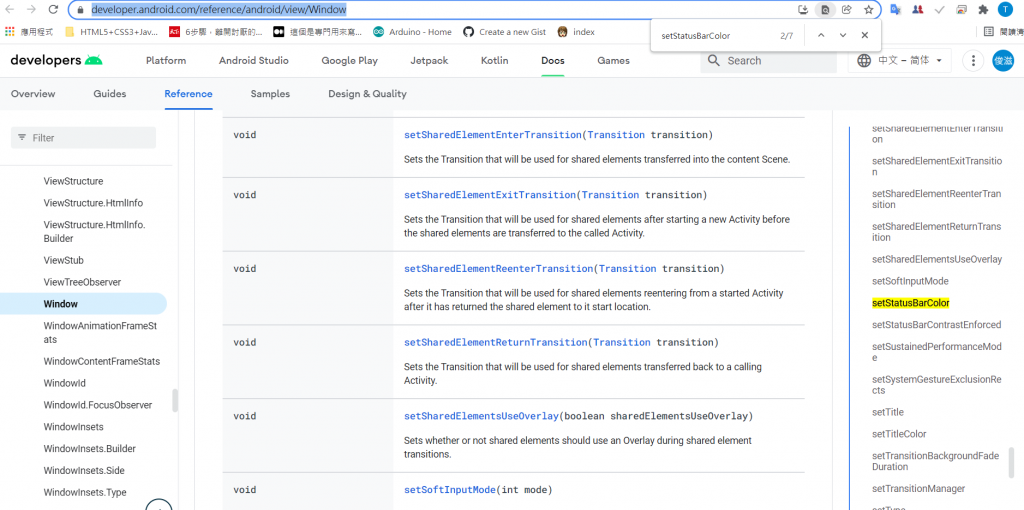
搜寻官网https://developer.android.com/reference/android/view/Window
资料的方法按 ctrl+f -再按入程序码中的关键字
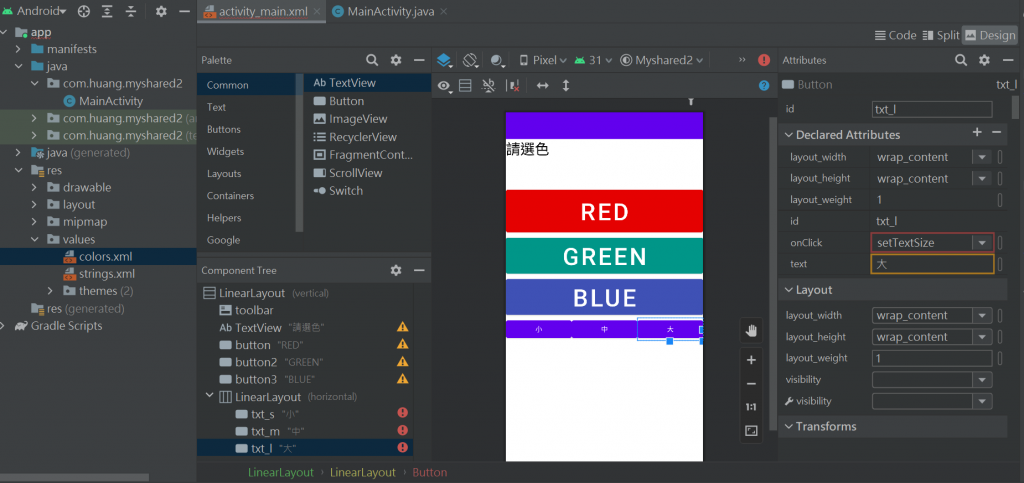
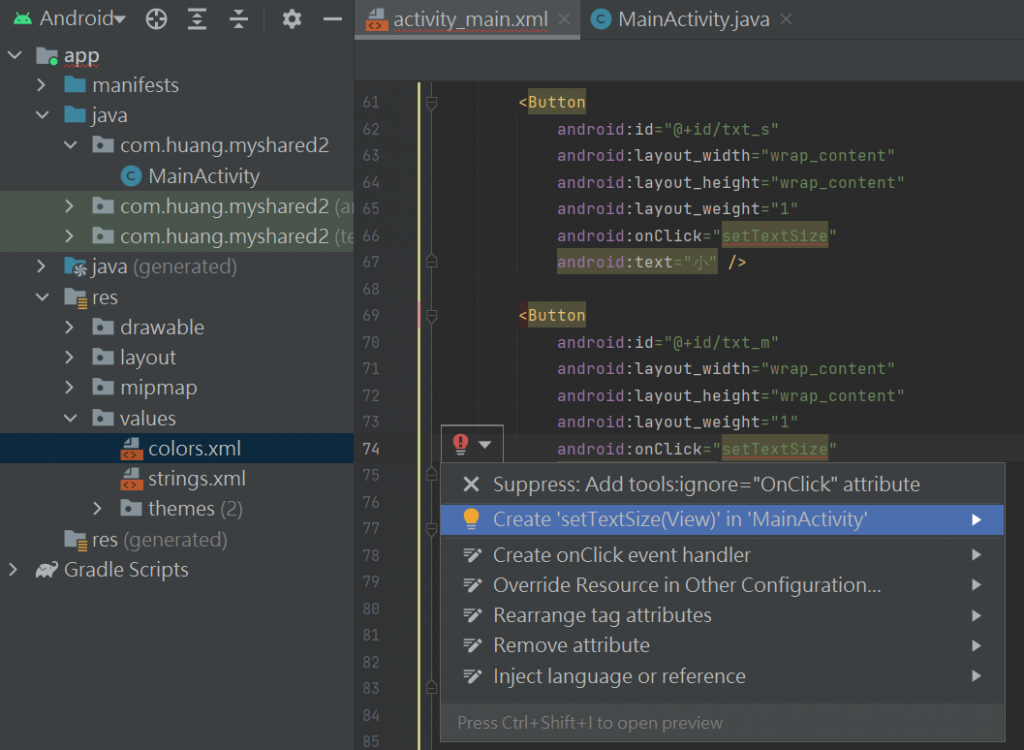
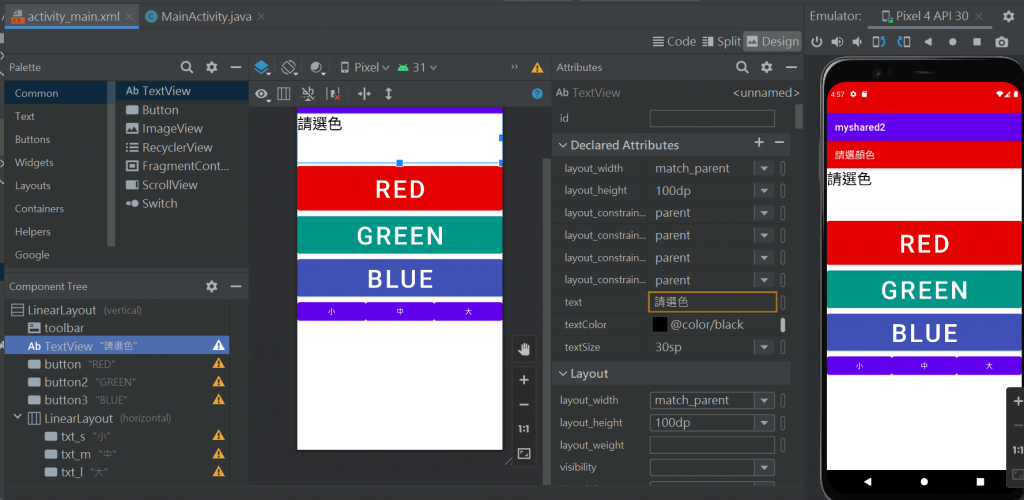
改字的大小~
加入按钮+绑定onclick 这里设定名字是 setTextSize
<?xml version="1.0" encoding="utf-8"?>
<LinearLayout xmlns:android="http://schemas.android.com/apk/res/android"
    xmlns:app="http://schemas.android.com/apk/res-auto"
    xmlns:tools="http://schemas.android.com/tools"
    android:layout_width="match_parent"
    android:layout_height="match_parent"
    android:orientation="vertical"
    tools:context=".MainActivity">

    <androidx.appcompat.widget.Toolbar
        android:id="@+id/toolbar"
        android:layout_width="match_parent"
        android:layout_height="wrap_content"
        android:background="?attr/colorPrimary"
        android:minHeight="?attr/actionBarSize"
        android:theme="?attr/actionBarTheme" />

    <TextView
        android:layout_width="match_parent"
        android:layout_height="100dp"
        android:text="请选色"
        android:textColor="@color/black"
        android:textSize="30sp"
        app:layout_constraintBottom_toBottomOf="parent"
        app:layout_constraintLeft_toLeftOf="parent"
        app:layout_constraintRight_toRightOf="parent"
        app:layout_constraintTop_toTopOf="parent" />

    <Button
        android:id="@+id/button"
        android:layout_width="match_parent"
        android:layout_height="100dp"
        android:backgroundTint="@color/myred"
        android:onClick="onclick"
        android:text="RED"
        android:textSize="50dp" />

    <Button
        android:id="@+id/button2"
        android:layout_width="match_parent"
        android:layout_height="wrap_content"
        android:backgroundTint="@color/mygreen"
        android:onClick="onclick"
        android:text="GREEN"
        android:textSize="50dp" />

    <Button
        android:id="@+id/button3"
        android:layout_width="match_parent"
        android:layout_height="wrap_content"
        android:backgroundTint="@color/myblue"
        android:onClick="onclick"
        android:text="BLUE"
        android:textSize="50dp" />

    <LinearLayout
        android:layout_width="match_parent"
        android:layout_height="match_parent"
        android:orientation="horizontal">

        <Button
            android:id="@+id/txt_s"
            android:layout_width="wrap_content"
            android:layout_height="wrap_content"
            android:layout_weight="1"
            android:onClick="setTextSize"
            android:text="小" />

        <Button
            android:id="@+id/txt_m"
            android:layout_width="wrap_content"
            android:layout_height="wrap_content"
            android:layout_weight="1"
            android:onClick="setTextSize"
            android:text="中" />

        <Button
            android:id="@+id/txt_l"
            android:layout_width="wrap_content"
            android:layout_height="wrap_content"
            android:layout_weight="1"
            android:onClick="setTextSize"
            android:text="大" />
    </LinearLayout>

</LinearLayout>
px : 其实就是图元单位,比如我们通常说的手机分辨清单800*400都是px的单位
sp : 同dp相似,还会根据使用者的字体大小偏好来缩放..文字专用
dp : 虚拟图元,在不同的图元密度的设备上会自动适配
onclick 这里设定名字是 setTextSize
从储存颜色的程序码 来改 储存尺寸
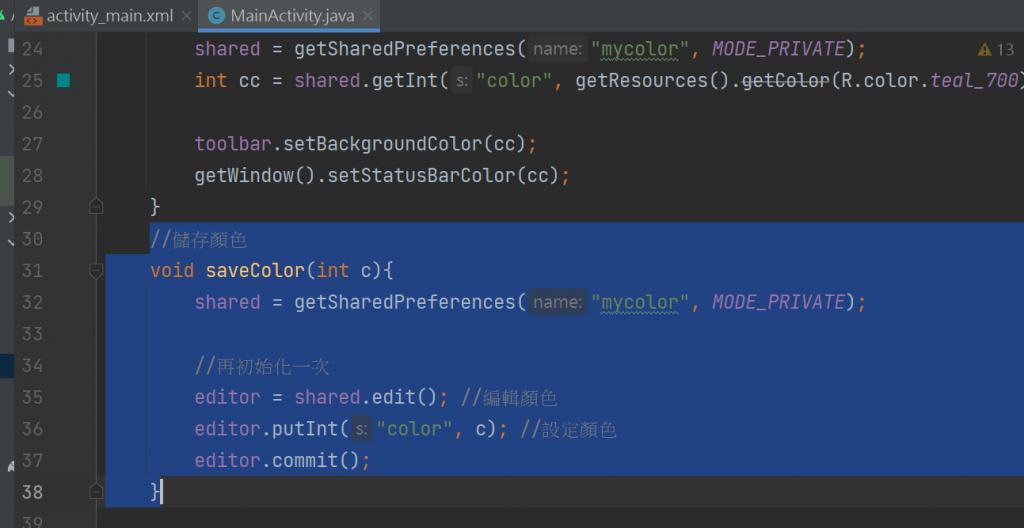
//储存颜色
    void saveColor(int c){
        shared = getSharedPreferences("mycolor", MODE_PRIVATE);

        //再初始化一次
        editor = shared.edit(); //编辑颜色
        editor.putInt("color", c); //设定颜色
        editor.commit();
    }
继续改内文
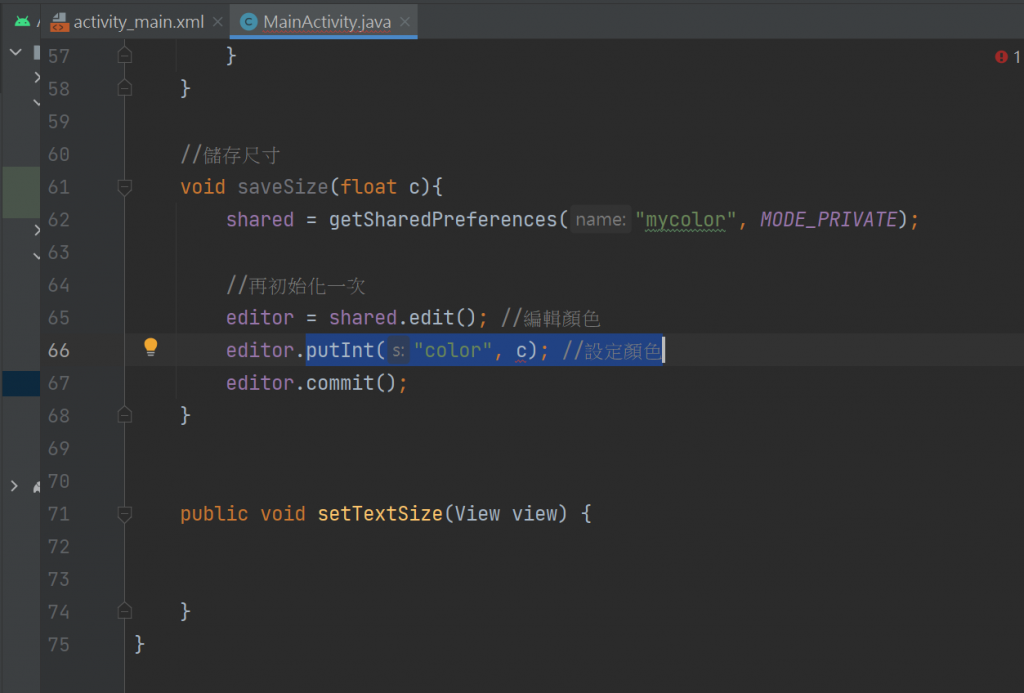
来改 储存尺寸-18不能写单位
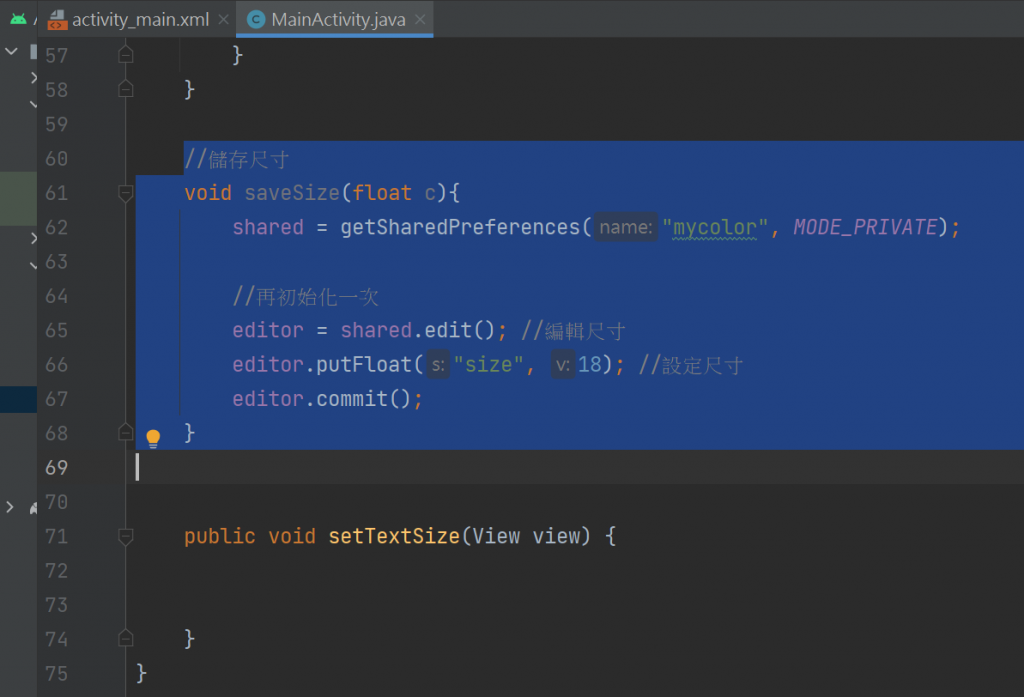
//储存尺寸
    void saveSize(float c){
        shared = getSharedPreferences("mycolor", MODE_PRIVATE);

        //再初始化一次
        editor = shared.edit(); //编辑尺寸
        editor.putFloat("size", 18); //设定尺寸
        editor.commit();
    }
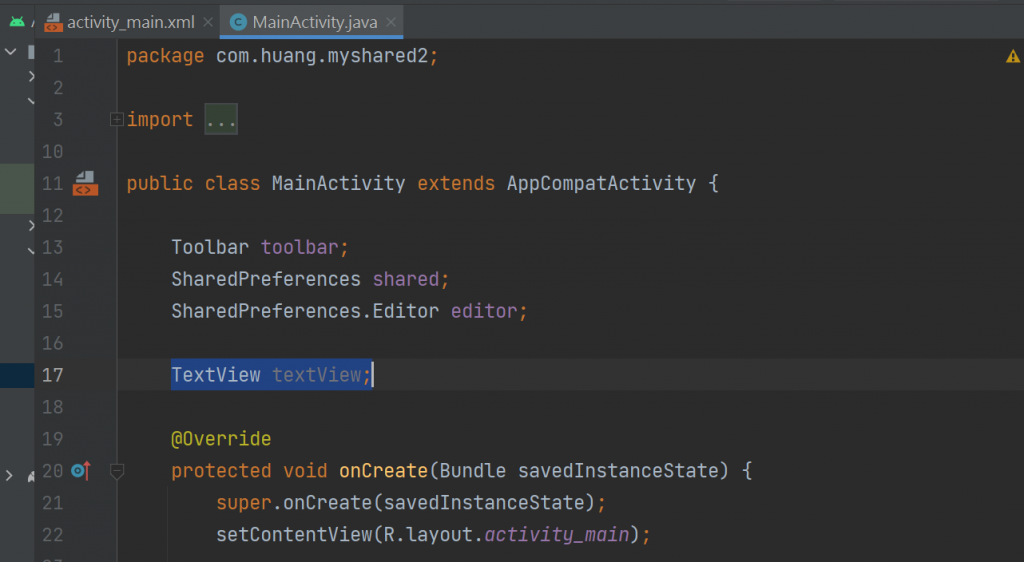
因为等一下要改的是textView 所以要来写textView
1-宣告变数
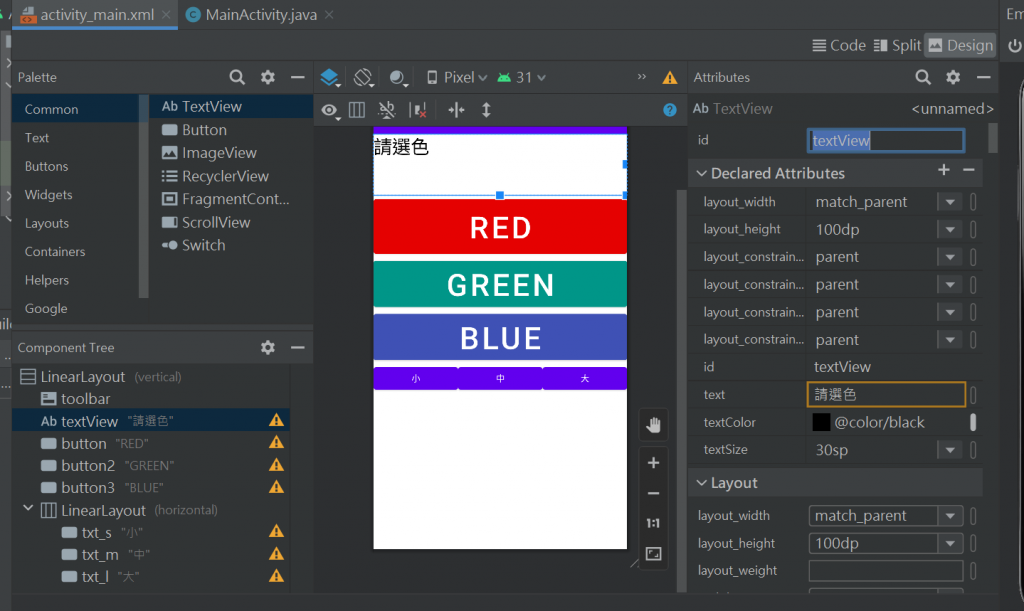
2-初始化元件

textView要有设定id才可以绑定
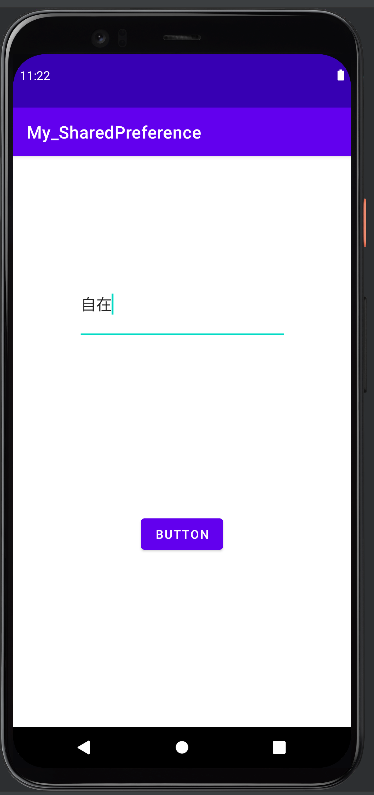
模拟器长这样-

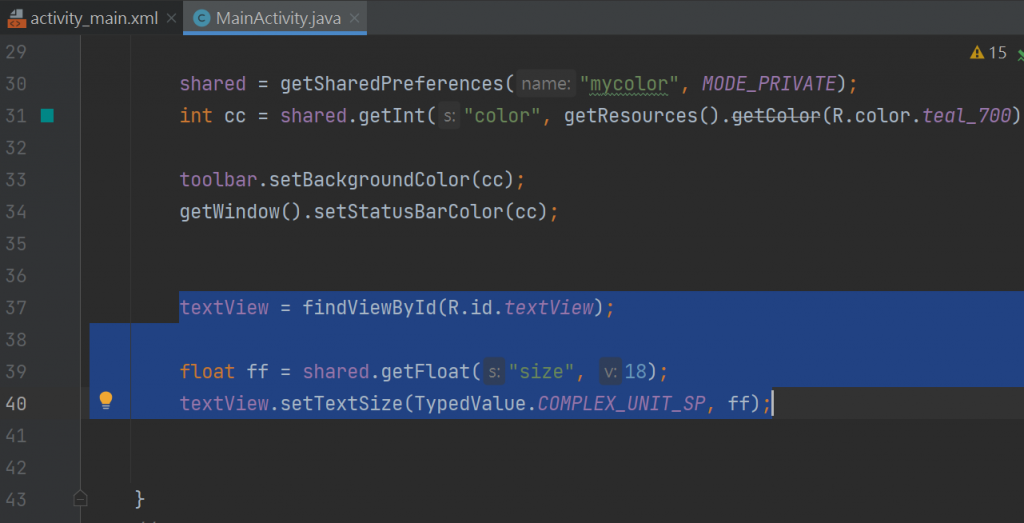
//设定-储存-丢进去
要标注18.0F因为是float
要改写成c
editor.putFloat("size", c); //设定尺寸
依序复制-
switch (view.getId()){
            case R.id.txt_s:
                textView.setTextSize(TypedValue.COMPLEX_UNIT_SP,18.0F);
                saveSize(18.0F);
                break;
把CODE排好-
package com.huang.myshared2;

import androidx.appcompat.app.AppCompatActivity;
import androidx.appcompat.widget.Toolbar;

import android.content.SharedPreferences;
import android.os.Bundle;
import android.util.TypedValue;
import android.view.View;
import android.widget.TextView;

public class MainActivity extends AppCompatActivity {

    Toolbar toolbar;
    SharedPreferences shared;
    SharedPreferences.Editor editor;

    TextView textView;

    @Override
    protected void onCreate(Bundle savedInstanceState) {
        super.onCreate(savedInstanceState);
        setContentView(R.layout.activity_main);

        toolbar = findViewById(R.id.toolbar);
        toolbar.setTitle("请选颜色");

        //--------------取得资料如果没有的话-----------------

        shared = getSharedPreferences("mycolor", MODE_PRIVATE);
        int cc = shared.getInt("color", getResources().getColor(R.color.teal_700));

        toolbar.setBackgroundColor(cc);
        getWindow().setStatusBarColor(cc);


        textView = findViewById(R.id.textView);

        float ff = shared.getFloat("size", 18);
        textView.setTextSize(TypedValue.COMPLEX_UNIT_SP, ff);


    }
    //储存颜色
    void saveColor(int c){
        shared = getSharedPreferences("mycolor", MODE_PRIVATE);

        //再初始化一次
        editor = shared.edit(); //编辑颜色
        editor.putInt("color", c); //设定颜色
        editor.commit();
    }

    public void onclick(View view) {
        switch(view.getId()){
            case R.id.button:
                toolbar.setBackgroundColor(getResources().getColor(R.color.myred));
                getWindow().setStatusBarColor(getResources().getColor(R.color.myred));
                saveColor(getResources().getColor(R.color.myred));
                break;
            case R.id.button2:
                toolbar.setBackgroundColor(getResources().getColor(R.color.mygreen));
                getWindow().setStatusBarColor(getResources().getColor(R.color.mygreen));
                saveColor(getResources().getColor(R.color.mygreen));
                break;
            case R.id.button3:
                toolbar.setBackgroundColor(getResources().getColor(R.color.myblue));
                getWindow().setStatusBarColor(getResources().getColor(R.color.myblue));
                saveColor(getResources().getColor(R.color.myblue));
                break;
        }
    }

    //储存尺寸
    void saveSize(float c){
        shared = getSharedPreferences("mycolor", MODE_PRIVATE);

        //再初始化一次
        editor = shared.edit(); //编辑尺寸
        editor.putFloat("size", c); //设定尺寸
        editor.commit();
    }

    //设定-储存-丢进去
    public void setTextSize(View view) {
        switch (view.getId()){
            case R.id.txt_s:
                textView.setTextSize(TypedValue.COMPLEX_UNIT_SP, 18.0F);
                saveSize(18.0F);
                break;
            case R.id.txt_m:
                textView.setTextSize(TypedValue.COMPLEX_UNIT_SP, 24);
                saveSize(24);
                break;
            case R.id.txt_l:
                textView.setTextSize(TypedValue.COMPLEX_UNIT_SP, 36.0F);
                saveSize(36.0F);
                break;
        }

    }
}
>>: # Day18--如果我早一点追求MVC小姊姊,我就不会乱写了
[Day15] Vite 出小蜜蜂~随机射击 Randomly Shoot!
Day15 在 Space Invaders 的游戏设计中, 除了随着不断前进而产生的压迫感之外, ...
[Day 25] vue-router路由传送参数 props
昨天做好了节庆活动的清单,但是目前只能看到大纲,没办法看到活动详情, 所以在渲染清单的同时,要帮他加...
Day4 VPC & Security Group
从地端 On-Premise的传统资讯部署,再到云端 Cloud的新形态部署模式,在这个转型过程初...
Day1 Open-Match 简介
在众多游戏类型中,对战游戏类型游戏占有很重要的一席之地。不论是手机游戏市场,还是以电脑为主的竞技游戏...
Day13 - Google Kubernetes Engine 基础 - 使用 Service 暴露服务
前言 上一回我们使用 Pod 将应用程序部属到 Kubernetes 环境里,今天会介绍如何透过 S...