git - 2 ( push github、找插件、token、branch+merge、tag、stash )
1. git push - 推送数据库到 Github (clone + push)

(1)建立新专案
命名新专案,并记录网址
https://github.com/Crashoxo/gittest.git
(2)新增资料夹,并移动进去
mkdir "github"
cd github
(3)将该资料夹与github专案连结(clone)
git clone https://github.com/Crashoxo/gittest.git
目前为空,因为github上没资料
(4)进入github(gittest)资料夹
cd gittest
(5)乱七八糟加东西
touch > git add . > git commit -m '备注'
(6)更新资料(推送数据库到 Github)
git push
要输入帐号密码,确认是本人
(7)第一次推
git remote add 数据库名称 https://github.com/Crashoxo/gittest.git
git branch -M 分支名称
git push -u 数据库名称 分支名称
2. 从 Github 找出实用插件流程
工程师把好用的插件放Github,利用查询找出使用
(1)利用搜寻引擎
https://github.com/search?q=slider
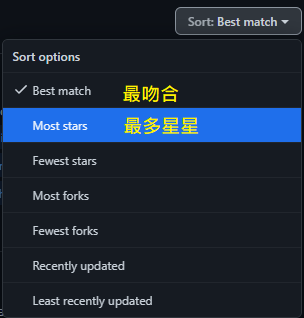
(2)查看星星 + 更新时间Updated on(半年内)
(3)观看commit可以得知更新甚麽

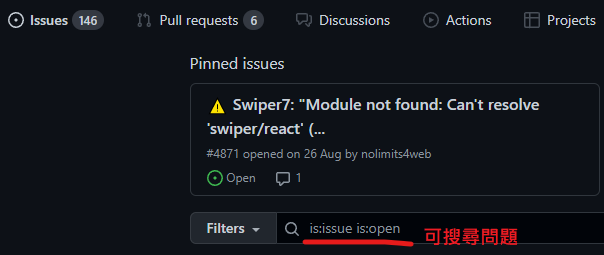
(4)Issues 观看有何错误(ex:不支援IE)
Github 专案不公开要钱,需要私人扣储存可用bitbucket
(限制:5人内团队才免费)
https://bitbucket.org/
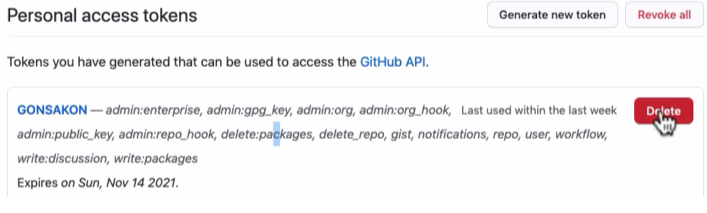
3. 创建 token(令牌)
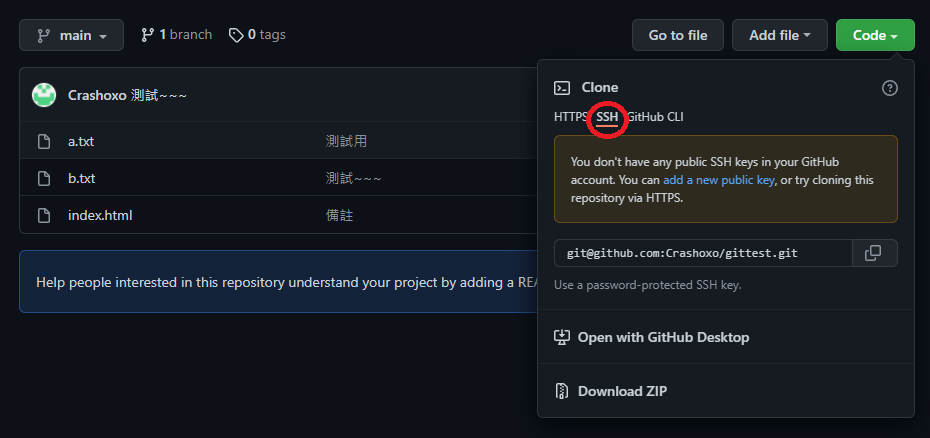
使用时机 遮隐密码 SSH
https://docs.github.com/cn/authentication/keeping-your-account-and-data-secure/creating-a-personal-access-token
申请完亦可删除,会失效
SSH
除了可以使用个人令牌(Token)解决 GitHub 改版的问题之外,
若同学想使用 SSH 的方式的话,则可以参考 Ray 助教的文章来设定哩
https://hsiangfeng.github.io/git/20210709/1381487661/
4. GitHub 部署流程 *********************************流程
git init
git add .
git commit -m '备注'
(1)将github与本地资料夹连结
git remote add ‘数据库名称’ https://github.com/Crashoxo/gittest.git
(2) 新增branch
git branch -M 'branch名称'
(3) 资料推到main
git push -u ‘数据库名称’ 'branch名称'
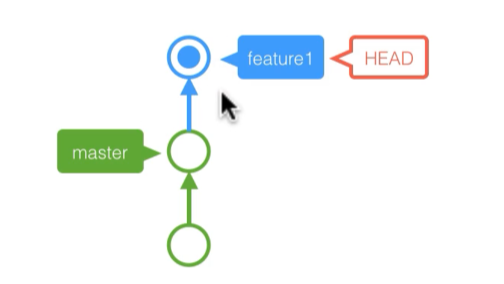
5. HEAD - 了解目前所在位置(目前所在位置的指标)
HEAD预设都会指向最新的commit
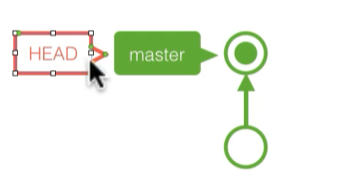
git checkout 可以指向以前的commit

举例:
(1) 浏览目前分支
git branch

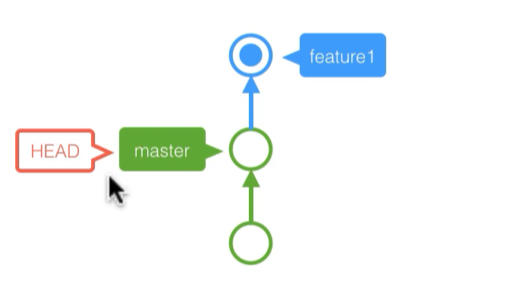
(2) 把资料回朔到以前的commit,确认当时的资料状态
git checkout '前四码'
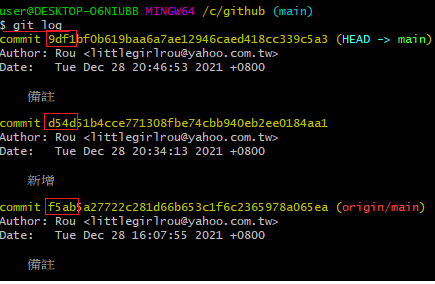

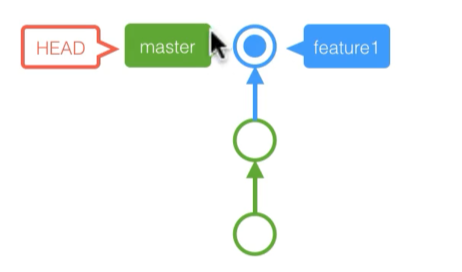
(3) 确认完资料後,复原
git checkout "master(看(1)在哪个分支就输入哪个分支)"

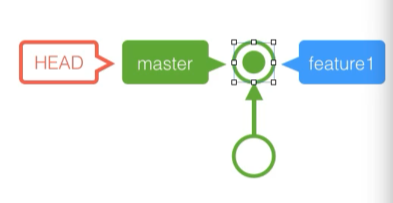
6. git branch - 分支创立
https://backlog.com/git-tutorial/tw/stepup/stepup1_1.html
分支用途:
分支是为了将修改记录的整体流程分开储存,让分开的分支不受其他分支的影响,
所以在同一个数据库里可以同时进行多个不同的修改。
分开的分支还是可以和其他分支合并的。
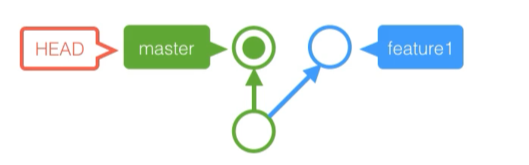
(1)建立分支
git branch 'feature1(分支名称)'
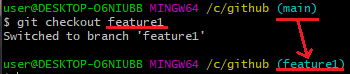
(2) 浏览目前分支
git branch
(3) 移动到该分支
git checkout 'feature1(分支名称)'

(4) 进入该分支後,才能编辑分支内的资料、并查看更新
git status
(5) add + commit
git add .
git commit -m '备注'
7. 合并分支 git merge - fast-forward
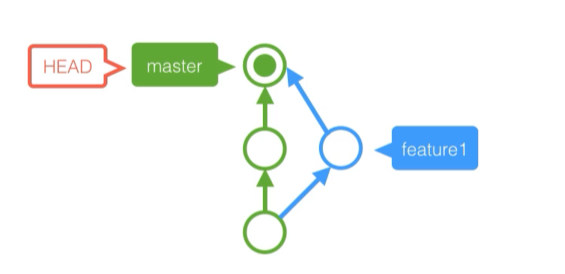
案例:没变更主要branch(main),变更 更新branch(feature1)
(1)先把HEAD移动到主要专案上
git checkout 'main(分支名称)'
(2)接着合并想合并的版本(两版本皆须已commit完成)
git merge 'feature1(分支名称)'
8. 自动合并篇 git merge
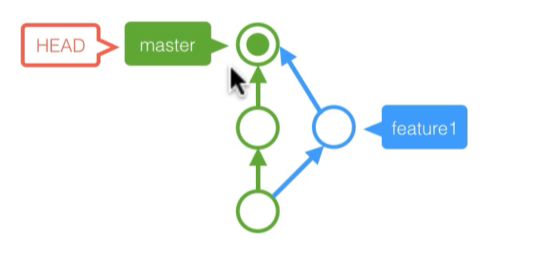
案例:有 变更主要branch 及变更 更新branch
(1)主要branch(main)与更新branch(feature1)同时更新,无冲突时:
(a)先把HEAD移动到主要专案上
git checkout 'main(分支名称)'
(b)接着合并想合并的版本(两版本皆须已commit完成)
git merge 'feature1(分支名称)'
会跳出警告,关掉即可
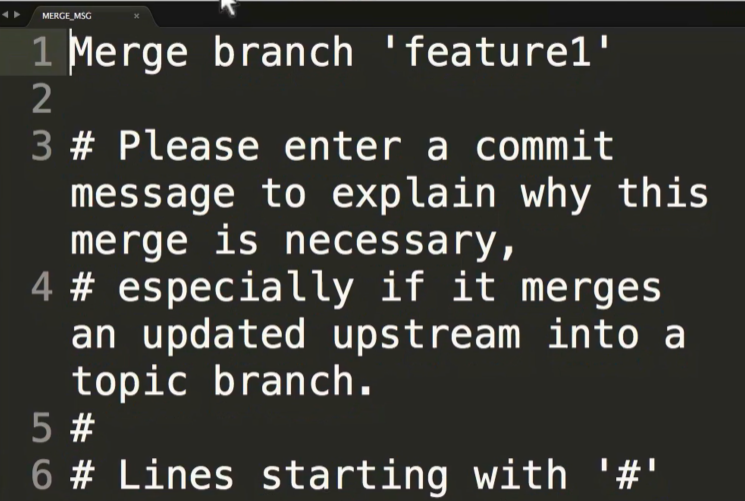
此时branch(main)内已经包含更新branch(feature1)
但更新branch(feature1)仍为原更新branch(feature1)
(git checkout feature1)
(2)主要branch(main)与更新branch(feature1)同时更新,有冲突时:
main、feature1同一行不同内容
(a) 先把HEAD移动到主要专案上
git checkout 'main(分支名称)'
(b) 接着合并想合并的版本(两版本皆须已commit完成)
git merge 'feature1(分支名称)'

(c) 解决上图问题,无法自动合并故改为 手动合并
看要保留谁
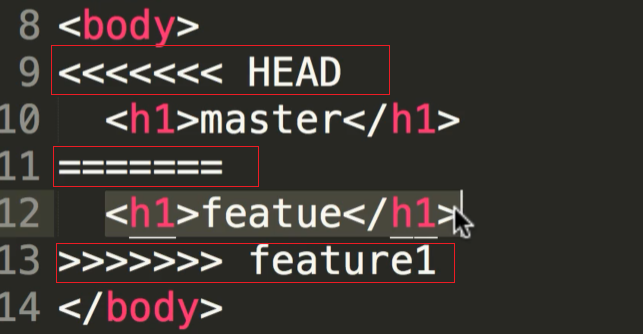
(d) add . + commit -m '备注'
9. 标签 - git tag
标签是用於标记特定的点/提交的历史
通常会用来标记发布版本的名称/号码(如:v1.0)。
(1)新增轻量标签( 只新增标签 )
git tag '标签名称'
(2)新增标示标签( 新增标签 + 标签详细资料 )
git tag -am ''详细资料'' '版本名称'

(3)查询标签
git tag
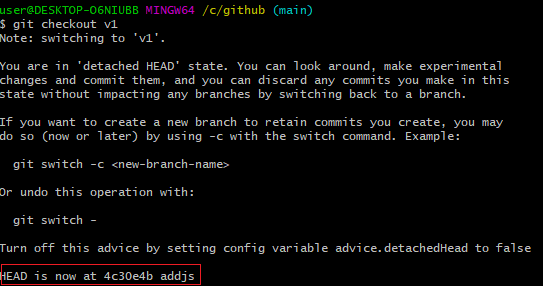
(4)切换到该标签的commit
git checkout '版本名称'
切换回原本的
git checkout '分支名称'
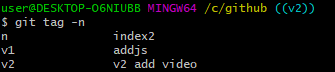
(5)查询详细标签
git tag -n
(6)删除标签
删除标签不会影响commit的内容
git tag -d '标签名称'
主要branch
更新branch(很多commit,也可以下tag)
用法
1.主要branch 与 更新branch merge 後 下tag (v1、v2)之後就可以回来看版本
2.每个commit都可以下tag,供之後参考(原本commit也可以回去查询,但使用四位数,不方便)
3.使用git checkout HEAD跳该commit 亦可下tag ,因此可以回以前的commit下tag
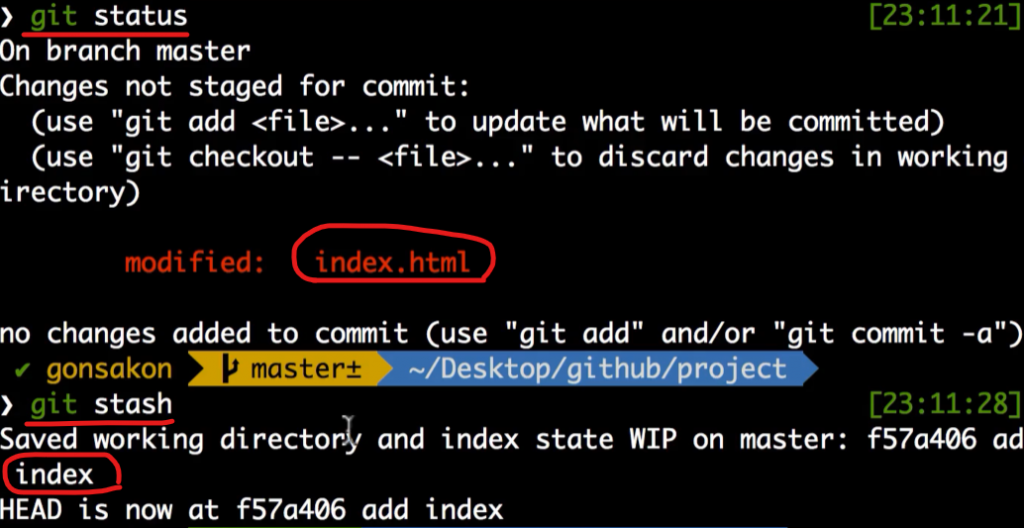
10. 暂存档案 - git stash
情境:资料写到一半做别的事情,很快就要回来继续写
(之前有commit过,但目前无需再更新commit)
(1)暂时储存当前目录
git stash
此时 git status 不会有东西(因非commit)
(2)浏览 git stash 列表
git stash list
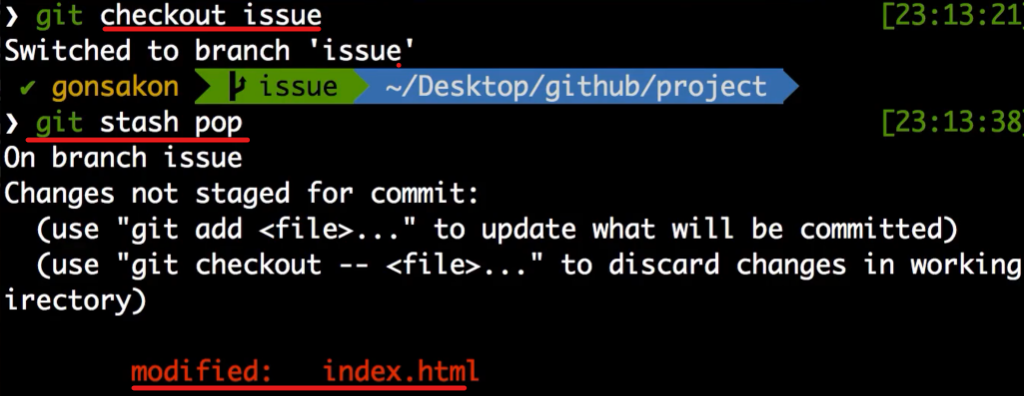
(3)还原暂存
git stash pop
step1.回之前暂存过的分支
step2.还原 暂存档案(git stash)
(4)清除最新暂存
git stash drop
(5)清除全部暂存
git stash clear
把暂存纪录带到其他branch作法:
git stash
git checkout '其他branch名称'
git stash pop
结论:
1.branch 制作分支,不影响主版本用
(查询 git branch,git checkout branch)
2.commit 回去之前的commit
(查询 git log,git checkout '前四码')
3.tag 制作版本用
(查询 git tag,git checkout '版本名称')
4.stash 暂存,很快就回来写
(查询 git stash list,git stash pop)
Day 03-选择Node.js&Express
Node.js: 是一种用JavaScript撰写的环境,以及内建处理网路请求和函式库。 为什麽选择...
31 赛後想法与游戏连结
再贴一次游戏规则 建立游戏: 按下 "Start a game" 後,下面有 &...
不只懂 Vue 语法:请说明 keep-alive 以及 is 属性的作用?
问题回答 <keep-alive> 的作用是缓存一个元件的资料状态,即使它被切换掉,不再...
Day27 go-elasticsearch(一)
今日我们将要介绍ES官方提供go-elasticsearch客户端的基本操作。 go-elastic...
缺乏计画的目标,只能叫做愿望。----目标设定篇(上)
缺乏计画的目标,只能叫做愿望。 A goal without a plan is just a wi...