[Day29] Template Driven Form
昨天我们完成了 service 的部分,已经可以用程序码打 API 来做 CRUD,但是我们还没有准备表单的 component,今天,我们就要来帮我们的 Angular app 补上表单的页面。
Angular 的表单有两种,一种叫 templae driven form(范本驱动表单),另一种叫 reactive form (响应式表单)。template driven form 主要在 HTML 中使用范本语法、简单易学;而reactive form 主要用 component.ts 里的程序控制表单的树状物件,比较进阶,但是速度快、且更适合用来制作复杂的表单。由於本系列只介绍入门款,所以我们今天只会介绍 template driven form,若想学习 reative form 可以参考这篇文章,文章写得非常详细,虽然它是 Angular 5 的,但大部分观念与语法都通用。
Template Driven Form
首先我们一样新增一个表单的 component,这边笔者命名为 ironman-form-add。
要在我们的 component 中使用 template driven form 很简单,只需要以下几个步骤
- 引用 FromsModule
- 建立 HTML 表单,并赋予这个表单一个代表 NgForm 的范本参考变数(template reference variable)
- 用 ngModel 把 HTML 输入与 data model 双向绑定
- 处理提交的工作
首先,我们到 app.module.ts 中引入 FromsModule
// app.module.ts
// ...
import { FormsModule } from '@angular/forms';
// ...
  imports: [
    // ...
    FormsModule,
    // ...
  ]
接着,到 component.ts 建立要用来储存资料的 data model,然後写一下提交表单时的处理逻辑
// ironman-form-add.component.ts
userModel: IronmanUser = {
    userId: 0,
    userName: '',
    email: '',
    verified: false
};
// ...
// ...
onSubmit(form: NgForm): void {
    if (form.valid) { // 验证 OK 才打 API
      this.ironmanService
          .addUser(this.userModel)
          .subscribe(resp => {
            this.submitted = true;
          });
    }
}
再来到 component.html 中建立表单,然後给一个范本参考变数、以及处理资料的系结
<!-- ironman-form-add.component.html -->
<form (ngSubmit)="onSubmit(formInstance)" #formInstance="ngForm">
    <label for="userName">UserName</label>
    <input type="text" id="userName" [(ngModel)]="userModel.userName" name="userName">
    <br>
    <label for="email">Email</label>
    <input type="email" id="email" [(ngModel)]="userModel.email" name="email">
    <br>
    <button type="submit">新增</button>
</form>
这里稍微说明一下上面的程序
- 当提交按钮被点击时会触发 ngSubmit 事件,我们使用事件系结指派 onSubmit() 这个 function 来处理提交表单的逻辑
- 我们用井字号宣告了一个范本参考变数(#formInstance),这个变数储存了 "ngForm",ngForm 就是 Angular 表单的实体
- 在同个 component.html 档案中,可以从任何地方存取 #formInstance,例如我们把 #formInstance 当作参数,把整个 Angular 表单的实体传给 onSubmit()
- ngModel 是一个内建的 Directive(指令),他会帮我们替 html input 与 component.ts 中的 model 做双向系结
- 请注意使用 template driven form 的时候,html input 一定要加 name 属性否则会出错。
简单的几行程序码,我们就完成新增使用者的表单了~~
表单验证
刚刚一切从简,目的只在用最少的程序码让我们的前端 app 动起来,不过像刚刚那样阳春的表单当然是不合格,因为我们什麽东西都没验证,随便乱打都能把资料打给 API,错了自己都不知道。所以现在我们要来介绍一下简单的表单验证。
用 Angular 做基础的验证也非常简单,只要在 html input 再加上代表验证规则的属性(attribute)就可以,Angular 会在使用者输入资料的时候自动帮我们做验证。
    <input type="text" id="userName" [(ngModel)]="userModel.userName" name="userName"
        required minlength="2"> <!-- 加了「必填」和「最小长度」的验证 -->
    <input type="email" id="email" [(ngModel)]="userModel.email" name="email"
        required email> <!-- 加了「必填」和「email 格式」的验证 -->
仅仅是加了这几个简单的验证属性,我们就能从 NgForm 实体中看到是否有错误发生

内建的验证规则与它们所触发的 error 属性名称请参阅官方文件
就如我们刚刚提到的,这个代表 Angular 表单的范本参考变数,可以在同个 component.html 的任何地方存取,所以我们就可以用他搭配 *ng-if 来显示错误提示
 <div *ngIf="formInstance.invalid && formInstance.dirty">
      <p *ngIf="formInstance.form.controls.userName.errors?.required">
        使用者名称为必填
      </p>
      <p *ngIf="formInstance.form.controls.userName.errors?.minlength">
        使用者名称最少需要{{formInstance.form.controls.userName.errors?.minlength.requiredLength}}字元
      </p>
      <p *ngIf="formInstance.form.controls.email.errors?.required">
        email 为必填
      </p>
      <p *ngIf="formInstance.form.controls.email.errors?.email">
        email 格式错误
      </p>
    </div>
用范本参考变数让程序码看起来简洁一点点(对,只有一点点)
上面的程序虽然已经能够运作,但是在验证那块的程序码实在有点太长,看起来很丑。如果我们要让这个验证看起来简洁一些,可以为 html input 也宣告一个范本参考变数,然後把 ngModel 赋值给这个变数,这样这个变数就会指向一个 FormControl (表单控制项,组成 Angular 表单的元件),我们再从这个 FormControl 取得错误资讯。
修改後的程序码如下
<form (ngSubmit)="onSubmit(formInstance)" #formInstance="ngForm">
<label for="userName">UserName</label>
<input type="text" id="userName" [(ngModel)]="userModel.userName" name="userName"
required minlength="2"
#userInput="ngModel">
<br>
<label for="email">Email</label>
<input type="email" id="email" [(ngModel)]="userModel.email" name="email"
required email #emailInput="ngModel">
<div *ngIf="formInstance.invalid && formInstance.dirty">
<p *ngIf="userInput.errors?.required">
使用者名称为必填
</p>
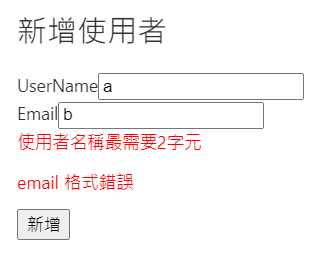
<p *ngIf="userInput.errors?.minlength">
使用者名称最需要{{userInput.errors?.minlength.requiredLength}}字元
</p>
<p *ngIf="emailInput.errors?.required">
email 为必填
</p>
<p *ngIf="emailInput.errors?.email">
email 格式错误
</p>
</div>
<button type="submit">新增</button>
</form>
轻轻松松~我们就完成 Angular 的表单跟验证,虽然他很阳春,但是只要掌握这些基础,视情况对我们的表单做扩充,就能满足一半以上的需求。明天我们会简单介绍一下 Angular 的路由(routing),让我们根据使用者巡览的位址显示不同的 component。
<<: #13-消失吧!Navbar!让你的网页更多空间 (JS)
>>: Day_17 : 让 Vite 来开启你的Vue 之 取得 模板元素 ref
[DAY 17] 小红堂牛肉面
小红堂牛肉面 地点:台南市新营区民权路118-5号 时间:11:00~14:00 17:00~...
DAY05 - XAMPP的vhost与SSL设定
前言: 今天是铁人赛的第五天,要特别讲一下vhost(虚拟网站)的设定方式 启动XAMPP的Apac...
Day01:铁人赛开场
一、主题内容 虽然知道全端工程师的路不好走,自己目前也还不是很称职,仍想以自己转职的角度、回顾的方式...
每个人都该学的30个Python技巧|技巧 26:搜寻以及取代—find()和replace()(字幕、衬乐、练习)
昨天学了两种功用相反的函式,那今天也轻松一点,学两个函式就好。其中find()函式是用来搜寻字串中有...
[13th][Day20] docker network
今天要来聊聊 docker networking container 之间的 connect 是用网...