Day16 vue.js之我有帐户了!!!
延续昨日
我们今天的目标是获取帐户讯息以及修改帐户资料
首先先去views 里面创一个Account.vue
在router 里面新增一个新的path(这次的path比较不同)
 {
    path: '/account/:id',
    name: 'Account',
    component: Account
  },
我们帐户的网址会是http://localhost:8080/account/登入者帐号
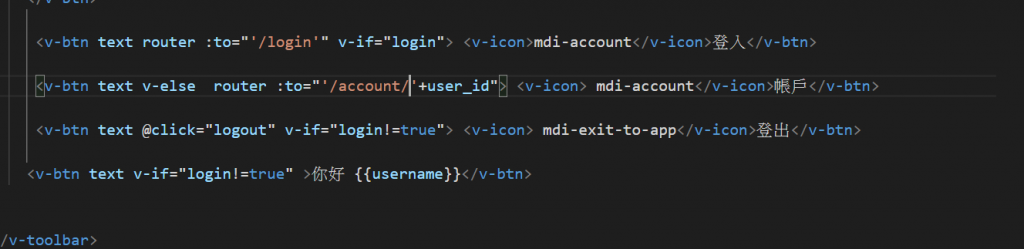
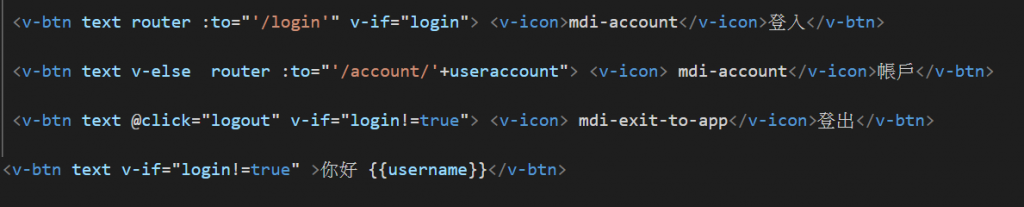
在navbar 里面的Router 会是这样设定(这样的目的是为了知道是谁在修改自己的帐户资料)

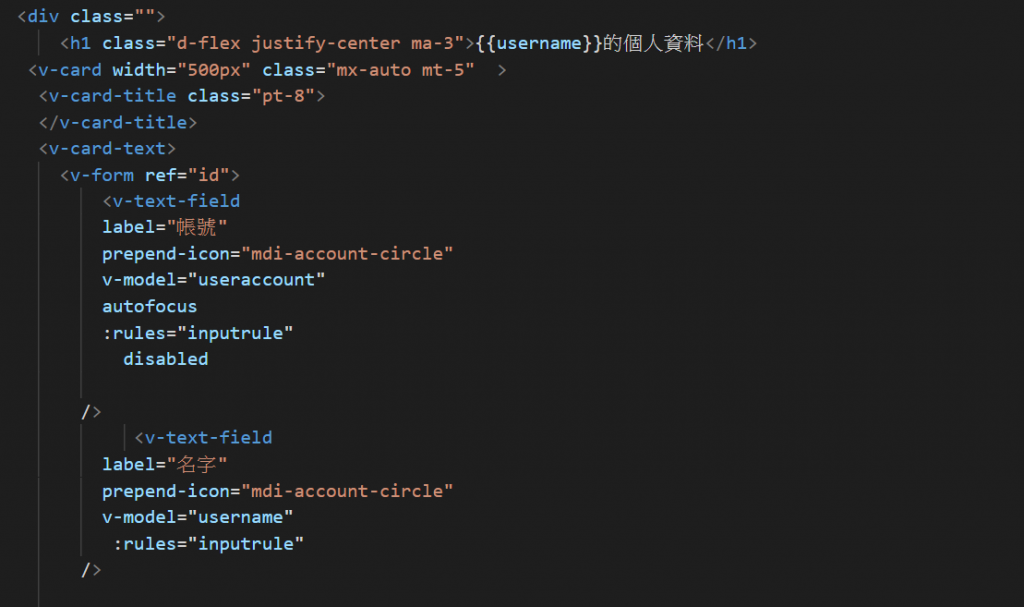
然後在注册页的data 里面新增几个变数
export default {

    data(){
      return{


        useraccount:'',
        userpassword:'',
        useremail:'',
        username:'',

      }
    },
然後在mounted里面接session
mounted(){
     let user=sessionStorage.getItem('user-info')
   this.useraccount=JSON.parse(user).id
     this.username=JSON.parse(user).username
     this.userpassword=JSON.parse(user).password
     this.useremail=JSON.parse(user).email

     if(!user){
       alert('请先登入')
       this.$router.push({name:'Login'})
     }
   }
再来直接把注册那一页的code 复制过来
就可以看到这样的画面
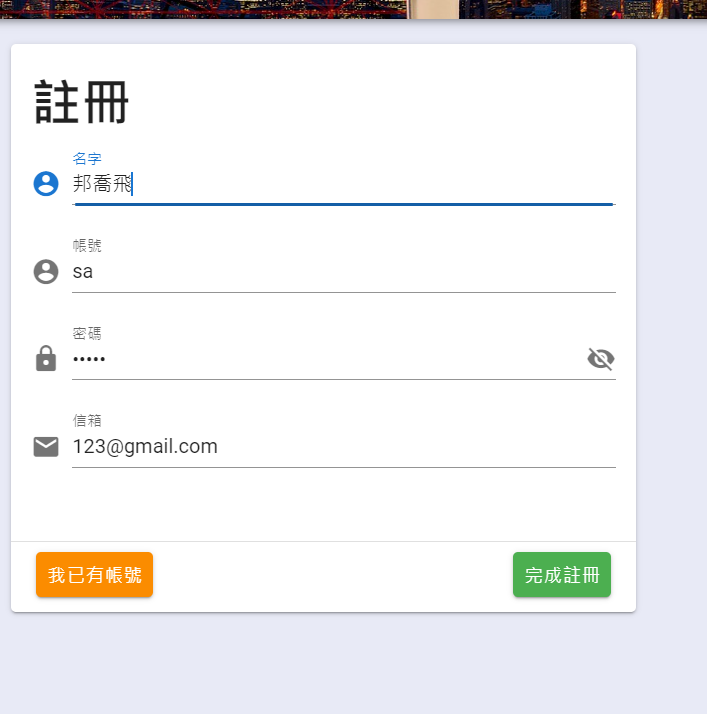
因为v-model都已经绑定了 所以会显示出原本的资料 再来就是做一点小修正
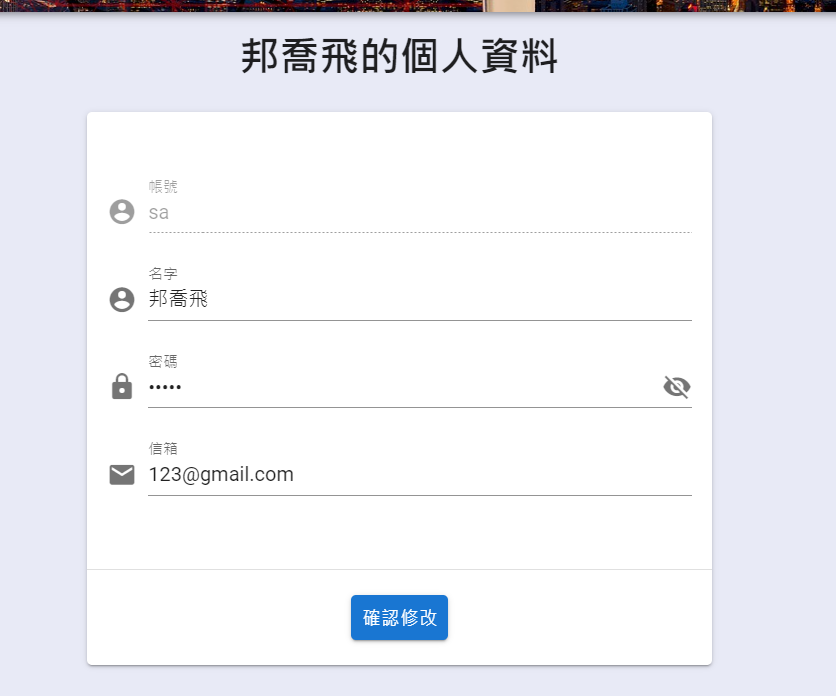
我将帐号跟名字的顺序换一下 改了一下btn的颜色
并且设定帐号不能更动(disabled)
以下是程序码
再来就是将新增的资料给更新到资料库
首先我想要先把api的网址设定成全域变数
这麽做的目的是我之後若改成别的资料库 或是资料库的port更动时我不需要去一个一个改
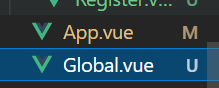
所以先创立一个名叫global.vue的资料(和app.vue同阶层)
以下是global.vue的内容
<script>
const db_api="http://localhost:3000/"
export default {

db_api,
}
</script>
再来就是 import 进来并return
<script>
  import global from '../Global.vue';
export default {

    data(){
      return{
    db_api:global.db_api,
      showPassword:'',
        useraccount:'',
        userpassword:'',
        useremail:'',
        username:'',
         inputrule:[
          x=>x.length>0 || "不得为空值"
        ],

      }
    },
接着在btn里设定@click的function名称

也别忘了在methods 设定function
   methods:{
        async changeAccount(){
            const result = await axios.patch(`${this.db_api}`+"users/"+this.$route.params.id,{
                username:this.username,
                password:this.userpassword,
                email:this.useremail,
            })
                console.warn(result);
        }


    },
p.s. this.route.params.id是我们在index设定的/id的id 再来id的值是什麽
我们在前面提到从navbar的route进来的时候有设定id给这个网页
我们的route是这样设定的: to route=”’/account/’”+user_id 所以params.id的值就会是user_id 而user_id是useraccount (我等等就去把user_id改成useraccount)
再来就是测试看看能不能改动了
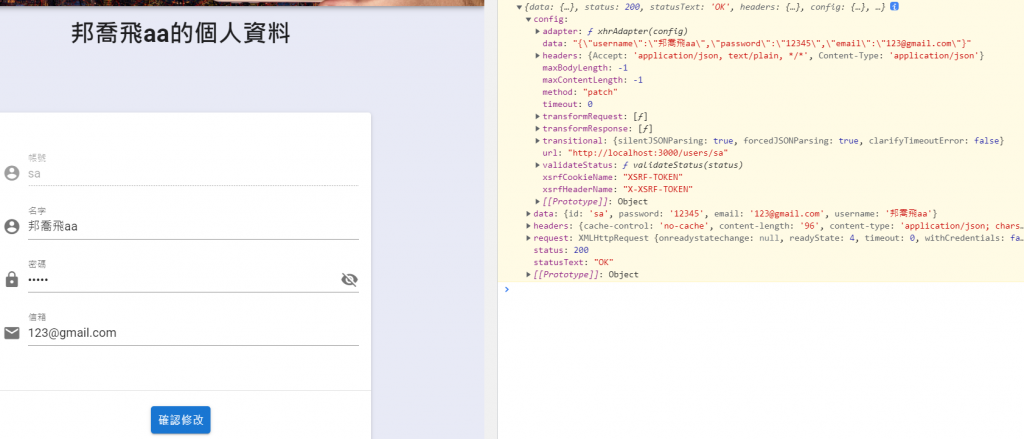
看起来是修改成功了 status是200
但是session 还是原本的session 所以必须再做一点修正
methods:{
        async changeAccount(){
            const result = await axios.patch(`${this.db_api}`+"users/"+this.$route.params.id,{
                username:this.username,
                password:this.userpassword,
                email:this.useremail,
            })
            if (result.status==200) {
                alert('修改成功')
                const newresult=await axios.get(`${this.db_api}`+"users?id="+`${this.useraccount}`+"&password="+`${this.userpassword}`)
                sessionStorage.setItem("user-info",JSON.stringify(newresult.data[0]))
                this.$router.push({name:'Home'})
                window.location.reload()

            }
        }


    },
再来就是把login.vue 跟register.vue有用到资料库api的改成db_api(记得先import global.vue 再去data设定变数)
methods:{

      async login(){
        let result = await axios.get(`${this.db_api}`+"users?id="+`${this.useraccount}`+"&password="+`${this.userpassword}`)
        console.log(result)


        if(result.status==200 && result.data.length==1 ){
          alert("登入成功")
          sessionStorage.setItem("user-info",JSON.stringify(result.data[0]))
          this.$router.push({name:'Home'})
          window.location.reload()


        }
        else{
          alert("失败")
        }


      },
然後我还去把navbar的user_id的变数名称改成useraccount
不知道当时脑子在想什麽变数应该要固定才对
好了今天弄了超久的
明天把首页的专案内容换成资料库的专案内容
我们明天见!
<<: [NestJS 带你飞!] DAY13 - Guard
>>: AI ninja project [day 28] QLattice --进阶回归
Powershell 入门之函数
前面,我们已经知道了,如何去编写 powershell 脚本,今天我们就一起来看看,其他的功能。通过...
【Day 10】C 语言的位元运算子
今天,我们来学位元运算子以及赋值运算子吧! 位元运算子 位元运算子作用於位元,并逐位执行。"&...
6. 恐惧支配到信任领导
前言 那一天,人类终於回想起了,曾经一度被他们所支配的恐怖,还有背囚禁於鸟笼中的那份屈辱那一天。 ...
Day28. Rails 搭配 DataTable 写出完美的列表页
今天要讲Stimulus & Datatable 的用法,不过不会Stimulus的读者们不...
Day5 Game Frontend
今天我们来了解一下 Game Frontend 这个须由我们实作的部件,在 Open-Match 所...