[前端暴龙机,Vue2.x 进化 Vue3 ] Day17.父子组件的沟通-$emit
在前一篇中,我们已经了解父组件向子组件传递资料了,接着来认识子组件向父组件的沟通吧
子组件向父组件沟通: $emit
子组件(传送)
this.$emit("在父层所定义的绑定事件名称", 要传送过去的参数);
所以我们衔接上一篇的例子来修改,以下
<div id="app">
  <counter :message="msg"></counter>
  {{ receive }}
</div>

<script>
Vue.component("counter",{
    template:`
      <div>
        <p>子组件拿到了父组件的资料 -- {{ message }}</p>
        <div>
            <button @click='returnData'>子组件回送</button>
        </div>
      </div>
    `,
    props: ['message'],
    data() {
      return {
        text: "我已收到,谢谢"
      }
    },
    methods:{
      returnData(){
        // 子组件
        this.$emit("responsedata", this.text);
      }
    }
});

var app = new Vue({
  el: '#app',
  data:{
    msg: "我是父组件要传送的包裹",
    receive: "尚无子组件讯息"
  }
})
</script>
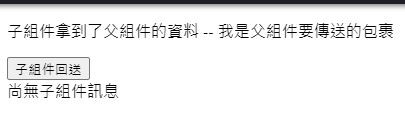
假想画面会是 透过 button 回送资料给 父组件
父组件(接收)
所以我们必需去定义父组件的接收
<div id="app">
  <counter :message="msg" @responsedata="父组件接收到後要去执行的 function "></counter>
  {{ receive }}
</div>
继续修改我们的范例程序码
<div id="app">
  <counter :message="msg" @responsedata="getChildMessage"></counter>
  {{ receive }}
</div>

<script>
    Vue.component("counter",{
        template:`
          <div>
            <p>子组件拿到了父组件的资料 -- {{ message }}</p>
            <div>
                <button @click='returnData'>子组件回送</button>
            </div>
          </div>
        `,
        props: ['message'],
        data() {
          return {
            text: "我已收到,谢谢"
          }
        },
        methods:{
          returnData(){
            this.$emit("responsedata", this.text);
          }
        }
    });

    var app = new Vue({
      el: '#app',
      data:{
        msg: "我是父组件要传送的包裹",
        receive: "尚无子组件讯息"
      },
      methods:{
        getChildMessage(context){
          this.receive = context;
        }
      }
    })
</script>
注意
当我们定义父层的接收 $emit ( @自定义名称="父层 function名称" ),自定义名称最好是全小写,自己实测是 camelCase (驼峰命名法) 跟 kebab-case (短横线分隔命名) 都会失败 (如果有误再麻烦纠正  )
)
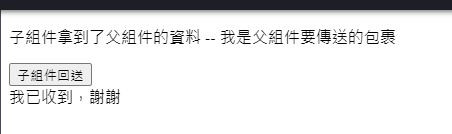
最後完成我们的范例啦~ 当我们点击回送按钮後,父层会将接到的讯息更新到画面~
参考资料
Vue 官方文件 通过 Prop 向子组件传递数据
Vue 官方文件 Prop
Lilybon Blog Vue.js - 组件间沟通
跟着 Vue 闯荡前端世界 - 06 父子组件沟通 pass props / emit event, 搞搞就懂
父子组件沟通原则
Component 的沟通方式 :props Day 14, iT邦帮忙 闪光洽
[第14天]理财达人Mx. Ada-盘中零股交易(Intraday Odd Order)
前言 本文说明如何进行盘中零股交易作业。 程序实作 程序 # 设定交易标的 # 股票:长荣(代码:2...
[NestJS 带你飞!] DAY19 - Module Reference
前面有提过,注入 Provider 的方式只需要在 constructor 设计参数并附上对应的型别...
【Day18】:STM32系统时钟配置(下)
待完成 ...
[iT铁人赛Day3]JAVA的键盘输入
有些程序码会在输入之前就先设定好变数值 然後直接执行程序 那如果想要自己输入变数值,然後看看程序码执...
[神经机器翻译理论与实作] 这个翻译不大正经
前言 也许你会觉得,这个标题下得很神经。没错!因为今天要正式进入新的主题-神经机器翻译。我们今天将会...