[NestJS 带你飞!] DAY11 - Middleware
什麽是 Middleware?
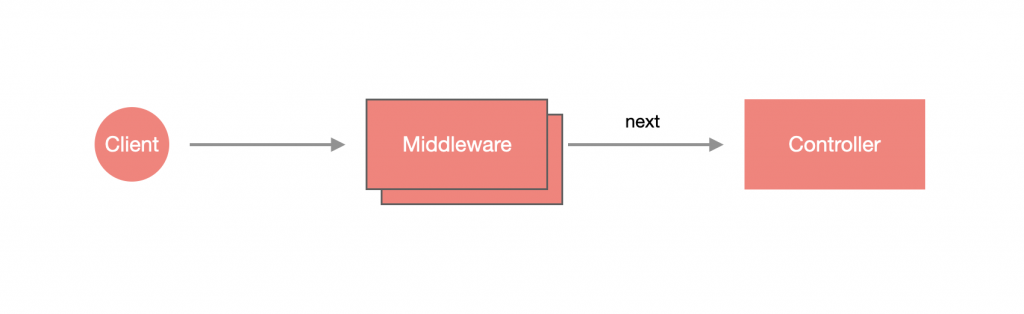
Middleware 是一种执行於路由处理之前的函式,可以存取请求物件与回应物件,并透过 next() 继续完成後续的流程,比如说:执行下一个 Middleware、进入正式的请求资源流程。如果有使用过 Express 的话,可能对 Middleware 不会太陌生,事实上 Nest 的 Middleware 与 Express 是一样的。那 Middleware 有哪些功用呢?下方为 Express 官方的说明:
- 可执行任何程序。
- 更改请求物件或回应物件。
- 结束整个请求周期。
- 呼叫下一个执行步骤。
- 如果在 Middleware 没有结束掉请求周期,需要使用
next()呼叫下一个执行步骤。
设计 Middleware
Middleware 有两种设计方式,一般的 function 或 带有 @Injectable 装饰器并实作 NestMiddleware 介面的 class:
Functional middleware
这种 Middleware 十分单纯,就是一个普通的 function,不过有三个参数,分别是:Request、Response 以及 NextFunction,使用方法与 Express middleware 是一样的。下方为一个简单的范例,可以看到在函式的结尾呼叫了 next(),表示将执行下一个执行步骤:
import { Request, Response, NextFunction } from 'express';

export function logger(req: Request, res: Response, next: NextFunction) {
  console.log('Hello Request!');
  next();
}
Class middleware
这种 Middleware 可以透过 CLI 产生:
$ nest generate middleware <MIDDLEWARE_NAME>
注意:
<MIDDLEWARE_NAME>可以含有路径,如:middlewares/logger,这样就会在src资料夹下建立该路径并含有 Middleware。
这边我建立一个 LoggerMiddleware 在 middlewares 资料夹下:
$ nest generate middleware middlewares/logger
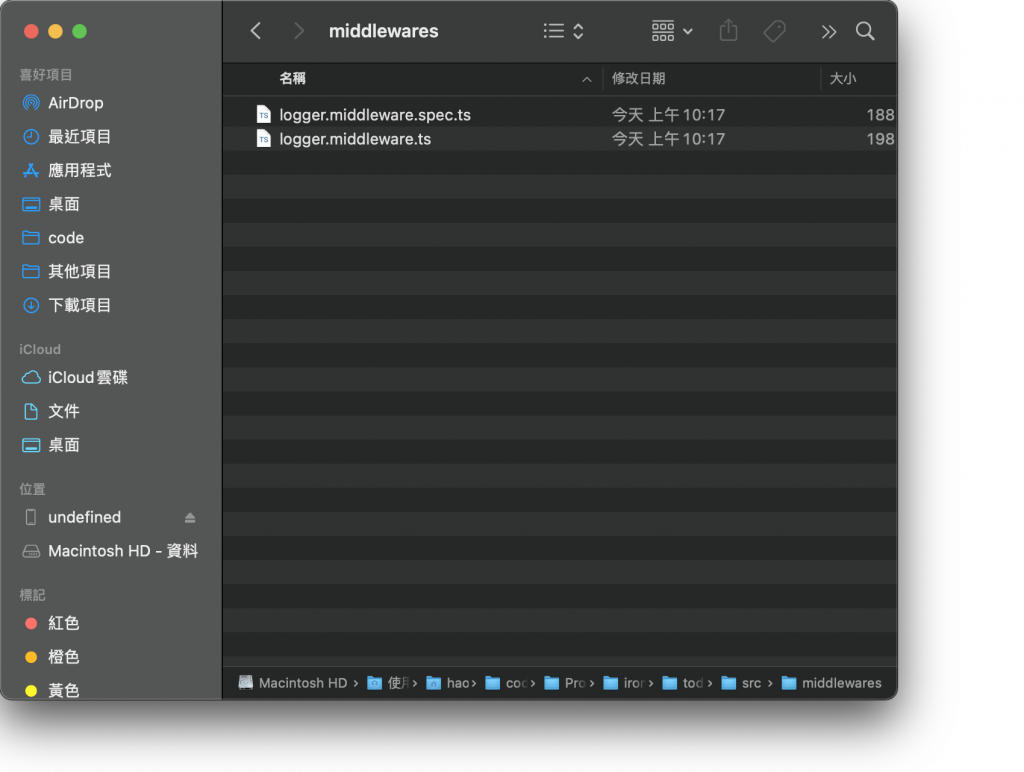
在 src 底下会看见一个名为 middlewares 的资料夹,里面有 logger.middleware.ts 以及 logger.middleware.spec.ts:
建立出来的 Middleware 骨架如下,会看到有一个 use(req: any, res: any, next: () => void) 方法,那正是处理逻辑的地方:
import { Injectable, NestMiddleware } from '@nestjs/common';

@Injectable()
export class LoggerMiddleware implements NestMiddleware {
  use(req: any, res: any, next: () => void) {
    next();
  }
}
等等,为何参数型别是 any?原因是要看使用的底层为何,假设是 Express 就改成下方的样子:
import { Injectable, NestMiddleware } from '@nestjs/common';
import { NextFunction, Request, Response } from 'express';

@Injectable()
export class LoggerMiddleware implements NestMiddleware {
  use(req: Request, res: Response, next: NextFunction) {
    next();
  }
}
使用 Middleware
Middleware 的使用方式并不是透过装饰器的方式来设定,而是在 Module 实作 NestModule 介面并设计 configure() 方法,再透过 MiddlewareConsumer 这个 Helper Class 来管理各个 Middleware。下方来实作一遍最基础的 Middleware 使用方式,先将 LoggerMiddleware 调整为下方的样子:
import { Injectable, NestMiddleware } from '@nestjs/common';
import { NextFunction, Request, Response } from 'express';

@Injectable()
export class LoggerMiddleware implements NestMiddleware {
  use(req: Request, res: Response, next: NextFunction) {
    console.log('Hello Request!');
    next();
  }
}
接着建立 TodoModule 与 TodoController:
$ nest generate module features/todo
$ nest generate controller features/todo
提醒:如果已经建立过可以略过此步骤。
调整 todo.controller.ts:
import { Controller, Get, Param } from '@nestjs/common';

@Controller('todos')
export class TodoController {
  @Get()
  getAll() {
    return [];
  }

  @Get(':id')
  get(@Param('id') id: string) {
    return { id };
  }
}
在 AppModule 实作 NestModule 与 configure(consumer: MiddlewareConsumer) 方法,并透过 apply 来套用 Middleware,再透过 forRoutes 设置要采用此 Middleware 的路由:
import { MiddlewareConsumer, Module, NestModule } from '@nestjs/common';
import { AppController } from './app.controller';
import { AppService } from './app.service';
import { TodoModule } from './features/todo/todo.module';
import { LoggerMiddleware } from './middlewares/logger.middleware';

@Module({
  imports: [TodoModule],
  controllers: [AppController],
  providers: [
    AppService
  ]
})
export class AppModule implements NestModule {
  configure(consumer: MiddlewareConsumer) {
    consumer.apply(LoggerMiddleware).forRoutes('/todos')
  }
}
打开浏览器查看 http://localhost:3000/todos 与 http://localhost:3000/todos/1,会在终端机看到下方结果;而查看 http://localhost:3000 终端机则不会有任何显示:
Hello Request!
套用多个路由与指定 HttpMethod
forRoutes 支援多个路由,只需要添加路由到参数中即可,比较特别的是可以指定特定 Http Method 与路由,将含有 path 与 method 的物件带入 forRoutes 中即可。这里调整一下 AppModule:
import { MiddlewareConsumer, Module, NestModule, RequestMethod } from '@nestjs/common';
import { AppController } from './app.controller';
import { AppService } from './app.service';
import { TodoModule } from './features/todo/todo.module';
import { LoggerMiddleware } from './middlewares/logger.middleware';

@Module({
  imports: [TodoModule],
  controllers: [AppController],
  providers: [
    AppService
  ]
})
export class AppModule implements NestModule {
  configure(consumer: MiddlewareConsumer) {
    consumer.apply(LoggerMiddleware).forRoutes(
      { path: '/todos', method: RequestMethod.POST }, // POST /todos 会生效
      { path: '/', method: RequestMethod.GET } // GET / 会生效
    )
  }
}
透过浏览器查看 http://localhost:3000/todos 在终端机不会有任何显示结果;但如果查看 http://localhost:3000 就会看到下方结果:
Hello Request!
提醒:
forRoutes也支援万用路由。
套用 Controller
forRoutes 也支援套用整个 Controller,只要在该 Controller 下的资源都能触发指定的 Middleware。这里调整 AppModule:
import { MiddlewareConsumer, Module, NestModule } from '@nestjs/common';
import { AppController } from './app.controller';
import { AppService } from './app.service';
import { TodoController } from './features/todo/todo.controller';
import { TodoModule } from './features/todo/todo.module';
import { LoggerMiddleware } from './middlewares/logger.middleware';

@Module({
  imports: [TodoModule],
  controllers: [AppController],
  providers: [
    AppService
  ]
})
export class AppModule implements NestModule {
  configure(consumer: MiddlewareConsumer) {
    consumer.apply(LoggerMiddleware).forRoutes(TodoController)
  }
}
透过浏览器查看 http://localhost:3000/todos 以及 http://localhost:3000/todos/1 都可以在终端机看到以下结果:
Hello Request!
排除特定路由与指定 HttpMethod
可以透过 exclude 来指定要被排除的路由,使用方式与 forRoutes 差不多,透过给定含有 path 与 method 的物件来设置。调整一下 AppModule:
import { MiddlewareConsumer, Module, NestModule, RequestMethod } from '@nestjs/common';
import { AppController } from './app.controller';
import { AppService } from './app.service';
import { TodoController } from './features/todo/todo.controller';
import { TodoModule } from './features/todo/todo.module';
import { LoggerMiddleware } from './middlewares/logger.middleware';

@Module({
  imports: [TodoModule],
  controllers: [AppController],
  providers: [
    AppService
  ]
})
export class AppModule  implements NestModule{
  configure(consumer: MiddlewareConsumer) {
    consumer.apply(LoggerMiddleware).exclude(
      { path: '/todos', method: RequestMethod.GET } // 排除 GET /todos
    ).forRoutes(TodoController)
  }
}
透过浏览器查看 http://localhost:3000/todos 会发现终端机没有任何结果。
套用多个 Middleware
apply 支援采用多个 Middleware,只需把 Middleware 添加到参数中即可。这里先新增一个 HelloWorldMiddleware:
$ nest generate middleware middlewares/hello-world
并修改 hello-world.middleware.ts 的内容:
import { Injectable, NestMiddleware } from '@nestjs/common';
import { NextFunction, Request, Response } from 'express';

@Injectable()
export class HelloWorldMiddleware implements NestMiddleware {
  use(req: Request, res: Response, next: NextFunction) {
    console.log('Hello World!');
    next();
  }
}
接着调整 AppModule 的内容:
import { MiddlewareConsumer, Module, NestModule } from '@nestjs/common';
import { AppController } from './app.controller';
import { AppService } from './app.service';
import { TodoController } from './features/todo/todo.controller';
import { TodoModule } from './features/todo/todo.module';
import { HelloWorldMiddleware } from './middlewares/hello-world.middleware';
import { LoggerMiddleware } from './middlewares/logger.middleware';

@Module({
  imports: [TodoModule],
  controllers: [AppController],
  providers: [
    AppService
  ]
})
export class AppModule implements NestModule {
  configure(consumer: MiddlewareConsumer) {
    consumer.apply(LoggerMiddleware, HelloWorldMiddleware).forRoutes(TodoController)
  }
}
透过浏览器查看 http://localhost:3000/todos 可以在终端机看到以下结果:
Hello Request!
Hello World!
全域 Middleware
如果要将 Middleware 套用在每一个资源上,可以在 main.ts 进行调整,只需要使用 use 方法即可:
import { NestFactory } from '@nestjs/core';
import { AppModule } from './app.module';
import { logger } from './middlewares/logger.middleware';

async function bootstrap() {
  const app = await NestFactory.create(AppModule);
  app.use(logger);
  await app.listen(3000);
}
bootstrap();
注意:在
main.ts的方式仅支援 Function Middleware。
如果是 Class Middleware 则在 AppModule 实作 NestModule,并指定路由为 * 即可:
import { MiddlewareConsumer, Module, NestModule } from '@nestjs/common';
import { AppController } from './app.controller';
import { AppService } from './app.service';
import { TodoModule } from './features/todo/todo.module';
import { LoggerMiddleware } from './middlewares/logger.middleware';

@Module({
  imports: [TodoModule],
  controllers: [AppController],
  providers: [AppService],
})
export class AppModule implements NestModule {
  configure(consumer: MiddlewareConsumer) {
    consumer.apply(LoggerMiddleware).forRoutes('*');
  }
}
小结
Middleware 的用途非常广泛,有许多应用都是基於 Middleware 进行实作的,比如:cors。
提醒:有关 cors 的介绍後续会再说明,或是可以看这篇。
这边附上今天的懒人包:
- Middleware 是一种执行於路由处理之前的函式,其可以存取请求物件与回应物件。
- Middleware 有两种设计方式:Functional middleware 与 Class middleware。
- 在 Module 实作
NestModule介面并设计configure()方法,再透过MiddlewareConsumer管理各个 Middleware。 - 可以把一个或多个 Middleware 套用在一个或多个路由、HttpMethod 或 Controller 上。
- 可以排除特定路由,让该路由不套用 Middleware。
- 可以将 Middleware 套用至全域。
<<: CSS微动画 - Slot的变化!数字钟也可以动起来
Day3-"if-else"
if(单一选择叙述)就是当某个条件成立时,就去做下列执行条件,反之当条件不成立时,就不会做这些事,下...
【HTML】【CSS】图片下方的空白
【前言】 本系列为个人前端学习之路的学习笔记,在过往的学习过程中累积了很多笔记,如今想藉着IT邦帮忙...
D9 - 酸 V 啊酸 V8 引擎
前言 前一天提到 v8,那就再深入一点点儿讨论 V8 是什麽 以及 它 怎麽翻译 JavaScrip...
24 - 建立结构化的 Log (2/4) - Elasticsearch Ingest Pipeline 资料 Index 前的转换好帮手 - 基本介绍
建立结构化的 Log 系列文章 (1/4) - Elastic Common Schema 结构化 ...
计算API所需要的参数: IV
重点是要透过第一天的 Nonce 来算出 IV,果然金融机构的 API 就是复杂。要从计算的结果再计...