[day14] 接收使用者的Line讯息
结合先前的
可以开始建立一个服务器接收由Line官方送过来的资讯,此处假设你使用Heroku进行开发,在Line Developers Console内,将Channel-->Messaging API-->Webhook URL设定为
https://[AppName].herokuapp.com/callback
并将Auto-reply messages 与 Greeting messages同样设为Disabled,方法为:
- 点选右侧的Edit
- Line Offficial Account Manager-->回应设定
- 停用加入好友的欢迎讯息与自动回应讯息
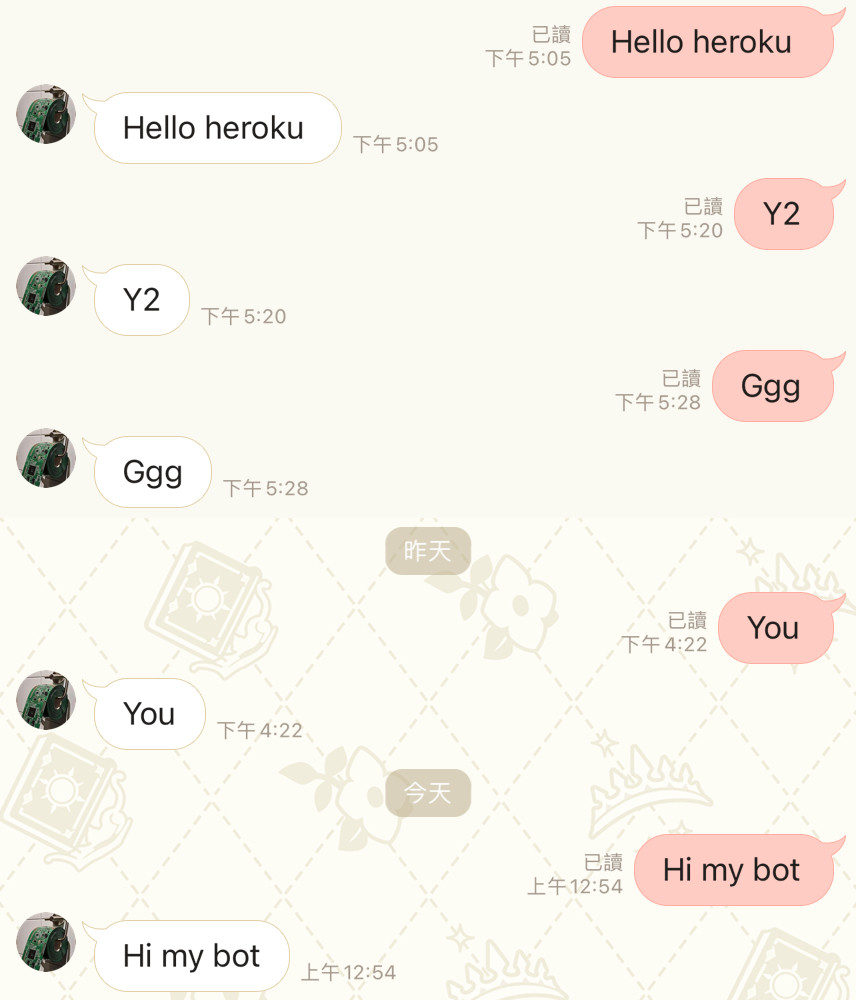
实作并部署回声机器人
此机器人功能:回传传给机器人的文字讯息
如果未安装line-bot-sdk套件
pip install line-bot-sdk
修改Server.py,加入以下内容
from flask import Flask, request, abort

from linebot import (
    LineBotApi, WebhookHandler
)
from linebot.exceptions import (
    InvalidSignatureError
)
from linebot.models import (
    MessageEvent, TextMessage, TextSendMessage,
)
import os

app = Flask(__name__)
api = Api(app)

#LCAT为Channel Access Token
line_bot_api = LineBotApi(os.environ['LCAT'])

#Cst为Channel secret
handler = WebhookHandler(os.environ['Cst'])

@app.route("/callback", methods=['POST'])
def callback():
    # get X-Line-Signature header value
    signature = request.headers['X-Line-Signature']

    # get request body as text
    body = request.get_data(as_text=True)
    app.logger.info("Request body: " + body)

    # handle webhook body
    try:
        handler.handle(body, signature)
    except InvalidSignatureError:
        print("Invalid signature. Please check your channel access token/channel secret.")
        abort(400)

    return 'OK'

@handler.add(MessageEvent, message=TextMessage)
def handle_message(event):
    line_bot_api.reply_message(
        event.reply_token,
        TextSendMessage(text=event.message.text))
部署:
git add .
git commit -m "Echo Bot"
git push heroku main
此时从Line传讯息给机器人,你应该就可以收得到来自机器人的回讯
加机器人为好友
Line Developers --> Channel Setting --> Messaging API --> Bot information --> Bot basic ID or QR code
使用你的手机搜寻Bot basic ID或扫描QR code加机器人为好友
过程解析
这是一个由Line官方传送过来的Webhook Sample
{
  "destination": "xxxxxxxxxx",
  "events": [
      {
          "type": "message",
          "message": {
              "type": "text",
              "id": "14353798921116",
              "text": "Hello, world"
          },
          "timestamp": 1625665242211,
          "source": {
              "type": "user",
              "userId": "U80696558e1aa831..."
          },
          "replyToken": "757913772c4646b784d4b7ce46d12671",
          "mode": "active"
      },
      {
          "type": "follow",
          "timestamp": 1625665242214,
          "source": {
              "type": "user",
              "userId": "Ufc729a925b3abef..."
          },
          "replyToken": "bb173f4d9cf64aed9d408ab4e36339ad",
          "mode": "active"
      },
      {
          "type": "unfollow",
          "timestamp": 1625665242215,
          "source": {
              "type": "user",
              "userId": "Ubbd4f124aee5113..."
          },
          "mode": "active"
      }
  ]
}
- 手机发讯息给Line
- Line传送通知给bot server(webhook URL)的webhook
- WebhookHandler验证headers中的x-line-signature栏位签章,除了使用SDK进行验证,也可以手动进行验证
- 将资料传送给配对的执行函数,如本次范例中使用的MessageEvent与TextMessage,进行处理
- 使用Line SDK回覆讯息,回传TextSendMessage(text=event.message.text)) 以此范例还说,就是Hello, world
跑完接收与发送,之後要开始把功能逐渐拼起来组成专案了
>>: Day11 Let's ODOO: Controller
DES-EDE3-CBC
初始化向量(IV)是一个随机数,通常是一次使用的数字,即一个随机数。它用於删除密文中的重复模式,以增...
Angular 冒泡事件
今天就来个说个在新手时期很常遇到,但却不知为什麽会发生的问题 来看一下我们前几天的表单范例,与图上 ...
Scrum 也自然吗
前言 昨天谈到敏捷的重点是其背後的精神,而 Scrum 也不例外,但为什麽 Scrum 的导入还是这...
教你彻底移除Mac应用程序的4 种方法 【必学】
如何删除Mac上的应用程序? 当大多数用户购买新的 Macbook/iMac 时,他们会将许多应用程...
[DAY 09]深度学习模型实作 -- 前导
前言 HIYO!又是阿峻我啦~ 再经过之前的环境处理系列之後,我们就要来开始实作几个常见的 Deep...