[Angular] Day24. Template-driven forms
在上一篇中提到了 Angular 中的两种不同的 Form,介绍了他们在使用上以及细节上的不同,接着在本篇中将会着重介绍 Template-driven forms,那就继续看下去吧。
What is Template-driven forms?
顾名思义 Template-driven forms 就是一个透过 template 驱动的表单,或者可以说他是基於原生 HTML 所产生出来的表单,在 template 中使用 directive 和 attribute 来为指定的输入元件进行绑定与验证,所有的动作都会在 template 中完成,所以 component 只需要很少的设定,这点是和 reactive forms 最大的不同,而 Template-driven forms 具有以下的设置:
- Form 是使用
ngFormdirective 所设置的 - 使用
ngModeldirective 设置控制元件 - ngModel 提供了双向绑定,将 template 的输入元素与 component 的 property 做绑定
- 在 template 中利用 directive 验证输入内容
所以对於 template-driven forms 的优点在於:
- 在 component 中有较少的设置
- 相较於 reactive forms 来说设置更简单
但他的缺点是:
- 难以动态添加表单控制元件
- 单元测试较为困难
Building a template-driven form
在介绍完 template-driven form 後,接着直接使用一个例子来讲解该如何使用 template form 吧,我们的目的再於创建一个 template-driven form,其 template 中的输入元素绑定到 component 的数据 property,并建立输入验证以维护数据的完整性,在这次的例子中我会添加一点样式让画面不会太丑 (
Import FormsModule
首先要做的就是在 app.module.ts 中从 @angular/form 中将 FormsModule 引入到 app.module 中 metadata 的 imports 中。
import { NgModule } from '@angular/core';
import { BrowserModule } from '@angular/platform-browser';

import { AppRoutingModule } from './app-routing.module';
import { AppComponent } from './app.component';
import { FormsModule } from '@angular/forms';

@NgModule({
  declarations: [
    AppComponent,
  ],
  imports: [
    BrowserModule,
    AppRoutingModule,
    FormsModule,
  ],
  providers: [],
  bootstrap: [AppComponent]
})
export class AppModule { }
Build the basic form
接着来建立一个基本的 form 吧,在建立 form 之前先把要 form 的数据模型给定义出来,所以新增一个 class 用於制定数据模型
// hero.ts

export class Hero {
  id!: number;
  name!: string;
  power!: string;
  alterEgo?: string;
  constructor(id: number, name: string, power: string, alterEgo?: string) {
    this.id = id;
    this.name = name;
    this.power = power;
    this.alterEgo = alterEgo;
  }
}
建立了名为 Hero 的 class,这样就可以利用 new 将参数传入後产生一个固定资料结构的 object,接着使用 Angular CLI 建立一个 component 用於处理 form 的逻辑与显示
ng generate component hero-form
建立完 component 後,接着在 hero-form.component.ts 中定义一些 form 的细节
import { Component, OnInit } from '@angular/core';
import { Hero } from '../hero';                                                // (1)

@Component({
  selector: 'app-hero-form',
  templateUrl: './hero-form.component.html',
  styleUrls: ['./hero-form.component.css'],
})
export class HeroFormComponent implements OnInit {
  powers = ['Really Smart', 'Super Flexible', 'Super Hot', 'Weather Changer']; // (2)
  model = new Hero(18, 'Dr IQ', this.powers[0], 'Chuck Overstreet');           // (3)
  submitted = false;

  constructor() {}

  ngOnInit(): void {}

  onSubmit() {                                                                 // (4)
    this.submitted = true;
  }
}
- (1): 引入刚刚写的 Hero class
- (2): 建立一个 property 将它指定为 array 并将所以有超能力填入其中
- (3): 使用 new 将刚刚写的 Hero 实例化为一个 object 并赋予给 property model
- (4): 新增一个 method 用於当使用者点击 submit 按钮时触发
定义完 app-hero.component.ts 後,接着将他的 selector 加入到 app.component.html 中
<!-- app.component.html -->

<app-hero-form></app-hero-form>
现在在画面生应该是空空如也才对,不过这非常正常因为还没撰写 hero-form.component 的 view,现在就来把他补上吧,希望在画面中呈现两个带有 <label> 的 <input> 还要有一个 <select> 最後要有一个 <button> 用来点击 submit。
<!-- hero-form.component.html -->

<div class="form-group">
  <label for="name">Name</label>
  <input type="text" class="form-control" id="name" required/>

  <label for="alterEgo">Alter Ego</label>
  <input type="text" class="form-control" id="alterEgo" required/>

  <label for="power">Hero Power</label>
  <select class="form-control" id="power" required>
    <option *ngFor="let pow of powers" [value]="pow">{{ pow }}</option>
  </select>

  <button type="submit" class="btn btn-success">Submit</button>
</div>
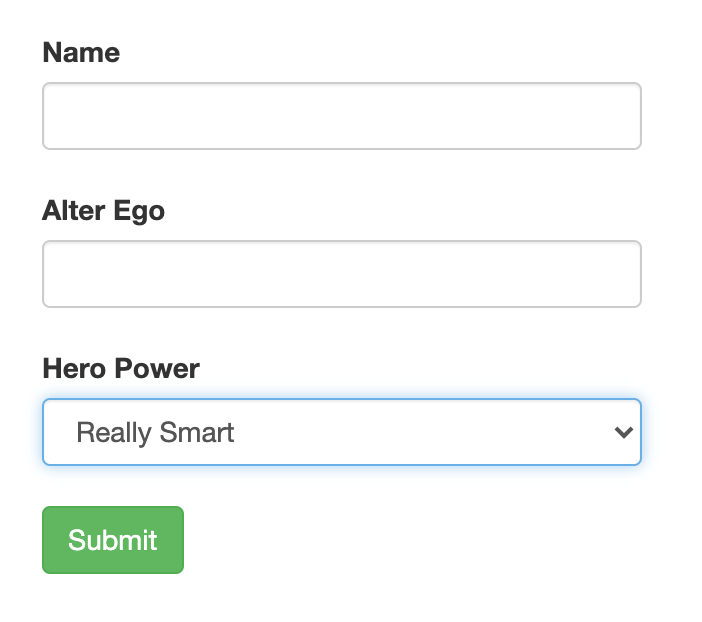
在画面中会看到这样的画面,因为我有加一些 CSS 的样式,所以这边可以发挥你的 CSS 功力看是要做的跟我一样还是做一个属於你自己的,不过主要还是要介绍 template form 所以就不多做介绍。
Bind input controls to data properties
在完成基本的 form 画面後,下一步要使用 双向绑定 ( Two-way binding ) 将 template 中的输入元素绑定到 component 中对应的 property,以便将使用者输入的值更新绑定的 property,也让使用程序更改的 property 的值可以呈现在画面中。
FormsModule 中声明的 ngModel directive 可以让 template-driven form 中的控制元件绑定到数据模型中的 property,当使用 Two-way binding 绑定 [(ngModel)] 後, Angualr 就可以跟踪控制元件的值和使用者交互,这可以让画面与表单模型保持同步。
-
首先先更改 hero-form.component.html 中的内容
<!-- hero-form.component.html -->

<div class="form-group">
  <label for="name">Name</label>
  <input
    type="text"
    class="form-control"
    id="name"
    [(ngModel)]="model.name"
    name="name"
		required
		#name="ngModel"
  />

  <label for="alterEgo">Alter Ego</label>
  <input
    type="text"
    class="form-control"
    id="alterEgo"
    [(ngModel)]="model.alterEgo"
    name="alterEgo"
		required
		#alterEgo="ngModel"
  />

  <label for="power">Hero Power</label>
  <select class="form-control" id="power" [(ngModel)]="model.power" name="power">
    <option *ngFor="let pow of powers" [value]="pow">{{ pow }}</option>
  </select>

  <button type="submit" class="btn btn-success">Submit</button>
</div>
在 Name 和 Alter Ego 两个
<label>下面的<input>利用[(ngModel)]绑定 component 中的 property,这边要注意的是当你使用了[(ngModel)]绑定 property 後,需要定义他的name不然会报错喔! -
绑定完每一个输入元素後接着来对整个 Form 进行绑定,在导入
FormsModule时 Angular 会自动创建一个NgFormdirective 并将其附加到 template 中的<form>上面(因为 NgForm 具有匹配<form>的 select ),所以要访问 NgForm 和整个表单状态,需要声明一个 template 引用变量。<!-- hero-form.component.html --> {{ model | json }} <form #heroForm="ngForm"> <div class="form-group"> <label for="name">Name</label> <input type="text" class="form-control" id="name" [(ngModel)]="model.name" name="name" required #name="ngModel" /> <label for="alterEgo">Alter Ego</label> <input type="text" class="form-control" id="alterEgo" [(ngModel)]="model.alterEgo" name="alterEgo" required name="alterEgo" /> <label for="power">Hero Power</label> <select class="form-control" id="power" [(ngModel)]="model.power" name="power" > <option *ngFor="let pow of powers" [value]="pow">{{ pow }}</option> </select> <button type="submit" class="btn btn-success">Submit</button> </div> </form>使用
<form>将之前写的表单包起来并使用 template variable 设定#heroForm,而 heroForm 这个变量现在是对控制整个表单的NgFormdirective 实例的 reference。而在整个 form 上面添加了
{{ model | json }}用於观看 component property 的变化,可以在画面中的输入框更改名称或选择其他的 power 来看看 component 中的 property 会不会跟着改变。
Track control states
接着要来介绍 NgModel directive 的跟踪控制元件的状态,他会告诉你使用者是否触碰了控制元件、值是否被更改了或是输入的值是否无效,Angular 在控制元件上设置了特殊的 CSS Class 来反映他的状况,如下表所示
| State | Class is true | Class if false |
|---|---|---|
| 控制元件是否被访问 | ng-touched | ng-untouched |
| 控制元件的值是否被更改 | ng-dirty | ng-pristine |
| 控制元件的值是否有效 | ng-valid | ng-invalid |
此外 Angular 再提交时将 ng-submitted CSS Class 应该要用於 <form>,所以不放在上面一起介绍。
Observe control states
要查看 Angular 如何添加和删除 CSS Class,可以打开浏览器的开发人员工具并检查英雄姓名的 <input>。
- 在 Name 的输入框中填入新的值,可以看到
<input>绑定的 CSS Class 发生更改 - 在
<input>中执行以下操作会更改成不同的 CSS Class- 完全不去点击和更改
<input>的话,代表他是未受影响的、原始且有效的。 - 点击
<input>後在点击外部(不更改内容),现在已经访问了控制元件,所以 CSS Class 从ng-untouched变为ng-touched。 - 在
<input>的内容加入一个斜杠( \ ),他会变成ng-touched和ng-dirty。 - 完全移除
<input>的内容这会使这个控制元件的值变为无效,因此会从ng-valid变为ng-invalid。
- 完全不去点击和更改
Create visual feedback for states
可以利用 ng-valid 和 ng-invalid 来处理当使用者填入非有效内容时会发生什麽事,当输入无效时可以在输入框下方显示警告的画面,也可以在警告的画面中填入提醒或范例,可以在 Name 的後面加上一个 <div> 并利用 [hidded] 来控制是否显示仅告讯息
<label for="name">Name</label>
<input
  type="text"
  class="form-control"
  id="name"
  [(ngModel)]="model.name"
  name="name"
  required
  #name="ngModel"
/>
<div [hidden]="name.valid || name.pristine" class="alert alert-danger">
  Name is required
</div>
当 name 的值是 valid 和 pristine 的时候会将这个警告区域隐藏,而当输入值为 invalid 实则会显示

Submit the form with ngSubmit
在使用者填写完表单後应该要有一个功能是提交使用者所写的内容,以上面的例子来说就是下方的 submit 按钮,但是目前还没对他进行任何处理所以点了也没反应,接着要来对这个按钮进行更改
-
首先在
<form>中添加一个 event binding,将(ngSubmit)绑定上去<form (ngSubmit)="onSubmit()" #heroForm="ngForm"> -
接着使用 template variable
#heroForm来当作 submit 按钮是否可以被点击(是否所有内容都 valid),并将他的 type 改为submit<button type="submit" class="btn btn-success" [disabled]="!heroForm.form.valid">Submit</button> -
在 hero-form.component.ts 中更改 onSubmit method
import { Component, ViewChild } from '@angular/core'; // (1) import { NgForm } from '@angular/forms'; import { Hero } from '../hero'; @Component({ selector: 'app-hero-form', templateUrl: './hero-form.component.html', styleUrls: ['./hero-form.component.css'], }) export class HeroFormComponent { @ViewChild('heroForm', { static: true }) heroForm!: NgForm; // (2) powers = ['Really Smart', 'Super Flexible', 'Super Hot', 'Weather Changer']; model = new Hero(18, 'Dr IQ', this.powers[0], 'Chuck Overstreet'); submitted = false; constructor() {} onSubmit() { console.log(this.heroForm.value); // (3) this.submitted = true; } }- (1): 从
@angular/core中引入ViewChild - (2) 利用 @ViewChild 获得访问 template 中的
heroForm - (3) 当使用者按下 submit 按钮时显示目前 Form 中所有栏位的内容(真实情况可以将这一组数据做别的处理)
- (1): 从

结论
本章中介绍了如何建立一个 template-driven form,可以对数据进行修改、验证等等,使用 [(NgModel)] 双向绑定 component 中的 property,使用 ngModel 中的 valid 来判断使用者输入的内容是否符合规定,至於 submit 按钮的 event binding 并不像之前的例子一样绑定在 <button> 上,而是要将 (ngSumbit) 绑定在 <form> 上,这样才可以获得整个 form 的内容,而在 component 中要获得表单的内容需要使用 @ViewChild 绑定 <form> 上的 template variable。
下一篇将要介绍 Angualr 中的另一种 form,Reactive forms 他相较於 template form 来说会复杂一点,但是比较有弹性且比较可测试性,对於大型的 form 来说是非常好用且方便的,详细的内容就明天再讲解吧,那麽明天见吧。
Reference
<<: Angular 深入浅出三十天:表单与测试 Day09 - 整合测试实作 - 登入系统 by Reactive Forms
>>: Day09-为了让表单资料不要太过自大,给予其正确的绝望-Validation(II)
Day22 春天下的第一场雨-蚂蚁上树
蚂蚁上树是一道家常的川菜,据说与窦娥的故事有关,相传窦娥有次因家里经济拮据,苦苦央求肉贩而得一小块...
开放最短路径优先 (OSPF)
-动态路由(来源:Wayne Hickey) OSPF 可以作为路由器的一个组成部分运行;它还可以...
【Day04】Component 与 Props
关於 Component 可理解为程序中彼此独立、可重组、拆分、复用的一种积木单元 每个 Compo...
[Day5] 第一章贴图
今日目标 载入图片,画出第一张图 stb_image.h 第三天-驱动OpenGL这篇有稍稍提到这个...
VSCode 套件推荐系列
身为一名工程师,将文字编辑器打造出具个人风格也是理所当然的。VSCode 是现在主流的文字编辑器,也...