【Day 08】 实作 - 透过 AWS 服务 - AppFlow 把 Google Analytics 资料存放至 AWS 中 ( 1 )
今天我们来实作怎麽『 透过 AWS 服务把 Google Analytics 资料撷取存放至 AWS 中』,流程如下所示:
- 创建 S3 Bucket
- 建置 Google Cloud PlatformOAuth 2.0 用户端 ID 以及设定允许 AWS AppFlow 使用
- 启用 Google API
- 建立 AppFlow 与 Google Analytics 的连线
那我们就开始吧! 
1. 创建 S3 Bucket
我们要有地方可以存放 Google Analytics 资料,故我们在 AWS 中创建一个 S3 Bucket:
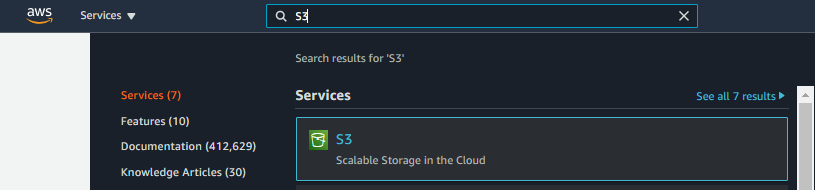
步骤一、登入 AWS Console 并搜寻 S3
步骤二、点选 Create bucket 後,输入 Bucket name、区域选 Tokyo,其他维持预设後 Create bucket
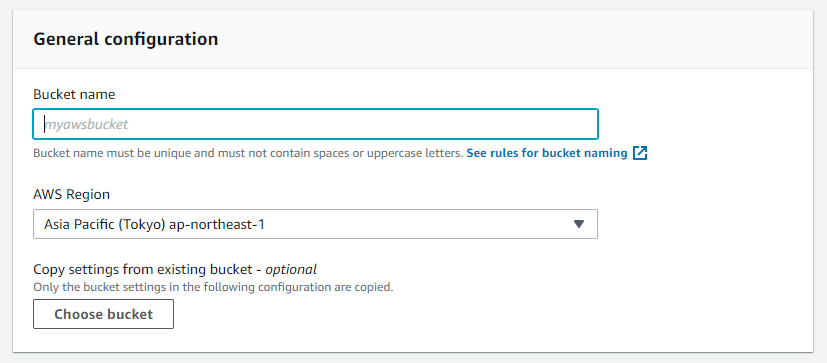
我们就成功於 AWS 建立一个储存区域
2. 建置 Google Cloud PlatformOAuth 2.0 用户端 ID 以及设定允许 AWS AppFlow 使用
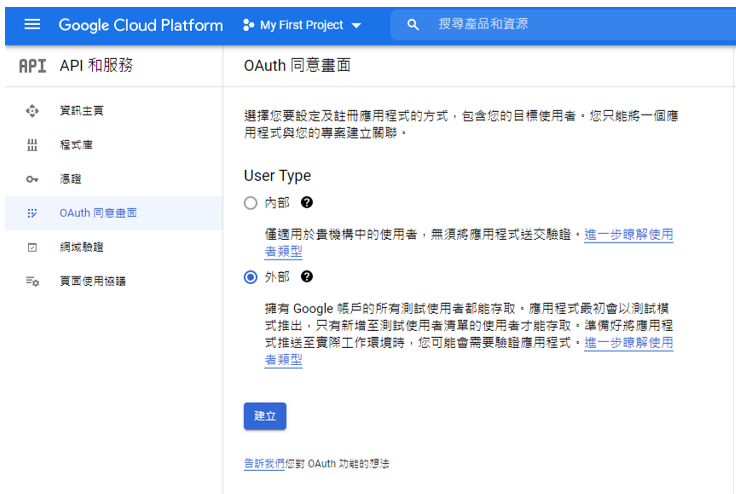
步骤一、点击连结 https://console.developers.google.com 并点选 OAuth 同意画面後,User Type 选外部後按建立
步骤二、创建一个名为 AppFlow 的应用程序。输入相关资讯,并添加 amazon.com 为授权网域後按储存并继续
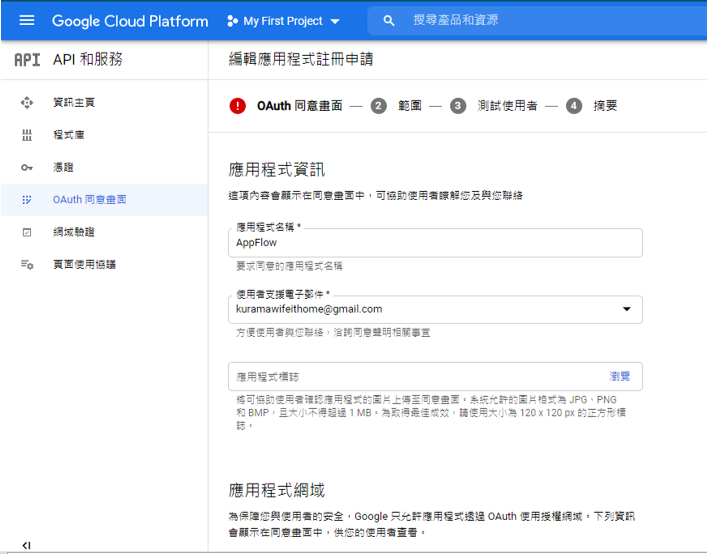
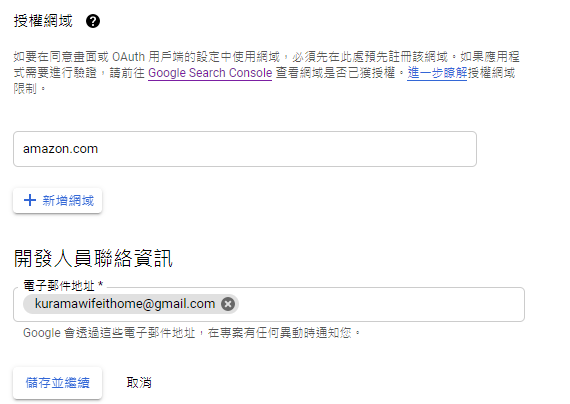
★小叮咛★ 务必确认此应用程序已推送到『实际工作环境』,而非测试中的状态喔~

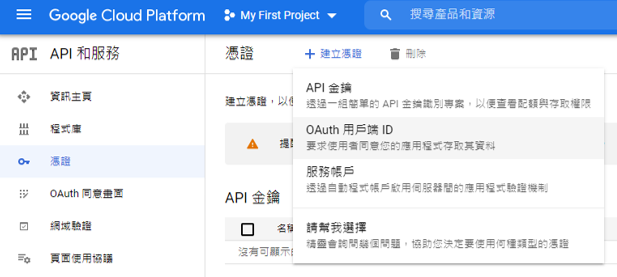
步骤三、点选凭证,创建一个新的 OAuth 用户端 ID。将应用程序类型设置为 网页应用程序,并输入名称

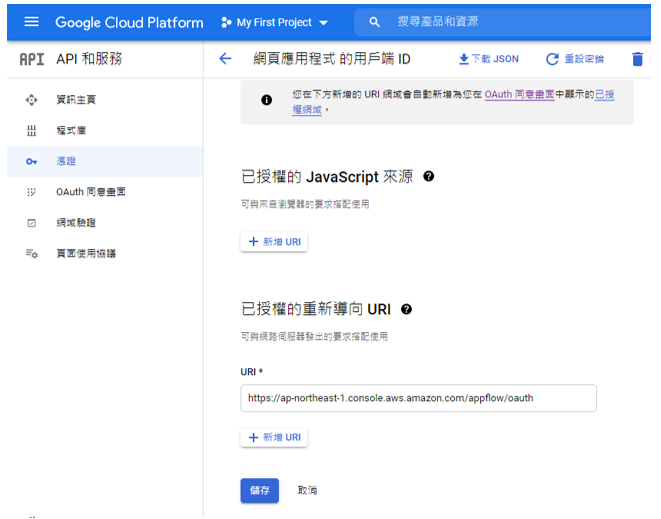
步骤四、设定已授权重新导向URL:
- 若你想把 AWS Appflow 建在区域为 us-east-1,则 https://console.aws.amazon.com/appflow/oauth
- 其他区域为 https: //<< region >>.console.aws.amazon.com/appflow/oauth
我们要将AWS AppFlow 建置在东京( ap-northeast-1 ),故如图所示设定:
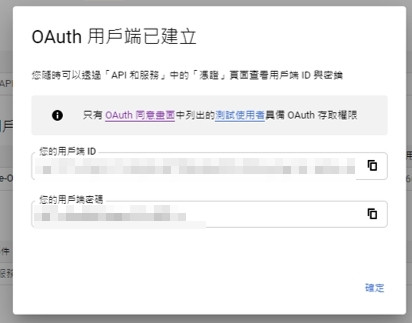
步骤五、储存後会跳出 ID 以及密码的视窗~之後我们只要在 Amazon AppFlow 输入 ID 和密码,那麽就可以将资料汇整到 AWS
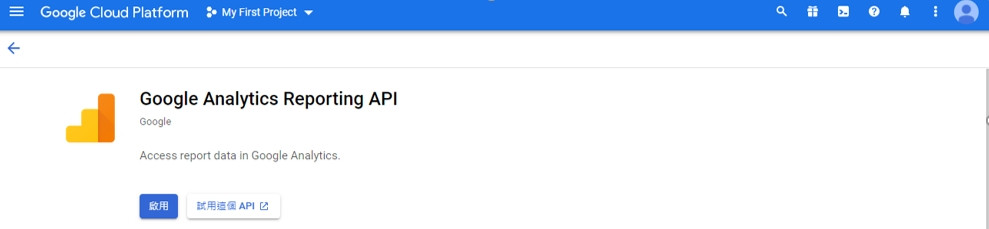
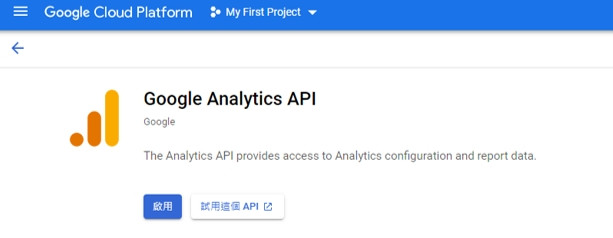
3. 启用 Google API
启用以下两个 API
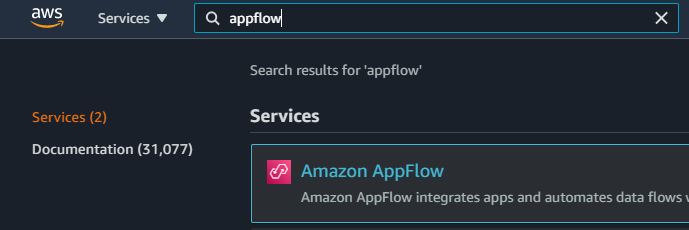
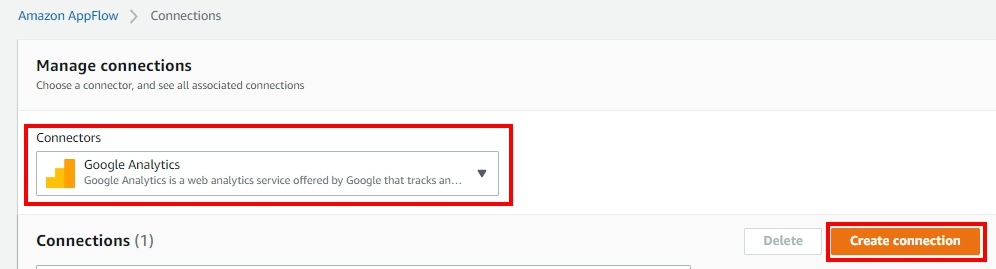
4. 建立 AppFlow 与 Google Analytics 的连线
步骤一、於 AWS Console 搜寻 AppFlow 服务
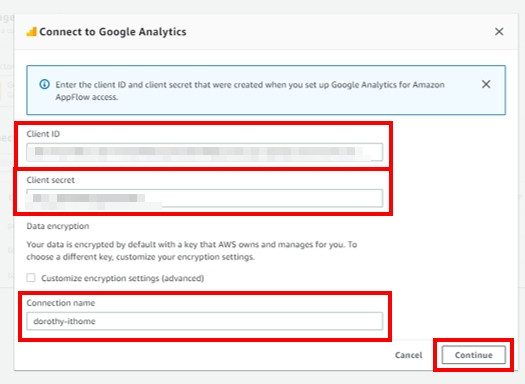
步骤二、点选左侧选单的 connections 後,Connectors 选择 Google Analytics 後按 Create connection
步骤三、输入先前生成的编号以及密码後按 Continue
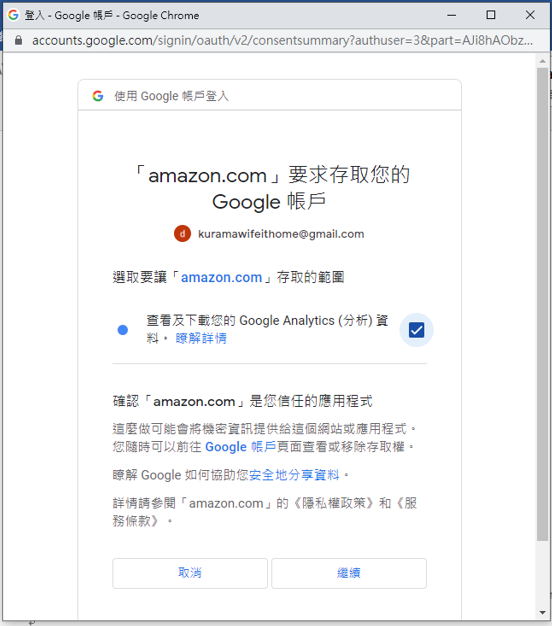
步骤四、接着就会跳出一个新视窗,将你重定向到 Google Analytics 登录页面。只要登入你的帐号後确认授予 Amazon AppFlow 访问您的 Google Analytics 帐户的权限。
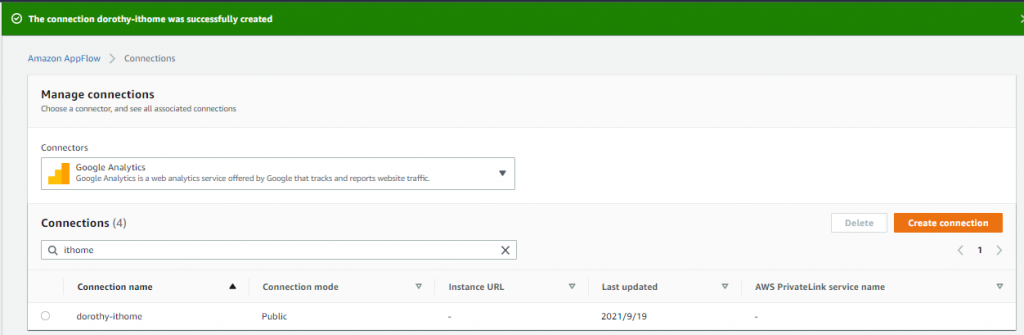
现在我们已经建立起 AppFlow 与 Google Analytics 的连线了~
接着我们就可以透过 AWS Console 的 UI 介面来拉取 Google Analytics Report 的资料罗~ 那下半段的操作,就明天继续完成~ 我们明天见:)
如果有任何指点与建议,也欢迎留言交流,一起漫步在 Data on AWS 中。
参考&相关来源:
- Google Analytics on AWS
https://docs.aws.amazon.com/zh_tw/appflow/latest/userguide/google-analytics.html
<<: DAY 10 『 UIAlertController 』Part1
>>: day7: CSS style 规划 - CSS in JS(emotion 使用 - 1)
Re: 新手让网页 act 起来: Day05 - 建立元件
昨天我们提到了该如何撰写 JSX,今天就来学习怎麽建立元件,来把同类型的 React element...
[Python学习笔记] 文件I/O-Day2
读取键盘输入 input函数 读取和写入标准输入和输出 开启的txt档案会写入 程序中的"...
[Day 21] Crypto 小烧声
今天的标题一样和 Crypto 没关联 解完题目再来分享 今天干大事来挑战解200分的题 Flags...
【Day24】维持权限 — 隐藏後门(一)
哈罗~ 来review一下, 之前提到维持权限时, 攻击者会建立後门或Rootkit, 并且会隐藏其...
Day-11 Excel资料横条及图示标注
今日练习档 ԅ( ¯་། ¯ԅ) 今天将延续昨日的内容,将介绍另外两种同样重要的标记功能,资料横条及...