Swift纯Code之旅 Day6. 「新增闹钟的第一步 - 新增新增闹钟页面」
你说这趟纯Code之旅都过了五天了,连闹钟的影子都没看到?
先别着急,我们今天就是要来实作新增闹钟的第一步。
还记得我们昨天已经将新增闹钟的按钮建好了吗?,今天就要来对他动手动脚,让他按下去有效果。
可以看到IPhone内建闹钟按下 + 按钮後,会有一个新增闹钟的页面由下往上跳出来。

这时候呢就要用到「Present」这个Function来让画面由下而上跳出来,啊你说跳就跳哦?谁知道要跳哪个画面出来?
没错!所以在实作跳画面之前,需要先建立一个画面!我们就将它命名为:「AddAlarmViewController」
命名在写程序很重要,无论是Function、变数、画面,一个好的命名可以为使用者省掉很多读Code的时间。
忘记怎麽新增画面的话,可以去前几篇文章帮我复(刷) 习(刷) 一(流) 下(量)。
新增完後让我们回到「AlarmViewController」内,在「addAlarm」中加入以下程序码:
@objc func addAlarm() {
        let vc = AddAlarmViewController()
        present(vc, animated: true, completion: nil)
    }
简单说明一下上面的程序码,首先我们建立了一个变数:「vc」,里面装着「AddAlarmViewController」
之後用 present() 将这个画面由下往上跳出来。
present()总共有三个引数,其代表意义分别为:
- 要将哪个画面由下往上跳出来
- animated -> (跳出来时是否要有动画)
- completion -> (跳出来後要执行哪些东西)
所以我们这边写present(vc, animated: true, completion: nil)就意味着:
要将「vc」这个画面从下往上跳出来,并且要有动画,跳出来後不执行任何动作。
最後呢,我们再回到「AddAlarmViewController」内,将他的背景色更改一下:
class AddAlarmViewController: UIViewController {

    override func viewDidLoad() {
        super.viewDidLoad()
        self.view.backgroundColor = .systemBlue
    }
}
马上执行程序看看会发生什麽事吧!

太~神~辣~ 相信各位看到自己做出这个效果一定很感动。
想当初我做出这个效果还到处去跟家人炫耀XD
现在让我们让画面更像IPhone的闹钟吧,你可以看见IPhone的新增闹钟页面也有Navigation Bar,
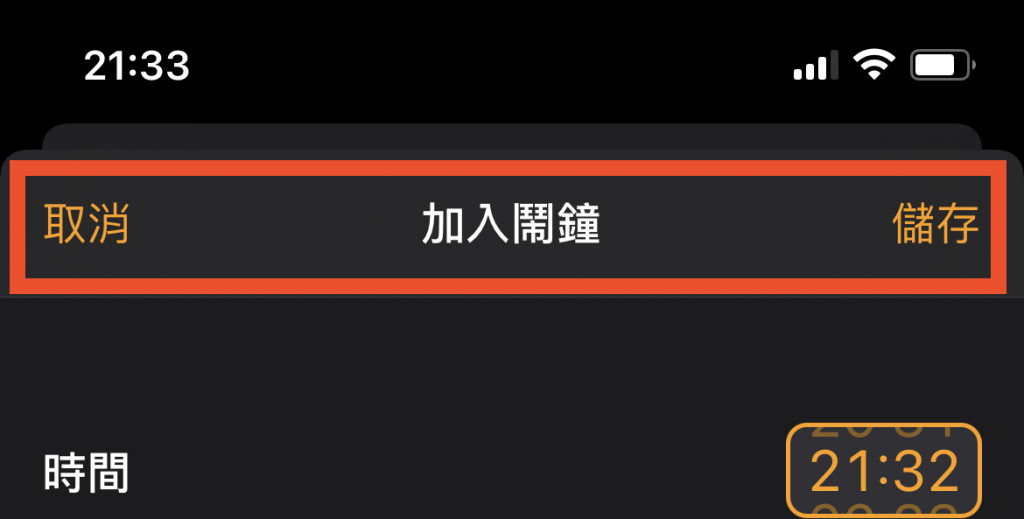
因此我们必须动点手脚让这片蓝色的画面变得更像IPhone的新增闹钟画面
首先先宣告一个变数「nv」,用来装 变成NavigationController的「vc」画面
因为要让「vc」可以有Navigation Bar,因此必须让 vc 变成 NavigationController
@objc func addAlarm() {
        let vc = AddAlarmViewController()
        let nv = UINavigationController(rootViewController: vc)
        present(nv, animated: true, completion: nil)
    }
然後再到「AddAlarmViewController」去设定他的Navigation Bar吧:
前几天都有说过,各位可以挑战看看 ,真的遇到困难再往下参考我的写法唷!
class AddAlarmViewController: UIViewController {

    override func viewDidLoad() {
        super.viewDidLoad()
        self.view.backgroundColor = .black
        setNavigation()
    }

    func setNavigation() {
        // Set Navigatoin title
        self.title = "加入闹钟"

        //Set Navigation Title Color
        self.navigationController?.navigationBar.titleTextAttributes =  [.foregroundColor: UIColor.white]

        //Set Navigation Bar Background Color
        self.navigationController?.navigationBar.barTintColor = #colorLiteral(red: 0.1669761635, green: 0.1807887411, blue: 0.2008549854, alpha: 1)

        //Left Button
        let cancelButton = UIBarButtonItem(title: "取消",
                                         style: .plain,
                                         target: self,
                                         action: #selector(backToMain))
        cancelButton.tintColor = .orange
        self.navigationItem.leftBarButtonItem = cancelButton

        //Right Button
        let saveButton = UIBarButtonItem(title: "储存",
                                        style: .plain,
                                        target: self,
                                        action: #selector(saveAlarm))
        saveButton.tintColor = .orange
        self.navigationItem.rightBarButtonItem = saveButton
    }

    @objc func saveAlarm() {

    }

    @objc func backToMain() {

    }
}
是不是真的很像了

<<: Day2:开启使用Parrot Security的Harvester来收集email清单
[Day 02] 环境建置(一) - 安装VS Code、NodeJS
Day 02 和 Day 03 我们会来将环境建置完毕,环境安装完成後就可以开始使用SASS了! 我...
完赛!YA!关於 Vue.js 进阶心法系列
其实原本不是要叫这个名字的。原本要叫《官网没教你的「如何把 Vue 写好」》但是太狂了,竟然敢代替官...
Progressive Web App 推播协定 (26)
之前已经可以用後端的套件去实作推播的服务器,但那个套件实际上做了哪些事情? 金钥对 Applicat...
[Day 13]Template应用
大家好,明明才第13天,我已经不知道要发什麽文了呜呜╯︿╰,但难产生出的文还是一样充满了知识!!希望...
用 tkinter 实现选择路径打开 excel ,并用 tree view 显示
引注资料 https://blog.csdn.net/weixin_43184622/article...