[Android Studio 30天自我挑战] Timer计时器练习
今天利用Timer来完成计时器的APP练习
Timer是一个普通的类,其中有几个重要的方法;
而TimerTask则是一个抽象类,其中有一个抽象方法run(),
类似执行绪中的run()方法,我们使用Timer建立一个他的物件,
然後使用这物件的schedule方法来完成这种间隔的操作。
Timer就是一个执行绪,使用schedule方法完成对TimerTask的排程,
多个TimerTask可以共用一个Timer,也就是说Timer物件呼叫一次schedule方法就是建立了一个执行绪,
并且呼叫一次schedule後TimerTask是无限制的回圈下去的,
使用Timer的cancel()停止操作。当然同一个Timer执行一次cancel()方法後,所有Timer执行绪都被终止。
先来设计xml:
<?xml version="1.0" encoding="utf-8"?>
<LinearLayout xmlns:android="http://schemas.android.com/apk/res/android"
xmlns:app="http://schemas.android.com/apk/res-auto"
xmlns:tools="http://schemas.android.com/tools"
android:layout_width="match_parent"
android:layout_height="match_parent"
android:orientation="vertical"
tools:context=".MainActivity">
<androidx.appcompat.widget.Toolbar
android:layout_width="match_parent"
android:layout_height="wrap_content"
android:background="@color/grey">
<Button
android:layout_width="wrap_content"
android:layout_height="wrap_content"
android:text="RESET"
android:background="@null"
android:textColor="@color/red"
android:textSize="30sp"
android:onClick="resetTapped"/>
<TextView
android:layout_width="wrap_content"
android:layout_height="wrap_content"
android:text="TIMER"
android:textColor="@color/black"
android:layout_gravity="center"
android:textSize="30sp"/>
<Button
android:layout_width="wrap_content"
android:layout_height="wrap_content"
android:text="START"
android:id="@+id/startStopButton"
android:background="@null"
android:textColor="@color/green"
android:textSize="30sp"
android:layout_gravity="end"
android:layout_marginRight="15dp"
android:onClick="startStopTapped"/>
</androidx.appcompat.widget.Toolbar>
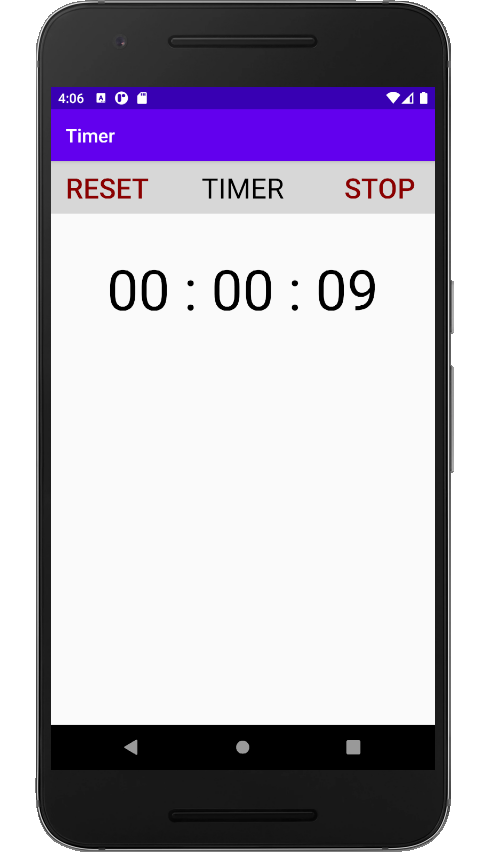
<TextView
android:layout_width="wrap_content"
android:layout_height="wrap_content"
android:id="@+id/timerText"
android:textSize="60sp"
android:text="00 : 00 : 00"
android:textColor="@color/black"
android:layout_gravity="center"
android:layout_marginTop="40dp"/>
</LinearLayout>
接着设定MainActivity.java
package codewithcal.au.timer;
import androidx.appcompat.app.AlertDialog;
import androidx.appcompat.app.AppCompatActivity;
import androidx.core.content.ContextCompat;
import android.content.Context;
import android.content.DialogInterface;
import android.os.Bundle;
import android.view.View;
import android.widget.Button;
import android.widget.TextView;
import java.util.Timer;
import java.util.TimerTask;
public class MainActivity extends AppCompatActivity
{
TextView timerText;
Button stopStartButton;
Timer timer;
TimerTask timerTask;
Double time = 0.0;
boolean timerStarted = false;
@Override
protected void onCreate(Bundle savedInstanceState)
{
super.onCreate(savedInstanceState);
setContentView(R.layout.activity_main);
timerText = (TextView) findViewById(R.id.timerText);
stopStartButton = (Button) findViewById(R.id.startStopButton);
timer = new Timer();
}
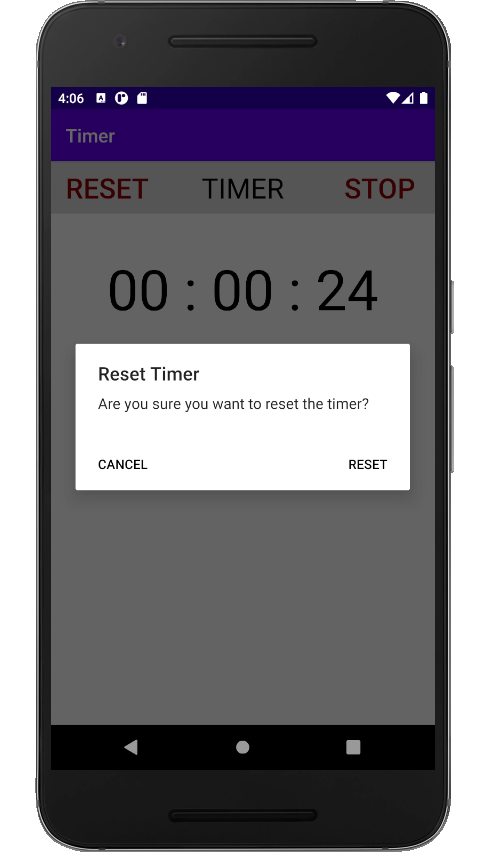
public void resetTapped(View view)
{
AlertDialog.Builder resetAlert = new AlertDialog.Builder(this);
resetAlert.setTitle("Reset Timer");
resetAlert.setMessage("Are you sure you want to reset the timer?");
resetAlert.setPositiveButton("Reset", new DialogInterface.OnClickListener()
{
@Override
public void onClick(DialogInterface dialogInterface, int i)
{
if(timerTask != null)
{
timerTask.cancel();
setButtonUI("START", R.color.green);
time = 0.0;
timerStarted = false;
timerText.setText(formatTime(0,0,0));
}
}
});
resetAlert.setNeutralButton("Cancel", new DialogInterface.OnClickListener()
{
@Override
public void onClick(DialogInterface dialogInterface, int i)
{
//do nothing
}
});
resetAlert.show();
}
public void startStopTapped(View view)
{
if(timerStarted == false)
{
timerStarted = true;
setButtonUI("STOP", R.color.red);
startTimer();
}
else
{
timerStarted = false;
setButtonUI("START", R.color.green);
timerTask.cancel();
}
}
private void setButtonUI(String start, int color)
{
stopStartButton.setText(start);
stopStartButton.setTextColor(ContextCompat.getColor(this, color));
}
private void startTimer()
{
timerTask = new TimerTask()
{
@Override
public void run()
{
runOnUiThread(new Runnable()
{
@Override
public void run()
{
time++;
timerText.setText(getTimerText());
}
});
}
};
timer.scheduleAtFixedRate(timerTask, 0 ,1000);
}
private String getTimerText()
{
int rounded = (int) Math.round(time);
int seconds = ((rounded % 86400) % 3600) % 60;
int minutes = ((rounded % 86400) % 3600) / 60;
int hours = ((rounded % 86400) / 3600);
return formatTime(seconds, minutes, hours);
}
private String formatTime(int seconds, int minutes, int hours)
{
return String.format("%02d",hours) + " : " + String.format("%02d",minutes) + " : " + String.format("%02d",seconds);
}
}
这样就完成啦

此篇Timer以及TimerTask参考至
https://codertw.com/%E7%A8%8B%E5%BC%8F%E8%AA%9E%E8%A8%80/314240/
<<: [ 卡卡 DAY 29 ] - React Native iOS 打包步骤及离线 jsbundle产生
>>: Day29 - [Shioaji] 超入门!永丰证券程序交易API快速上手 (2)
2.4.17 Design System - Tooltip
Tooltip 元件主要用作提供一些协助资讯给用户 在 checklist 上的说明是只会发生在桌机...
Day11 - this&Object Prototypes Ch3 Objects - Contents - Existence
作者说明了两种确认 object 特定 property 是否存在的方式 in operator:p...
[Day 18] Mattermost - 设定
设定 这里我简单介绍几个我觉得实用的功能唷!! 主题切换 官方提供的主题不好看啊~~~想自订主题怎麽...
将机器人部属到网路上去
开始部属 点击 登入後会看到这个画面 点击左上方的加号 进行第一次的线上coding 在main上输...
Day 4:AWS是什麽?30天从动漫/影视作品看AWS服务应用 -《Vivy -Fluorite Eye's Song》Part 4
虽然被断赛了,但既然是自我挑战,亦无关乎系统连贯的程度吧。大家记得准时发文www 第七、八集中,着名...