[ 卡卡 DAY 29 ] - React Native iOS 打包步骤及离线 jsbundle产生
因为实在有太多东西想分享了,但已经 29 天了
我们先来个 iOS 打包步骤
完成开发後再来就是要如何打包及送审发布
今天来尝试分享这部分吧!
打包前情提要
基本上我们会在 iOS 的目录里放 main.jsbundle,和打包 React Native Android 不同的地方是我们无法一个步骤就打包玩 iOS。我们需要将 JS 代码及图档打包导出,再通过 XCode 放入 iOS 目录里。
如何导出 js bundle 呢?
react-native bundle
--platform ios --dev false // 哪个装置 iOS/android
--entry-file index.js // iOS/android 入口的 js 名称
--bundle-output ./ios/main.jsbundle  // 生成 jsbundle 的名称
--assets-dest ./ios // 图片资源生成的路径
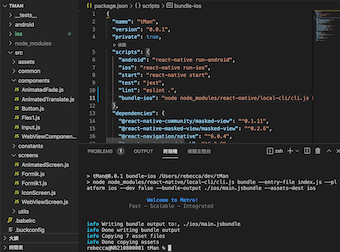
因为要时常打包而我会在 package.json 中增加编字的指令
  "scripts": {
    "bundle-ios": "node node_modules/react-native/local-cli/cli.js bundle --entry-file index.js --platform ios --dev false --bundle-output ./ios/main.jsbundle --assets-dest ios"
   },
下指令即可打包生成离线资源
npm run bundle-ios
开始
-
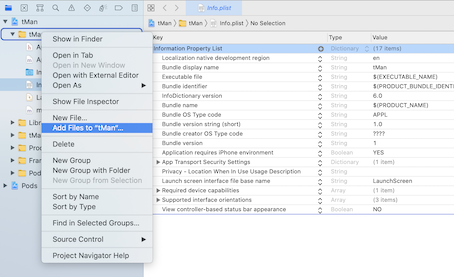
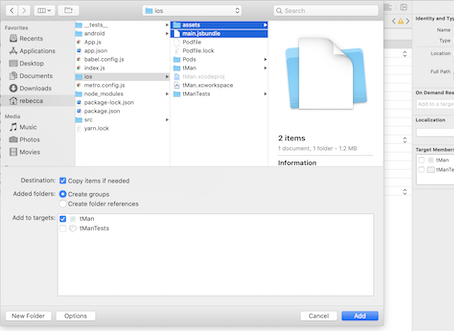
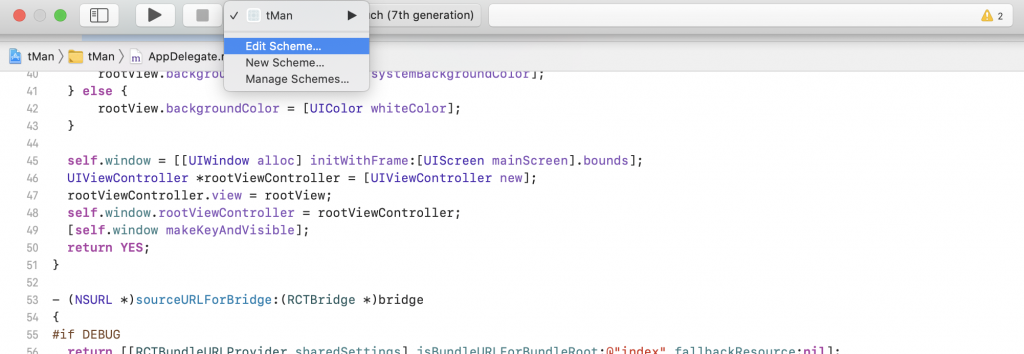
打开 xcode 开起 {档名}.xcodeProj 档案
-
参照以下步骤加入档案 main.jsbundle and asset folder 选择 create folder reference,参照下图
- 设定 AppDelegate.m 档案
- (NSURL *)sourceURLForBridge:(RCTBridge *)bridge
{
#if DEBUG // 测试 debug
  return [[RCTBundleURLProvider sharedSettings] jsBundleURLForBundleRoot:@"index" fallbackResource:nil];
#else
  // 如果妹有使用CodePush正式 release,使用A:
  return [[NSBundle mainBundle] URLForResource:@"main" withExtension:@"jsbundle"];

  //如果有使用CodePush那我们就可以直接透过CodePush来读取本地的jsbundle,使用B:
  return [CodePush bundleURL];
#endif }
-
如何控制 debug / release 呢?
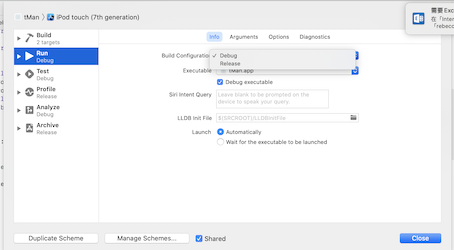
-
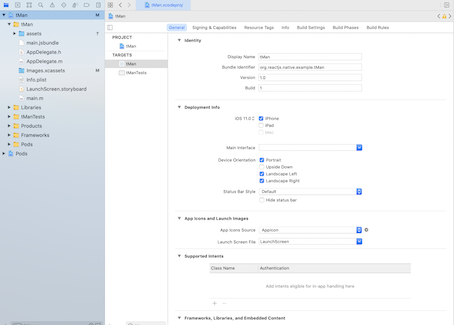
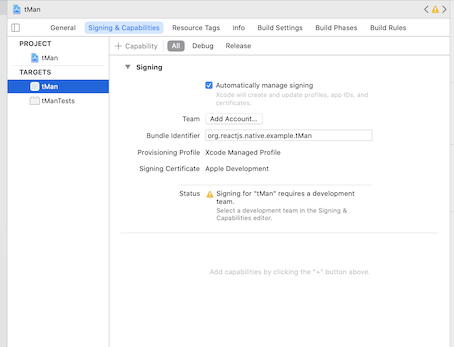
General / Signing & Capabilities 设定
修改 Version 和 Buildk 版好,写入 bundle Identifier,选择 Provisioning profile 为此专案的叙述文件
-
与 iOS 一样需要一个 AppStore account
iOS 开发者帐号申请实录 -
打包及部署
- 先将设备设定成 build only device / ios device
- 点击 Product Archive 开始打包
- 按 dustribute App
- 选择部署方式
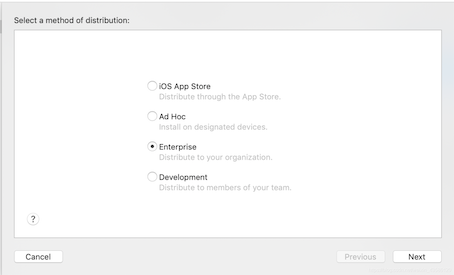
- 在 iotApp.app 选择安装的证书,按 “next”。
-
接着按 export ,会弹出文件夹,选择一个自己好找的目录即可。 ipa 就会存放在这里。
-
将生成的 ipa 上传到 itunes 连接帐户,且提交审核即可。
Day 29 done ~~ 请多多指教
>>: [Android Studio 30天自我挑战] Timer计时器练习
Progressive Web App 推播通知: 网站推播通知用户端实作入门 (24)
什麽是网站推播通知 推播通知不管对 App 或是网站来说都是一种重新吸引用户来使用 App 的方法,...
[常见的自然语言处理技术] N-Gram Model 与关键字预测 (II)
前言 上次我们提到,语言模型( language model, LM )就是赋予一段文句机率值。 在...
[Day04] CH03:各式运算子(上)
今天要介绍的是运算子(Operator),在程序语言中有分为: 指定运算子 「=」可以把右侧的东西指...
电源供应
电源是一种向电力负载提供电力的电气设备。电源的主要功能是将电流从源头转换成正确的电压、电流和频率,为...
14【推坑】考 APCS 升大学大有优势
提完了那麽多有关 APCS 的事,这次想要分析考 APCS 能够有怎样的好处。 权威性: APCS ...