Day [29] Azure Custom Vision-Line Chatbot整合(一)
Line Messaging API-Get User content
今天带大家整合目前开发的Line Chatbot与昨天建置的Custom Vision模型整合。
首先我们先处理使用者在官方帐号输入照片的Image Webhook Event其资料格式如下:
{
  "destination": "xxxxxxxxxx",
  "events": [
    {
      "replyToken": "nHuyWiB7yP5Zw52FIkcQobQuGDXCTA",
      "type": "message",
      "mode": "active",
      "timestamp": 1462629479859,
      "source": {
        "type": "user",
        "userId": "U4af4980629..."
      },
      "message": {
        "id": "325708",
        "type": "image",
        "contentProvider": {
          "type": "line"
        }
      }
    }
  ]
}
可以看到Image Webhook Event的资料中并无任何关於照片的资料,是因为Webhook并不会真的把照片的资料拿来传送,实际上照片是储存在Line Platform,我们收到的Webhook Event只是告诉我们官方帐号收到照片的事件,那如果想要取得该照片该怎麽做呢?
Line有提供Get content by users API,可参考Line Messaging API-Get content sent by users
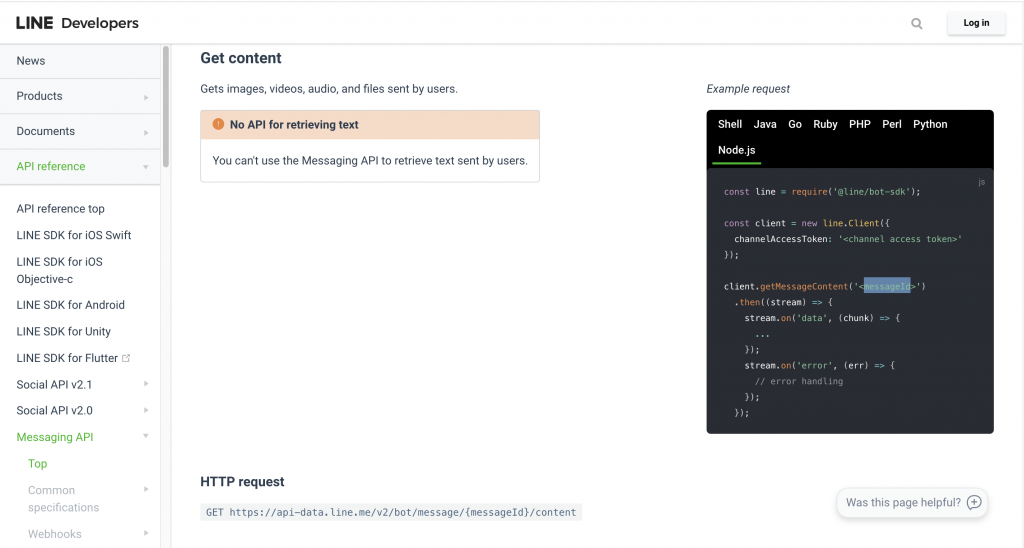
Get content API透过用户输入讯息的messageId取得该讯息的images, videos, audio,files等档案资料,messageId可由上方Image Webhook Event资料中取得。
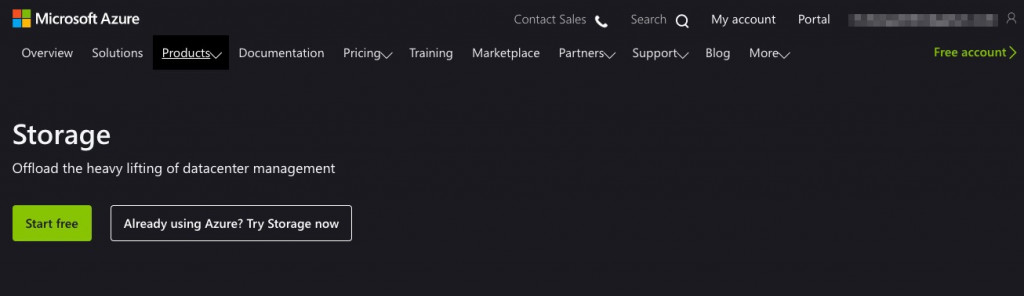
当应用需求会需要储存用户输入的图片,这时候可以使用Azure Storage,其Node.js SDK如何操作可参Microsoft Azure Storage SDK for Node.js
我们修改Dispatcher.ts程序,新增处理Image Webhook Event的逻辑
const messageDispatcher = async(message: EventMessage, replyToken: string, userId: string) => {
    switch (message.type) {
        case "text":
            const phrase = message.text
            await workflow.textUnderstanding(phrase, replyToken)
            break

        case "location":

            const GPS = {
                lat: message.latitude,
                lon: message.longitude
            }
            await workflow.findMaskStore(GPS, userId)
            break

        case "image":
            const messageId = message.id
            let imageBuffer = await workflow.getImageContent(messageId)
            console.log(imageBuffer)

            await workflow.predictionImage(imageBuffer, replyToken)
            break

        default:
            break
    }
}
再来在Workflow.ts中新增一支 getImageContent( ) function 取得用户输入的Image
export const getImageContent = async (messageId: string): Promise<any> => {
    let chunks = [] as Array<any>
    let imageBuffer: any

    const lineClient = new Client(LINE)

    await lineClient.getMessageContent(messageId).then(stream => {
        return new Promise((resolve, reject) => {
            stream.on('data', (chunk) => {
                chunks.push(chunk)
            });
            stream.on('end', () => {
                imageBuffer = Buffer.concat(chunks)
                resolve()
            });
            stream.on('error', () => {
                reject()
            });
        })
    }).catch(err => console.log(err))

    console.log(imageBuffer)
    return imageBuffer
}
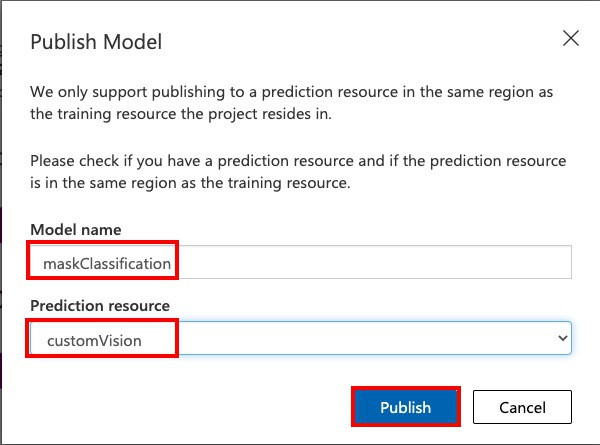
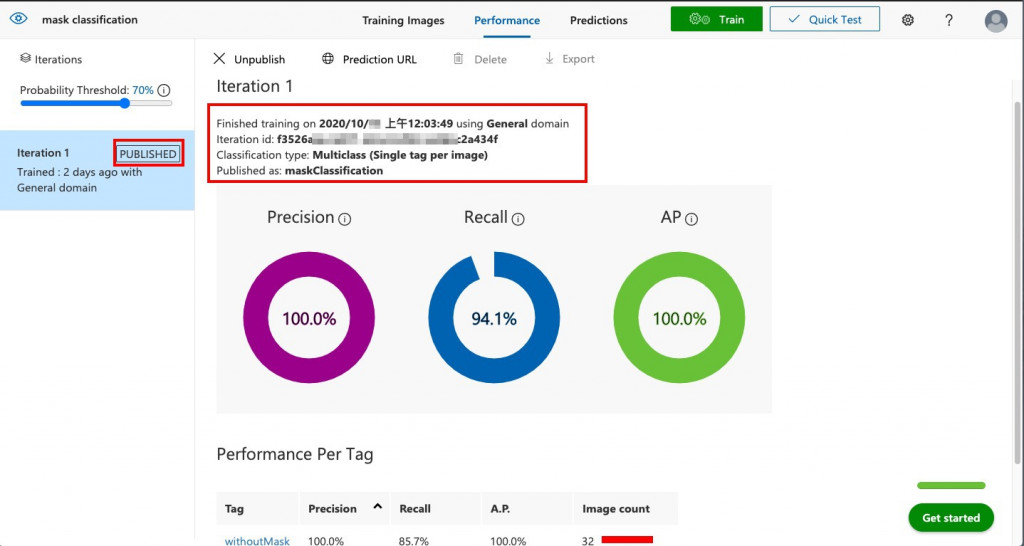
Publish your trained iteration
Day [28] Azure 认知服务-Custom Vision 建置我们已经训练完成Model,若要将影像提交至预测 API端点以程序辨识影像,必须先发布Iterations。选取 [Performance] 後点选[Publish]并指定发行的Model名称。这会让您的模型可供您自订视觉 Azure 资源的预测 API 存取。
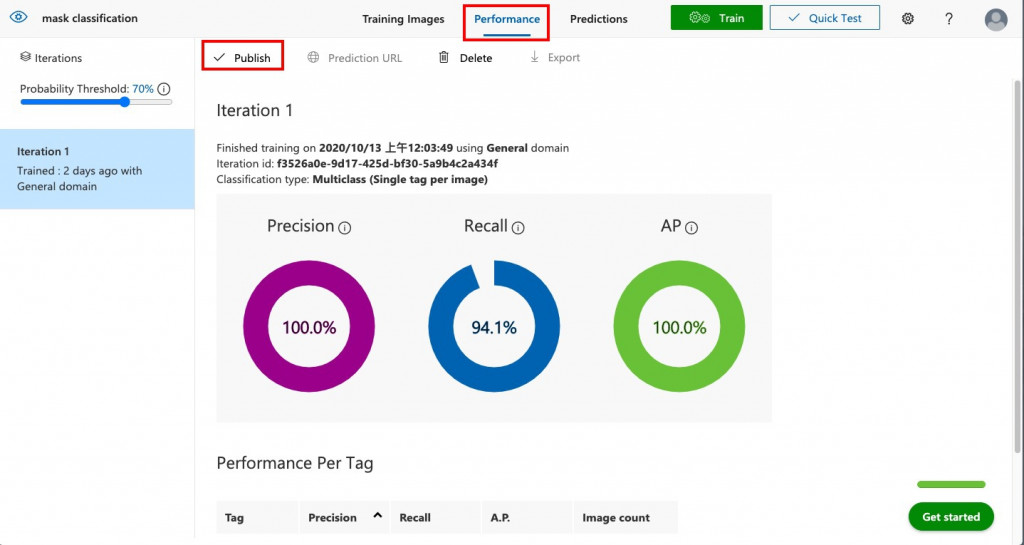
成功发布Model之後,您会看到左侧栏位中的Iterations旁出现「PUBLISHED」标签。
Get the prediction keys 设定config.ts
应用程序要使用Custon Vision SDK来辨识影像,我们需要Custon Vision专案的Project Id, Key, Endpoint 才能与服务互动。前往Custom Vision入口网站选取右上方的「齿轮图示」。 在清单中可以取得金钥等资讯如下图:
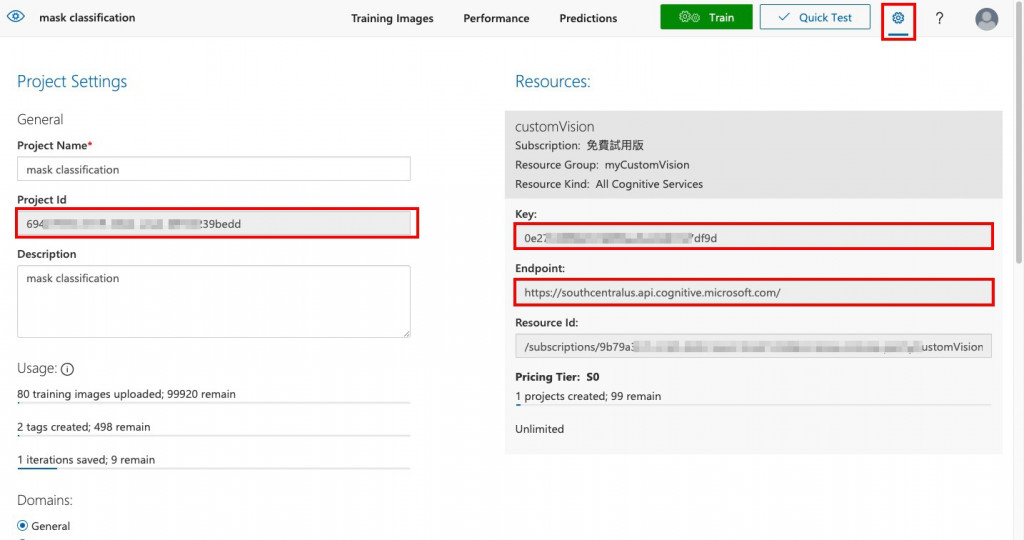
在Day [15]时我们将Chatbot会使用到的重要设定参数交由config.ts程序管理,现在我们把LUIS的金钥等重要资讯新增至config.ts:
export const CUSTOMVISION  = {
    projectId: "<REPLACE-WITH-YOUR-CUSTOMVISION-PROJECTID>",
    key: "<REPLACE-WITH-YOUR-PREDICTIONKEY>",
    endpoint: "<REPLACE-WITH-YOUR-CUSTOMVISION-ENDPOINT>"
}
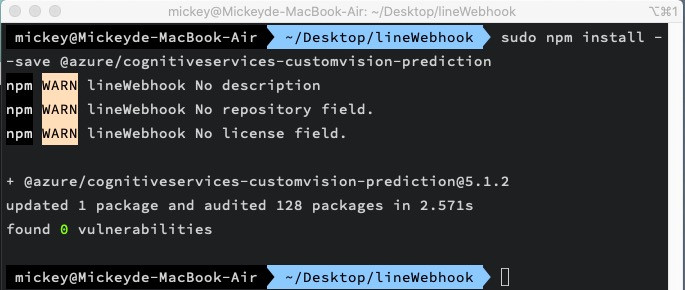
Install the Custom Vision client library
现在要我们使用Azure Custom Vision辨识图片,首先需要在Azure Functions Webhook 专案中安装Azure Custom Vision Node.js moudule,其library完整说明可参考官方文件@azure/cognitiveservices-customvision-prediction package在终端机输入npm install --save @azure/cognitiveservices-customvision-prediction
$ npm install --save @azure/cognitiveservices-customvision-prediction
完成config.ts基本设置後,明天我们将继续完成Workflow.ts中的predictionImage( ) Function,在Azure Functions中使用上面安装的Nods.js @azure/cognitiveservices-customvision-prediction Module 辨识图片以完成Chatbot的影像辨识服务!
<<: Day 29 测试 React 元件:测试 React Hook
Day 28 - [实战练习] iOS 15 介面
随着 iPhone 13 发表後,前几天 ios 15 已推出正式版,之前威尔猪的 2 篇实战都是...
百度存档列印
没百度帐号,想下载百度档案,,请问可以帮我吗? 万分感谢 ...
必然 (2) 形成ing - Becoming
永远的新手模式 「形成ing」的基本概念 科技生活是一连串的升级, 不论一种工具用了多久,无尽的升级...
Day 05 : 资料处理 Pandas (1)
excel 是很多人常用来处理报表与数据的工具,同样地在 python 也有一个套件常常在处理这件事...
[Day 30] Heroku Scheduler
架好服务器後,要订阅服务,就是要在一个时间点去捞设定资料并产生PDF并寄送email,写一个档案去做...