Day 26 - CDK 建置 Amazon Elastic Kubernetes Service(EKS)- Service
昨天介绍完了 Cluster 今天来介绍如何使用 CDK 建立 EKS Service
往常我们如果使用 kubectl 要新增服务或是控制都会需要用到 yaml 档案,但今天我们使用 CDK 部署 EKS 不用使用到 yaml,那我们要怎麽控制 Kubernetes(K8S)呢?
我们用 typescript 写 CDK 当然就是直接写 JSON 拉!是不是很神奇呢?快点跟着我看下去吧!

部署目标
在部署前我们先整理一下这次目标需要什麽
- 部署一个服务名称:hello-kubernetes
- replicas 设定为:3
- Docker Image 使用:paulbouwer/hello-kubernetes:1.5
- Container 内部 port 为:8080
- 设定一个 LoadBalancer 外部 port 为 80 对接内部的 hello-kubernetes 服务
部署 EKS Service
定义 Deployment
整理好後我们先设定 Deployment 以部署 Kubernetes(K8S)的 YAML 来说,我们要处理 Container 名称、数量、内部 Port
apiVersion: apps/v1
kind: Deployment
metadata:
  name: hello-kubernetes
spec:
  replicas: 3
  selector:
    matchLabels: hello-kubernetes
  template:
    metadata:
      labels: hello-kubernetes
    spec:
      containers:
        - name: hello-kubernetes
          image: 'paulbouwer/hello-kubernetes:1.5'
          ports:
            - containerPort: 8080
但我们说过我们这次的部署不需要 YAML 所以我们直接使用 TypeScript 来写
const appLabel = { app: "hello-kubernetes" };

const deployment = {
  apiVersion: "apps/v1",
  kind: "Deployment",
  metadata: { name: "hello-kubernetes" },
  spec: {
    replicas: 3,
    selector: { matchLabels: appLabel },
    template: {
      metadata: { labels: appLabel },
      spec: {
        containers: [
          {
            name: "hello-kubernetes",
            image: "paulbouwer/hello-kubernetes:1.5",
            ports: [{ containerPort: 8080 }],
          },
        ],
      },
    },
  },
};
Deployment 部署方法可以参考 kubernetes Documentation
定义 Service
而在部署 Kubernetes(K8S)的 Service YAML,需要处理 LoadBalancer 外部 port 与内部 Service 的对应
apiVersion: v1
kind: Service
metadata:
  name: hello-kubernetes
spec:
  type: LoadBalancer
  ports:
    - port: 80
      targetPort: 8080
  selector: hello-kubernetes
想好後转换成 TypeScript 的程序
const service = {
  apiVersion: "v1",
  kind: "Service",
  metadata: { name: "hello-kubernetes" },
  spec: {
    type: "LoadBalancer",
    ports: [{ port: 80, targetPort: 8080 }],
    selector: appLabel,
  },
};
Service 部署方法可以参考 kubernetes Documentation
设定 Manifest
往常使用 Kubernetes(K8S)我们需要使用 kubectl apply -f hello-kubernetes.yaml 而在 CDK 我们可以直接使用 addManifest 塞入 cluster 就做完了!
cluster.addManifest("mypod", service, deployment);
显示 Load Balancer
在使用 Kubernetes(K8S 需要使用 kubectl get rc,services 取得我们 Service 的位置,那使用 CDK 可以直接让它在部署的时候用 Output 直接吐出来!从此可以不用再使用 kubectl 拉!ヽ(✿゚▽゚)ノ
new cdk.CfnOutput(this, "LoadBalancer", {
  value: cluster.getServiceLoadBalancerAddress("hello-kubernetes"),
});
测试
说了这麽多我们来部署测试看看吧!虽然上面说我们不需要用到 kubectl 不过我们还是需要用它来进行测试确定系统有没有如所想的部署执行一下 cdk deploy 等它 15 ~ 30 分钟吧! ( • ̀ω•́ )
执行完後的 Output:
Outputs:
CdkEksStack.LoadBalancer = aba304eea204b4239abb905439ac8ec7-1947016485.us-west-2.elb.amazonaws.com
CdkEksStack.eksConfigCommandDB09280A = aws eks update-kubeconfig --name eksB49B8EA3-7fcd6a64ed934f00ae43ec1cb67a87fa --region us-west-2 --role-arn arn:aws:iam::869989823608:role/CdkEksStack-mastersRole634808EE-1I504Q4EPLS70
CdkEksStack.eksGetTokenCommand8952195F = aws eks get-token --cluster-name eksB49B8EA3-7fcd6a64ed934f00ae43ec1cb67a87fa --region us-west-2 --role-arn arn:aws:iam::869989823608:role/CdkEksStack-mastersRole634808EE-1I504Q4EPLS70
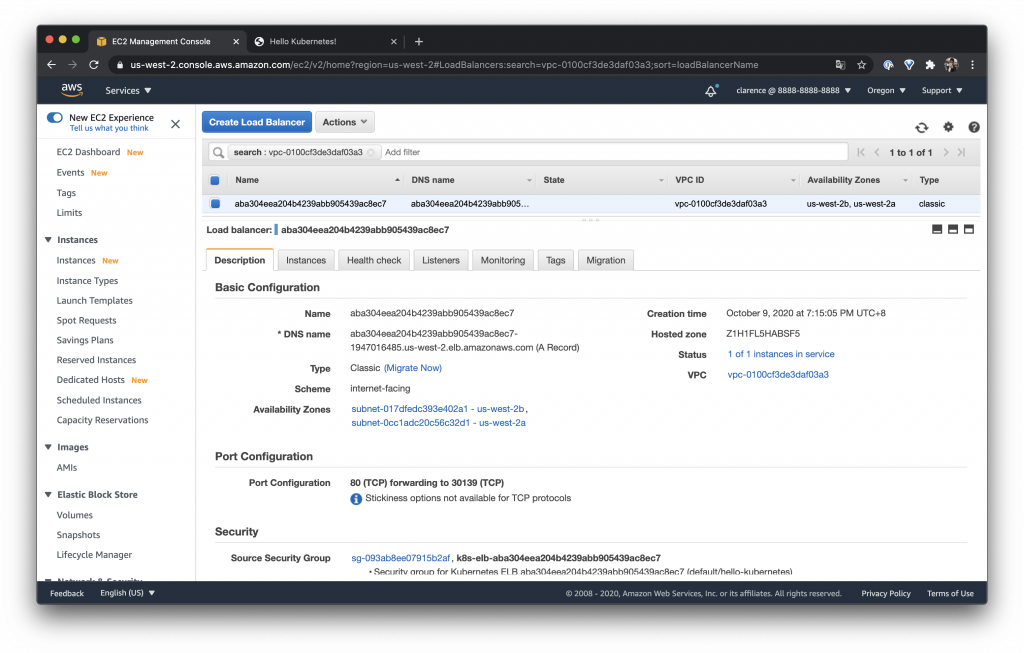
AWS Console 的 Load balancer
可以看到在 AWS Load balancer 建立了一个 classic 的服务而他的 DNS 如上面的 CDK Output
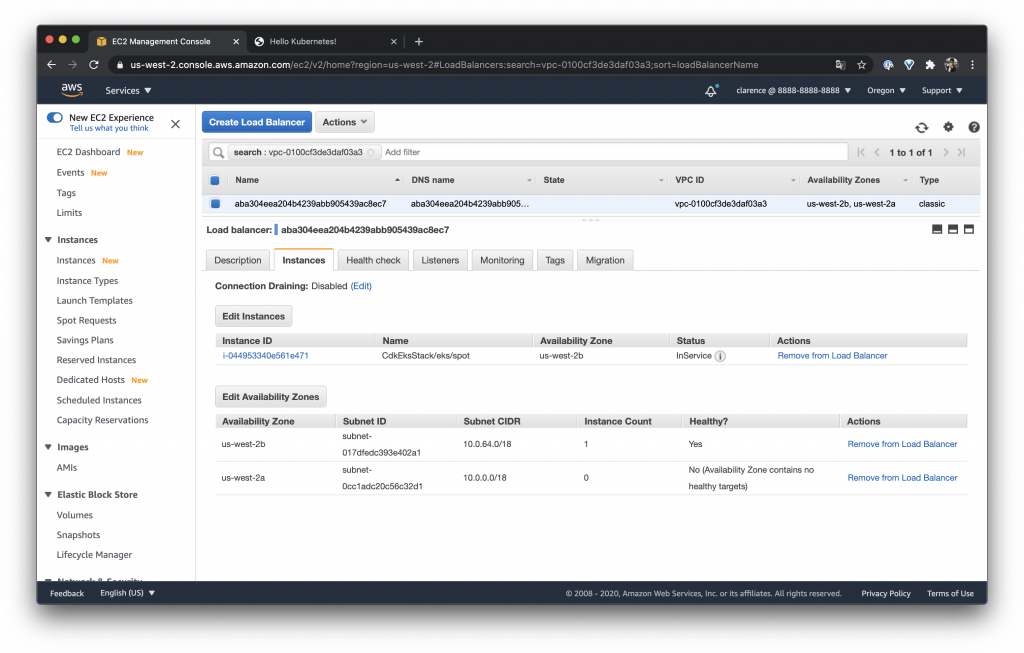
而在 Instances 可以看到我们的 Cluster 机器确实注册在这个 Load balancer 後面
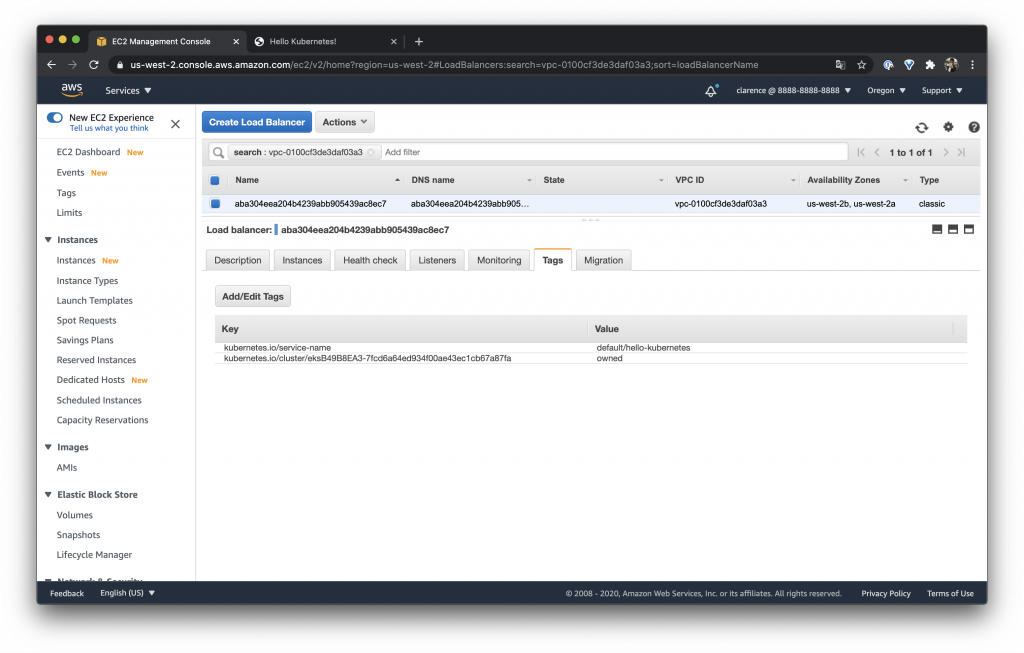
Tags 可以看到有些设定被定义
查看 Kubernetes replicas 数量
可以使用 kubectl get pods 看到我们的 replicas 确实有设定为 3
$ kubectl get pods
NAME READY STATUS RESTARTS AGE
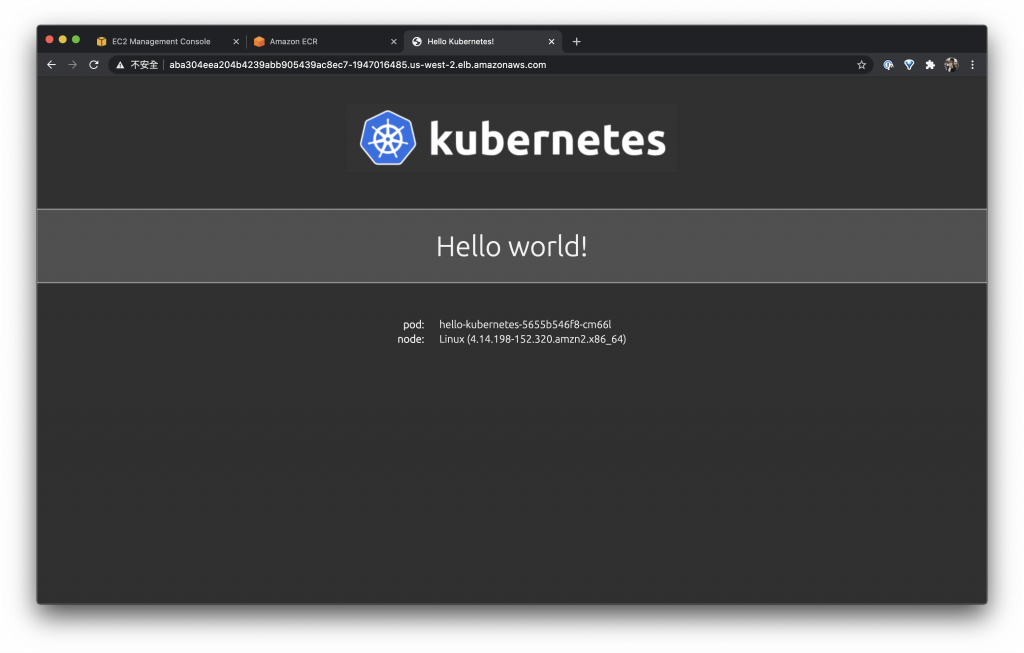
hello-kubernetes-5655b546f8-cm66l 1/1 Running 0 49m
hello-kubernetes-5655b546f8-l8xkj 1/1 Running 0 49m
hello-kubernetes-5655b546f8-msjh6 1/1 Running 0 49m
mypod 1/1 Running 0 97m
查看 Kubernetes Services 的部署状态
使用 kubectl get rc,services 查看我们的 Load Balancer 确实也与 AWS Console 显示的一样
$ kubectl get rc,services
NAME                       TYPE           CLUSTER-IP      EXTERNAL-IP                                                               PORT(S)        AGE
service/hello-kubernetes   LoadBalancer   172.20.200.52   aba304eea204b4239abb905439ac8ec7-1947016485.us-west-2.elb.amazonaws.com   80:30139/TCP   35m
service/kubernetes         ClusterIP      172.20.0.1      <none>                                                                    443/TCP        3h35m
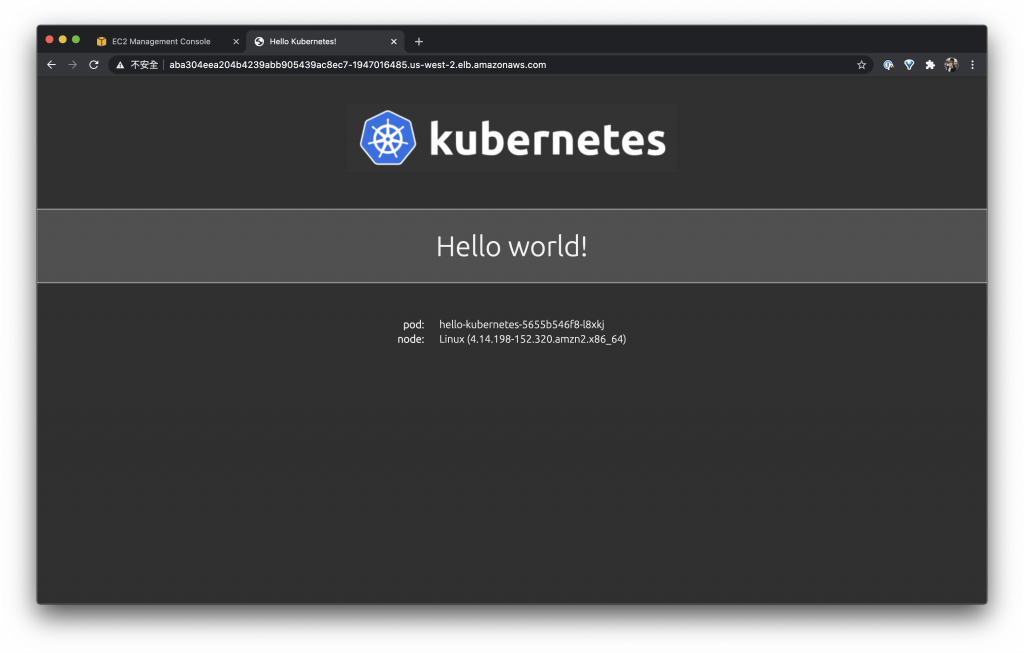
浏览一下 Kubernetes 部署的网页
浏览一下刚刚部署的 LoadBalancer 可以看到我们的 pod id 每次都不一样,如刚刚部署的 replicas 数量会有三个轮流吃到我们的 request

查看 pod log
虽然我们这边主要不是介绍 Kubernetes 不过顺便提一下如果想要看到 pod 的 log 可以使用 kubectl logs 带上 id 查看 Log
$ kubectl logs hello-kubernetes-5655b546f8-cm66l
npm info it worked if it ends with ok
npm info using [email protected]
npm info using [email protected]
npm info lifecycle [email protected]~prestart: [email protected]
npm info lifecycle [email protected]~start: [email protected]

> [email protected] start /usr/src/app
> node server.js

Listening on: http://hello-kubernetes-5655b546f8-cm66l:8080
::ffff:10.0.255.11 - - [09/Oct/2020:11:17:29 +0000] "GET / HTTP/1.1" 200 667 "-" "curl/7.64.1"
::ffff:10.0.255.11 - - [09/Oct/2020:11:17:40 +0000] "GET /favicon.ico HTTP/1.1" 404 150 "http://aba304eea204b4239abb905439ac8ec7-1947016485.us-west-2.elb.amazonaws.com/" "Mozilla/5.0 (Macintosh; Intel Mac OS X 10_15_6) AppleWebKit/537.36 (KHTML, like Gecko) Chrome/85.0.4183.121 Safari/537.36"
今天介绍 CDK 可以神奇的处理很多原本要用 kubectl 才可以处理的事情是不是超神奇的啊!!!
想要看更多吗?欢迎到我的部落格参观
文章内容主要是网路或是程序开发类型的文章
本文同步刊载於 Clarence 部落格:Day 26 - CDK builds Amazon Elastic Kubernetes Service (EKS)-Service
「AWS CDK 完全学习手册:打造云端基础架构程序码 IaC」
本书改编并延伸自第 12 届 iT 邦帮忙铁人赛获得 DevOps 组冠军的《用 CDK 定义 AWS 架构》系列文章,以简单、好读的行文风格详述技术细节,并提供完整的程序码范例与说明,一步一步带领新手从零开始踏上 AWS CDK 技术达人之路。有兴趣的朋友欢迎至天珑书局选购!
<<: [Day 26] 想让 Wordpress主题能做到多语言?看完这篇你也懂
【25】ReLU 家族评比 个别使用ReLU LeakyReLU PReLU SELU 来训练
Colab连结 今天要来实验不同的 ReLU 家族的评比,挑战者有 基本 ReLU 尾巴翘起来的 L...
android studio 30天学习笔记-day 6-介绍retrofit(二)
今天要来了解上一篇的各个步骤 1.创建资料类别 有个快速生成data class的插件,可以从Fil...
Day 1 前言 - 我是谁、我在哪里、我要做什麽
各位同学好,这是我第一次参加铁人赛。 同时感谢团长阿瑜邀请我参加。 我是 JohnTing,一个失业...
SuiteScript - Entry Point
Schedule Script execute Map/Reduce Script getInput...
Raspberry pi 的GPIO_python小控制
前面我很轻描淡写的叙述了GPIO 说有28个GPIO可用 今天就实际来使用看看 我用Python小写...