顺着藏宝图的指示,可以寻获庞大的财富
Ingress
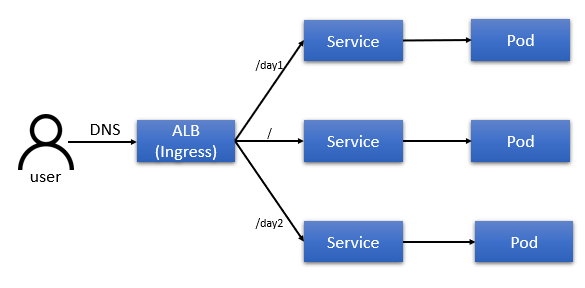
Service是给予User透过特定的Port来访问Pod,当有多个Service连接Pod,就会需要知道每个Port才可以去访问。而Ingress就是去连接多个Service可以透过DNS或路径去访问不同的Pod,且Ingress透过HTTP/HTTPS协议(Layer 7)的方式进行访问,也可以将URL挂上SSL凭证,提高安全性
使用AWS的EKS进行Ingress配置,AWS则会使用ALB进行deploy,而不清楚ALB功能的可以回顾[Day18],所以User只要透过ALB DNS就可以访问到Pod上的服务,请看以下的图,帮助理解:
此篇只要按照步骤,就可以在EKS上建立Ingress,请依序步骤执行指令
- 选你想要的Cluster,开启OIDC provider
eksctl utils associate-iam-oidc-provider --cluster <your cluster name> --approve
- 建立Cluster role
kubectl apply -f https://raw.githubusercontent.com/kubernetes-sigs/aws-alb-ingress-controller/v1.1.8/docs/examples/rbac-role.yaml
- 下载IAM policy
curl -o iam_policy.json https://raw.githubusercontent.com/kubernetes-sigs/aws-load-balancer-controller/v2.2.0/docs/install/iam_policy.json
- 在IAM建立客制化policy
aws iam create-policy \
    --policy-name AWSLoadBalancerControllerIAMPolicy \
    --policy-document file://iam_policy.json
- 将建立好的IAM policy,attach到cluster上
eksctl create iamserviceaccount \
  --cluster=itcluster \
  --namespace=kube-system \
  --name=aws-load-balancer-controller \
  --attach-policy-arn=arn:aws:iam::<your account ID>:policy/AWSLoadBalancerControllerIAMPolicy \
  --override-existing-serviceaccounts \
  --approve
- 安装cert-manager在cluster上
kubectl apply \
--validate=false \
-f https://github.com/jetstack/cert-manager/releases/download/v1.1.1/cert-manager.yaml
- 下载Ingress Controller
curl -o v2_2_0_full.yaml https://raw.githubusercontent.com/kubernetes-sigs/aws-load-balancer-controller/v2.2.0/docs/install/v2_2_0_full.yaml
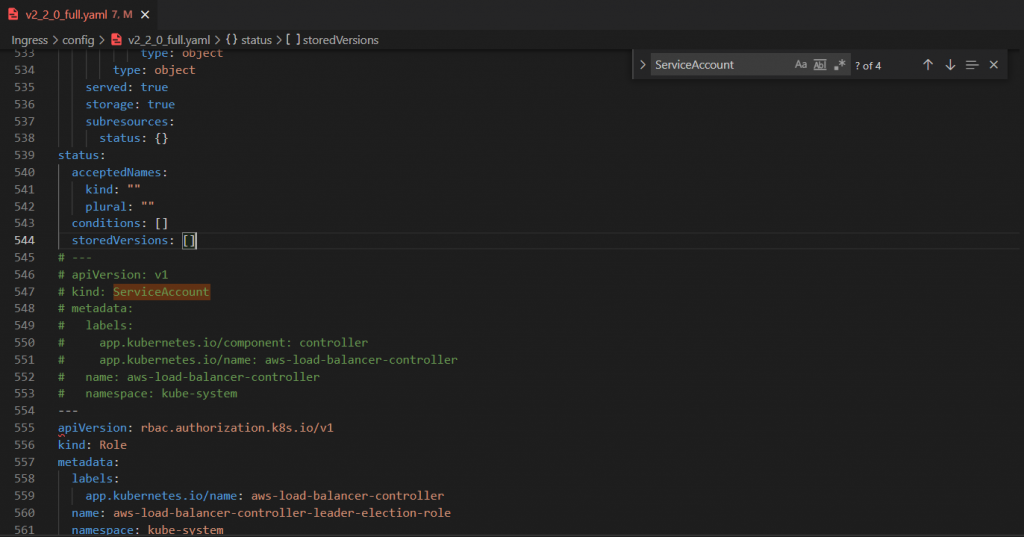
- 在v2_2_0_full.yaml里的ServiceAccount区块作注解或删除
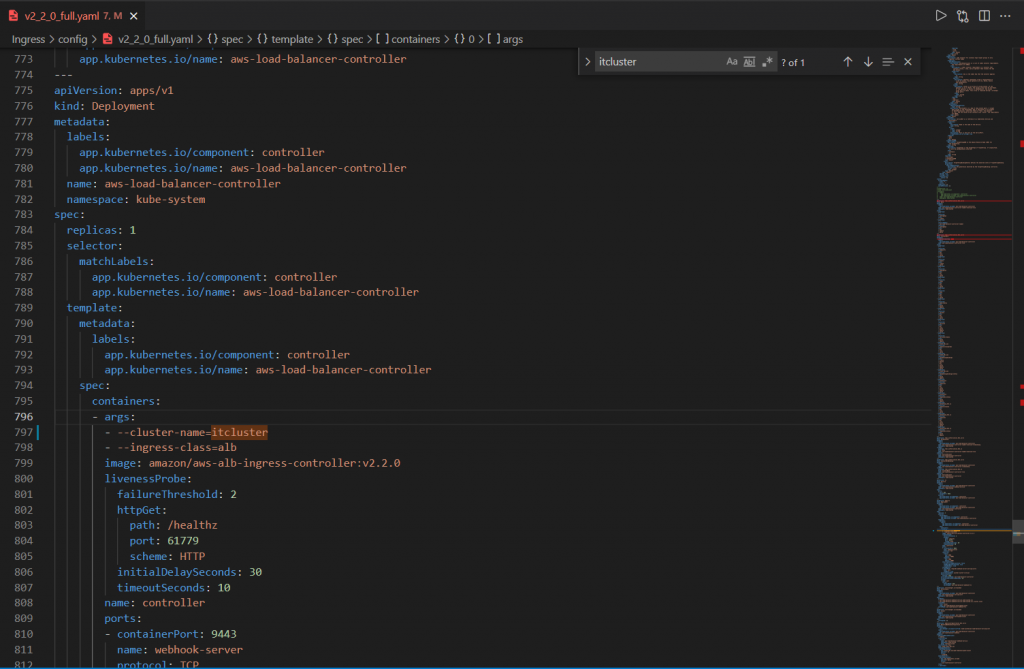
- 在v2_2_0_full.yaml里选择想要的cluster
- Deploy Ingress Controller
kubectl apply -f v2_2_0_full.yaml
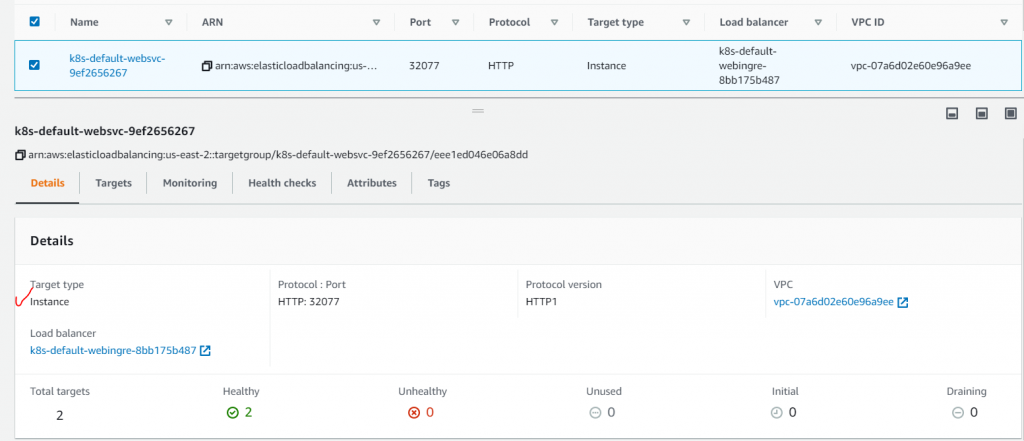
- 建立ALB(ingress),并将Node加入到Target group
kubectl apply -f ingress.yaml
- 在Pod上建立应用程序
kubectl apply -f web-deploy.yaml
底下会解析ingress.yaml和web-deploy.yaml这两个档案,以及cluster的配置
Cluster
底下的设定跟之前的是一样,如果有安全性考量,可以设定private Cluster,这样Node就会配置在private subnet,且有配置ALB,也可以访问到private subnet的机器
apiVersion: eksctl.io/v1alpha5
kind: ClusterConfig

metadata:
  name: itcluster
  region: us-east-2
vpc:
  clusterEndpoints:
    publicAccess: true
    privateAccess: true
  publicAccessCIDRs: ["MYIP"]

managedNodeGroups:
  - name: it-mng
    instanceType: t3.small
    minSize: 1
    maxSize: 3
    desiredCapacity: 2
    volumeSize: 10
    volumeType: gp3
    ssh:
      publicKeyName: itdemo
    labels:
      name: morepods
Ingress
apiVersion: networking.k8s.io/v1
kind: Ingress
metadata:
name: web-ingress
annotations:
kubernetes.io/ingress.class: alb
alb.ingress.kubernetes.io/scheme: internet-facing
alb.ingress.kubernetes.io/target-type: instance
alb.ingress.kubernetes.io/target-node-labels: name=morepods
spec:
rules:
- http:
paths:
- path: /
pathType: Prefix
backend:
service:
name: web-svc
port:
number: 80
annotations: 给AWS去识别ALB的设定
alb.ingress.kubernetes.io/scheme: 面对internet
alb.ingress.kubernetes.io/target-type: Instance(机器) or IP
alb.ingress.kubernetes.io/target-node-labels: 在target group设定要注册的机器

Ingress会去寻找後面名称为web-svc做连接
web-deploy这个档案,笔者这边有写两个服务,分别是Service和Deployment。这些参数之前的篇章都有介绍过,可以复习之前的章节。若EKS上面的Node持续增加,想要把Pod deploy到想要的Node上,就可以使用nodeSeletor做管理
apiVersion: v1
kind: Service
metadata:
  name: web-svc
spec:
  type: NodePort
  selector:
    app: web
  ports:
    - port: 80
      targetPort: 80
      protocol: TCP
---
apiVersion: apps/v1
kind: Deployment
metadata:
  name: web-deploy
spec:
  replicas: 2
  selector:
    matchLabels:
      app: web
  template:
    metadata:
      labels:
        app: web
    spec:
      nodeSelector:
        name: morepods
      containers:
        - name: web
          image: johnson860312/awswebdb
          resources:
            limits:
              memory: "256Mi"
              cpu: "128m"
          ports:
            - containerPort: 80
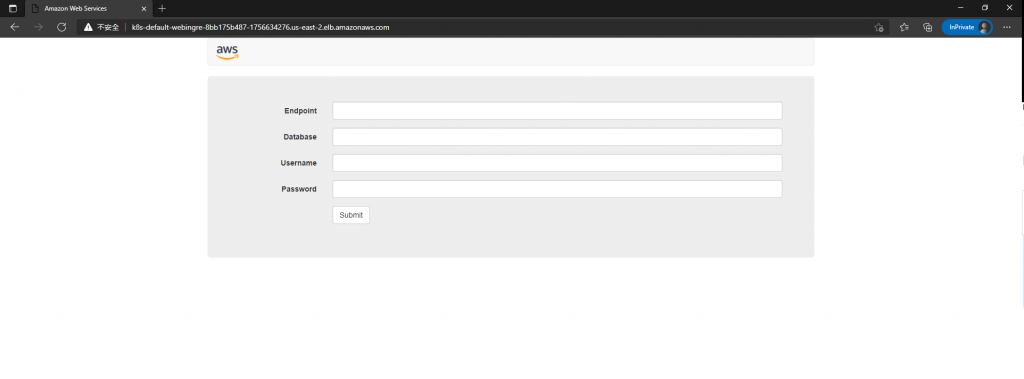
结果
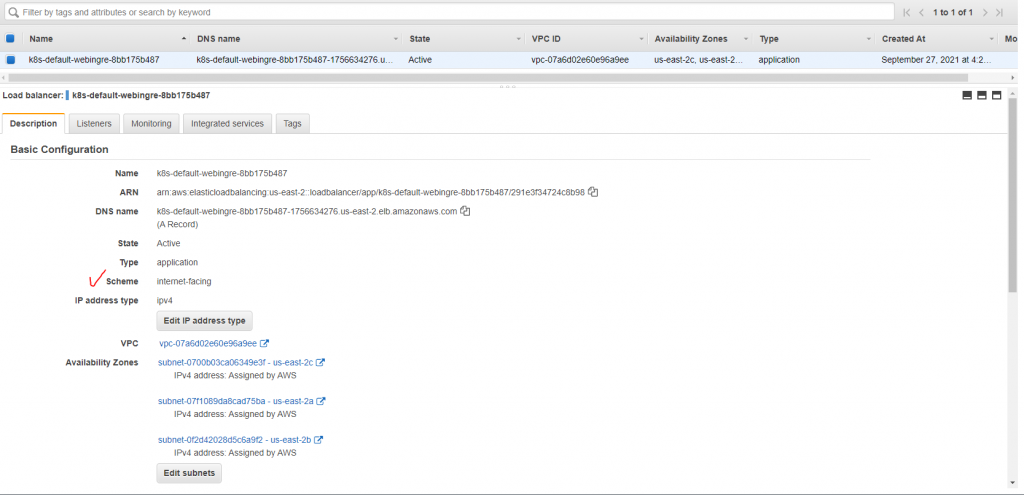
复制这个Address到browser,就可以看到deploy好的应用程序,或可以到ALB复制DNS name

Ingress大致上就讲到这边,明天会讲HPA
>>: Day25-介接 API(三)Google Calendar(III)OAuth 凭证建立与用 Google Calendar API 建立 Google Meet 会议
[13th][Day10] waiting group
之前有做过一个需求:要打一个 request 一千万次,并收集其 response 以供之後流程处理...
Day 08 - 智慧城市Go Smart Award 经历(2) - 复赛
图片来源 延续上一篇谈说怎麽临时生出创意组合的想法去投稿Go Smart Award比赛, 这篇就...
【Day6】重设密码页面X Firebase Auth
中秋节快乐!!! 这几天烤肉烤到有点忘记打Code的感觉了,那提到忘记这个词,我们就想到我们平常密...
Day-20 用 Pytorch 的最後一个块拼图
那我们已经在昨天说明了 Pytorch 的 Dataset 跟 DataLoader 要如何建立了...
Day01 - 一切从试着了解开始
前言 话说,看了历年这麽多iThome铁人赛的文章,觉得这是一个相当好的活动,曾经从历年铁人大大们的...