Day 26 : Tkinter实战,配合pillow制作简易的处理照片程序(下)
今天继续把上一篇文的程序做完,没看过的记得要去看喔!
图片转向
那再来就先来做转向的部分:
from PIL import Image

def output():
  fileRoute = loadFile_en.get()
  imgOpen = Image.open(fileRoute)
  name = fileRoute.split('/')
  if radioVar.get()==0:
    new_imgOpen = imgOpen.rotate(0)
  if radioVar.get()==1:
    new_imgOpen = imgOpen.rotate(90)
    new_imgOpenResult = new_imgOpen
  if radioVar.get()==2:
    new_imgOpen = imgOpen.rotate(270)
    new_imgOpenResult = new_imgOpen
  if radioVar.get()==3:
    new_imgOpen = imgOpen.rotate(180)
    new_imgOpenResult = new_imgOpen
定义output这个函式,我打算把处理图片的程序码都写在里面。
还记得可以利用get()来获得元素吗。先用get()取得刚刚选取的照片路径,然後用PIL的Image.open()开启,定义name变数,将路径用split切好,然後再设定当按钮被点下时要让照片如何选转,然後旋转完丢到new_imgOpenResult这个变数中,准备进行下一步:特殊效果。
特殊效果
再来进到特殊效果的部分,二值化跟黑白化不能并存,既然都用checkbutton了,那就只能想办法写成点选一个选项时另一个选项禁用了,所以我又写了一个**checkbutton_state()**函式。
def checkbutton_state():
  if color_checkbutton.get()==1:
    Binarization_checkbutton1.config(state='disabled')
  elif color_checkbutton.get()==0:
    Binarization_checkbutton1.config(state='normal')
  if Binarization_checkbutton.get()==1:
    color_checkbutton1.config(state='disabled')
  elif Binarization_checkbutton.get()==0:
    color_checkbutton1.config(state='normal')
判断不同状态进而设定两个按键的state,记得要把两个按键设置command参数并指到这个函式。
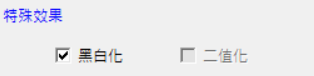
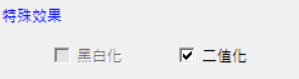
可以看到点选一个按键时另外一个按键就会变成disabled,无法点选的模式。
再来就来处理特殊效果的程序码,其实也不难,就是将刚刚的new_imgOpenResult再做一层:
if Binarization_checkbutton.get()==1:
    new_imgOpenResult = new_imgOpen
    new_imgOpenResult = new_imgOpenResult.convert('1')
if color_checkbutton.get()==1:
    new_imgOpenResult = new_imgOpen
    new_imgOpenResult = new_imgOpenResult.convert('L')
if内的第一行是怕说如果没有选择反转的话,要将变数名变成new_imgOpenResult方便接下来做特殊效果。
if color_checkbutton.get()==1 or Binarization_checkbutton.get()==1 or radioVar.get() != 0:
    new_imgOpenResult.save(f"new_{name[-1]}")
我又写了一个判别式,如果上述作完就想输出的话,就可以从这边先存档,档名我预设是"new_"加上刚刚用split切好的路径的倒数第一个值(档名)。
再来就是嵌入文字的部分了:
if input_word.get() is not None:
    w ,h = imgOpen.width, imgOpen.height
    word = input_word.get()
    image_table = Image.new(mode='RGBA', size=(w,h))
    draw_table = ImageDraw.Draw(im=image_table)
    font = ImageFont.truetype('kaiu.ttf', 20)
    image_table.save("text.png")
    text = word
    color = colorPrint['bg']
    draw_table.text((0, 0), text, font = font, align ="left",fill = color)
    image_table.save("text.png")
先判断是否有输入文字,有在进入。可以看到文字的颜色是由上面第9行读取显示颜色的Label的背景参数,其他的就是设定文字的参数,之前都有提到过这边就不多做解释。
		if Binarization_checkbutton.get()==1 or color_checkbutton.get()==1 or radioVar.get() != 0:
      imageA = Image.open(f"new_{name[-1]}")
    if radioVar.get() == 0 and Binarization_checkbutton.get()==0 and color_checkbutton.get()==0:
      imageA = imgOpen
    imageA = imageA.convert('RGBA')
    widthA , heightA = imageA.size
    imageB = Image.open('text.png')
    imageB = imageB.convert('RGBA')
    newWidthB = int(widthA)
    newHeightB = int(heightA)
    imageB_resize = imageB.resize((newWidthB, newHeightB))
    resultPicture = Image.new('RGBA', imageA.size, (0, 0, 0, 0))
    resultPicture.paste(imageA,(0,0))
    right_bottom = (0,0)
    resultPicture.paste(imageB_resize, right_bottom, imageB_resize)

    resultPicture.save(f"new_{name[-1]}")
注意缩排,这些都要包在"if input_word.get() is not None:"这里面,前面两个if是判断说前面有没有做刚刚的转向或特殊效果,有就开启刚刚存档的照片,没有就开启原图片。这边我把文字的位置固定在左上角,有兴趣的人也可以研究可以指定位置的方法。
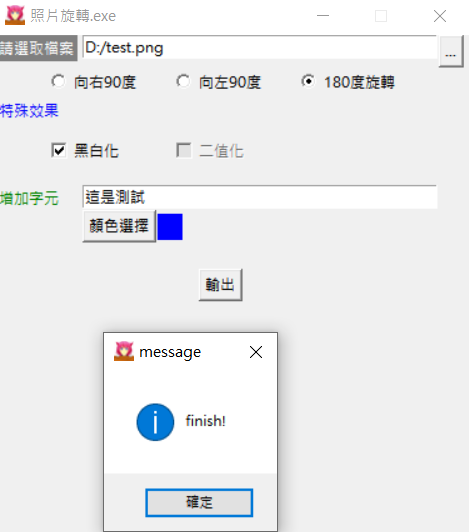
之後储存档案,并在"def output():"层级下的最後面将name清空并且用tk.messagebox.showinfo(),写一个弹出视窗告诉使用者已经处理完了,并且将这个函式附加到output_btn(输出)按钮上。
name = ''
tk.messagebox.showinfo("message", "finish!")
output_btn = tk.Button(text="输出",height=1,command=output) #增加command参数
在来就来实际测试吧!
原图:

处理过的:

这样就完成了!老实说这种写法虽然满好理解的,可是程序码繁杂,一堆的if也很不舒服,所以还是建议多订几个函是参数互传,可以更好维护程序码。这个程序当然还有很多可以思考的地方,例如改变文字大小、位置,增加其他功能阿等等的,就交给各位发挥想像力搂,下面附上完整程序码(好长
from tkinter.constants import CENTER
from tkinter.messagebox import *
import tkinter as tk
from tkinter import filedialog
import tkinter.colorchooser as cc
from PIL import Image,ImageDraw,ImageFont

#函式定义的部分
def loadFile():
    if loadFile_en.get() is None:
        file_path = filedialog.askopenfilename(filetypes = (("png files","*.png"),("all files","*.*")))
        loadFile_en.insert(0,file_path)
    else:
        file_path = filedialog.askopenfilename(filetypes = (("png files","*.png"),("all files","*.*")))
        loadFile_en.delete(0,'end')
        loadFile_en.insert(0,file_path)

def checkbutton_state():
  if color_checkbutton.get()==1:
    Binarization_checkbutton1.config(state='disabled')
  elif color_checkbutton.get()==0:
    Binarization_checkbutton1.config(state='normal')
  if Binarization_checkbutton.get()==1:
    color_checkbutton1.config(state='disabled')
  elif Binarization_checkbutton.get()==0:
    color_checkbutton1.config(state='normal')

def output():
  fileRoute = loadFile_en.get()
  imgOpen = Image.open(fileRoute)
  name = fileRoute.split('/')
  if radioVar.get()==0:
    new_imgOpen = imgOpen.rotate(0)
  if radioVar.get()==1:
    new_imgOpen = imgOpen.rotate(90)
    new_imgOpenResult = new_imgOpen
  if radioVar.get()==2:
    new_imgOpen = imgOpen.rotate(270)
    new_imgOpenResult = new_imgOpen
  if radioVar.get()==3:
    new_imgOpen = imgOpen.rotate(180)
    new_imgOpenResult = new_imgOpen

  if Binarization_checkbutton.get()==1:
    new_imgOpenResult = new_imgOpen
    new_imgOpenResult = new_imgOpenResult.convert('1')
  if color_checkbutton.get()==1:
    new_imgOpenResult = new_imgOpen
    new_imgOpenResult = new_imgOpenResult.convert('L')

  if color_checkbutton.get()==1 or Binarization_checkbutton.get()==1 or radioVar.get() != 0:
    new_imgOpenResult.save(f"new_{name[-1]}")

  if input_word.get() is not None:
    w ,h = imgOpen.width, imgOpen.height
    word = input_word.get()
    image_table = Image.new(mode='RGBA', size=(w,h))
    draw_table = ImageDraw.Draw(im=image_table)
    font = ImageFont.truetype('kaiu.ttf', 20)
    image_table.save("text.png")
    text = word
    color = colorPrint['bg']
    draw_table.text((0, 0), text, font = font, align ="left",fill = color)
    image_table.save("text.png")


    if Binarization_checkbutton.get()==1 or color_checkbutton.get()==1 or radioVar.get() != 0:
      imageA = Image.open(f"new_{name[-1]}")
    if radioVar.get() == 0 and Binarization_checkbutton.get()==0 and color_checkbutton.get()==0:
      imageA = imgOpen
    imageA = imageA.convert('RGBA')
    widthA , heightA = imageA.size
    imageB = Image.open('text.png')
    imageB = imageB.convert('RGBA')
    newWidthB = int(widthA)
    newHeightB = int(heightA)
    imageB_resize = imageB.resize((newWidthB, newHeightB))
    resultPicture = Image.new('RGBA', imageA.size, (0, 0, 0, 0))
    resultPicture.paste(imageA,(0,0))
    right_bottom = (0,0)
    resultPicture.paste(imageB_resize, right_bottom, imageB_resize)
    resultPicture.save(f"new_{name[-1]}")

  name = ''
  tk.messagebox.showinfo("message", "finish!")

def colorChoice():
    color=cc.askcolor()
    color = color[1]
    print(str(color))
    colorPrint.config(bg=color)
#Tkinter的部分
win = tk.Tk()
win.title('照片旋转.exe')
win.geometry('380x400')
win.resizable(False, False)
win.iconbitmap('icon.ico')
'''Label区域'''
lb = tk.Label(text="请选取档案",bg ="grey",fg="white",height=1)
lb.place(x=0 ,y=0)
lb2 = tk.Label(text="特殊效果",fg="blue",height=1)
lb2.place(x=0 ,y=50)
lb3 = tk.Label(text="增加字元",fg="green",height=1)
lb3.place(x=0 ,y=120)
colorPrint = tk.Label(height=1,width=2)
colorPrint.place(x=130 ,y=143)
'''Label区域'''
'''Entry区域'''
loadFile_en = tk.Entry(width=40)
loadFile_en.place(x=70 ,y=0)
input_word = tk.Entry(width=40)
input_word.place(x=70 ,y=120)
'''Entry区域'''
'''Radiobutton区域'''
radioVar = tk.IntVar()
radio1 = tk.Radiobutton(text='向右90度',variable=radioVar, value=1)
radio2 = tk.Radiobutton(text='向左90度',variable=radioVar, value=2)
radio3 = tk.Radiobutton(text='180度旋转',variable=radioVar, value=3)
radio1.place(x=40,y=25)
radio2.place(x=140,y=25)
radio3.place(x=240,y=25)
'''Radiobutton区域'''
'''checkbutton区域'''
color_checkbutton = tk.IntVar()
color_checkbutton1 = tk.Checkbutton(text='黑白化',variable=color_checkbutton,command=checkbutton_state)
color_checkbutton1.place(x=40,y=80)
Binarization_checkbutton = tk.IntVar()
Binarization_checkbutton1 = tk.Checkbutton(text='二值化',variable=Binarization_checkbutton,command=checkbutton_state)
Binarization_checkbutton1.place(x=140,y=80)
'''checkbutton区域'''
'''Button区域'''
loadFile_btn = tk.Button(text="...",height=1,command=loadFile)
loadFile_btn.place(x=355 ,y=0)
color_choice = tk.Button(text="颜色选择",command=colorChoice)
color_choice.place(x=70,y=140)
output_btn = tk.Button(text="输出",height=1,command=output)
output_btn.place(anchor=CENTER,x=180 ,y=200)
'''Button区域'''
win.mainloop()
剩下最後一个系列了,再来把Linebot介绍完就能休息了,加油!
<<: Day24-Kubernetes 那些事 - 内部架构
DAY 28- BIP32- HD wallet
「BIP BIP BIP 」 BIP 由於区块链没有一个中心系统,在协议上没有办法由中心统一更新, ...
【Day 7】Google Apps Script - 使用 Google Docs 撰写 Demo 用的 API 文件
用 Google 文件把 API 规格描述出来,协作上比较方便,之後专案文件要列印装订成册交付,再...
Chapter4 附录 贝兹曲线
前言 什麽是贝兹曲线?它能创造一连串平滑的曲线,被应用在PS和AI中的钢笔、以及常见的CSS Ani...
【第三天 - SVN 泄漏】
Q1. 什麽是 SVN ? Subversion (简称SVN),与 Git 一样是原始码版本管理软...
[Day19] 第十九章-今天来开双B (blade与bootstrap 安装手册)
前言 昨天把简单的view切出来後 我们当然要上 css框架阿!! 我们今天就想办法把blade v...