ETA Screen (1)
现在来到整个 app 最重要的页面:抵站时间页。这个页面基本上都是跟上一页一样,都是以 RecyclerView 为主。但因为这次的内容要从 API server 取得,即是说我们需要处理载入中、载入成功和载入失败三个情景。当中载入成功时更要细分为显示班次、事故和延误三个情景。情况好像有点复杂,我们先看看各情景时的画面:
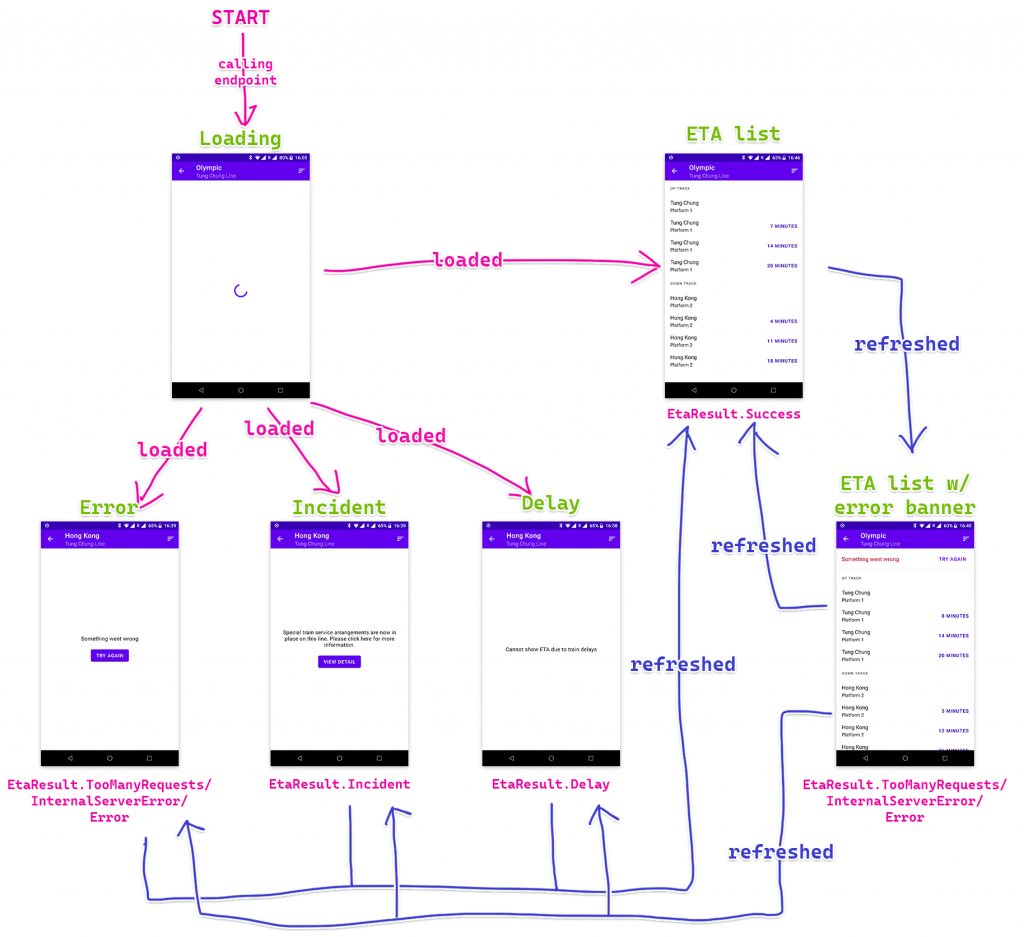
大致上可以分为两部分:首次成功载入前和首次成功载入後。在首次成功载入前我们要全页显示载入中和各式错误画面,但在首次成功载入後我们就尽量停留在班次画面,如果是不能连接互联网这类普通错误类型的话我们就在页顶显示一个 banner,下方就维持显示之前成功载入的班次资料。但如果是出现事故和延误的话那就不适宜显示之前载入的班次,因为很可能都不正确,所以就全页显示错误。我们会在每次 call 完 API endpoint 後隔一段时间再 call 一次 API endpoint 更新内容,这样用户就不用刻意手动更新。
班次列表
现在我们就先实作 RecyclerView 的部分。做法其实跟之前都是差不多,还是分为行车方向和班次两个 view type。
List item types
跟上次一样,我们都是会建立供 adapter 专用的 sealed interface 来表示显示的 list item。留意我们不会把上下行标题 String 直接放进去,因为要避免 configuration change 後仍然显示未切换语言前的文字。另外,因为 Header 只有一个 property,我们可以转用 value class。
Value class 以前是叫做 inline class,本身设计的用途是用来明确标明那个 parameter 的意义。Kotlin 的 Duration 本身都是 value class。在定义 value class 时是需要加上 @JvmInline。我们看看下面的例子,原本 getProduct 的参数是 Int,但 Int 的意义不够明显。我们可以开一个 value class ProductId 做这个 parameter 的 type。这样要 call getProduct 就要特别地「instantiate」一个 ProductId,那用家就一定知道这个数字是 product ID 而不是 user ID 之类的东西。留意 value class 在 compile 的时候会尽量拆走那个 type,所以 compile 後的 getProduct 参数最终只会变成 Int,这样就不用担心额外的开销。但如果你做了好几个放 Int 的 value class 然後又用 when 去判断那个是不是 ProductId 的话,Kotlin compiler 就只会把那些 variable 的 type 变回普通 Java class 般(因为不可能拿着几个 Int variable 就可以分辨到是那个 value class)。
// 原本的写法
fun getProduct(productId: Int): Product

// 用了 value class 的写法
fun getProduct(productId: ProductId): Product

@JvmInline
value class ProductId(val id: Int)
sealed interface EtaListItem {
    @JvmInline
    value class Header(val direction: EtaResult.Success.Eta.Direction) : EtaListItem

    data class Eta(
        val direction: EtaResult.Success.Eta.Direction,
        val destination: Station,
        val platform: String,
        val minuteCountdown: Int,
    ) : EtaListItem

    object DiffCallback : DiffUtil.ItemCallback<EtaListItem>() {
        override fun areItemsTheSame(oldItem: EtaListItem, newItem: EtaListItem): Boolean =
            when {
                oldItem is Header && newItem is Header -> oldItem.direction == newItem.direction
                oldItem is Eta && newItem is Eta -> oldItem == newItem
                else -> false
            }

        override fun areContentsTheSame(
            oldItem: EtaListItem,
            newItem: EtaListItem
        ): Boolean = when {
            oldItem is Header && newItem is Header -> oldItem == newItem
            oldItem is Eta && newItem is Eta -> oldItem == newItem
            else -> false
        }
    }
}
由於每笔班次都没有 ID,我们惟有直接写 oldItem == newItem。
List item view
首先是行车方向的 layout XML (eta_list_header_item.xml):
<com.google.android.material.textview.MaterialTextView xmlns:android="http://schemas.android.com/apk/res/android"
    xmlns:tools="http://schemas.android.com/tools"
    android:layout_width="match_parent"
    android:layout_height="48dp"
    android:ellipsize="end"
    android:gravity="center_vertical|start"
    android:maxLines="1"
    android:paddingStart="16dp"
    android:paddingEnd="16dp"
    android:textAlignment="viewStart"
    android:textAppearance="?textAppearanceOverline"
    tools:text="@string/up_track" />

对应的 HeaderViewHolder:
class HeaderViewHolder(
    private val binding: EtaListHeaderItemBinding,
) : RecyclerView.ViewHolder(binding.root) {
    fun bind(header: EtaListItem.Header) {
        binding.root.text = binding.root.resources.getString(
            when (header.direction) {
                EtaResult.Success.Eta.Direction.UP -> R.string.up_track
                EtaResult.Success.Eta.Direction.DOWN -> R.string.down_track
            }
        )
    }
}
这次我们直接用 view binding 而不是 data binding,因为它只有一个 TextView 没有其他东西,写的 code 份量跟用 data binding 还是差不多。
然後是班次的部分,先看看 layout XML (eta_list_eta_item.xml):
<?xml version="1.0" encoding="utf-8"?>
<layout xmlns:android="http://schemas.android.com/apk/res/android"
    xmlns:app="http://schemas.android.com/apk/res-auto"
    xmlns:tools="http://schemas.android.com/tools">

    <data>

        <variable
            name="eta"
            type="net.swiftzer.etademo.presentation.eta.EtaListItem.Eta" />

        <variable
            name="presenter"
            type="net.swiftzer.etademo.presentation.stationlist.LineStationPresenter" />
    </data>

    <androidx.constraintlayout.widget.ConstraintLayout
        android:layout_width="match_parent"
        android:layout_height="wrap_content">

        <androidx.constraintlayout.widget.Guideline
            android:id="@+id/startGuideline"
            android:layout_width="wrap_content"
            android:layout_height="wrap_content"
            android:orientation="vertical"
            app:layout_constraintGuide_begin="16dp" />

        <androidx.constraintlayout.widget.Guideline
            android:id="@+id/endGuideline"
            android:layout_width="wrap_content"
            android:layout_height="wrap_content"
            android:orientation="vertical"
            app:layout_constraintGuide_end="16dp" />

        <com.google.android.material.textview.MaterialTextView
            android:id="@+id/destination"
            android:layout_width="0dp"
            android:layout_height="wrap_content"
            android:layout_marginTop="8dp"
            android:layout_marginEnd="16dp"
            android:ellipsize="end"
            android:maxLines="1"
            android:text="@{presenter.mapStation(eta.destination)}"
            android:textAlignment="viewStart"
            android:textAppearance="?textAppearanceListItem"
            app:layout_constraintEnd_toStartOf="@+id/countdown"
            app:layout_constraintStart_toStartOf="@id/startGuideline"
            app:layout_constraintTop_toTopOf="parent"
            app:layout_goneMarginEnd="0dp"
            tools:text="@tools:sample/cities" />

        <com.google.android.material.textview.MaterialTextView
            android:id="@+id/platform"
            android:layout_width="0dp"
            android:layout_height="wrap_content"
            android:layout_marginTop="2dp"
            android:layout_marginEnd="16dp"
            android:layout_marginBottom="8dp"
            android:ellipsize="end"
            android:maxLines="1"
            android:text="@{@string/platform(eta.platform)}"
            android:textAlignment="viewStart"
            android:textAppearance="?textAppearanceListItemSecondary"
            app:layout_constraintBottom_toBottomOf="parent"
            app:layout_constraintEnd_toStartOf="@+id/countdown"
            app:layout_constraintStart_toStartOf="@id/startGuideline"
            app:layout_constraintTop_toBottomOf="@id/destination"
            app:layout_goneMarginEnd="0dp"
            tools:text="@string/platform" />

        <com.google.android.material.textview.MaterialTextView
            android:id="@+id/countdown"
            isVisible="@{eta.minuteCountdown > 0}"
            android:layout_width="wrap_content"
            android:layout_height="wrap_content"
            android:ellipsize="end"
            android:maxLines="1"
            android:text="@{@plurals/countdown_minute(eta.minuteCountdown, eta.minuteCountdown)}"
            android:textAlignment="viewEnd"
            android:textAppearance="?textAppearanceButton"
            android:textColor="@color/purple_700"
            app:layout_constraintBottom_toBottomOf="parent"
            app:layout_constraintEnd_toEndOf="@id/endGuideline"
            app:layout_constraintTop_toTopOf="parent"
            tools:text="22 min" />

    </androidx.constraintlayout.widget.ConstraintLayout>
</layout>
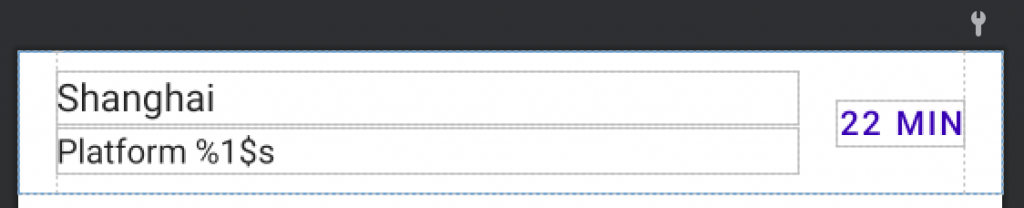
在 countdown 我们用了 @plurals/countdown_minute 的 quantity string resource。括号的两个参数其实就是跟 getQuantityString 一样。
class EtaViewHolder(
    lifecycleOwner: LifecycleOwner,
    private val binding: EtaListEtaItemBinding,
    presenter: LineStationPresenter,
) : RecyclerView.ViewHolder(binding.root) {
    init {
        binding.lifecycleOwner = lifecycleOwner
        binding.presenter = presenter
    }

    fun bind(eta: EtaListItem.Eta) {
        binding.eta = eta
    }
}
然後是对应的 EtaViewHolder,由於我们用了 data binding,所以里面只有设定 data binding 的 code。
Adapter
接下来就是 ListAdapter 的部分,同样地都是跟上一页的差不多。
class EtaListAdapter(
    lifecycleOwner: LifecycleOwner,
    presenter: LineStationPresenter,
) : ListAdapter<EtaListItem, RecyclerView.ViewHolder>(EtaListItem.DiffCallback) {
    private val lifecycleOwner = WeakReference(lifecycleOwner)
    private val presenter = WeakReference(presenter)

    override fun onCreateViewHolder(parent: ViewGroup, viewType: Int): RecyclerView.ViewHolder {
        val inflater = LayoutInflater.from(parent.context)
        return when (viewType) {
            R.layout.eta_list_header_item -> HeaderViewHolder(
                binding = EtaListHeaderItemBinding.inflate(inflater, parent, false),
            )
            R.layout.eta_list_eta_item -> EtaViewHolder(
                lifecycleOwner = requireNotNull(lifecycleOwner.get()),
                binding = EtaListEtaItemBinding.inflate(inflater, parent, false),
                presenter = requireNotNull(presenter.get()),
            )
            else -> throw UnsupportedOperationException("Unsupported view type $viewType")
        }
    }

    override fun getItemViewType(position: Int): Int = when (getItem(position)) {
        is EtaListItem.Header -> R.layout.eta_list_header_item
        is EtaListItem.Eta -> R.layout.eta_list_eta_item
    }

    override fun onBindViewHolder(holder: RecyclerView.ViewHolder, position: Int) {
        when (val item = getItem(position)) {
            is EtaListItem.Header -> (holder as HeaderViewHolder).bind(item)
            is EtaListItem.Eta -> (holder as EtaViewHolder).bind(item)
        }
    }
}
页面
准备好 RecyclerView 的东西後,我们可以准备页面的东西。
Layout XML
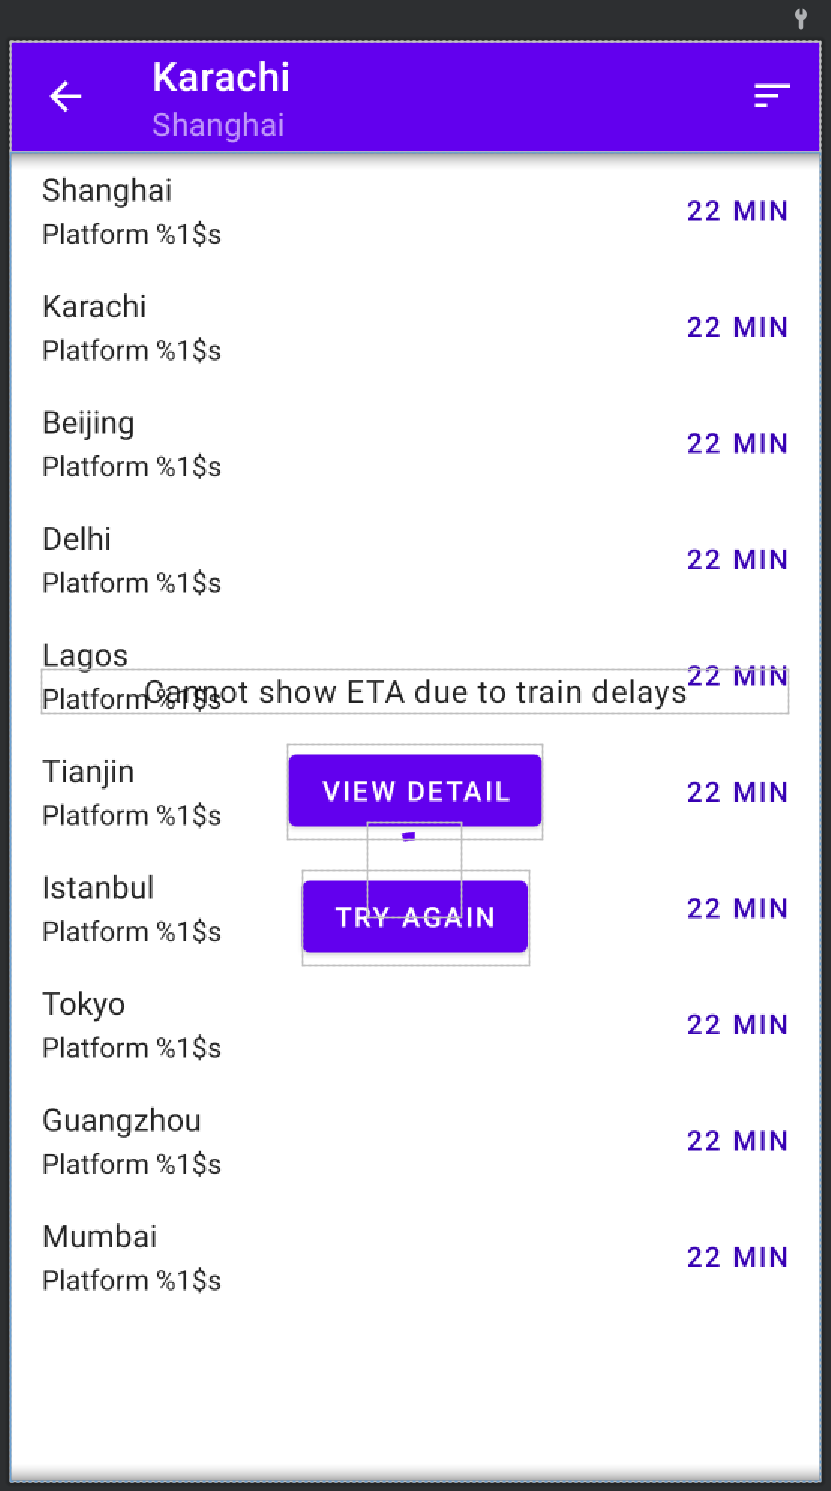
这页的 layout XML 主要会放显示班次的 RecyclerView、表示载入中的 CircularProgressIndicator 和显示错误的 NestedScrollView,那个显示在 RecyclerView 上方的 banner 会在之後补上。由於普通错误、延误和事故三款错误所显示的 UI 几乎完全相同,我们会共用 NestedScrollView 入面的 view。
下面是 eta_fragment.xml 的内容:
<?xml version="1.0" encoding="utf-8"?>
<layout xmlns:android="http://schemas.android.com/apk/res/android"
    xmlns:app="http://schemas.android.com/apk/res-auto"
    xmlns:tools="http://schemas.android.com/tools">

    <data>

        <variable
            name="viewModel"
            type="net.swiftzer.etademo.presentation.eta.EtaViewModel" />

        <variable
            name="lineStationPresenter"
            type="net.swiftzer.etademo.presentation.stationlist.LineStationPresenter" />

        <variable
            name="etaPresenter"
            type="net.swiftzer.etademo.presentation.eta.EtaPresenter" />
    </data>

    <androidx.coordinatorlayout.widget.CoordinatorLayout
        android:layout_width="match_parent"
        android:layout_height="match_parent">

        <com.google.android.material.appbar.AppBarLayout
            android:layout_width="match_parent"
            android:layout_height="wrap_content">

            <com.google.android.material.appbar.MaterialToolbar
                android:id="@+id/topAppBar"
                style="@style/Widget.MaterialComponents.Toolbar.Primary"
                android:layout_width="match_parent"
                android:layout_height="?attr/actionBarSize"
                app:menu="@menu/eta"
                app:navigationIcon="@drawable/ic_baseline_arrow_back_24"
                app:navigationOnClickListener="@{() -> viewModel.goBack()}"
                app:subtitle="@{lineStationPresenter.mapLine(viewModel.line)}"
                app:title="@{lineStationPresenter.mapStation(viewModel.station)}"
                tools:subtitle="@tools:sample/cities"
                tools:title="@tools:sample/cities" />
        </com.google.android.material.appbar.AppBarLayout>

        <androidx.recyclerview.widget.RecyclerView
            android:id="@+id/recyclerView"
            isVisible="@{viewModel.showEtaList}"
            android:layout_width="match_parent"
            android:layout_height="match_parent"
            app:layout_behavior="@string/appbar_scrolling_view_behavior"
            tools:listitem="@layout/eta_list_eta_item" />

        <androidx.core.widget.NestedScrollView
            isVisible="@{viewModel.showError}"
            android:layout_width="match_parent"
            android:layout_height="match_parent"
            android:fillViewport="true"
            app:layout_behavior="@string/appbar_scrolling_view_behavior">

            <LinearLayout
                android:layout_width="match_parent"
                android:layout_height="match_parent"
                android:gravity="center"
                android:orientation="vertical"
                android:padding="16dp">

                <com.google.android.material.textview.MaterialTextView
                    android:layout_width="match_parent"
                    android:layout_height="wrap_content"
                    android:text="@{etaPresenter.mapErrorMessage(viewModel.errorResult)}"
                    android:textAlignment="center"
                    android:textAppearance="?textAppearanceBody1"
                    tools:text="@string/delay" />

                <com.google.android.material.button.MaterialButton
                    isVisible="@{viewModel.showViewDetail}"
                    android:layout_width="wrap_content"
                    android:layout_height="wrap_content"
                    android:layout_marginTop="16dp"
                    android:onClick="@{() -> viewModel.viewIncidentDetail()}"
                    android:text="@string/incident_cta" />

                <com.google.android.material.button.MaterialButton
                    isVisible="@{viewModel.showTryAgain}"
                    android:layout_width="wrap_content"
                    android:layout_height="wrap_content"
                    android:layout_marginTop="16dp"
                    android:onClick="@{() -> viewModel.refresh()}"
                    android:text="@string/try_again" />
            </LinearLayout>
        </androidx.core.widget.NestedScrollView>

        <com.google.android.material.progressindicator.CircularProgressIndicator
            isVisible="@{viewModel.showLoading}"
            android:layout_width="wrap_content"
            android:layout_height="wrap_content"
            android:layout_gravity="center"
            android:indeterminate="true"
            app:layout_behavior="@string/appbar_scrolling_view_behavior" />
    </androidx.coordinatorlayout.widget.CoordinatorLayout>
</layout>
MaterialToolbar 入面有一个切换班次排序的 menu item,下面是 menu resource XML:
<?xml version="1.0" encoding="utf-8"?>
<menu xmlns:android="http://schemas.android.com/apk/res/android"
    xmlns:app="http://schemas.android.com/apk/res-auto">

    <item
        android:id="@+id/changeSorting"
        android:icon="@drawable/ic_baseline_sort_24"
        android:title="@string/change_sorting"
        app:showAsAction="ifRoom" />
</menu>
EtaFragment
我们这次会先做成功显示班次的情景,所以其他地方会留待之後的篇章讨论。EtaFragment 主要的工作是初始化 layout XML data binding、因应 EtaViewModel 外露的 Flow 来更新 RecyclerView 内容和处理用户按下返回键时的转页导航。
在 onViewCreated 入面有一句 viewModel.setLanguage 用来通知 EtaViewModel 当前语言。要从 EtaFragment 取得当前语言而非由 EtaViewModel 经 constructor 取得 Application Context 然後取得当前语言是因为 ViewModel 能够在 configuration change 後生存(即是在 configuration change 後都能经 ViewModelProvider 取得同一个 ViewModel instance),这亦都是 ViewModel 只能用 Application Context 而非 Activity Context 的原因(因为 Activity 会在 configuration change 後 instantiate 一个新的 instance,如果 ViewModel 持有 Activity 的 instance 会在 configuration change 後 leak Activity 。)回到当前语言的问题,由於 EtaViewModel 在 instantiate 时就拿到 Application Context,那个 Context 在 configuration change 後就不能反映到当前用户所选的语言,要取得用户最新选用的语言就要靠 Activity 或 Fragment 的 resources.configuration 取得。这亦解释了为甚麽我们不会在 ViewModel call resources.getString 这类 method。如果你的 app 本身有强行更改 app locale 的话你应该会储存用户想看的语言,这样你可以在 use case constructor injection 取得语言设定而不用经 Activity 或 Fragment。
EtaPresenter 是用来协助显示错误文字,由於目前我们现在先处理成功的情景,我们暂时略过这部分。
而 onCreate 我们用了 onBackPressedDispatcher 拦截用户 back button 的原因是为了统一返回的处理。之前在 layout XML 我们按 MaterialToolbar 的返回按钮会 call EtaViewModel 的 goBack 处理,然後 EtaViewModel 会触发 navigateBack 的 Flow 发射一个讯号让 EtaFragment 导航。如果不加拦截的话用户按系统的 back button 就不会绕经这个流程,日後想更改返回的流程就要额外花时间理解为甚麽按上方的 back button 跟下方系统的 back button 会有不同效果。
@AndroidEntryPoint
class EtaFragment : Fragment() {
    private val viewModel by viewModels<EtaViewModel>()
    private var _binding: EtaFragmentBinding? = null
    private val binding: EtaFragmentBinding get() = _binding!!
    private var _adapter: EtaListAdapter? = null
    private val adapter: EtaListAdapter get() = _adapter!!

    @Inject
    lateinit var lineStationPresenter: LineStationPresenter

    @Inject
    lateinit var etaPresenter: EtaPresenter

    override fun onCreate(savedInstanceState: Bundle?) {
        super.onCreate(savedInstanceState)
        requireActivity().onBackPressedDispatcher.addCallback(this, true) {
            viewModel.goBack()
        }
    }

    override fun onCreateView(
        inflater: LayoutInflater,
        container: ViewGroup?,
        savedInstanceState: Bundle?
    ): View {
        _binding = EtaFragmentBinding.inflate(inflater, container, false)
        binding.lifecycleOwner = viewLifecycleOwner
        binding.viewModel = viewModel
        binding.lineStationPresenter = lineStationPresenter
        binding.etaPresenter = etaPresenter
        return binding.root
    }

    override fun onViewCreated(view: View, savedInstanceState: Bundle?) {
        super.onViewCreated(view, savedInstanceState)
        viewModel.setLanguage(resources.configuration.appLanguage)

        binding.topAppBar.setOnMenuItemClickListener {
            when (it.itemId) {
                R.id.changeSorting -> {
                    viewModel.toggleSorting()
                    true
                }
                else -> false
            }
        }

        _adapter = EtaListAdapter(
            lifecycleOwner = viewLifecycleOwner,
            presenter = lineStationPresenter,
        )
        with(binding.recyclerView) {
            layoutManager = LinearLayoutManager(requireContext())
            adapter = [email protected]
        }

        observeViewModel()
    }

    private fun observeViewModel() {
        viewLifecycleOwner.lifecycleScope.launch {
            viewLifecycleOwner.repeatOnLifecycle(Lifecycle.State.STARTED) {
                viewModel.navigateBack.collect {
                    findNavController().popBackStack()
                }
            }
        }
        viewLifecycleOwner.lifecycleScope.launch {
            viewLifecycleOwner.repeatOnLifecycle(Lifecycle.State.STARTED) {
                viewModel.etaList.collect {
                    adapter.submitList(it)
                }
            }
        }
    }

    override fun onDestroyView() {
        super.onDestroyView()
        binding.recyclerView.adapter = null
        _adapter = null
        _binding = null
    }
}
EtaViewModel
最後来到 EtaViewModel 的部分,部分 code 放了 TODO() 是因为这些部分会留待之後讲解。
import java.time.Duration as JavaDuration

@HiltViewModel
class EtaViewModel @Inject constructor(
    private val savedStateHandle: SavedStateHandle,
    private val clock: Clock,
    private val getEta: GetEtaUseCase,
) : ViewModel() {
    private val args by navArgs<EtaFragmentArgs>(savedStateHandle)
    private val language = MutableStateFlow(Language.ENGLISH)
    private val sortedBy = savedStateHandle.getLiveData(SORT_BY, 0).asFlow()
        .map { GetEtaUseCase.SortBy.values()[it] }
    val line: StateFlow<Line> = MutableStateFlow(args.line)
    val station: StateFlow<Station> = MutableStateFlow(args.station)
    private val _navigateBack = Channel<Unit>(Channel.BUFFERED)
    val navigateBack: Flow<Unit> = _navigateBack.receiveAsFlow()
    private val triggerRefresh = Channel<Unit>(Channel.BUFFERED)
    private val etaResult: StateFlow<Loadable<EtaResult>> = combineTransform(
        language,
        line,
        station,
        sortedBy,
        triggerRefresh.receiveAsFlow(),
    ) { language, line, station, sortedBy, _ ->
        emit(Loadable.Loading)
        emit(Loadable.Loaded(getEta(language, line, station, sortedBy)))
    }.stateIn(
        scope = viewModelScope,
        started = SharingStarted.WhileSubscribed(STATE_FLOW_STOP_TIMEOUT_MILLIS),
        initialValue = Loadable.Loading,
    )
    private val loadedEtaResult = etaResult.filterIsInstance<Loadable.Loaded<EtaResult>>()
        .map { it.value }
    val showLoading: StateFlow<Boolean> = etaResult
        .map { it == Loadable.Loading }
        .stateIn(
            scope = viewModelScope,
            started = SharingStarted.WhileSubscribed(STATE_FLOW_STOP_TIMEOUT_MILLIS),
            initialValue = true,
        )
    val showError: StateFlow<Boolean> = TODO()
    val showViewDetail: StateFlow<Boolean> = TODO()
    val showTryAgain: StateFlow<Boolean> = TODO()
    val errorResult: StateFlow<EtaFailResult> = TODO()
    val showEtaList = etaResult
        .map { it is Loadable.Loaded && it.value is EtaResult.Success }
        .stateIn(
            scope = viewModelScope,
            started = SharingStarted.WhileSubscribed(STATE_FLOW_STOP_TIMEOUT_MILLIS),
            initialValue = false,
        )
    val etaList = loadedEtaResult
        .filterIsInstance<EtaResult.Success>()
        .map { it.schedule }
        .combine(sortedBy) { schedule, sortedBy ->
            sequence {
                var lastDirection: EtaResult.Success.Eta.Direction? = null
                schedule.forEach {
                    if (lastDirection != it.direction && sortedBy == GetEtaUseCase.SortBy.DIRECTION) {
                        yield(EtaListItem.Header(it.direction))
                    }
                    yield(
                        EtaListItem.Eta(
                            direction = it.direction,
                            destination = it.destination,
                            platform = it.platform,
                            minuteCountdown = JavaDuration.between(clock.instant(), it.time)
                                .toMinutes()
                                .toInt()
                        )
                    )
                    lastDirection = it.direction
                }
            }.toList()
        }
        .stateIn(
            scope = viewModelScope,
            started = SharingStarted.WhileSubscribed(STATE_FLOW_STOP_TIMEOUT_MILLIS),
            initialValue = emptyList(),
        )
    private val _viewIncidentDetail = Channel<String>(Channel.BUFFERED)
    val viewIncidentDetail: Flow<String> = _viewIncidentDetail.receiveAsFlow()

    init {
        viewModelScope.launch {
            triggerRefresh.send(Unit)
        }
    }

    fun setLanguage(language: Language) {
        this.language.value = language
    }

    fun goBack() {
        viewModelScope.launch {
            _navigateBack.send(Unit)
        }
    }

    fun toggleSorting() {
        TODO()
    }

    fun refresh() {
        TODO()
    }

    fun viewIncidentDetail() {
        TODO()
    }
}
我们先看看 etaResult,我们用了 combineTransform 把 language(语言)、line(路綫)、station(车站)、sortedBy(排序)、triggerRefresh(触发重新载入)整合在一起然後 call API endpoint(即是 GetEtaUseCase)。除了 triggerRefresh 之外,其余的都是因为 GetEtaUseCase 需要用到才要加进入 combineTransform。而把 triggerRefresh 加进去只是单纯想触发它 call use case,这样我们就可以一直使用同一个上游不用因为每次 call API 更新就要切换一个全新的 Flow。在 combineTransform 我们会用 emit 来发射最新的 value 去下游。在这里我们先发射 Loadable.Loading 好让我们在 UI 能显示载入中的画面。而之後的 emit 就会等待 getEta return 回来後才会发射实际结果。这个写法会令每次 triggerRefresh 有东西被放进去後 etaResult 都会先发射载入中然後才发射实际 API 回传结果。而最後转成 StateFlow 就能让下游(即是其余在 data binding 用到的 StateFlow 和 etaList)每次有人 collect 时都不用再 call endpoint。而在 init 我们为了一进入这页就 call API,所以就加了一句 triggerRefresh.send(Unit) 来触发第一次的 API call。
接着就是 loadedEtaResult,它只是用来方便写之後的 Flow,因为有好几个 Flow 都会载入後的值才能继续。
然後就是显示 RecyclerView 的部分。showEtaList 就是控制 RecyclerView 是不是可见,所以就要检查是不是已收到 API 成功的结果。另外一个 Flow 是 etaList,很明显就是提供 RecyclerView 要显示的内容。这个我们要取得 EtaResult.Success.schedule(班次)和 sortedBy(排序方式)来准备那个 List。在 combine 内有一个 sequence { ... }.toList() 的 block,其实我只是借 Sequence 来生成一个 List。因为 buildList 现在仍是 experimental,如果不想 opt-in 去用这些 API 的话就找了 sequence 来代替。跟上面的 combineTransform 有点似,sequence 都有 yield 来提供元素放进去 Sequence 内。整段 code 的大意是:如果是按方向排序的话,那就在方向开首加插一个标题(因为 EtaResult.Success.schedule 已经按方向排序好,所以我们会留意 EtaResult.Success.schedule 的 direction 跟上一笔是否不同就知道要不要加插标题);如果是按时间排序就直接生成 EtaListItem.Eta 就可以了。在转换成供 adapter 使用的 EtaListItem.Eta 我们会把 Instant 换算成分钟。那个 JavaDuration 是 java.time.Duration,帮它改名是因为之後我们会同时用到 Java 的 Duration 和 Kotlin 的 Duration,为免混淆我们就把它改名。
至於 goBack 就是处理用户返回上一页的动作,由於我们没有特别的东西要做,所以就直接向 _navigateBack Channel 发送一个 Unit 就可以了,另外会提供一个 navigateBack 的 Flow 让 Fragment 接收。同时做 private 的 Channel 跟 public 的 Flow 意义在於 Channel 本身就可以让人放东西进去,在 ViewModel 我们应该只开放指定的渠道供 Fragment 去通知 ViewModel。把 Channel 直接 public 出去 Fragment 那边就可以直接绕过我们原先设计的机制,所以在很多 ViewModel 的示范都会同时出现 MutableLiveData 跟 LiveData、MutableStateFlow 跟 StateFlow 的组合,就是为了令 Fragment 那边不能直接改变 value,要改变 value 就一定要经 ViewModel 指定 method 去改。习惯上如果出现这种组合的话,我们会把 private 那个 variable 前面加一个 underscore (_) 来分别 public 那一个。如果你能想到一个更好的命字就当然直接用另一个名字。分开 public/private 的好处是为日後功能有变动时留有空间,而且把 logic 保留在 ViewModel 内。
小结
这次的内容比较长,这是因为我想尽量压缩篇数来写其他内容。现在我们已经做了最基本显示成功载入班次的部分。下一篇我们会暂时转一转题目,然後才继续余下的部分。
本篇我们看了用 combine 和 combineTransform 把多个 Flow 汇合成一个新的 Flow,以往用 LiveData 我们要自己 extend MediatorLiveData 才能做到的东西现在转用 Flow 就有现成的东西可以用。
完整的 code 可以在 GitHub repo 找到,不过会夹杂本篇未完成的部分,希望大家不要介意。
<<: [Day 24] 机器学习 - 不能忽视的过拟合与欠拟合
>>: Day 23 : Tkinter-利用Python建立GUI(基本操作及布局篇)
iOS APP 开发 OC 第五天, OC 数据类型
tags: OC 30 day OC 有哪些数据类型呢? oc 中支援所有C语言的数据变量。 基本数...
Day 24 - 影像处理篇 - 用Canvas实作动态绿幕抠像 - 成为Canvas Ninja ~ 理解2D渲染的精髓
上一篇我们提到我们接着要开始玩一些比较有趣的实作~ 所以我们就来讲讲怎麽在web端实作绿幕抠像(Gr...
Day6 Director & Match Function
首先我们会介绍 Director 是如何实作的,并介绍 Director 跟 Open-Match ...
Day5 NiFi - FlowFiles
还记得系列文的一开始,有先向各位读者介绍在 NiFi 中重要的几个 Componenet,那时候还只...
印表机维修五种常见故障,若遇到问题就能先自己排除了
印表机维修常见故障问题,原因分析:对於喷墨印表机,可能有两方面原因:1.墨盒墨尽;2.印表机长时间不...