EP17 - 容器化你的 Django 专案
昨天我们简单介绍什麽是容器,
今天我们要开始实战,
将你的 Django Portal,
逐步包装成容器,
并放到 AWS 的容器储存库(ECR),
中间的过程,
我们会再把之前建置环境的过程简略带过,
建置完成後会将建置完成的容器,
在 CI/CD 的过程中,
将容器推送到 AWS 容器储存库(ECR)。
(还不会部署到 Kubernetes)
建立 AWS ECR使用 Terraform
什麽是 AWS ECR
Amazon Elastic Container Registry (Amazon ECR) 是一个全受管容器登录档
可随时随地轻松存放、管理、共享及部署容器映像和成品
Amazon ECR 让您不必操作自己的容器储存库
也不必担心如何扩展基础设施
Amazon ECR 会将您的映像托管在高可用性及高效能架构中
让您可靠地为您的容器应用程序部署映像
您可以在组织内以私有方式共享容器软件
也可以在世界范围内以公有方式共享
让任何人都可以探索和下载
所以使用容器储存库
不一定要使用 Dockerhub
使用 Amazon ECR 一样可公开可私有
Terraform
不要怀疑
建立一个 ecr repository 就是这麽简单
比较特别的是 image_tag_mutability 这个 attribute
因为我们在 push 上 repository 的时候
会不断地覆盖 latest
如果没有设成 MUTABLE
会造成第一次可以顺利 push
之後 push latest 的时候因为不能更改
所以就失败了
resource "aws_ecr_repository" "portal" {
    name                 = "portal"
    image_tag_mutability = "MUTABLE"

    image_scanning_configuration {
        scan_on_push = true
    }
}
terraform apply
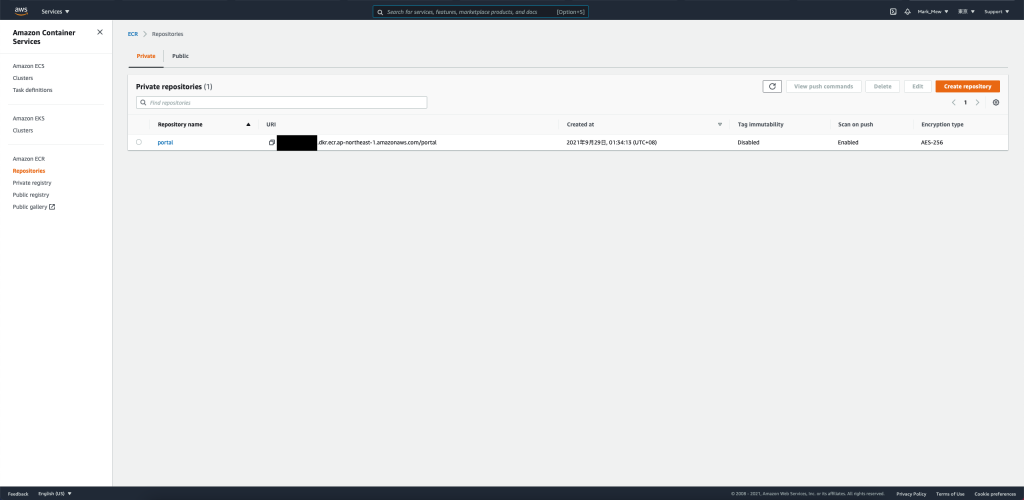
AWS 查看
建立後我们可以登入 AWS Cloud Console
查看是否有正常建立
在搜寻框内输入 ECR
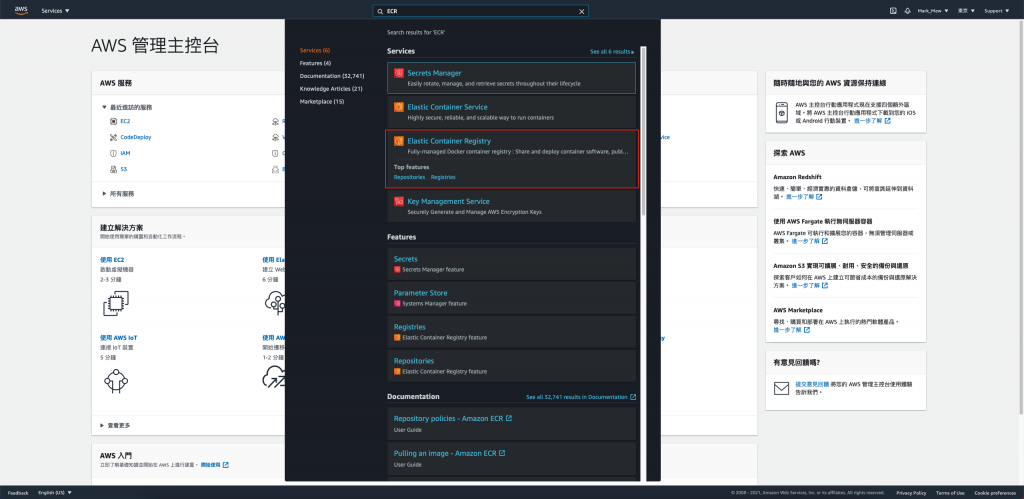
点入後就可以看见容器储存库的列表
将 Django 专案容器化
安装 Docker
在 EP10 - Django 持续整合持续部署使用 Jenkins 和 AWS CodeDeploy 的时候
我们有介绍过如何在 Jenkins Server 上安装 Docker
这次我们要安装的环境是本机的 vagrant
因为 Ubuntu 版本相同
所以也比照同样方式安装就可以了
不过因为我们没有在本机跑 Jenkins
所以最後 Grant Jenkins 的权限就不用做
只需要 Grant 给 vagrant 就可以了
那我们先到我们虚拟机械的 console
Adding Docker’s GPG Key
curl -fsSL https://download.docker.com/linux/ubuntu/gpg | sudo apt-key add -
Installing the Docker Repository
sudo add-apt-repository "deb [arch=amd64] https://download.docker.com/linux/ubuntu $(lsb_release -cs) stable"
Installing the Latest Docker
sudo apt update
sudo apt-get install docker-ce
Verifying Docker Installation
docker --version
Start and Enable Docker
sudo systemctl start docker
sudo systemctl enable docker
变更权限
sudo chown vagrant:docker /var/run/docker.sock
sudo chmod 644 /var/run/docker.sock
修改 apache.conf
上次我们在 EP09 - 建立 Django 专案和 EC2 环境 并手动部署到 EC2
有提到要去 /etc/apache2/apache2.conf 的最下方 apend 几行
但是要实际建立 Docker 就不能这麽偷懒
这里我是会把 apache.conf 进版控
并且在制作容器时
整份档案复制进去
我们在 portal 专案的根目录新增一个 apache2.conf 档案
并把以下档案附近进去
需要注意的是 LoadModule wsgi_module 的档名和位置
会因为使用的 python 版本而有所不同
# This is the main Apache server configuration file.  It contains the
# configuration directives that give the server its instructions.
# See http://httpd.apache.org/docs/2.4/ for detailed information about
# the directives and /usr/share/doc/apache2/README.Debian about Debian specific
# hints.
#
#
# Summary of how the Apache 2 configuration works in Debian:
# The Apache 2 web server configuration in Debian is quite different to
# upstream's suggested way to configure the web server. This is because Debian's
# default Apache2 installation attempts to make adding and removing modules,
# virtual hosts, and extra configuration directives as flexible as possible, in
# order to make automating the changes and administering the server as easy as
# possible.

# It is split into several files forming the configuration hierarchy outlined
# below, all located in the /etc/apache2/ directory:
#
#       /etc/apache2/
#       |-- apache2.conf
#       |       `--  ports.conf
#       |-- mods-enabled
#       |       |-- *.load
#       |       `-- *.conf
#       |-- conf-enabled
#       |       `-- *.conf
#       `-- sites-enabled
#               `-- *.conf
#
#
# * apache2.conf is the main configuration file (this file). It puts the pieces
#   together by including all remaining configuration files when starting up the
#   web server.
#
# * ports.conf is always included from the main configuration file. It is
#   supposed to determine listening ports for incoming connections which can be
#   customized anytime.
#
# * Configuration files in the mods-enabled/, conf-enabled/ and sites-enabled/
#   directories contain particular configuration snippets which manage modules,
#   global configuration fragments, or virtual host configurations,
#   respectively.
#
#   They are activated by symlinking available configuration files from their
#   respective *-available/ counterparts. These should be managed by using our
#   helpers a2enmod/a2dismod, a2ensite/a2dissite and a2enconf/a2disconf. See
#   their respective man pages for detailed information.
#
# * The binary is called apache2. Due to the use of environment variables, in
#   the default configuration, apache2 needs to be started/stopped with
#   /etc/init.d/apache2 or apache2ctl. Calling /usr/bin/apache2 directly will not
#   work with the default configuration.


# Global configuration
#

#
# ServerRoot: The top of the directory tree under which the server's
# configuration, error, and log files are kept.
#
# NOTE!  If you intend to place this on an NFS (or otherwise network)
# mounted filesystem then please read the Mutex documentation (available
# at <URL:http://httpd.apache.org/docs/2.4/mod/core.html#mutex>);
# you will save yourself a lot of trouble.
#
# Do NOT add a slash at the end of the directory path.
#
#ServerRoot "/etc/apache2"

#
# The accept serialization lock file MUST BE STORED ON A LOCAL DISK.
#
#Mutex file:${APACHE_LOCK_DIR} default

#
# The directory where shm and other runtime files will be stored.
#

DefaultRuntimeDir ${APACHE_RUN_DIR}

#
# PidFile: The file in which the server should record its process
# identification number when it starts.
# This needs to be set in /etc/apache2/envvars
#
PidFile ${APACHE_PID_FILE}

#
# Timeout: The number of seconds before receives and sends time out.
#
Timeout 300

#
# KeepAlive: Whether or not to allow persistent connections (more than
# one request per connection). Set to "Off" to deactivate.
#
KeepAlive On

#
# MaxKeepAliveRequests: The maximum number of requests to allow
# during a persistent connection. Set to 0 to allow an unlimited amount.
# We recommend you leave this number high, for maximum performance.
#
MaxKeepAliveRequests 100

#
# KeepAliveTimeout: Number of seconds to wait for the next request from the
# same client on the same connection.
#
KeepAliveTimeout 5


# These need to be set in /etc/apache2/envvars
User ${APACHE_RUN_USER}
Group ${APACHE_RUN_GROUP}

#
# HostnameLookups: Log the names of clients or just their IP addresses
# e.g., www.apache.org (on) or 204.62.129.132 (off).
# The default is off because it'd be overall better for the net if people
# had to knowingly turn this feature on, since enabling it means that
# each client request will result in AT LEAST one lookup request to the
# nameserver.
#
HostnameLookups Off

# ErrorLog: The location of the error log file.
# If you do not specify an ErrorLog directive within a <VirtualHost>
# container, error messages relating to that virtual host will be
# logged here.  If you *do* define an error logfile for a <VirtualHost>
# container, that host's errors will be logged there and not here.
#
ErrorLog ${APACHE_LOG_DIR}/error.log

#
# LogLevel: Control the severity of messages logged to the error_log.
# Available values: trace8, ..., trace1, debug, info, notice, warn,
# error, crit, alert, emerg.
# It is also possible to configure the log level for particular modules, e.g.
# "LogLevel info ssl:warn"
#
LogLevel warn

# Include module configuration:
IncludeOptional mods-enabled/*.load
IncludeOptional mods-enabled/*.conf

# Include list of ports to listen on
Include ports.conf


# Sets the default security model of the Apache2 HTTPD server. It does
# not allow access to the root filesystem outside of /usr/share and /var/www.
# The former is used by web applications packaged in Debian,
# the latter may be used for local directories served by the web server. If
# your system is serving content from a sub-directory in /srv you must allow
# access here, or in any related virtual host.
<Directory />
        Options FollowSymLinks
        AllowOverride None
        Require all denied
</Directory>

<Directory /usr/share>
        AllowOverride None
        Require all granted
</Directory>

<Directory /var/www/>
        Options Indexes FollowSymLinks
        AllowOverride None
        Require all granted
</Directory>

#<Directory /srv/>
#       Options Indexes FollowSymLinks
#       AllowOverride None
#       Require all granted
#</Directory>


# AccessFileName: The name of the file to look for in each directory
# for additional configuration directives.  See also the AllowOverride
# directive.
#
AccessFileName .htaccess

#
# The following lines prevent .htaccess and .htpasswd files from being
# viewed by Web clients.
#
<FilesMatch "^\.ht">
        Require all denied
</FilesMatch>

#
# The following directives define some format nicknames for use with
# a CustomLog directive.
#
# These deviate from the Common Log Format definitions in that they use %O
# (the actual bytes sent including headers) instead of %b (the size of the
# requested file), because the latter makes it impossible to detect partial
# requests.
#
# Note that the use of %{X-Forwarded-For}i instead of %h is not recommended.
# Use mod_remoteip instead.
#
LogFormat "%v:%p %h %l %u %t \"%r\" %>s %O \"%{Referer}i\" \"%{User-Agent}i\"" vhost_combined
LogFormat "%h %l %u %t \"%r\" %>s %O \"%{Referer}i\" \"%{User-Agent}i\"" combined
LogFormat "%h %l %u %t \"%r\" %>s %O" common
LogFormat "%{Referer}i -> %U" referer
LogFormat "%{User-agent}i" agent

# Include of directories ignores editors' and dpkg's backup files,
# see README.Debian for details.

# Include generic snippets of statements
IncludeOptional conf-enabled/*.conf

# Include the virtual host configurations:
IncludeOptional sites-enabled/*.conf

# vim: syntax=apache ts=4 sw=4 sts=4 sr noet
ServerName localhost
# WSGIDaemonProcess portal processes=2 threads=12 python-home=/var/www/portal
# WSGIProcessGroup portal
# WSGIRestrictEmbedded On
# WSGIPassAuthorization On
Alias /static/ /var/www/portal/static
<Directory /var/www/portal/static>
  Require all granted
</Directory>

LoadModule wsgi_module "/var/www/venv/portal/lib/python3.7/site-packages/mod_wsgi/server/mod_wsgi-py37.cpython-37m-x86_64-linux-gnu.so"
WSGIPythonHome /var/www/venv/portal
WSGIPythonPath /var/www/portal
WSGIScriptAlias / /var/www/portal/portal/wsgi.py
<Directory /var/www/portal/portal>
  <Files wsgi.py>
    Require all granted
  </Files>
</Directory>
配置 Dockerfile
在根目录新增一个档案叫 Dockerfile
FROM python:3.7.10-slim
MAINTAINER Mark_Mew

ENV APACHE_LOG_DIR /var/log/apache2

RUN apt-get -qq update \
    && apt-get upgrade -y \
    && apt-get install -y libpq-dev \
    && apt-get install -y apache2 apache2-dev \
    && apt-get clean

RUN chmod 755 -R /var/log/apache2 \
    && chown www-data:www-data -R /var/log/apache2 \
    && mkdir /var/www/portal \
    && mkdir /var/www/venv \
    && /usr/local/bin/python3.7 -m pip install --upgrade pip \
    && /usr/local/bin/pip install virtualenv \
    && /usr/local/bin/virtualenv /var/www/venv/portal

COPY apache2.conf /etc/apache2/
ADD portal.tar.gz /var/www/portal/

RUN /var/www/venv/portal/bin/pip install mod_wsgi \
   && /var/www/venv/portal/bin/pip install -r /var/www/portal/requirements.txt

WORKDIR /var/www/portal

CMD ["apachectl", "-D", "FOREGROUND"]
建置与执行
打包一份最新的程序码
git archive --format=tar.gz --output ./portal.tar.gz HEAD
在专案的根目录建置容器
sudo docker build -t portal .
执行 docker
因为 vagrant 只对外开 8000 port
但是 docker 里面装 apache2 预设会吃 80 port
因此需要做一次 port forward
sudo docker run -p 8000:80 -it --rm portal
打开浏览器确认是否正常执行
理论上上方执行无误的话
都可以正常跑起来
其他指令
这边主要告诉大家一条可以走的路
至於 docker 指令或 debug 方式
我觉得就有点仰赖经验
有时候我会更改 entrypoint 用 bash 进去
看我档案是否摆放正确
或是套件是否正常安装
有时候则是 exec
将容器启动并进入後将所有服务启动
并反覆离开进入查看状况
docker ps -a
docker rm 'container id'
docker rmi 'image id'
docker run -it --rm --entrypoint /bin/bash portal
Jenkins 整合 ECR
修改 IAM 权限
以最小权限来看
至少我们需要以下权限
因为 Container 每个聚合在一起的指令都是一层
会了能够也将每层放上 ECR
所以有些权限也是需要加的
stage/main.tf
resource "aws_iam_user_policy" "jenkins_push_ecr" {
    name = "JenkinsPushEcr"
    user = aws_iam_user.jenkins.name

    policy = <<EOF
{
  "Version": "2012-10-17",
  "Statement": [
    {
      "Action": [
        "ecr:PutImageTagMutability",
        "ecr:GetAuthorizationToken",
        "ecr:ListTagsForResource",
        "ecr:UploadLayerPart",
        "ecr:ListImages",
        "ecr:PutImage",
        "ecr:UntagResource",
        "ecr:CompleteLayerUpload",
        "ecr:DescribeImages",
        "ecr:TagResource",
        "ecr:DescribeRepositories",
        "ecr:InitiateLayerUpload",
        "ecr:BatchCheckLayerAvailability"
      ],
      "Effect": "Allow",
      "Resource": "*"
    }
  ]
}
EOF
}
terraform apply
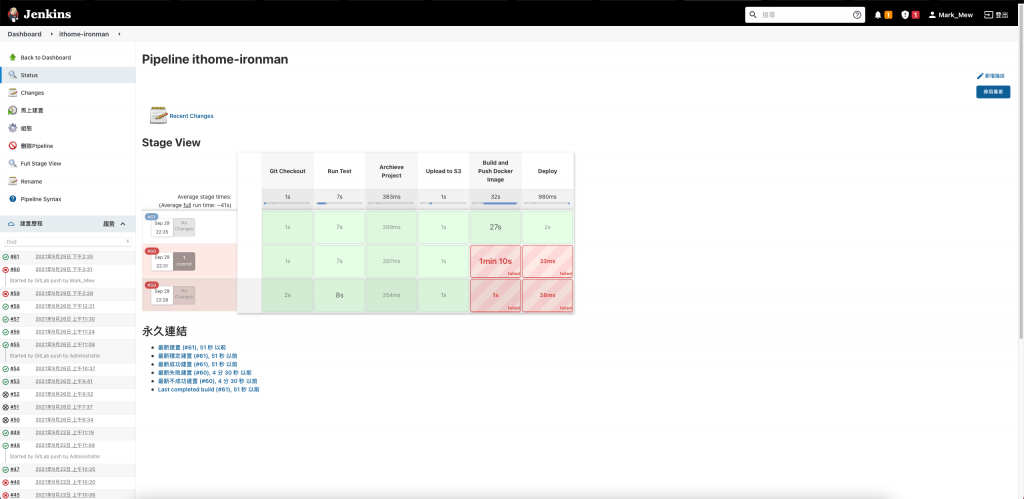
Pipeline
我们在 Upload to S3 和 Deploy 中间
加一个建置 Docker 并上传到 ECR 的步骤
比较特别的是
根据官网描述的使用方式
我们需要先呼叫一个 get-login 的语法取得密码才能做登入
使用者名称统一是 AWS
看起来 ECR 底层被 AWS 包的很好
这样才能统一用 IAM 管理所有权限
    stage('Upload to S3') {
        steps {
            echo 'Upload...'
            dir('ithome-ironman') {
                sh "docker run --rm -v ${WORKSPACE}/ithome-ironman:/app -v /usr/local/src/aws_docker_file/.aws:/root/.aws mikesir87/aws-cli aws s3 cp /app/portal.tar.gz s3://ithome-ironman-markmew-jenkins/portal/stage/portal-${env.BUILD_ID}.tar.gz"
            }
        }
    }
    stage('Build and Push Docker Image') {
        steps {
            script {
                dir('ithome-ironman') {
                    echo 'Building...'
                    def customImage = docker.build("portal:${env:BUILD_ID}", "./")
                    echo 'Validating... aws'
                    sh 'docker run --rm -v /usr/local/src/aws_docker_file/.aws:/root/.aws mikesir87/aws-cli aws ecr get-login-password --region ap-northeast-1 | docker login --username AWS --password-stdin 帐号.dkr.ecr.ap-northeast-1.amazonaws.com'
                    echo 'Tag docker image'
                    sh "docker tag portal:${env:BUILD_ID} ECR位置:${env:BUILD_ID}"
                    sh "docker tag portal:${env:BUILD_ID} ECR位置:latest"
                    echo 'Push docker image'
                    sh "docker push ECR位置:${env:BUILD_ID}"
                    sh "docker push ECR位置:latest"
                }
            }
        }
    }
    stage('Deploy') {
        steps {
            echo 'Deploy ...'
            dir('ithome-ironman') {
                sh "docker run --rm -v /usr/local/src/aws_docker_file/.aws:/root/.aws mikesir87/aws-cli aws deploy create-deployment --application-name ithome-ironman-portal --deployment-config-name CodeDeployDefault.OneAtATime --deployment-group-name ithome-ironman-portal --description \"codedeploy test\" --s3-location bucket=ithome-ironman-markmew-jenkins,bundleType=tgz,key=portal/stage/portal-${env.BUILD_ID}.tar.gz"
            }
        }
    }
将 Portal 的程序码 checkin 进 git
git add Dockerfile
git add apache2.conf
git commit -m "Build docker container for portal"
git push
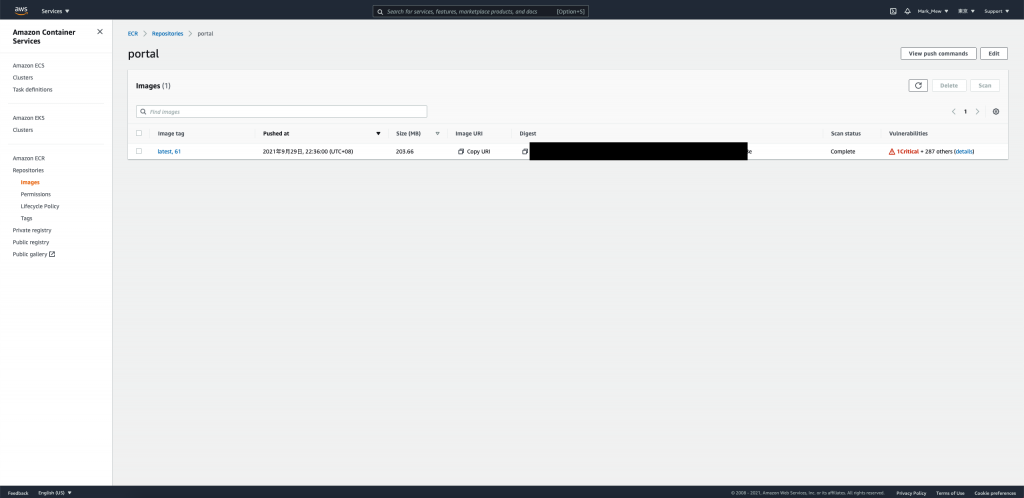
然後就可以让整个流程自动化跑起来
流程如果顺利执行完
就可以到 ECR 看到刚刚 Push 的 Container 罗
虽然我比较想要
带大家一步一步走
做到打造一个服务并放上
但是每个需要知道的背景知识似乎有点多
没有解释的部分
可能也要参考其他前辈写的教学文了
参考资料:
<<: D29 - 如何打包 Apps Script 的程序码?(二)包成 HTML 网页与或 API
[Day29] Room创出来就好吗?
当然要拿来用啊 於是我想利用Room 当我储存每个平台帐号密码的资料库 并且要可以浏览每个平台 这个...
第18天~SharedPreference常被使用於资料储存
SharedPreference常被使用於资料储存,很适合做一些简单的资料存取 先配置按钮-因为是要...
[NestJS 带你飞!] DAY12 - Interceptor
什麽是 Interceptor? 中文名称为拦截器,受到 剖面导向程序设计 (Aspect Orie...
Day-03 说明在 Ruby 里常数 (constant) 跟变数 (variable) 的差别是什麽?
其实在 Ruby 的世界里常数(constant)和变数(variable)两者的差别并不大! 他...
Day 29. 聊聊 Hugo SEO
前言 做好 Search Engine Optimizing (SEO),可以让使用者透过搜寻引擎,...