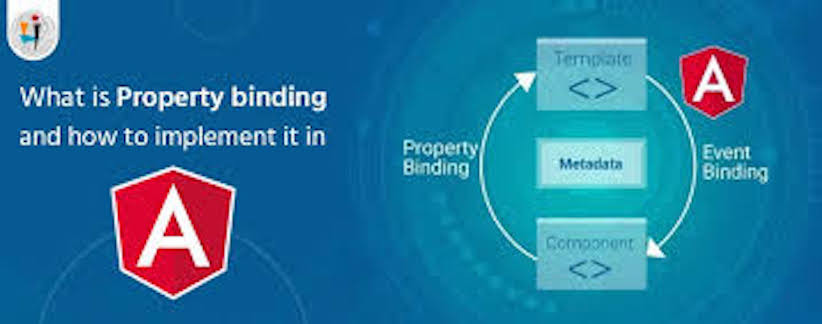
[Angular] Day10. Property binding and Event binding
本篇中将介绍 Angular 的 property binding 与 event binding,property binding 可以让你设置 HTML Tag 或 directive 的属性值,可以利用 property binding 做到切换按钮、以程序方式设置 url 路径以及在各个 Component 之间共享数据等等。
而 Event binding 则是可以将事件绑定在 HTML 的元件上,随时监听使用者的操作,例如按下按键、滑鼠移动、点击以及触摸,就先从 property binding 开始介绍吧。

Binding to a property
在 Angular 中的 property binding 会让数据往一个方向流动,就是从 component 流向 HTML 的元件,而如果要将数据绑定到 HTML 元件请使用方括号( [ ] )将他括在其中,比如说可以将 <img>中的 src 属性利用 property binding 绑定。
<img [src]="itemImageUrl">
在大多数形况下目标名称就是属性的名称,所以以上面的例子来说,src 就是 <img> 元件的属性名称,而方括号会让 Angular 将等号右边评估为动态表达式,如果没有括号 Angular 会将右侧视为字串文字并将属性设置为该静态值。
Setting an element property to a component property value
以上面的例子来说,如果要将 <img> 的属性绑定到 Component 的 property,请将 src 放在方括号中,後面加上等号与 component 的 property 名称。
<img [src]="itemImageUrl">
这时就可以在 Component 中定义一个 property 并将他赋值,那麽这个值就会绑定到 HTML 的元件上
itemImageUrl: '../assets/phone.png'
Toggling button functionality
在 <button> 这个 HTML 中有一个属性可以控制是否可以点击这个按钮那就是 disabled,我们可以透过 property binding 将这个属性绑定到 component 的 property,建立一个动态改变他状态的功能,一样来举个例子吧:
-
在 app.component.ts 中新增一个 property 用来绑定
<button>与一个 method 用来更改 property 的值import { Component } from '@angular/core'; @Component({ selector: 'app-root', templateUrl: './app.component.html', }) export class AppComponent { isUnchanged = true; onButtonChange() { this.isUnchanged = !this.isUnchanged; } } -
在 app.component.html 中新增两个
<button>一个用来做 property binding 另一个用来改变 property 的内容<!-- app.component.html --> <div style="margin-bottom: 10px;"> <button [disabled]="isUnchanged">Property binding</button> </div> <button (click)="onButtonChange()">Change Property value</button>

在画面中可以看到,当我们点击 Change Property value 时,他将 Component 中的 isUnchanged 内容更改,所以让 Property binding 这个 <button> 可以动态被 disable 与 enable。
Bind values between components
在前几天介绍 @Input() 时常常在用到的 <app-child-component [item]="currentItem"></app-child-component> 其实就是 property binding,将父层 component 中的 property 绑定给子层,当父层 Component 的这个 property 发生改变时,因为绑定的关系所以会将这个改变也带给子层,
这边再稍微复习一下该怎麽使用 @Input() 吧![]()
-
先 parent.component.ts 中定义一个 property 并将他赋值
import { Component } from '@angular/core'; @Component({ selector: 'app-parent-component', templateUrl: './parent.component.html' }) export class ParentComponent { constructor() { } currentItem = 'Television'; // defind a property } -
在 parent.component.html 中使用 property binding 将父层的 currentItem property 绑定给子层
<app-child-component [item]="currentItem"></app-child-component> -
在 child.component.ts 中使用 @Input( ) 装饰器将 property 装饰为是从父层传下来的
import { Component, Input } from '@angular/core'; @Component({ selector: 'app-child-component', templateUrl: './child.component.html' }) export class ChildComponent { @Input() item = ''; constructor() { } } -
在 child.component.html 中使用 Text interpolation 将他呈现在画面上
<div>Today's item: {{ item }}</div>
当初在介绍 @Input() 时还有很多技巧没有讲到(property binding、test interpolation)现在在重复看一次之前的例子有没有比较可以把前几章的内容串起来了呢。
Property binding and security
既然 property binding 这麽好用,那有没有什麽问题或是缺点呢?来看看下面的例子
evilTitle = 'Template <script>alert("evil never sleeps")</script> Syntax';
当我在一个 component 中添加一个属性,并将这个属性里面多加了 <script>,在这个里面放了一些会危害到你专案的 javascript 程序,那麽会发生什麽事?
其实不会发生上面说的会危害到你专案的情况发生,因为 Angular 在 property binding 中有做一个限制,不允许带有 <script> 标签的 HTML 元件,也不允许带有插值和属性绑定,所以将上面那个 property 差值到你的 HTML file 中时,会有下面的 error message
"Template <script>alert("evil never sleeps")</script> Syntax" is the interpolated evil title.
这是 Angular 对 property binding 做的安全机制。
Property binding and interpolation
可能有人会问拉:property binding 与 text interpolation 都是将 component 中的 property 绑定在 HTML file 中,那们他们有什麽不一样吗?
其实这个问题非常好,他们两个理论上可以达到相同的目的
<p>
	<img src="{{itemImageUrl}}"> is the <i>interpolated</i> image.
</p>
<p>
	<img [src]="itemImageUrl"> is the <i>property bound</i> image.
</p>
上面这两个的结果会是一样的,无论是透过 text interpolation 将 property 插进 <img> 的 src 属性,还是利用 proprety binding 住 <img> 的 src 属性都是可以将 component 的 property 放进我们想放的位置。
虽然两个都可以达到目的,所以当在将数据值呈现为字串时可以使用两种方法的其中一种,但为了可读性更倾向於使用 text interpolation,但是当将元素属性设置为非字串数值时,就必须使用属性绑定,比如上面提到的 <button> 的 disabled 属性。
Binding to events
介绍完 property binding 後,接着要来介绍 event binding,顾名思义他就是将 event 绑定到 HTML 的元件上用於监听使用这的操作,event binding 的语法是将目标事件名称放在等号左边的括弧中和将引号的模板语句 放在右侧,举个例子吧,当画面中的一个按钮被点击到时,要触发 component 中的 onSave() method,这时就可以这样写
<button (click)="onSave()">Save</button>

如果你的 method 是带有参数的,只要再等号右边的 method 的括号中填入参数即可
<button (click)="onSave(data)">Save</button>
Custom events with EventEmitter
还记得在前几天中介绍的 @Output() 吗?来复习一下吧, @Output() 的用意是将子层的内容透过一个 event 往上传递给父层,一样举个子来回忆一下吧
-
在 child.component.ts 中加入一个 property 并将他使用 @Output() 装饰成 EventEmitter 型态
import { Component, Output, EventEmitter } from '@angular/core'; @Component({ selector: 'app-child-component', templateUrl: './child.component.html', styleUrls: ['./child.component.css'] }) export class ChildComponent { @Output() newItemEvent = new EventEmitter<boolean>(); // (2) constructor() { } parentValueChange(value: boolean) { this.newItemEvent.emit(value); } } -
在 child.component.html 中新增两个
<button>用来让 user 点击触发 event<!-- child.component.html --> <p>child component works!</p> <div class="button"> <button (click)="parentValueChange(true)">+</button> <button (click)="parentValueChange(false)">-</button> </div> -
在 parent.component.ts 中添加一个 method,用来处理当子层传送的数据
import { Component } from '@angular/core'; @Component({ selector: 'app-parent-component', templateUrl: './parent.component.html' }) export class ParentComponent { constructor() { } counterValue = 0; addOrSub(event: boolean) { if (event) { this.counterValue++; } else { this.counterValue--; } } } -
在 parent.component.html 中使用 event binding 将子层传送的事件与 parent.component.ts 的 method 绑定
<!-- parent.component.html -->
<p>parent component works!</p>
<div>parent component property counter: {{counterValue}}</div>

<hr>
<app-child-component (newItemEvent)="addOrSub($event)"></app-child-component>
在介绍完 event binding 後再回来看这个例子,有没有更能够了解如何使用 @Output() 与 evebt binding 了呢?
Determining an event target
在使用 Event binding 时,Angular 会检查 event target 的名称是否与已知指令事件属性匹配,比如说
<button (myClick)="clickMessage=$event" clickable>click with myClick</button>
你使用了一个自订义的 (myClick) 作爲 event target 时,因为他不符合已知指令事件属性,所以 Angular 会传出 unknown directive 的错误讯息,所以在使用 event binding 时要记得使用正确的 event target 喔!
结论
在本章中介绍了两种 binding,property binding 是用於将 component 中的 property 绑定给 HTML 中的元件,常用在将父层的 property 绑定给子层、将比较复杂或是需要逻辑计算的 HTML 元件属性放到 component 中计算後再放回等等。
而 event binding 是将 component 中的 method 绑定到 HTML 的元件上用於监听使用者的操作,常用再处理使用者使用者操作画面而处发的事件、将子层透过 EventEmitter 往父层传递数据时的绑定。
下一章将会介绍另外两种 binding 方法,分别是 Attrubute, class, strle binding 与 Two-way binding, Attrubute, class, strle binding 顾名思义就是将 component 中的 property 绑定到 HTML 的 class 或 attrubute,而 Two-way binding 则是可以让父子层之间只使用一个 binding 就可以同时监听事件与更新值,不需要使用 property binding 和 event binding。
Reference
>>: DAY5 速谈flex gride布局、定位、响应式
信托业业务人员信托业务专业测验 -- 攻略心得
前言 为什麽会想讲这个主题呢? IT人员如果有一天跳槽到金融业,可能就需要一张金融证照, 而信托业业...
Day-7 Pipeline
Pipeline tags: IT铁人 Clock Cycle Time Clock Cycle T...
第 28 集:Bootstrap 客制化 component 元件样式
此篇会介绍如何修改 Bootstrap 元件样式。 事前准备 须先了解变数设置、通用类别设置,再继...
【从实作学习ASP.NET Core】Day18 | 後台 | 会员的 CRUD 页面
今天接续昨天的内容,把会员管理页面做一个收尾 使用者列表 这边可以用 ViewModel 来呈现使用...
[Golang]同步工具-sync包的WaitGroup-心智图总结
1. WaitGroup类型有三个指针方法,Add、Done、Wait A. 这个类型提供ㄧ个计数器...