新新新手阅读 Angular 文件 - Day05
学习内容
这篇内容是纪录阅读官方文件 Create a feature component 的内容。
当专案的内容越来越多的时候,我们不可能再将所有内容都放在同一个元件中,这会让专案变得比较难维护,所以,我们会将这个元件拆成好几个小元件,让每个小元件只专注在特定的任务。
本章就是在记录如何将一个大元件拆成几个小元件的内容。
创出专门呈现英雄详细资料的元件
延续 Day04 的专案内容,我们要创一个 hero-detail 的小元件,专门呈现被点击英雄的详细资料。
所以,我们在 Angular CLI 中输入 ng generate component hero-detail ,在专案中创出 hero-detail 这个元件。
当成功创建之後,你会发现在 src/app 目录底下会出现一个 hero-detail 的资料夹,里面就放了专属此元件的三个构成档案 ts, css, html。且我们也可以在 app.module.ts 看到 CLI 自动帮我们将这个 hero-detail 元件加到declarations 的阵列中。
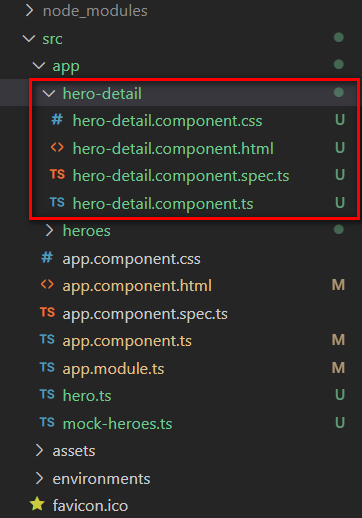
资料夹结构就会长得像下面这样
Notice: 这边注意到一下就是虽然档名是 hero-detail ,但是,在档案中这个元件的名称直接会被改成 HeroDetailComponent 写法,甚至在 app.module.ts 引入这个元件的时候也是用 HeroDetailComponent 写法。
撰写 HeroDetailComponent 的样板内容
接下来,撰写 hero-detail.component.html 的内容。
我们可以直接把原本在 heroes.component.html 中,有关 selectedHero 的部分,直接贴到 hero-detail.component.html 里。
在 hero-detail.component.html 中,不需再使用到 selectedHero 这变数了,可以任意命名这个变数,因为这个变数的内容是会由元件外部传进来的,所以,我们这边直接将 selectedHero 换成 hero。
所以 hero-detail.component.html 内容会如下
--- hero-detail.component.html ---
<div *ngIf="hero">
  <h2>{{hero.name | uppercase}} Details</h2>
  <div><span>id: </span>{{hero.id}}</div>
  <div>
    <label for="hero-name">Hero name: </label>
    <input id="hero-name" [(ngModel)]="hero.name" placeholder="name">
  </div>
</div>
新增元件的媒介属性
上面有提到原本 selectedHero 这个资料内容,会由 hero-detail 元件的外部传入元件内部,所以,我们会需要定义 hero-detail 的媒介属性,将外部的资料接进来,提供给元件内部使用(很像 Vue 的 props)。
所以,我们会在 hero-detail 元件引入 Input 这个模组,利用它来定义元件的媒介属性。
接着,就利用它来定义媒介属性罗,程序码如下
--- hero-detail.component.ts ---
import { Component, OnInit, Input } from '@angular/core';
import { HERO } from '../hero';

@Component({
  // ...
})
export class HeroDetailComponent implements OnInit {
  // ...
  @Input() hero?: HERO  // 定义 hero 媒介属性
}
我们利用 Input 模组来定一个叫 hero 的媒介属性,接着,我们在 HeroesComponent 的 html 档案中加入 HeroDetailComponent 的 html 标签。
--- heroes.component.html ---
<h2>My Heroes</h2>
<ul class="heroes">
  <li *ngFor="let hero of heroes" (click)="onSelect(hero)" [class.selected]="hero === selectedHero">
    <span class="badge">{{hero.id}}</span> {{hero.name}}
  </li>
</ul>

<app-hero-detail [hero]="selectedHero"></app-hero-detail>  // 利用 hero 来将外部资料 selectedHero 接进来
用以上的方法,我们就可以将指定英雄的物件,透过 hero 这个属於 HeroDetailComponent 的媒介属性传入 HeroDetailComponent 里,再透过这个传入的资料来呈现详细的英雄资讯在画面中。
现在我们知道 HeroesComponent 是父层元件,HeroDetailComponent 是子层元件,而将子层元件加入父层元件的方式就是将它的 @Compoent 的 selector 的内容贴到到父层元件的 html 中,所以,可以看到上面的 heroes.component.html 中加入了 app-hero-detail 标签,让 HeroDetailComponent 元件的内容加入到 HeroesComponent 中。
而本文中 HeroDetailComponent 的媒介属性 hero ,是 Angular 中 one way data binding 的用法。
经过以上的操作之後,网页的画面结果会像下面这样

虽然,看起来跟昨天的操作结果没有不同,但是,我们确实的将呈现英雄详细资料的功能切分给 hero-detail 元件来处理罗~
Summary
这边做个总结,
- 如何使用
Input模组来定义元件的媒介属性,并透过这个媒介属性来将外部的资料引入元件中使用。 - 如何在父层元件中呈现子层元件的内容,就是在父层元件的 html 档案中,加入子层元件的 @Componet 中的 selector 属性的内容。
- 学到如何将特定内容切分给特定原件来处理,让专案更好管理
Day-1 杰哥的考研纪录
杰哥的考研纪录 tags: IT铁人 首先先跟各位打个招呼! 欢迎来到杰哥的考研小天地~ 这篇会简单...
Day 19 AWS云端实作起手式第九弹 让开机器变得很自动自发Auto Scaling最後一击
来到了Auto Scaling的完结篇,我们一起来感受看看云端开机器的爽感和烧钱的威力XD。 今天设...
公司转型要如何靠网路行销SEO布局及定位策略
随着2020年Covid-19疫情对全世界造成的剧烈冲击,许多企业被迫在转型与不转型之间做选择,所有...
2.4.15 Design System - Tabs
所有的安排都不一定会照着计画走 比如说以前的旅行可能会像是踩点一样 安排好很多个景点 在有限时间底...
【把玩Azure DevOps】Day24 设定Build Pipeline与Release Pipeline的执行权限
先前我们建立Build pipeline和Release pipeline的时候使用的都是管理者的帐...