[NestJS 带你飞!] DAY26 - Swagger (上)
如果你是一名前端工程师,那麽你应该会有跟後端要 API 文件的经验,如果你是一名後端工程师,那你应该会有写 API 文件的需求,相信很多人都不喜欢花时间在写文件,甚至要为每个版本做维护,实在是耗时耗力,难道就没有其他方法来解决这个问题吗?答案是有的,解决方案就是非常知名的 Swagger。
什麽是 Swagger?

Swagger 是一套把 API 用视觉化方式呈现的工具,简单来说,就是会产生一个页面将各个 API 条列出来,包含了 API 所需的参数以及参数格式等,甚至可以透过这个页面直接对後端的 API 做操作,达到了 Postman 的效果,大幅降低 API 文件的维护成本,更可以促进前後端的开发效率。
初探 Swagger
Nest 有把 Swagger 包装成模组,只需透过 npm 进行安装,不过这里需要特别注意除了安装 Nest 制作的模组外,还需要安装 Swagger 的套件:
$ npm install @nestjs/swagger swagger-ui-express
注意:如果底层使用 Fastify 的话,就不是安装
swagger-ui-express了,而是fastify-swagger。
接着,我们要在 main.ts 进行初始化,透过 DocumentBuilder 来产生基本的文件格式,可以设置的内容大致上有:标题、描述、版本等,有了格式以後,只需要透过 SwaggerModule 的 createDocument 方法将文件产生出来,并使用 SwaggerModule 的 setup 方法来启动即可,而 setup 共接受四个参数,分别为:
-
path:Swagger UI 的路由。 -
app:将要绑定的 Nest App 实例带入。 -
document:放入初始化文件,即createDocument产生的文件。 -
options:UI 配置选项,为选填项目,接受的参数格式为SwaggerCustomOptions。
注意:UI 配置选项稍後会再特别说明。
下方为简单的范例:
import { NestFactory } from '@nestjs/core';
import { INestApplication } from '@nestjs/common';
import { DocumentBuilder, SwaggerModule } from '@nestjs/swagger';
import { AppModule } from './app.module';

async function bootstrap() {
  const app = await NestFactory.create(AppModule);
  setupSwagger(app);
  await app.listen(3000);
}

function setupSwagger(app: INestApplication) {
  const builder = new DocumentBuilder();
  const config = builder
    .setTitle('TodoList')
    .setDescription('This is a basic Swagger document.')
    .setVersion('1.0')
    .build();
  const document = SwaggerModule.createDocument(app, config);
  SwaggerModule.setup('api', app, document);
}

bootstrap();
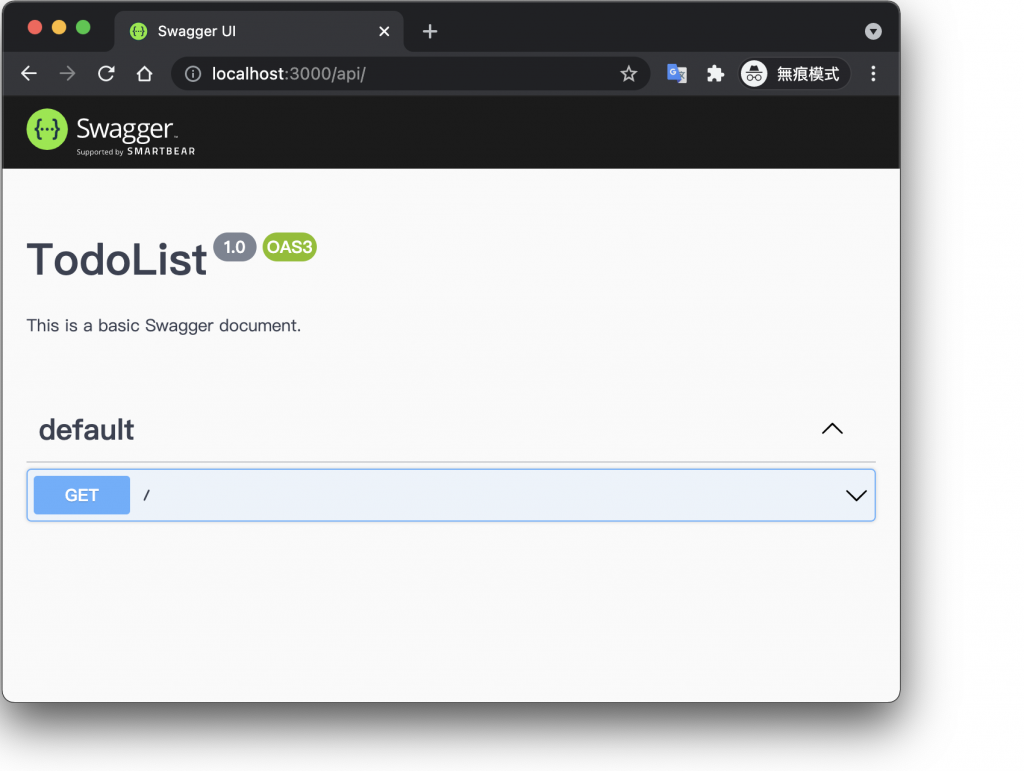
透过浏览器查看 http://localhost:3000/api 会到下方结果:
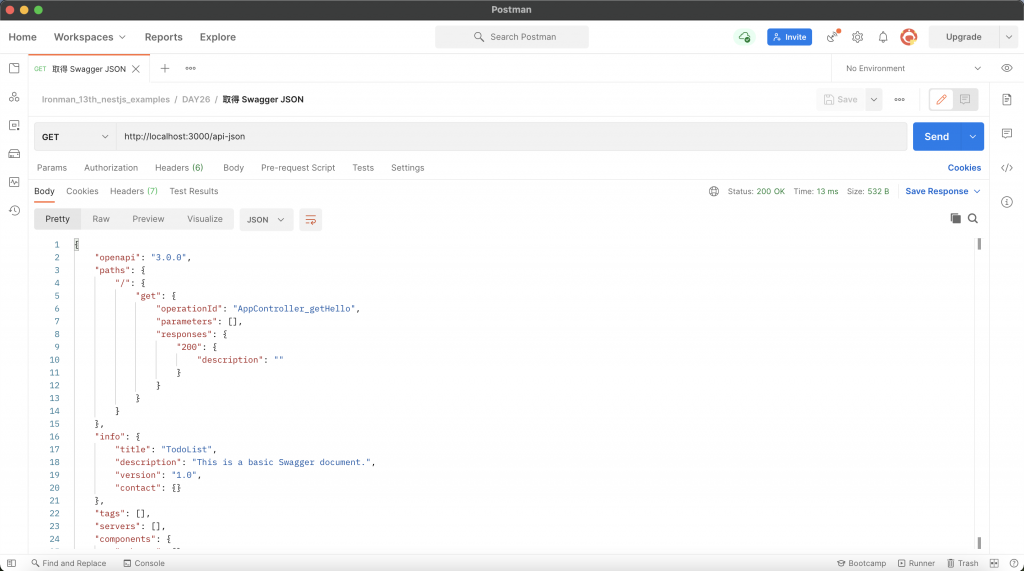
假如我们要取得该 Swagger 的文件 JSON 档,可以透过 http://localhost:3000/<PATH>-json 来取得,以上方范例为例,path 为 api,透过 Postman 存取 http://localhost:3000/api-json 就可以获得文件 JSON 档:
UI 配置选项
可以透过 UI 配置选项来调整 Swagger UI,其较为重要的如下:
-
explorer:是否开启搜寻列,预设为false。 -
swaggerOptions:Swagger 其他配置项目,可以参考官方文件。 -
customCss:自定义 Swagger UI 的 CSS。 -
customCssUrl:给予自定义 Swagger UI 的 CSS 资源位址。 -
customJs:透过自订 JavaScript 来操作 Swagger UI。 -
customfavIcon:自订 Swagger UI icon。 -
swaggerUrl:给予 Swagger JSON 资源位址。 -
customSiteTitle:自订义 Swagger UI 的标题。 -
validatorUrl:给予 Swagger 的 Validator 资源位址。
以下方范例为例,我们将搜寻列开启:
import { NestFactory } from '@nestjs/core';
import { INestApplication } from '@nestjs/common';
import { DocumentBuilder, SwaggerCustomOptions, SwaggerModule } from '@nestjs/swagger';
import { AppModule } from './app.module';

async function bootstrap() {
  const app = await NestFactory.create(AppModule);
  setupSwagger(app);
  await app.listen(3000);
}

function setupSwagger(app: INestApplication) {
  const builder = new DocumentBuilder();
  const config = builder
    .setTitle('TodoList')
    .setDescription('This is a basic Swagger document.')
    .setVersion('1.0')
    .build();
  const document = SwaggerModule.createDocument(app, config);
  const options: SwaggerCustomOptions = {
    explorer: true, // 开启搜寻列
  };
  SwaggerModule.setup('api', app, document, options);
}

bootstrap();
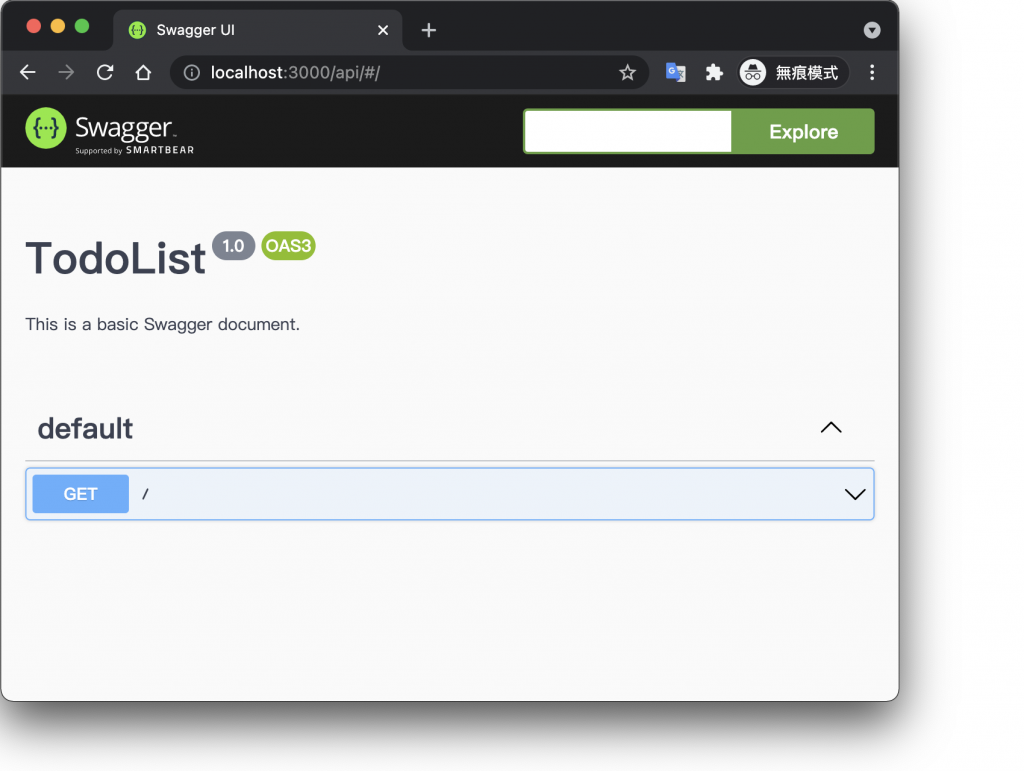
透过浏览器查看 http://localhost:3000/api 会发现上方出现了搜寻列:
API 参数设计
SwaggerModule 在建置文件的过程中,会去搜寻所有 Controller 底下的路由,并将带有 @Query、@Param 以及 @Body 的参数解析出来,进而显示在 Swagger UI 上,透过这样的方式不仅能把该 API 所需的参数列出来,还能显示该参数的型别。
我们先透过 CLI 产生 TodoModule、TodoController 与 TodoService:
$ nest generate module features/todo
$ nest generate controller features/todo
$ nest generate service features/todo
接着,我们在 TodoService 设计一个阵列来存放资料,并提供 getTodo 方法来取得指定的内容:
import { Injectable } from '@nestjs/common';

@Injectable()
export class TodoService {
  todos = [
    {
      id: 1,
      title: 'Ironman 13th',
      description: 'NestJS tutorial.',
      completed: false,
    },
  ];

  getTodo(id: string) {
    return this.todos.find((todo) => todo.id.toString() === id);
  }
}
然後调整一下 TodoController 的内容,设计一个透过 id 取得资料的 API:
import { Controller, Get, Param } from '@nestjs/common';
import { TodoService } from './todo.service';

@Controller('todos')
export class TodoController {
  constructor(private readonly todoService: TodoService) {}

  @Get(':id')
  getTodo(@Param('id') id: string) {
    return this.todoService.getTodo(id);
  }
}
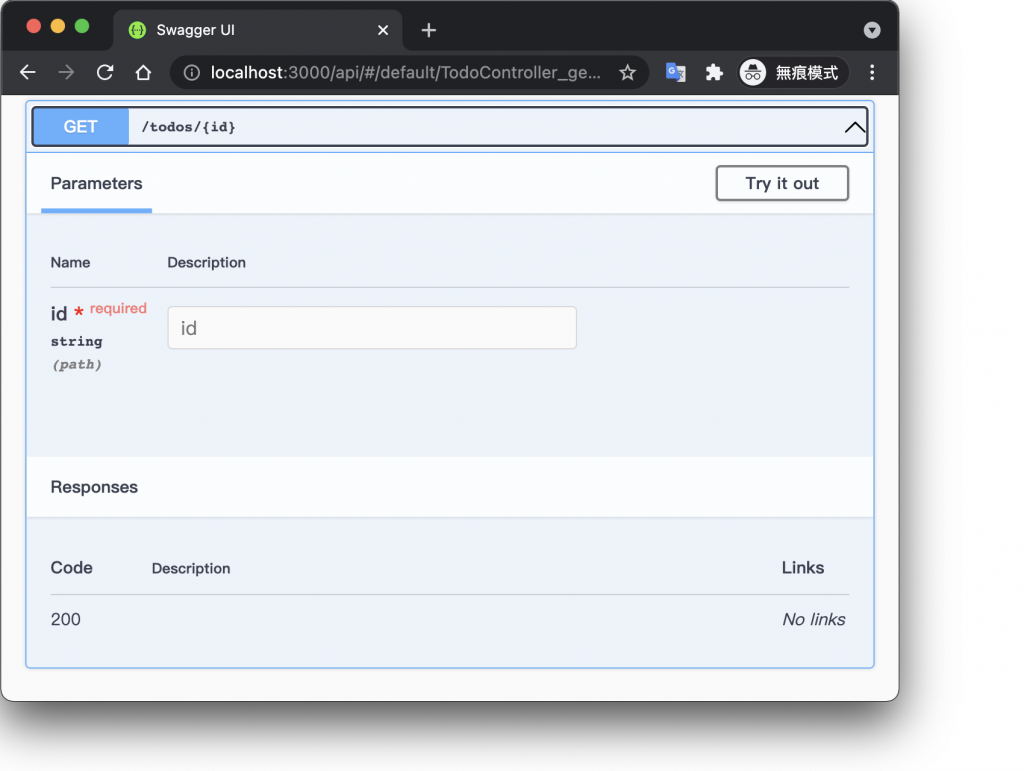
这时候我们可以透过浏览器查看 http://localhost:3000/api 会看到 API 的参数与型别都有正确显示:
解析复杂型别
虽然说 SwaggerModule 可以自动解析出参数型别,但在面对较为复杂的参数型别就要特别处理才能够被解析出来,需要特别进行处理的型别有以下几种:
DTO
DTO 是一种物件格式的资料型别,若要让 SwaggerModule 可以顺利解析出该物件中的每个参数的话,需要在每个属性上使用 @ApiProperty 装饰器。
我们先在 src/features/todo 资料夹下建立 dto 资料夹并新增 create-todo.dto.ts,在每个属相上都添加 @ApiProperty 装饰器:
import { ApiProperty } from '@nestjs/swagger';

export class CreateTodoDto {
  @ApiProperty()
  title: string;

  @ApiProperty()
  description: string;

  @ApiProperty()
  completed: boolean;
}
接着,我们修改一下 TodoService 的内容,新增一个 createTodo 的方法来添加资料:
import { Injectable } from '@nestjs/common';
import { CreateTodoDto } from './dto/create-todo.dto';

@Injectable()
export class TodoService {
  todos = [
    {
      id: 1,
      title: 'Ironman 13th',
      description: 'NestJS tutorial.',
      completed: false,
    },
  ];

  createTodo(data: CreateTodoDto) {
    const todo = { id: this.todos.length + 1, ...data };
    this.todos.push(todo);
    return todo;
  }

  getTodo(id: string) {
    return this.todos.find((todo) => todo.id.toString() === id);
  }
}
最後,在 TodoController 添加一个 API 让我们可以添加资料:
import { Body, Controller, Get, Param, Post } from '@nestjs/common';
import { TodoService } from './todo.service';

import { CreateTodoDto } from './dto/create-todo.dto';

@Controller('todos')
export class TodoController {
  constructor(private readonly todoService: TodoService) {}

  @Post()
  createTodo(@Body() data: CreateTodoDto) {
    return this.todoService.createTodo(data);
  }

  @Get(':id')
  getTodo(@Param('id') id: string) {
    return this.todoService.getTodo(id);
  }
}
透过浏览器查看 http://localhost:3000/api 并点选 [POST] /todos 查看其参数的型别:
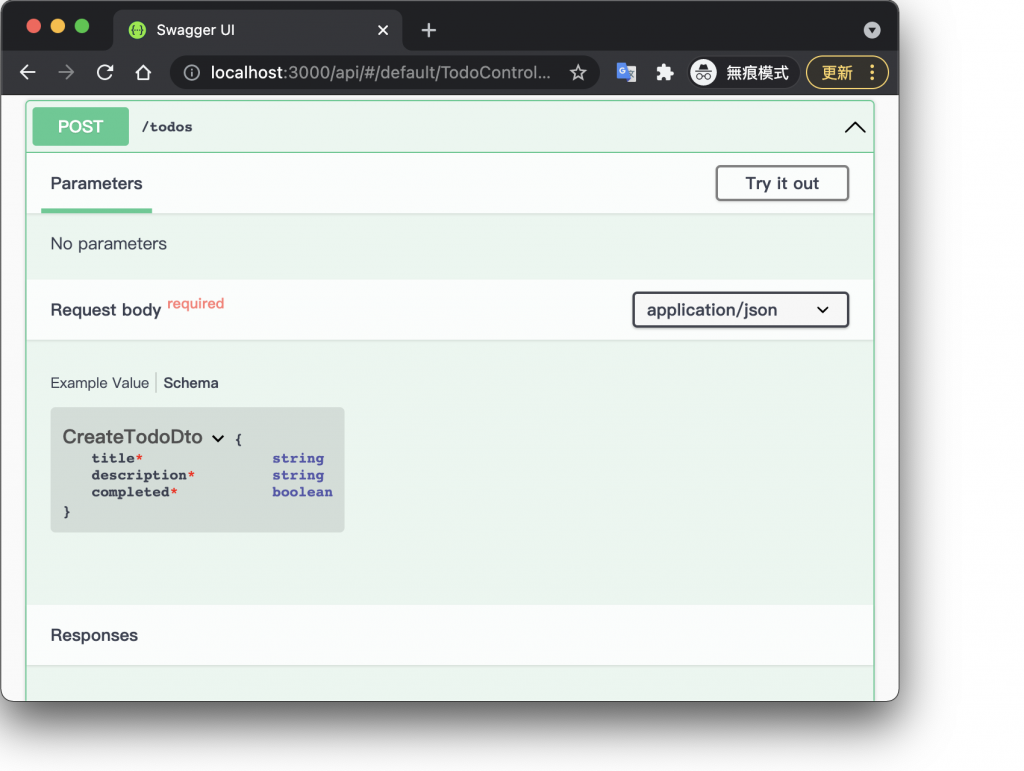
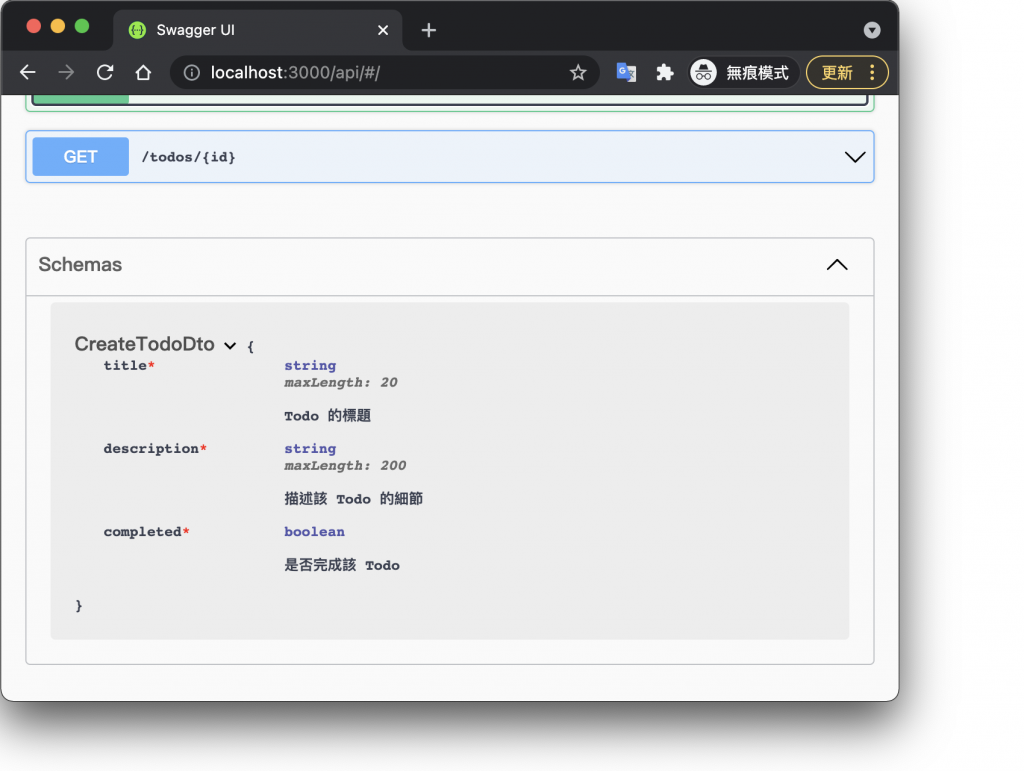
如果想要替属性添加一些选项配置,例如:描述、最大长度等,则可以给参数在 @ApiProperty 装饰器中,以下方为例,指定 title 最大长度为 20、description 最大长度为 200,并描述每个属性的作用:
import { ApiProperty } from '@nestjs/swagger';

export class CreateTodoDto {
  @ApiProperty({
    maxLength: 20,
    description: 'Todo 的标题',
  })
  title: string;

  @ApiProperty({
    maxLength: 200,
    description: '描述该 Todo 的细节',
  })
  description: string;

  @ApiProperty({
    description: '是否完成该 Todo',
  })
  completed: boolean;
}
注意:更多选项配置可以参考官方文件。
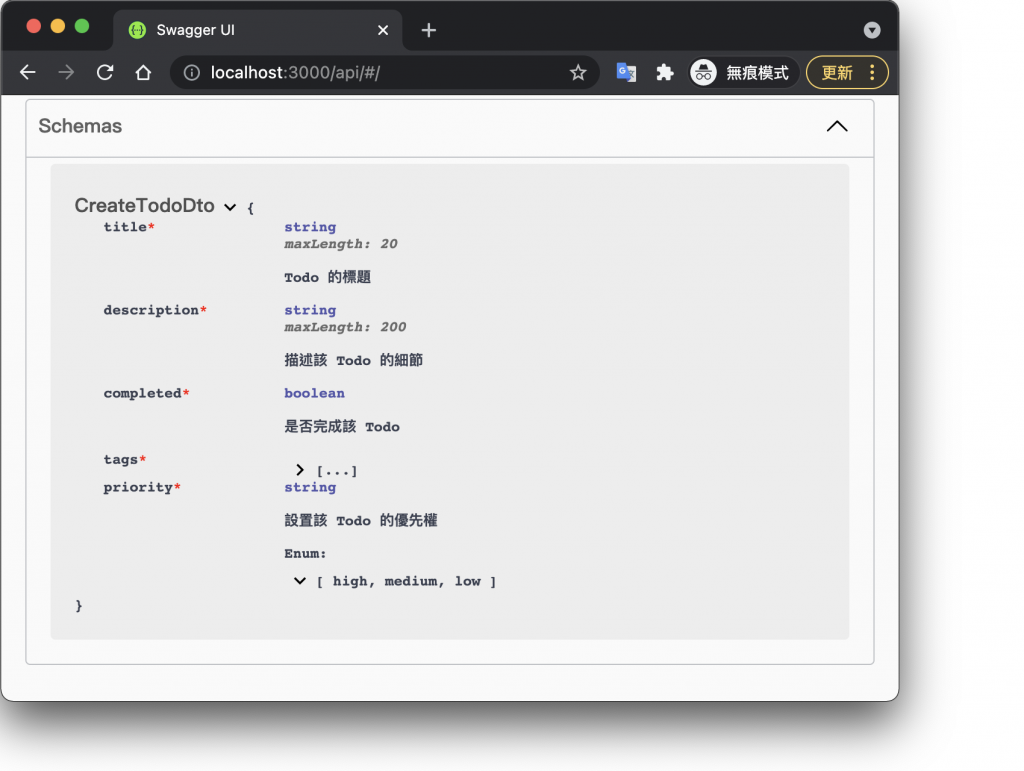
透过浏览器查看 http://localhost:3000/api 并点选 Schemas 里面的 CreateTodoDto,会看到下方结果:
阵列
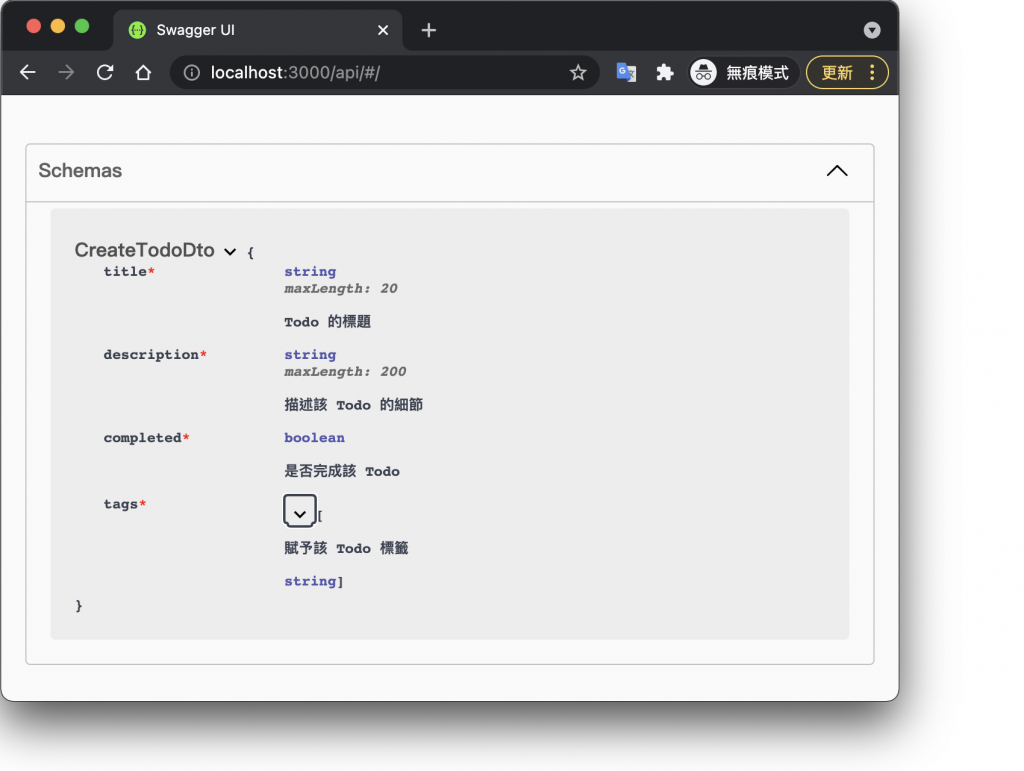
阵列也是无法被解析出的型别,这在 DTO 里面也会遇到含有阵列型别的资料,这时候一样透过 @ApiProperty 装饰器即可搞定,给定 type 让 SwaggerModule 知道这个属性是阵列型别。
我们调整一下 CreateTodoDto,添加一个 tags 的属性:
import { ApiProperty } from '@nestjs/swagger';

export class CreateTodoDto {
  @ApiProperty({
    maxLength: 20,
    description: 'Todo 的标题',
  })
  title: string;

  @ApiProperty({
    maxLength: 200,
    description: '描述该 Todo 的细节',
  })
  description: string;

  @ApiProperty({
    description: '是否完成该 Todo',
  })
  completed: boolean;

  @ApiProperty({
    type: [String],
    description: '赋予该 Todo 标签',
  })
  tags: string[];
}
透过浏览器查看 http://localhost:3000/api 并点选 Schemas 里面的 CreateTodoDto,会看到下方结果:
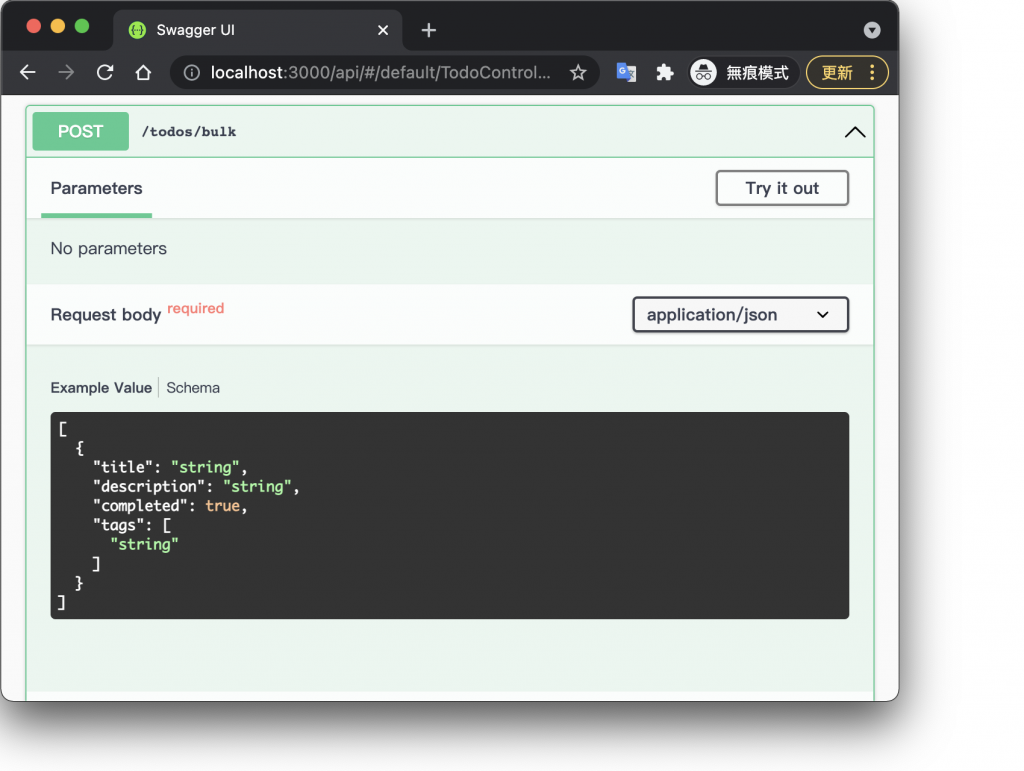
还有一种情况比较特殊,如果传送进来的 主体资料(Body) 是阵列型别的话,就不适合使用 @ApiProperty 来解析,而是要在该方法上套用 @ApiBody 装饰器,并指定其 type。
我们修改一下 TodoController,新增一个批次上传资料的 API,并添加 @ApiBody 装饰器以及指定 type 为 [CreateTodoDto]:
import { Body, Controller, Get, Param, Post } from '@nestjs/common';
import { ApiBody } from '@nestjs/swagger';

import { TodoService } from './todo.service';

import { CreateTodoDto } from './dto/create-todo.dto';

@Controller('todos')
export class TodoController {
  constructor(private readonly todoService: TodoService) {}

  @Post()
  createTodo(@Body() data: CreateTodoDto) {
    return this.todoService.createTodo(data);
  }

  // 批次上传
  @ApiBody({ type: [CreateTodoDto] })
  @Post('bulk')
  createTodos(@Body() todos: CreateTodoDto[]) {
    return todos.map((todo) => this.todoService.createTodo(todo));
  }

  @Get(':id')
  getTodo(@Param('id') id: string) {
    return this.todoService.getTodo(id);
  }
}
透过浏览器查看 http://localhost:3000/api 并点选 [POST] /todos/bulk 查看其参数的型别:
Enum
Enum 也是需要特别做指定的型别,以 DTO 为例,它需要在 @ApiProperty 装饰器中指定 enum 为特定的 Enum。
我们在 src/features/todo 资料夹下建立 types 资料夹并新增 priority.type.ts:
export enum TodoPriority {
  HIGH = 'high',
  MEDIUM = 'medium',
  LOW = 'low',
}
接着,我们调整一下 CreateTodoDto 的内容,添加一个 priority 属性,并带上 @ApiProperty 装饰器以及指定 enum 为 TodoPriority:
import { ApiProperty } from '@nestjs/swagger';
import { TodoPriority } from '../types/priority.type';

export class CreateTodoDto {
  @ApiProperty({
    maxLength: 20,
    description: 'Todo 的标题',
  })
  title: string;

  @ApiProperty({
    maxLength: 200,
    description: '描述该 Todo 的细节',
  })
  description: string;

  @ApiProperty({
    description: '是否完成该 Todo',
  })
  completed: boolean;

  @ApiProperty({
    type: [String],
    description: '赋予该 Todo 标签',
  })
  tags: string[];

  // 设置优先权
  @ApiProperty({
    enum: TodoPriority,
    description: '设置该 Todo 的优先权',
  })
  priority: TodoPriority;
}
透过浏览器查看 http://localhost:3000/api 并点选 Schemas 里面的 CreateTodoDto,会看到下方结果:
从上面的结果可以看出 Enum 被解析出来了,但如果希望它也能够成为 Schema 的话,只需要在 @ApiProperty 装饰器中多添加 enumName 即可,范例如下:
import { ApiProperty } from '@nestjs/swagger';
import { TodoPriority } from '../types/priority.type';

export class CreateTodoDto {
  @ApiProperty({
    maxLength: 20,
    description: 'Todo 的标题',
  })
  title: string;

  @ApiProperty({
    maxLength: 200,
    description: '描述该 Todo 的细节',
  })
  description: string;

  @ApiProperty({
    description: '是否完成该 Todo',
  })
  completed: boolean;

  @ApiProperty({
    type: [String],
    description: '赋予该 Todo 标签',
  })
  tags: string[];

  // 设置优先权
  @ApiProperty({
    enum: TodoPriority,
    enumName: 'TodoPriority', // 取名称让 Swagger 将其建立成 Schema
    description: '设置该 Todo 的优先权',
  })
  priority: TodoPriority;
}
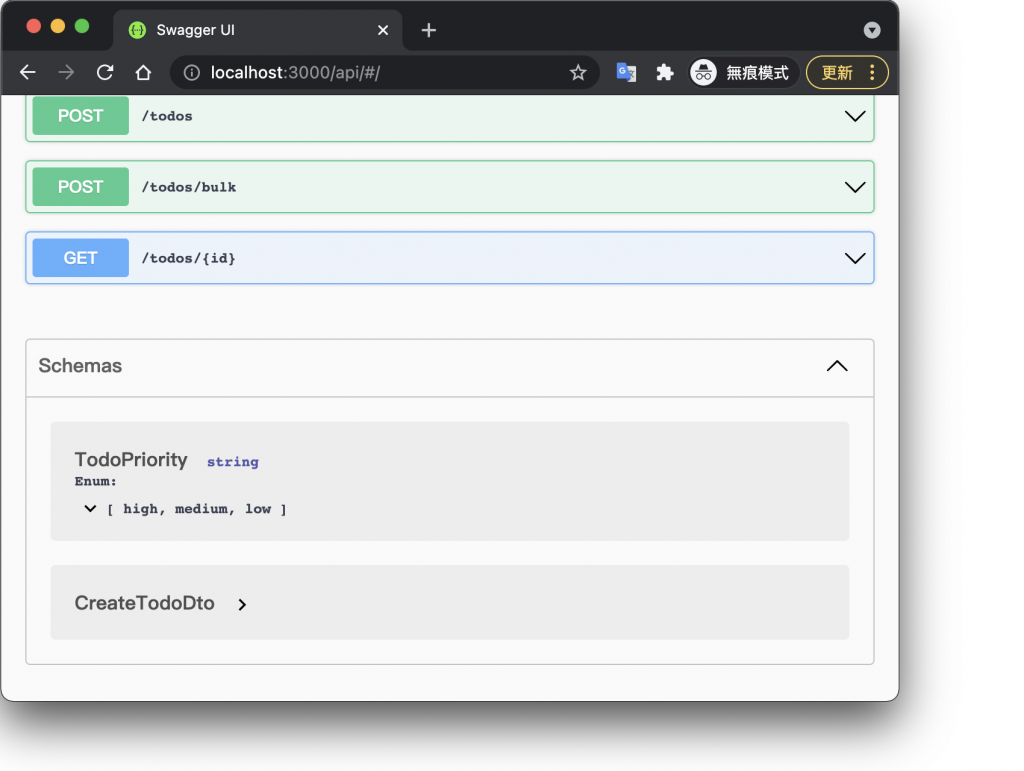
透过浏览器查看 http://localhost:3000/api 并点选 Schemas,会看到下方结果:
巢状复杂结构
有些结构非常复杂,比如:二维阵列,这种时候该如何配置呢?以 DTO 为例,透过 type 指定为 array 并用型别为物件的 items 来指定该阵列内的型别,因为是二维阵列,故 items 内需要再使用 type 指定为 array,而这里的 items 则配置 type 为该二维阵列使用的资料型别。
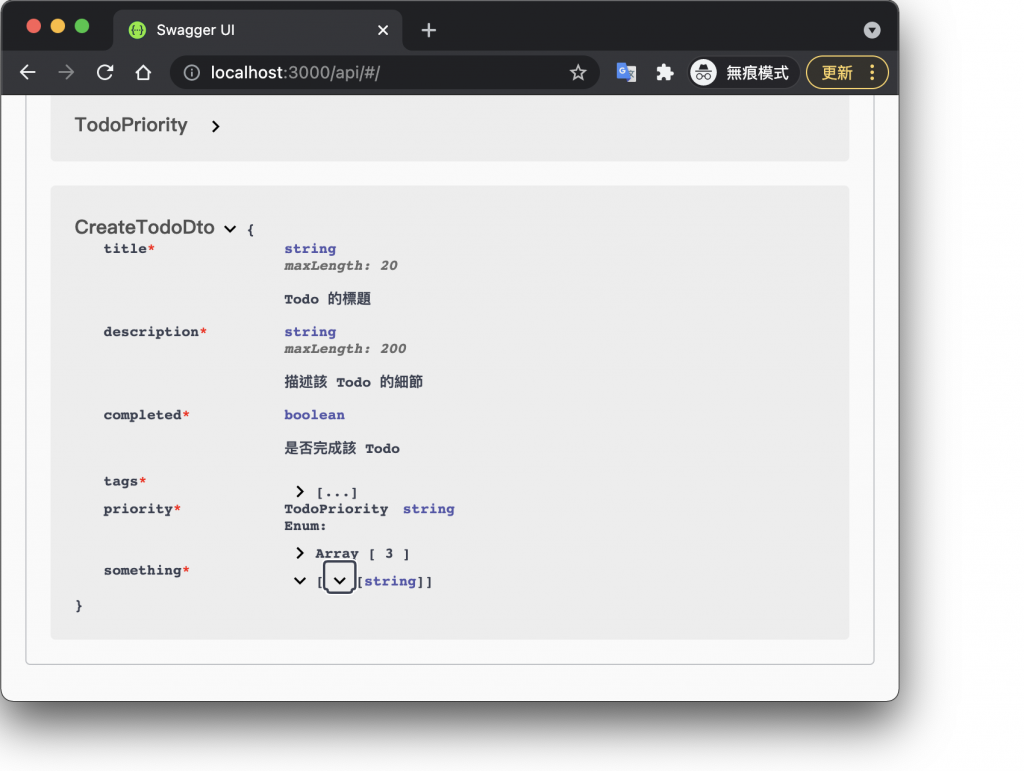
上面的叙述有点抽象,这里用实际范例来说明,我们在 CreateTodoDto 内新增一个 something 属性,它的型别为 string[][],并套用 @ApiProperty 装饰器,接着设置 type 以及 items 来让 SwaggerModule 可以顺利将其型别解析出来:
import { ApiProperty } from '@nestjs/swagger';
import { TodoPriority } from '../types/priority.type';

export class CreateTodoDto {
  @ApiProperty({
    maxLength: 20,
    description: 'Todo 的标题',
  })
  title: string;

  @ApiProperty({
    maxLength: 200,
    description: '描述该 Todo 的细节',
  })
  description: string;

  @ApiProperty({
    description: '是否完成该 Todo',
  })
  completed: boolean;

  @ApiProperty({
    type: [String],
    description: '赋予该 Todo 标签',
  })
  tags: string[];

  @ApiProperty({
    enum: TodoPriority,
    enumName: 'TodoPriority',
    description: '设置该 Todo 的优先权',
  })
  priority: TodoPriority;

  // 二维阵列
  @ApiProperty({
    type: 'array',
    items: {
      type: 'array',
      items: {
        type: 'string',
      },
    },
  })
  something: string[][];
}
透过浏览器查看 http://localhost:3000/api 并点选 Schemas 里面的 CreateTodoDto,会看到下方结果:
小结
Swagger 是一个很不错的工具,套用方法简单而且也很容易维护,大幅减少了撰写文件的时间,更可以增进前後端的开发效率,好工具值得一推!下一篇将会继续介绍 Swagger,把一些我认为比较基础且常用的功能交代清楚。这里附上今天的懒人包:
- Swagger 是一套把 API 用视觉化方式呈现的工具。
- Nest 有将 Swagger 包装成模组,其名为
SwaggerModule。 - 透过
DocumentBuilder与createDocument来产生基本的文件格式。 - 透过
setup来建置 Swagger UI。 -
SwaggerModule会去侦测所有 API 带有@Body、@Query以及@Param的参数,进而在 Swagger UI 显示其参数与型别。 - DTO 等复杂型别需要进行特殊处理,例如:
@ApiProperty、@ApiBody等。
>>: Day 27 - WooCommerce: 建立虚拟帐号付款订单
Swift 新手-App Launch Screen 设计观念
承接上一篇,新建专案後,按下试跑的画面如下: 假设自己身为使用者,打开 App 後呈现一片空白是什麽...
[13th][Day16] tamplete
golang template golang stdlib(标准函式库)中提供两种跟 templat...
伸缩自如的Flask [day16] API
活在前後端分离的年代,我觉得後端重要的工作之一就是写出好用、好沟通的API。 可以先看一下HTTP ...
[FGL] 吸星大法 - IMPORT之 1: 使用extension扩展功能
转换为Genero後,FourJs’ 为了扩展整体程序语言,令他可以执行更多不一定与资料库相关的功能...
Day 4 Matrix capsules with EM routing
前言 接续着昨天讲到的EM routing,今天来将EM routing做进一步的解释 EM rou...